

Halloween cookies are a fun way to add something special to your treats this season. Here are 14 decorated cookie ideas that work well for parties or family baking. Each recipe comes with clear steps and decoration tips you can follow at home. You will find options that use basic tools and ingredients most people already have. Pick the ones that fit your time and skill level.
Helpful Tips Before You Start
These tips will help you decorate Halloween cookies with clean lines and bold colors.
Chill the Dough
Roll out and cut cookie dough, then chill the shapes for 30 minutes before baking. This keeps edges sharp for ghosts, bats, and pumpkins.
Prepare Two Icing Consistencies
Make royal icing in outline and flood versions. Test the flood icing on a spare cookie so it settles flat without spreading past the lines.
Let Layers Dry
Dry each color completely before adding the next. This prevents bleeding when you add details like spider legs or candy corn stripes.
Pipe Fine Details Last
Switch to a small round tip for eyes, mouths, and webs after the base colors set. Practice a few lines on parchment to get steady pressure.
Spooky Ghost Sugar Cookies with Royal Icing Faces
These ghost-shaped sugar cookies bring a lighthearted touch to Halloween gatherings. Kids and adults enjoy decorating them together, and the finished treats look great on a dessert table. The cookies bake up with a tender center and a slight crunch at the edges, while the royal icing sets into a smooth white surface that holds fine details for the faces.
The buttery vanilla flavor pairs well with the sweet, crisp icing. They travel well to parties and stay fresh for several days when stored properly.

Serves 4 people.
Ingredients
- 1 1/4 cups all-purpose flour
- 1/2 cup unsalted butter, softened
- 1/3 cup granulated sugar
- 1 large egg
- 1 teaspoon vanilla extract
- 1/2 teaspoon baking powder
- 1/4 teaspoon salt
- 2 cups powdered sugar
- 2 tablespoons meringue powder
- 1/4 cup water
- Black gel food coloring
Instructions
- Beat the softened butter and granulated sugar together in a mixing bowl until light and fluffy. Add the egg and vanilla extract and mix until combined.
- Whisk the flour, baking powder, and salt in a separate bowl. Gradually add the dry ingredients to the butter mixture and stir until a soft dough forms.
- Shape the dough into a disk, wrap it, and chill for 30 minutes. Preheat the oven to 350 degrees and line a baking sheet with parchment paper.
- Roll the dough to 1/4-inch thickness on a lightly floured surface. Cut out ghost shapes with a cookie cutter and place them on the baking sheet.
- Bake for 10 to 12 minutes until the edges are lightly golden. Cool the cookies completely on a wire rack.
- Combine the powdered sugar, meringue powder, and water in a clean bowl. Beat until the icing reaches stiff peaks. Divide a small portion into another bowl and tint it black with gel food coloring.
- Pipe a smooth white layer of icing over each ghost cookie and let it set for 10 minutes. Use the black icing in a piping bag to draw simple eyes and mouths on the ghosts.
Extra Tips
Pipe the faces only after the white base has formed a slight skin so the black lines stay sharp. If the royal icing feels too thick for piping, add water one teaspoon at a time until it flows smoothly but still holds shape. Store finished cookies in a single layer in an airtight container at room temperature for up to four days.Course: Dessert Cuisine: American Equipment: Mixing Bowl, Baking Sheet, Piping Bag
Jack-O’-Lantern Pumpkin Spice Cookies with Piped Icing
These cookies combine soft pumpkin spice dough with bright orange icing piped into simple jack-o’-lantern faces. The warm spices stand out against the sweet topping, making them a fun choice for fall gatherings or Halloween parties.
They suit afternoon baking sessions when you want something festive without much fuss. The finished cookies hold their shape well and travel nicely in a container for sharing.

Serves 4 people.
Ingredients
- 1 cup all-purpose flour
- 1/2 cup pumpkin puree
- 1/4 cup unsalted butter, softened
- 1/4 cup brown sugar
- 1 large egg
- 1 teaspoon pumpkin pie spice
- 1/2 teaspoon baking soda
- 1/2 teaspoon vanilla extract
- 1 cup powdered sugar
- 2 tablespoons milk
- Orange food coloring
- Black food coloring
Instructions
- Preheat the oven to 350 degrees and line a baking sheet with parchment paper.
- In a mixing bowl, cream the softened butter and brown sugar until smooth. Add the pumpkin puree, egg, and vanilla extract, then stir until combined.
- In a separate bowl, whisk the flour, pumpkin pie spice, and baking soda. Gradually mix the dry ingredients into the wet mixture until a soft dough forms.
- Scoop rounded tablespoons of dough onto the prepared baking sheet and gently flatten each one. Bake for 10 to 12 minutes until the edges are set. Cool the cookies completely on a wire rack.
- While the cookies cool, stir the powdered sugar and milk together in a clean bowl to make a smooth icing. Divide the icing into two small bowls. Tint one bowl orange and the other black.
- Spoon the orange icing into a piping bag and pipe a round face on each cookie. Use the black icing in a second piping bag to add eyes, nose, and a mouth.
Extra Tips
Pipe the orange base first and let it set for a few minutes before adding the black details so the lines stay sharp. If the icing feels too thick, add a drop more milk. Store the cookies in a single layer in an airtight container at room temperature for up to three days.Course: Dessert Cuisine: American Equipment: Mixing bowls, Baking sheet, Piping bags, Wire rack
Black Cat Cocoa Cookies with Candy Eyes and Whiskers
These cookies bring a playful touch to any Halloween spread. The deep cocoa flavor pairs with a soft, chewy center and crisp edges, while the candy eyes and whiskers turn each cookie into a simple black cat face. They work well for school parties, neighborhood gatherings, or an easy weekend bake with kids.
The recipe stays straightforward with basic pantry items and a quick decorating step at the end. No special tools are needed beyond what most home kitchens already have.

Serves 4 people.
Ingredients
- ¾ cup all-purpose flour
- ¼ cup unsweetened cocoa powder
- ½ teaspoon baking soda
- ¼ teaspoon salt
- ¼ cup unsalted butter, softened
- ½ cup granulated sugar
- 1 large egg
- 1 teaspoon vanilla extract
- 16 black candy eyes
- 8 thin black licorice strings
Instructions
- Preheat the oven to 350°F and line a baking sheet with parchment paper.
- In a small bowl, whisk together the flour, cocoa powder, baking soda, and salt.
- In a medium bowl, beat the softened butter and sugar until light and fluffy.
- Add the egg and vanilla extract to the butter mixture and stir until smooth.
- Gradually mix the dry ingredients into the wet ingredients until a soft dough forms.
- Scoop tablespoon-sized portions of dough onto the prepared baking sheet and gently flatten each one into a round shape.
- Bake for 8 to 10 minutes, until the edges are set.
- While the cookies are still warm, press two candy eyes into each cookie and add two short pieces of licorice below them to form whiskers.
- Let the cookies cool completely on the baking sheet before moving them.
Extra Tips
Press the candy eyes and licorice pieces in right after baking so they stick without extra icing. If the licorice feels too stiff, warm it briefly between your fingers first. Store cooled cookies in an airtight container at room temperature for up to three days to keep the texture chewy.Course: Dessert Cuisine: American Equipment: Mixing Bowls, Baking Sheet, Whisk, Electric Mixer
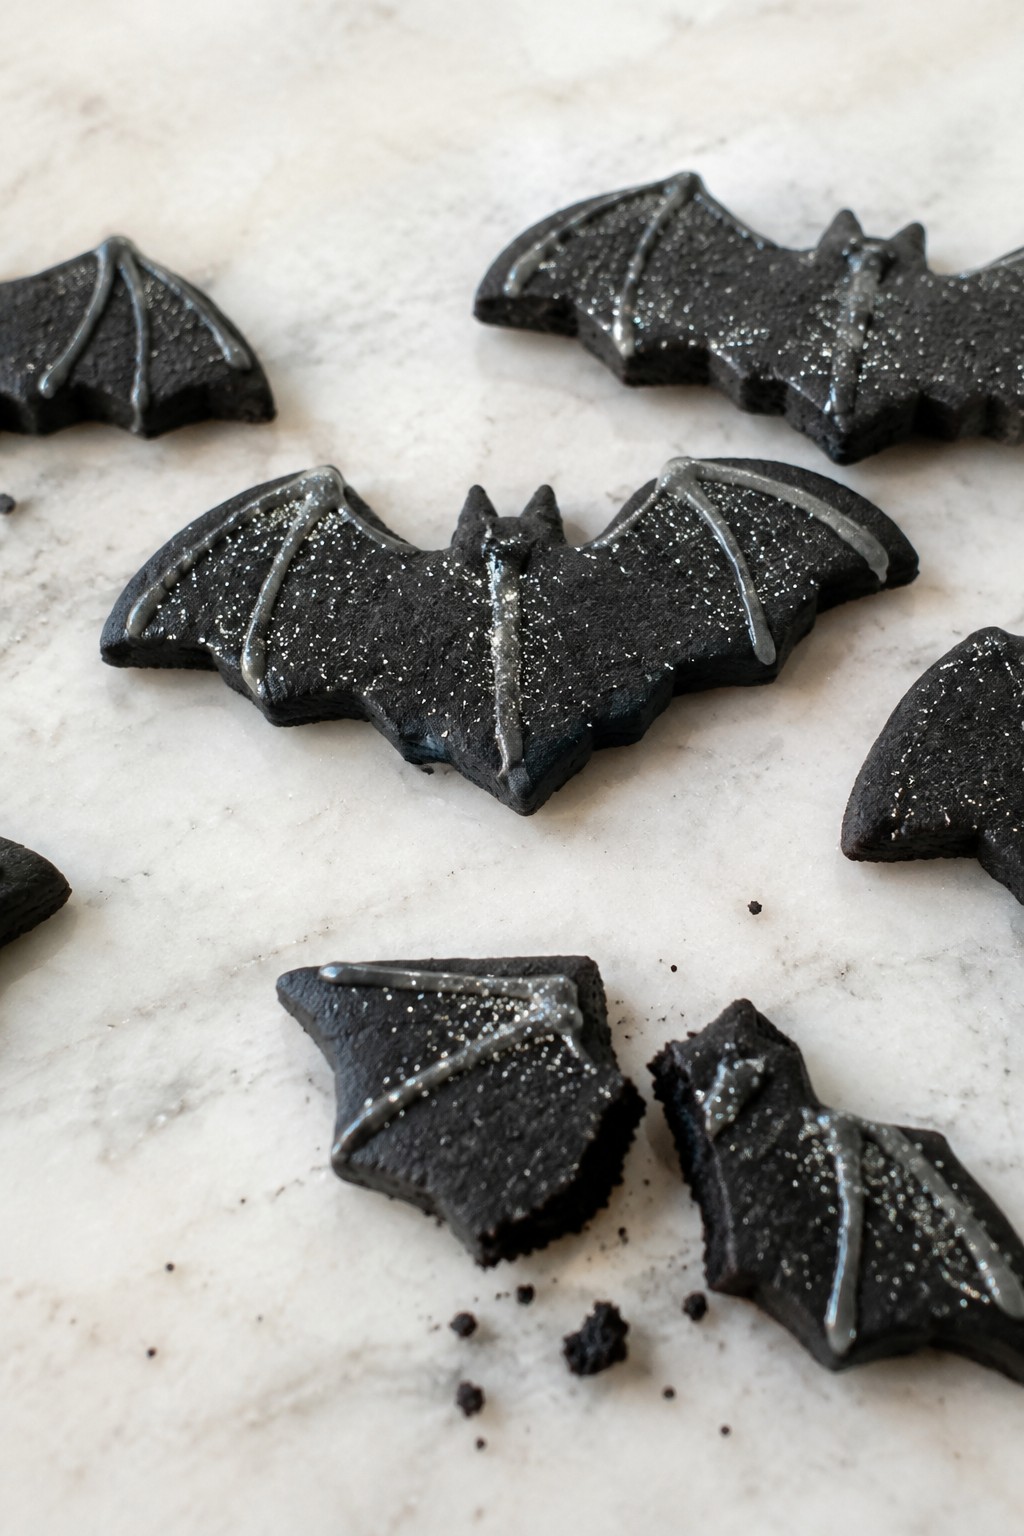
Bat Wing Black Cocoa Cookies with Silver Glitter Icing
These cookies stand out at Halloween gatherings because the black cocoa gives them a deep, dark color that looks striking against silver icing. They work well for cookie swaps or party platters where you want something simple to make but visually bold. The texture is crisp on the edges with a tender center, and the flavor stays rich and chocolatey without being overly sweet.
The silver glitter icing adds a subtle shine that catches the light, making the bat wing shapes pop on a dessert table. This recipe keeps the process straightforward with basic pantry items and one mixing bowl for the dough.
Serves 4 people.
Ingredients
- 1 1/2 cups all-purpose flour
- 1/2 cup black cocoa powder
- 1/2 cup butter, softened
- 3/4 cup granulated sugar
- 1 large egg
- 1 teaspoon vanilla extract
- 1/2 teaspoon baking powder
- 1/4 teaspoon salt
- 1 cup powdered sugar
- 3 tablespoons milk
- 2 tablespoons edible silver glitter
Instructions
- Preheat the oven to 350 degrees and line a baking sheet with parchment paper.
- In a bowl, whisk together the flour, black cocoa powder, baking powder, and salt.
- In another bowl, cream the butter and granulated sugar until light. Beat in the egg and vanilla extract.
- Stir the dry mixture into the wet mixture until a dough forms. Roll the dough out on a floured surface to about 1/4 inch thick.
- Cut the dough into bat wing shapes using a cutter or knife. Place the shapes on the prepared baking sheet.
- Bake for 10 to 12 minutes until the edges are set. Let the cookies cool completely on the sheet.
- Mix the powdered sugar and milk in a small bowl until smooth. Stir in the edible silver glitter.
- Pipe or spread the icing over the cooled cookies in thin lines to highlight the wing details.
Extra Tips
Roll the dough between two sheets of parchment to keep it from sticking without extra flour. The black cocoa already provides the dark color, so skip any food coloring. Store the finished cookies in an airtight container at room temperature for up to three days to keep the icing from softening.Course: Dessert Cuisine: American Equipment: Mixing bowls, Baking sheet, Piping bag
Mummy Wrapped Shortbread Cookies with Drizzled White Chocolate
These cookies bring a fun Halloween twist to classic shortbread. The buttery base stays crisp while the white chocolate creates a simple mummy wrap effect on top. They work well for parties or as a quick treat to share with family.
The flavor stays mild and sweet with a smooth finish from the chocolate. Kids can help with the drizzling step once the cookies cool.

Serves 4 people.
Ingredients
- 1 cup all-purpose flour
- 1/2 cup unsalted butter, softened
- 1/4 cup powdered sugar
- 1/2 teaspoon vanilla extract
- Pinch of salt
- 4 ounces white chocolate chips
- 16 mini chocolate chips
Instructions
- Preheat the oven to 350 degrees and line a baking sheet with parchment paper.
- In a mixing bowl, cream the softened butter and powdered sugar until light and smooth.
- Stir in the vanilla extract and salt.
- Gradually mix in the flour until a soft dough forms.
- Roll the dough into a log about 1 inch thick, then slice into 8 equal pieces and shape each into a rectangle.
- Place the rectangles on the baking sheet and bake for 12 to 14 minutes until the edges turn lightly golden.
- Let the cookies cool completely on the sheet.
- Melt the white chocolate chips in a microwave-safe bowl in 20-second bursts, stirring between each until smooth.
- Drizzle the melted white chocolate over each cookie in thin lines to resemble mummy bandages.
- Press two mini chocolate chips into the white chocolate on each cookie to form eyes.
Extra Tips
Use a zip-top bag with one corner snipped for easy drizzling control. Store cooled cookies in an airtight container at room temperature for up to three days. If the white chocolate thickens while working, warm it briefly to restore flow.Course: Dessert Cuisine: American Equipment: Mixing Bowl, Baking Sheet, Microwave-Safe Bowl
Frankenstein Monster Green Cookies with Bolt Details
These green cookies bring a playful Frankenstein twist to any Halloween spread. The bright color and simple bolt accents make them stand out on a dessert table without much fuss. They suit kids parties, school events, or an afternoon baking session with family.
The base stays soft and buttery with a mild vanilla taste. A layer of green icing adds sweetness while the black licorice bolts give a fun, graphic finish.

Serves 4 people.
Ingredients
- 1 1/2 cups all-purpose flour
- 1/2 cup unsalted butter, softened
- 1/2 cup granulated sugar
- 1 large egg
- 1 teaspoon vanilla extract
- Green food coloring
- 1 cup powdered sugar
- 2 tablespoons milk
- Black licorice strips
Instructions
- Preheat the oven to 350 degrees and line a baking sheet with parchment paper.
- Cream the butter and granulated sugar in a mixing bowl until light. Add the egg and vanilla extract, then mix until smooth.
- Stir in the flour gradually until a soft dough forms. Add green food coloring a few drops at a time until the dough reaches a bright green shade.
- Roll the dough into small balls, place them on the baking sheet, and flatten each slightly with your palm. Bake for 10 to 12 minutes until the edges look set.
- Cool the cookies completely on a wire rack.
- Whisk the powdered sugar with milk in a small bowl until smooth. Stir in green food coloring until the icing matches the cookie color.
- Spread the green icing over each cooled cookie. While the icing is still wet, cut small pieces from the black licorice strips and press two onto the sides of each cookie to form bolts.
Extra Tips
Press the licorice bolts into the icing right after spreading so they hold without extra glue. Store the finished cookies in a single layer inside an airtight container to keep the icing from smearing. If the dough feels too sticky after adding color, chill it for 15 minutes before shaping.Course: Dessert Cuisine: American Equipment: Mixing Bowl, Baking Sheet, Wire Rack
Vampire Bite Red Velvet Cookies with Red Ganache Centers
These cookies stand out with their deep red color and soft centers that release a bright ganache filling. They suit Halloween parties or casual fall baking when you want something eye-catching but straightforward.
The red velvet base stays tender with a light cocoa note. The ganache adds a creamy contrast that looks like a fresh bite mark once it settles.

Serves 4 people.
Ingredients
- 1 cup all-purpose flour
- 2 tablespoons unsweetened cocoa powder
- 1/2 teaspoon baking soda
- 1/4 teaspoon salt
- 1/2 cup unsalted butter, softened
- 3/4 cup granulated sugar
- 1 large egg
- 1 teaspoon vanilla extract
- 1 tablespoon red food coloring
- 1/3 cup heavy cream
- 4 ounces white chocolate, chopped
Instructions
- Heat the oven to 350 degrees and line a baking sheet with parchment paper.
- Whisk the flour, cocoa powder, baking soda, and salt in a bowl. Set aside.
- Beat the butter and sugar until light and fluffy. Add the egg, vanilla extract, and red food coloring. Mix until the color is even.
- Stir the dry ingredients into the wet mixture until a soft dough forms.
- Scoop the dough into eight balls and place them on the baking sheet. Press a small well into the center of each ball with your thumb.
- Bake for 10 to 12 minutes until the edges are set. Remove from the oven and let the cookies cool on the sheet for 5 minutes.
- Heat the heavy cream in a small saucepan until it just starts to steam. Remove from heat, add the white chocolate, and stir until smooth. Stir in the red food coloring.
- Spoon the warm ganache into the center of each cookie. Let the cookies cool completely so the filling sets.
Extra Tips
Fill the centers while the ganache is still warm for the best spread. Store the cookies in a single layer in an airtight container to keep the soft texture. If the ganache thickens too much before use, warm it gently over low heat.Course: Dessert Cuisine: American Equipment: Mixing Bowl, Baking Sheet, Small Saucepan
Skeleton Bone Vanilla Cookies with Intricate Icing Details
These cookies stand out on a Halloween spread because of their bone shape and fine icing lines that mimic real skeleton details. They work well for parties or as a fun baking project with older kids who enjoy piping. The base is a soft vanilla cookie with a light snap at the edges, topped by smooth icing that sets firm for easy handling.

Serves 4 people.
Ingredients
- 1 1/2 cups all-purpose flour
- 1/2 cup unsalted butter, softened
- 1/2 cup granulated sugar
- 1 large egg
- 2 teaspoons vanilla extract
- 1/2 teaspoon baking powder
- 1/4 teaspoon salt
- 1 cup powdered sugar
- 2 tablespoons milk
Instructions
- Heat the oven to 350 degrees and line a baking sheet with parchment paper.
- In a mixing bowl, beat the softened butter and granulated sugar until light and creamy.
- Add the egg and 1 teaspoon of vanilla extract, then mix until combined.
- Stir in the flour, baking powder, and salt until a soft dough forms.
- Roll the dough into thin logs about 4 inches long and shape each into a bone by pressing the ends slightly wider.
- Place the shaped cookies on the baking sheet and bake for 10 to 12 minutes until the edges turn lightly golden.
- Cool the cookies completely on a wire rack.
- In a clean bowl, whisk the powdered sugar, milk, and remaining 1 teaspoon of vanilla extract until smooth and thick enough to hold lines.
- Transfer the icing to a piping bag fitted with a small tip and pipe fine bone-like details across each cooled cookie.
Extra Tips
Pipe the icing lines while the mixture is still thick to keep the skeleton details sharp. If the icing feels too runny, add a little more powdered sugar one teaspoon at a time. Store finished cookies in a single layer in an airtight container so the icing stays intact.Course: Dessert Cuisine: American Equipment: Mixing Bowl, Baking Sheet, Piping Bag, Wire Rack
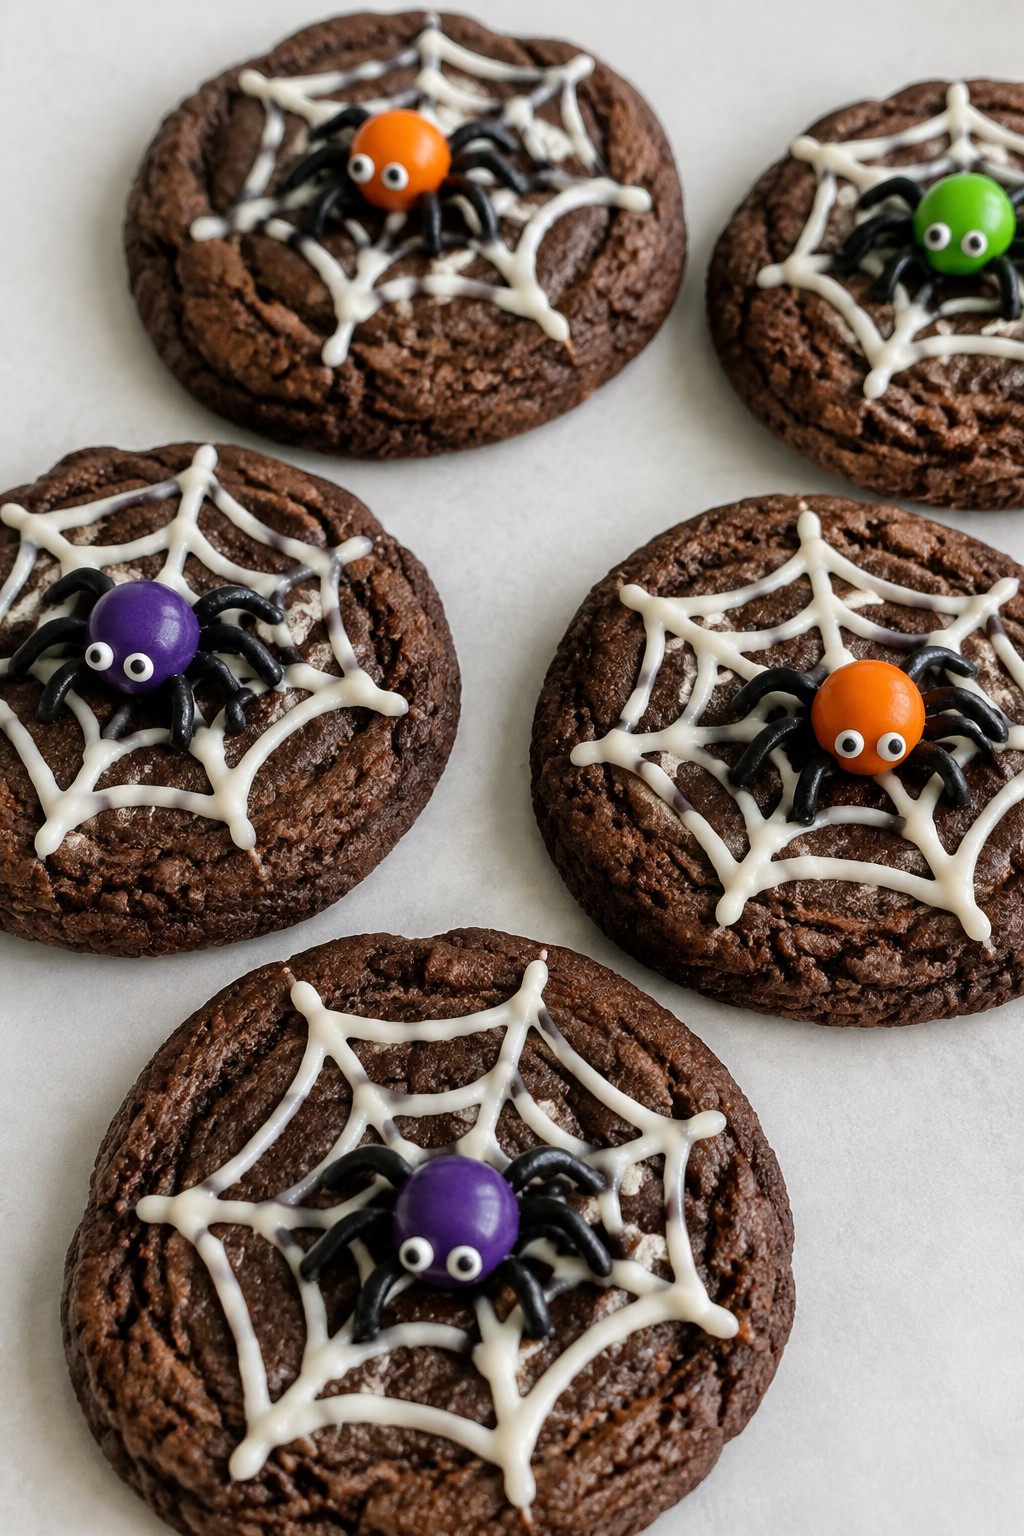
Spiderweb Chocolate Cookies with Candy Spider Toppers
These chocolate cookies stand out with their deep cocoa taste and simple piped spiderweb patterns on top. They fit well for Halloween gatherings or an afternoon baking project with family. The texture stays soft in the center with a light snap at the edges, and the candy spiders add a playful finish.
Serves 4 people.
Ingredients
- 1 1/4 cups all-purpose flour
- 1/2 cup unsweetened cocoa powder
- 1/2 teaspoon baking soda
- 1/4 teaspoon salt
- 1/2 cup unsalted butter, softened
- 3/4 cup granulated sugar
- 1 large egg
- 1 teaspoon vanilla extract
- 1/2 cup white chocolate chips
- 12 candy spider toppers
Instructions
- Preheat the oven to 350 degrees and line a baking sheet with parchment paper.
- Whisk the flour, cocoa powder, baking soda, and salt in a mixing bowl until evenly combined.
- In a separate bowl, beat the softened butter and sugar until light and creamy. Add the egg and vanilla extract, then mix until smooth.
- Gradually stir the dry ingredients into the wet mixture until a dough forms. Scoop rounded tablespoons of dough onto the prepared baking sheet and flatten slightly.
- Bake for 10 to 12 minutes until the edges look set. Let the cookies cool on the sheet for 5 minutes before moving them to a wire rack.
- Melt the white chocolate chips in the microwave in short bursts, stirring until smooth. Spoon the melted chocolate into a piping bag or zip-top bag with a small corner cut.
- Pipe thin spiderweb designs on each cooled cookie. Place one candy spider topper in the center of each web while the chocolate is still soft.
Extra Tips
Pipe the webs only after the cookies reach room temperature to keep the lines clean and prevent spreading. If the white chocolate thickens while working, warm it briefly in the microwave. Store finished cookies in an airtight container at room temperature for up to three days.Course: Dessert Cuisine: American Equipment: Mixing Bowl, Baking Sheet, Piping Bag
Witch Hat Cookies with Chocolate Base and Purple Icing
These cookies bring a fun Halloween twist with a rich chocolate base that holds its shape well after baking. The purple icing adds a bright pop of color and a smooth finish that stands out on a dessert table. They work nicely for parties or as a simple project to make with kids.
The flavor combines deep cocoa with sweet vanilla icing. The texture stays crisp on the edges and slightly soft in the center.

Serves 4 people.
Ingredients
- 1/2 cup unsalted butter, softened
- 1/2 cup granulated sugar
- 1 cup all-purpose flour
- 1/4 cup cocoa powder
- 1 large egg
- 1 teaspoon vanilla extract
- 1/4 teaspoon salt
- 1 1/2 cups powdered sugar
- 2 tablespoons milk
- Purple gel food coloring
Instructions
- Preheat the oven to 350 degrees and line a baking sheet with parchment paper.
- In a mixing bowl, cream the butter and granulated sugar until light and fluffy.
- Add the egg and vanilla extract, then mix until combined.
- Stir in the flour, cocoa powder, and salt until a dough forms.
- Roll the dough into eight small balls and place them on the baking sheet. Flatten each ball slightly into a round base.
- Bake for 10 to 12 minutes until the edges are set. Let the cookies cool completely on the baking sheet.
- In a clean bowl, whisk the powdered sugar and milk until smooth. Add purple gel food coloring a drop at a time until the icing reaches the desired shade.
- Transfer the icing to a piping bag and pipe a wide circle on each cookie, then add a tall triangle on top to form the witch hat shape. Let the icing set before serving.
Extra Tips
Pipe the icing in two stages so the brim sets slightly before adding the tall hat section. Store the finished cookies in a single layer in an airtight container to keep the icing smooth. If the icing feels too thick, add milk one drop at a time while mixing.
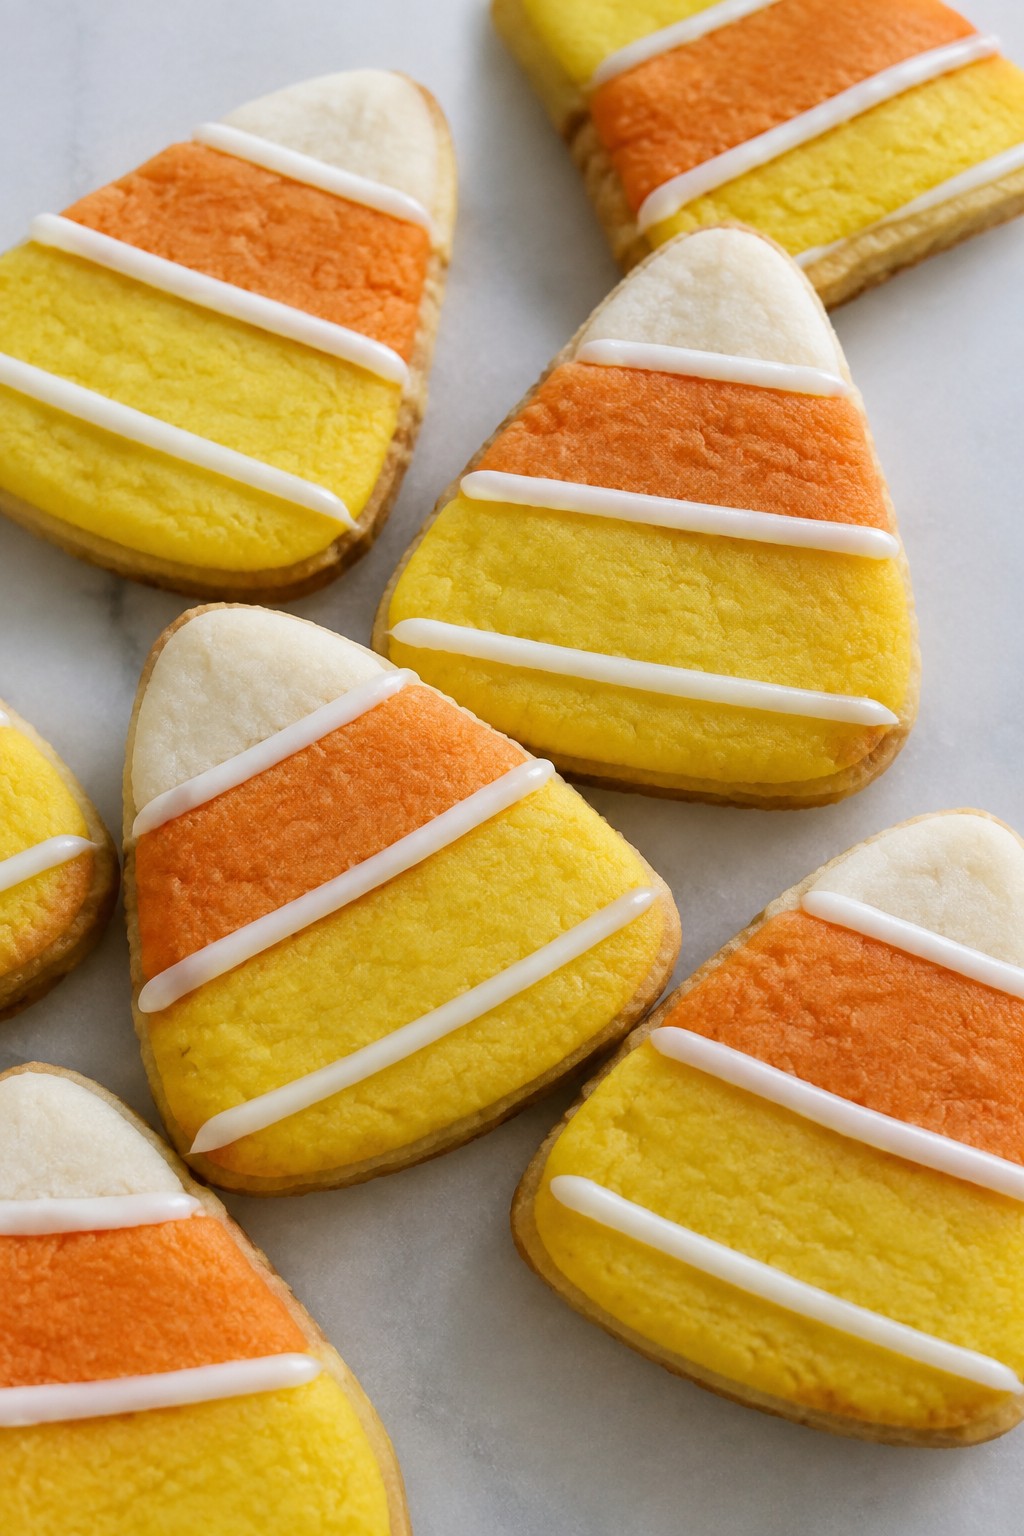
Course: Dessert Cuisine: American Equipment: Mixing Bowl, Baking Sheet, Piping Bag, OvenCandy Corn Layered Sugar Cookies with Striped Icing
These cookies stack three colored layers to mimic candy corn. The buttery sugar base stays soft inside with crisp edges. Striped icing adds a bright finish that fits right into any Halloween spread.
They work well for parties or afternoon baking with kids. The colors stay bold after baking and the stripes give each cookie a playful look without much extra work.
Serves 4 people.
Ingredients
- 2 cups all-purpose flour
- 1/2 teaspoon baking powder
- 1/4 teaspoon salt
- 1/2 cup unsalted butter, softened
- 3/4 cup granulated sugar
- 1 large egg
- 1 teaspoon vanilla extract
- Yellow food coloring
- Orange food coloring
- 1 cup powdered sugar
- 2 tablespoons milk
Instructions
- Heat the oven to 350 degrees and line a baking sheet with parchment paper.
- Stir together the flour, baking powder, and salt in a bowl.
- In a second bowl, beat the butter and granulated sugar until light. Add the egg and vanilla and mix well.
- Add the dry ingredients to the wet mixture and stir until a dough forms.
- Divide the dough into three equal parts. Leave one part plain, tint the second yellow, and tint the third orange.
- Press the plain dough into a rectangle on a lightly floured surface. Layer the yellow dough on top, then the orange dough on top of that. Gently roll the stack to about 1/4 inch thick.
- Cut out shapes with a cookie cutter and place them on the baking sheet.
- Bake for 8 to 10 minutes until the edges turn light golden. Cool the cookies completely on a wire rack.
- Mix the powdered sugar and milk in a bowl until smooth. Divide the icing into three small bowls and tint one yellow and one orange, leaving the third white.
- Place the three colors side by side in a piping bag fitted with a small tip so the stripes form as you pipe. Pipe stripes across each cooled cookie.
Extra Tips
Chill the layered dough for 20 minutes before cutting if it feels soft and the colors start to blur. Use gel food coloring for stronger shades without thinning the dough. Store finished cookies in an airtight container at room temperature for up to three days.Course: Dessert Cuisine: American Equipment: Mixing bowls, Baking sheet, Piping bag
Haunted Tree Cookies with Owl and Branch Details
These cookies stand out at any Halloween gathering with their tree shapes and small owl details perched on piped branches. They work well for parties or as a weekend baking project with kids. The design uses simple icing and candy to create a spooky forest look without much fuss.
The cookies have a classic vanilla flavor with a crisp edge and soft center. Green icing gives the trees a leafy appearance while chocolate branches add contrast and hold the owl details in place.

Serves 4 people.
Ingredients
- 1 1/2 cups all-purpose flour
- 1/2 cup unsalted butter, softened
- 2/3 cup granulated sugar
- 1 large egg
- 1 teaspoon vanilla extract
- 1/2 teaspoon baking powder
- 1/4 teaspoon salt
- 1 cup powdered sugar
- 2 tablespoons milk
- Green food coloring
- 1/4 cup dark chocolate, melted
- 8 candy eyes
Instructions
- Cream the butter and granulated sugar in a mixing bowl until light. Add the egg and vanilla extract and mix until combined.
- Stir in the flour, baking powder, and salt until a dough forms. Wrap the dough and chill for 30 minutes.
- Roll the dough to 1/4 inch thick on a lightly floured surface. Cut into tree shapes and place on a baking sheet.
- Bake at 350°F for 10 to 12 minutes until the edges turn golden. Cool completely on the sheet.
- Mix the powdered sugar and milk to make icing. Add green food coloring until the desired shade is reached.
- Pipe the green icing over the tree tops to create leaves. Pipe the melted dark chocolate into branch shapes across the cookies.
- Place two candy eyes on each branch to form the owls.
Extra Tips
Pipe the chocolate branches first so they set slightly before adding the candy eyes. If the icing feels too thick, add a few drops of milk to loosen it for smoother lines. Store cooled cookies in an airtight container at room temperature to keep the edges crisp.Course: Dessert Cuisine: American Equipment: Mixing bowl, Baking sheet, Piping bags, Tree cookie cutter
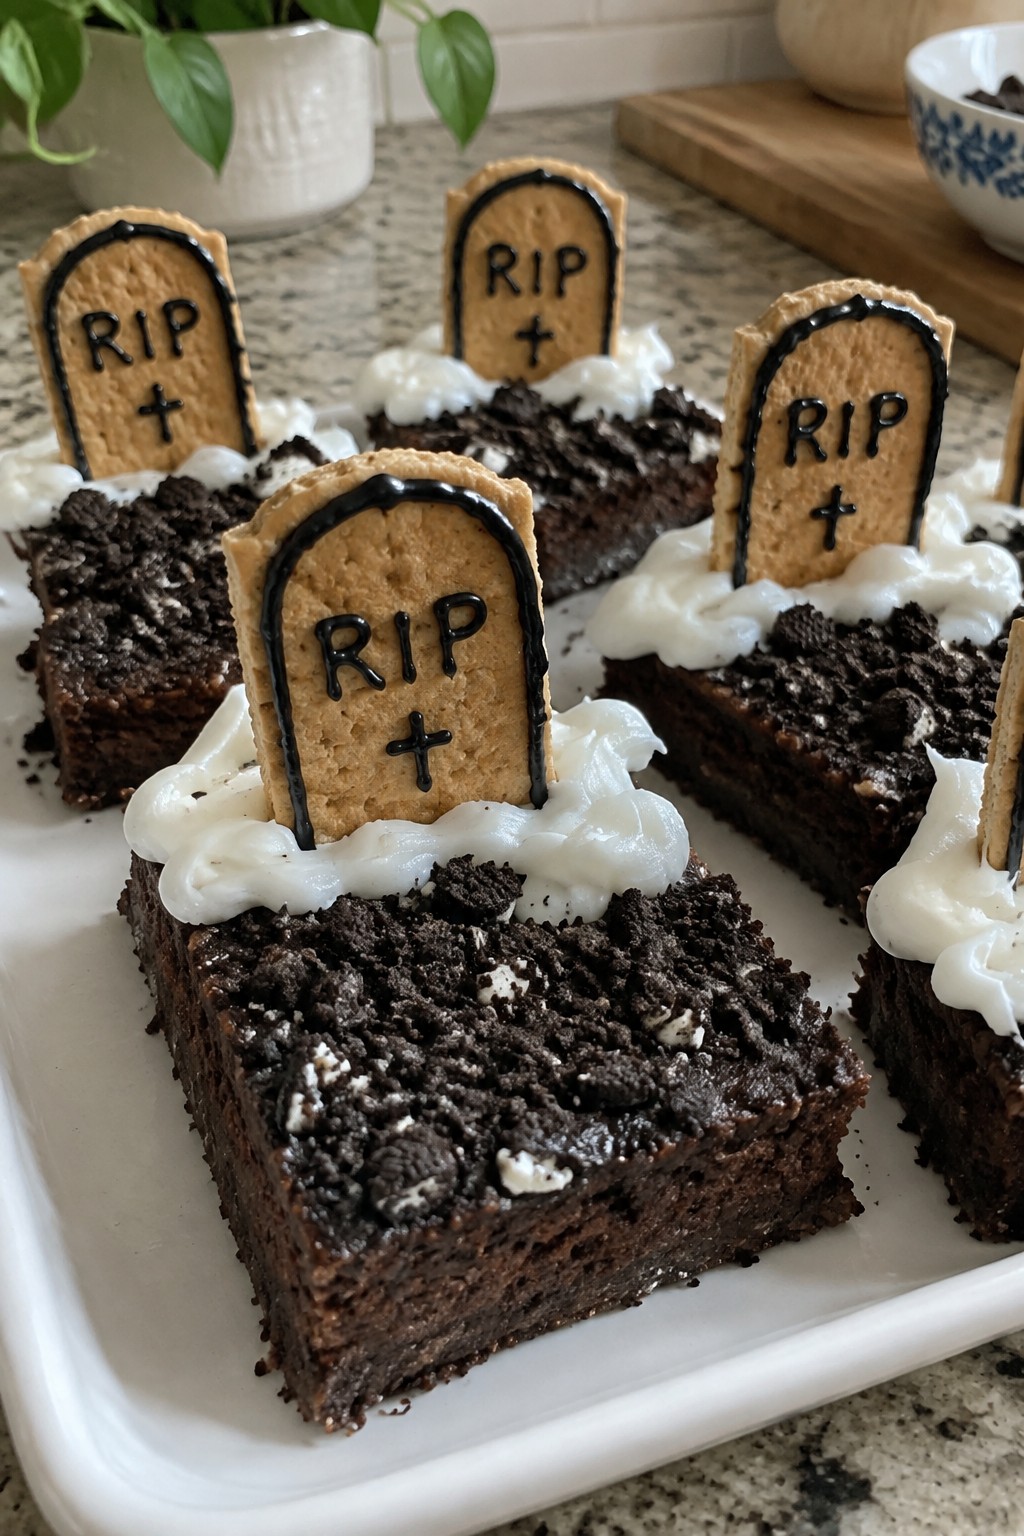
Graveyard Cookie Bars with Tombstone and Fog Accents
These bars turn a simple chocolate cookie base into a graveyard scene that fits right on a Halloween dessert table. The rich cocoa flavor pairs with crunchy cookie crumbs, while the tombstones and fog details give it a playful yet spooky look that guests notice right away.
They work well for small gatherings or as part of a larger cookie spread when you want something that feels themed without extra fuss. The texture stays chewy in the center with crisp edges, and the decorations add a light contrast from the frosting and icing.
Serves 4 people.
Ingredients
- 1 cup all-purpose flour
- ½ cup unsalted butter, softened
- ½ cup brown sugar
- ¼ cup unsweetened cocoa powder
- 1 large egg
- 1 teaspoon vanilla extract
- ½ teaspoon baking powder
- Pinch of salt
- 6 chocolate sandwich cookies, crushed
- 4 graham cracker rectangles
- Black gel icing
- ½ cup white frosting
Instructions
- Preheat the oven to 350°F and line an 8×8 baking pan with parchment paper.
- In a mixing bowl, cream the softened butter and brown sugar until smooth. Add the egg and vanilla extract, then mix until combined.
- Stir in the flour, cocoa powder, baking powder, and salt until a dough forms. Press the dough evenly into the prepared pan.
- Bake for 18 minutes, then let the bars cool completely in the pan.
- Spread the crushed chocolate sandwich cookies over the cooled bars to create the graveyard dirt layer.
- Use the black gel icing to write short names or simple crosses on each graham cracker rectangle to form the tombstones, then press them upright into the crushed cookies.
- Pipe or spread small swirls of white frosting around the base of the tombstones and across parts of the cookie layer to create the fog accents.
Extra Tips
Let the bars cool fully before adding the crushed cookies so the surface stays firm. The white frosting works best when piped in thin layers to keep the fog effect light rather than heavy. Store any leftovers in an airtight container at room temperature for up to two days to maintain the cookie texture.Course: Dessert Cuisine: American Equipment: Mixing Bowl, 8×8 Baking Pan, Oven, Piping Bag
Cauldron Bubble Cookies with Swirled Candy and Sprinkles
These cookies bring a fun Halloween touch with a dark base and colorful candy swirls on top. They work well for parties or handing out at school events. The soft cookie texture pairs with the crackly candy and crunchy sprinkles for a nice contrast in every bite.

Serves 4 people.
Ingredients
- 1 1/4 cups all-purpose flour
- 1/2 cup unsalted butter, softened
- 1/3 cup granulated sugar
- 1 large egg
- 1 teaspoon vanilla extract
- 1/2 teaspoon baking powder
- 1/4 teaspoon salt
- 1 tablespoon black cocoa powder
- 4 ounces candy melts in assorted colors
- 2 tablespoons Halloween sprinkles
- 1 tablespoon popping candy
Instructions
- Preheat the oven to 350 degrees F and line a baking sheet with parchment paper.
- In a mixing bowl, cream the softened butter and sugar until light. Add the egg and vanilla extract, then mix until combined.
- Stir in the flour, baking powder, salt, and black cocoa powder until a dough forms.
- Divide the dough into four equal portions and shape each into a round cookie about 3 inches wide. Place on the prepared baking sheet.
- Bake for 10 to 12 minutes until the edges are set. Let the cookies cool completely on the sheet.
- Melt the candy melts in a microwave-safe bowl in 20-second bursts, stirring between each until smooth.
- Spoon small amounts of different colored candy melts onto each cookie and swirl them together with a toothpick to create a bubbling cauldron look.
- Quickly add the Halloween sprinkles and popping candy on top before the candy melts set.
Extra Tips
Use a toothpick to keep the candy swirls loose and avoid overmixing the colors. The popping candy adds the bubble effect but loses its crackle if stored too long, so add it just before serving. These cookies hold up well in an airtight container at room temperature for two days.Course: Dessert Cuisine: American Equipment: Mixing Bowl, Baking Sheet, Microwave-safe Bowl
