
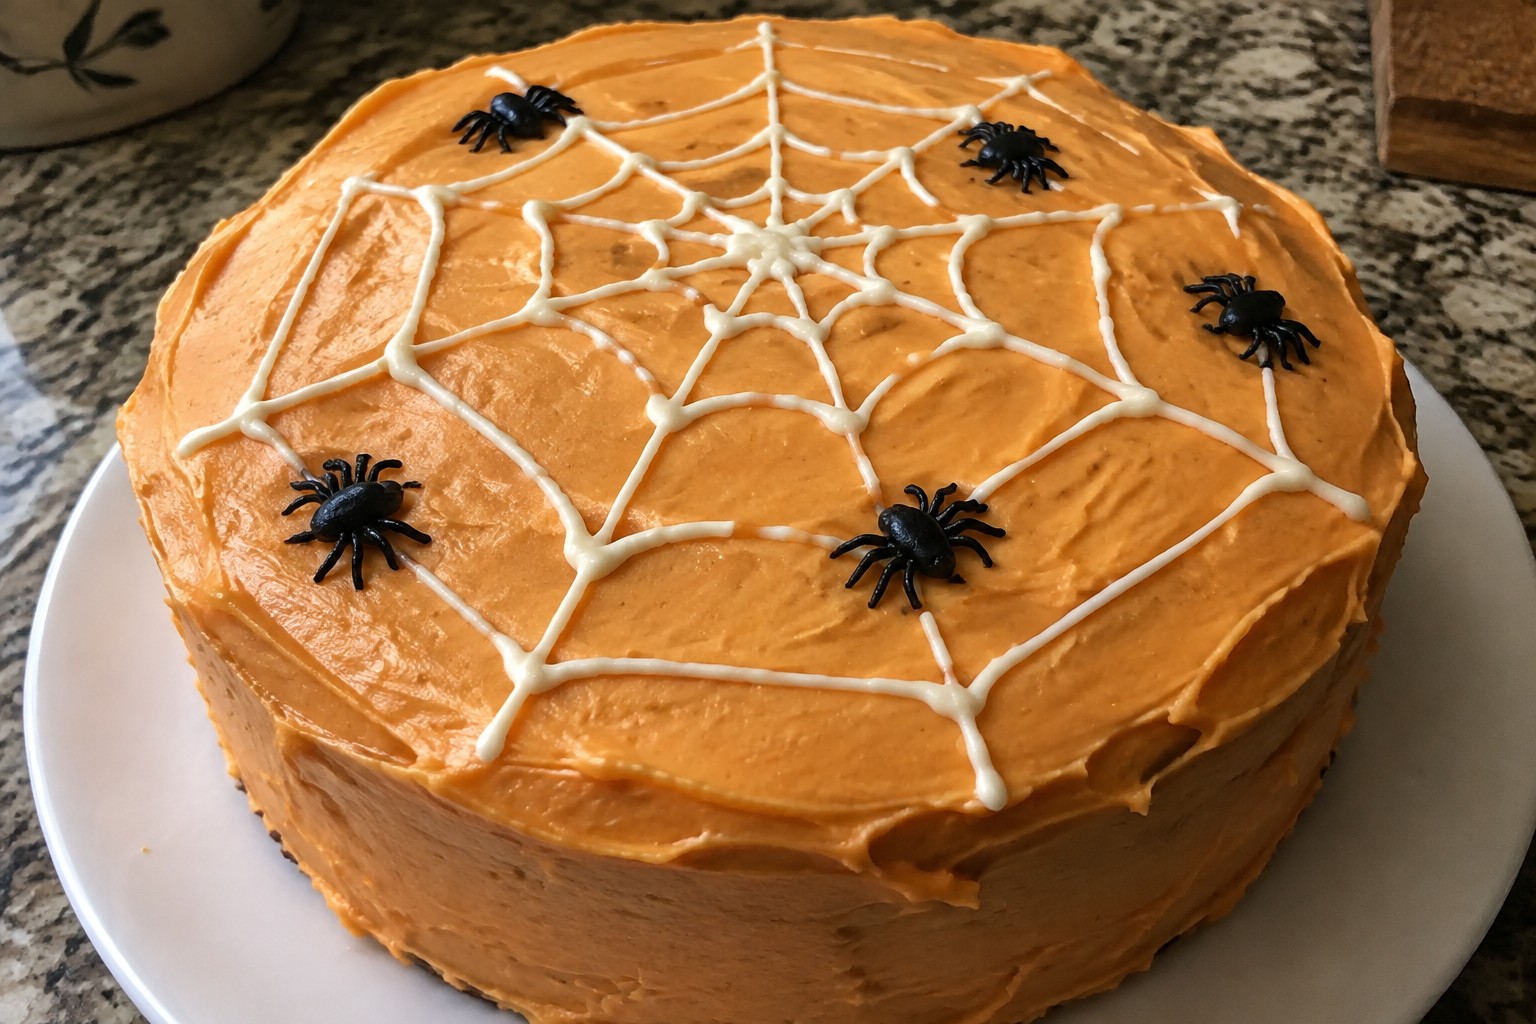
Halloween is coming up and it is a good time to plan some simple themed foods for your gatherings. These ideas focus on recipes that are easy to put together with everyday ingredients. You will find a mix of snacks, main dishes, and desserts that fit a festive table. Each one is meant to help you create a nice spread without needing special skills. They work well for family meals or small parties with friends.
Helpful Tips Before You Start
These tips will help your Halloween recipes come together smoothly.
Choose the Right Colors
Gel food coloring works best for bright orange, black, and green hues without changing texture. Start with small amounts and adjust as needed.
Prep in Stages
Make doughs, frostings, or fillings one day ahead. This keeps assembly quick on the day of your event.
Use Simple Tools for Shapes
Cookie cutters and melon ballers create pumpkins, ghosts, and spiders fast. Keep a few sizes on hand for variety.
Watch for Allergens
Mark any recipes with nuts, dairy, or gluten clearly. Offer at least two options that fit common restrictions.
Jack-o’-Lantern Sausage Stuffed Peppers
These stuffed peppers turn ordinary bell peppers into jack-o’-lanterns with simple carved faces. They work well for Halloween dinners or parties when you want something hearty that still fits the theme. The filling combines savory sausage with rice and cheese for a filling bite that stays balanced by the soft roasted pepper.
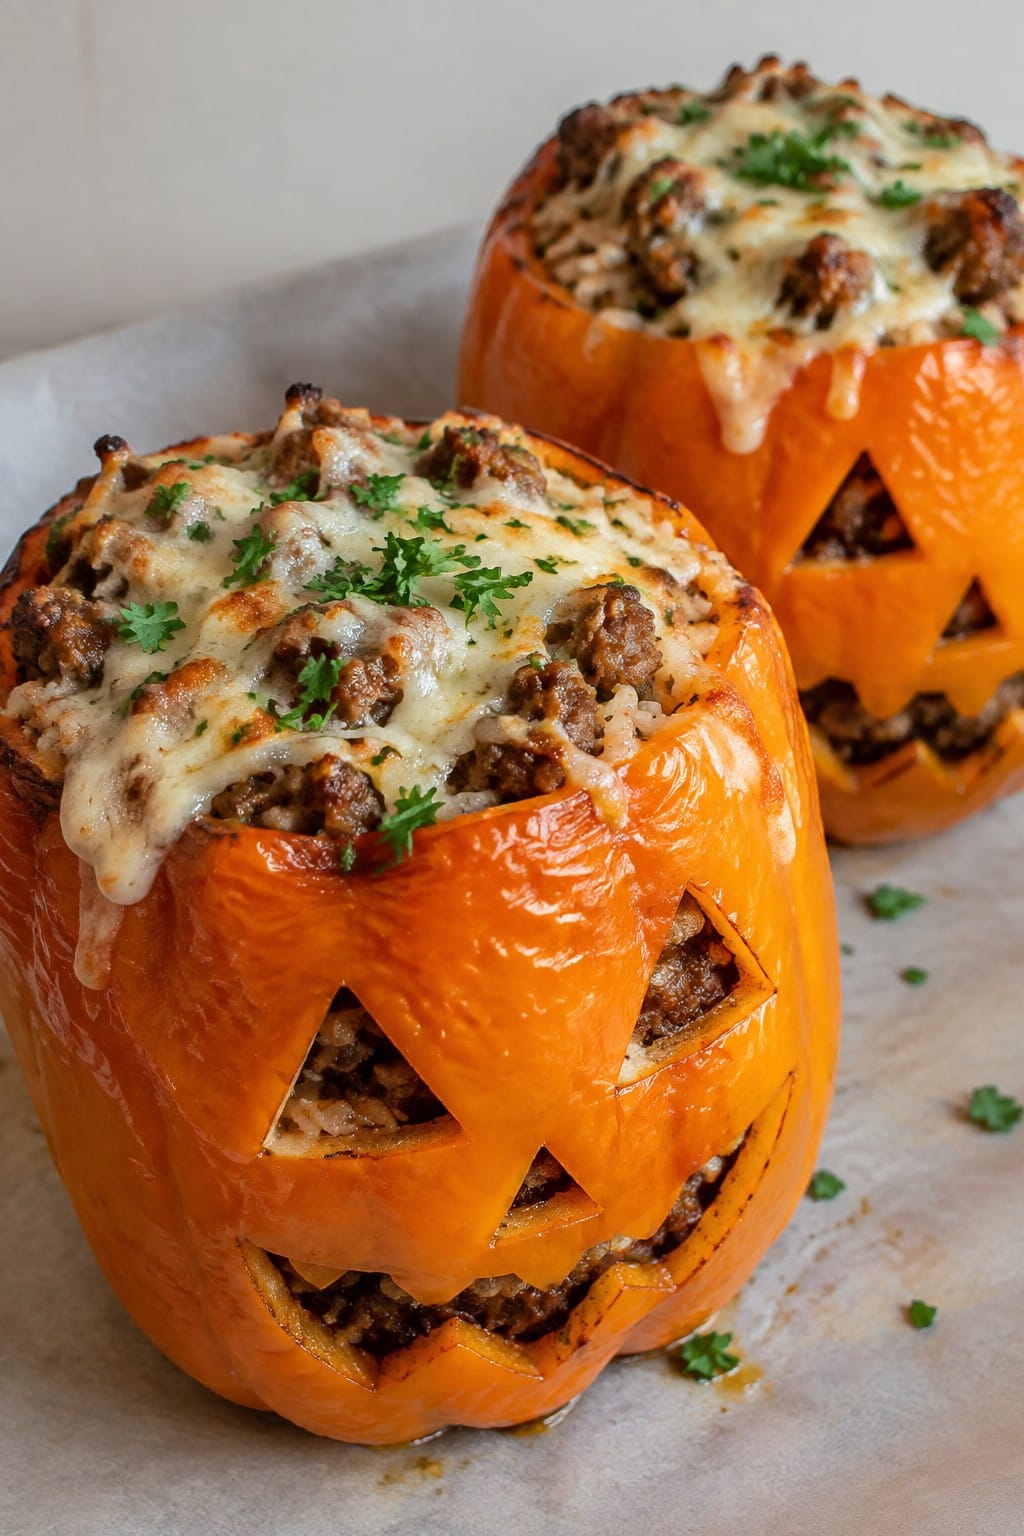
Serves 4 people.
Ingredients
- 4 large orange bell peppers
- 1 pound ground Italian sausage
- 1 small onion, diced
- 2 garlic cloves, minced
- 1 cup cooked white rice
- 1 cup marinara sauce
- 1 teaspoon Italian seasoning
- 1/2 teaspoon salt
- 1/4 teaspoon black pepper
- 1 cup shredded mozzarella cheese
- 1 tablespoon olive oil
- Fresh parsley for garnish
Instructions
- Preheat the oven to 375 degrees. Cut the tops off each orange bell pepper and set them aside. Carve simple jack-o’-lantern faces into the front of each pepper. Remove the seeds and membranes from inside.
- Heat the olive oil in a large skillet over medium heat. Add the ground Italian sausage and cook until browned, breaking it up as it cooks.
- Add the diced onion and minced garlic to the skillet. Cook for 3 to 4 minutes until the onion softens.
- Stir in the cooked white rice, marinara sauce, Italian seasoning, salt, and black pepper. Mix well and remove from heat. Stir in half of the shredded mozzarella cheese.
- Place the prepared peppers in a baking dish. Spoon the sausage mixture evenly into each pepper. Top with the remaining mozzarella cheese and replace the pepper tops.
- Bake for 25 to 30 minutes until the peppers are tender and the cheese is melted. Remove from the oven and sprinkle with fresh parsley before serving.
Extra Tips
Carve the faces after cutting off the tops so the peppers stay stable on the cutting board. The mixture can be made a day ahead and stored in the fridge, then stuffed and baked the next day. Leftovers reheat well in a 350-degree oven for 10 minutes to keep the peppers from getting too soft.Course: Main Course Cuisine: American Equipment: Oven, Large Skillet, Baking Dish, Cutting Board, Knife
Mummy Crescent-Wrapped Hot Dogs with Mustard
These mummy hot dogs bring a fun Halloween touch to any party spread. Crescent dough bakes up flaky around the hot dogs, while a few dots of mustard create simple faces. The result is a warm, savory bite that works well for kids and adults at casual gatherings.
The texture combines crisp pastry with juicy sausage, balanced by the sharp taste of mustard. Serve them as a quick main or finger food during October celebrations.

Serves 4 people.
Ingredients
- 8 all-beef hot dogs
- 2 cans (8-ounce) refrigerated crescent roll dough
- 1/4 cup yellow mustard
Instructions
- Heat the oven to 375 degrees and line a baking sheet with parchment paper.
- Open the crescent roll cans and unroll the dough on a clean surface. Cut each triangle into thin strips about 1/2 inch wide.
- Wrap the dough strips around each hot dog in a crisscross pattern, leaving small gaps near the top for the face area.
- Place the wrapped hot dogs on the prepared baking sheet and bake for 12 to 15 minutes until the dough turns golden brown.
- Remove from the oven and let cool for 2 minutes. Use a small spoon or squeeze bottle to add two dots of mustard in the gaps to form eyes.
Extra Tips
For the best mummy look, keep the dough strips uneven so they resemble bandages. If the hot dogs are very cold, let them sit at room temperature for 10 minutes before wrapping to help the dough stick. Leftovers reheat well in a 350-degree oven for 5 minutes to restore crispness. Yellow mustard gives the clearest contrast, but any prepared mustard works for the eyes.Course: Appetizer Cuisine: American Equipment: Baking sheet, Oven, Knife
Cauldron Smoky Beef Chili with Cornbread Toppers
This smoky beef chili works well for Halloween dinners because it comes together in one big pot and feels hearty on a cool evening. The cornbread toppers add a sweet, crumbly contrast that makes each bowl more interesting without extra fuss.
The flavor leans bold from smoked paprika and chili powder, while the beef and beans keep the texture thick and satisfying. Cornbread pieces placed on top right before serving give a nice balance of soft and crisp in every bite.
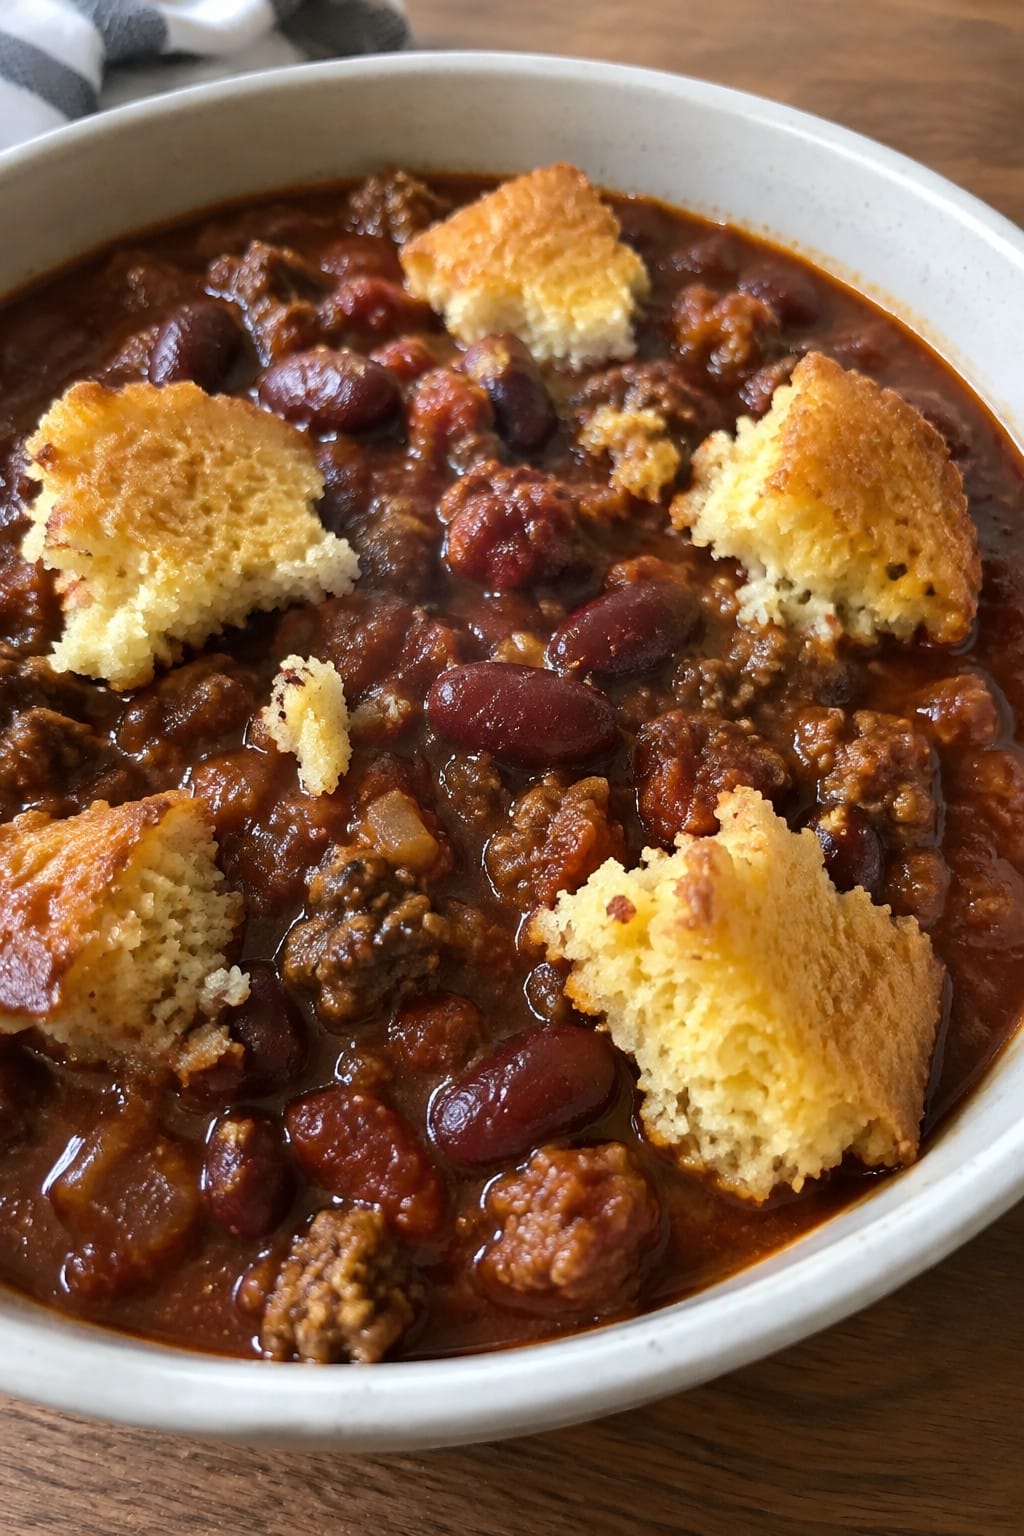
Serves 4 people.
Ingredients
- 1 pound ground beef
- 1 medium onion, chopped
- 2 garlic cloves, minced
- 1 can (15 oz) kidney beans, drained and rinsed
- 1 can (14.5 oz) diced tomatoes
- 2 tablespoons tomato paste
- 1 cup beef broth
- 1 tablespoon chili powder
- 1 teaspoon smoked paprika
- 1 teaspoon ground cumin
- Salt and black pepper to taste
- 1 cup cornmeal
- 1/2 cup all-purpose flour
- 1 tablespoon baking powder
- 1/2 teaspoon salt
- 1 cup milk
- 1 egg
- 2 tablespoons butter, melted
Instructions
- Brown the ground beef in a large pot over medium heat. Add the chopped onion and minced garlic, then cook until the onion softens.
- Stir in the chili powder, smoked paprika, and cumin. Cook for one minute to wake up the spices.
- Add the diced tomatoes, tomato paste, beef broth, and drained kidney beans. Season with salt and black pepper. Bring the mixture to a simmer and cook for 20 minutes, stirring now and then.
- While the chili simmers, heat the oven to 400°F. In a mixing bowl, combine the cornmeal, flour, baking powder, and salt. Whisk in the milk, egg, and melted butter until smooth.
- Drop spoonfuls of the cornbread batter onto a baking sheet to form small rounds. Bake for 12 to 15 minutes until the edges turn golden.
- Ladle the chili into bowls and place two or three warm cornbread toppers on each serving.
Extra Tips
If the chili thickens too much while simmering, add a splash more broth to loosen it. The cornbread toppers stay crispier if you place them on the chili just before serving rather than stirring them in. Leftovers reheat gently on the stove with a little extra broth to restore the texture.Course: Main Course Cuisine: American Equipment: Large Pot, Mixing Bowl, Baking Sheet
Ghostly Chicken Alfredo Fettuccine
This creamy fettuccine dish works well for a Halloween dinner because the white Alfredo sauce gives off a ghostly look when finished with simple cheese cutouts. The tender chicken and rich sauce make it a filling choice that still feels festive without extra effort.
The flavor stays mild and comforting with garlic and Parmesan leading the way. The texture comes out smooth from the cream sauce and slightly chewy from the pasta.
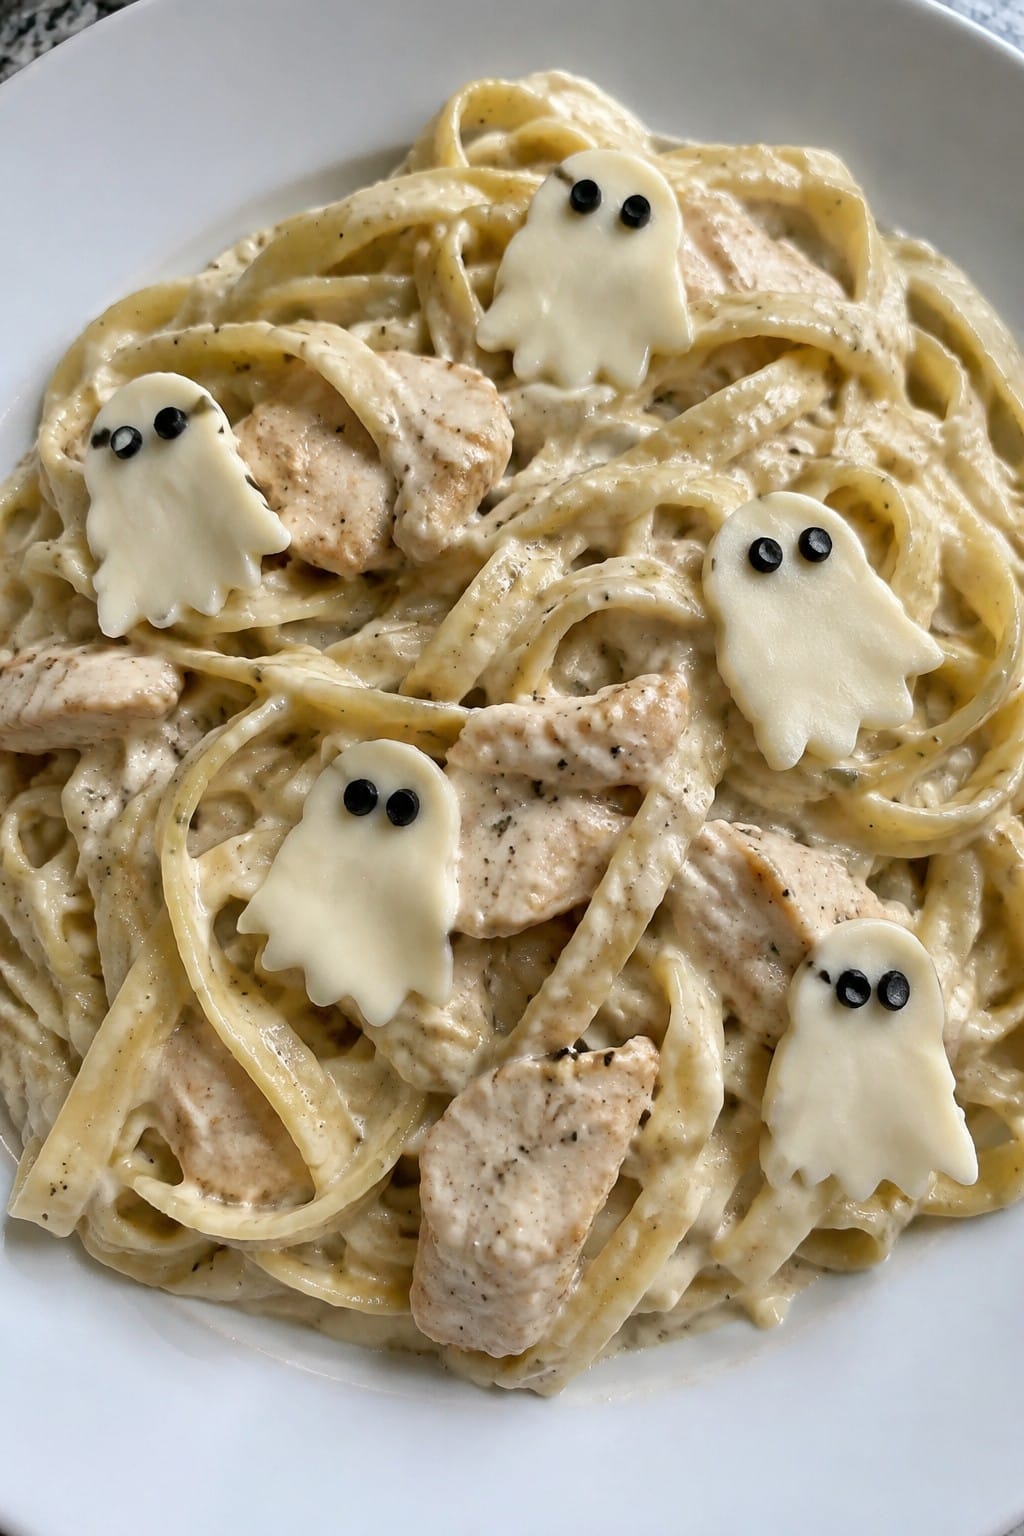
Serves 4 people.
Ingredients
- 12 ounces fettuccine pasta
- 1 pound boneless skinless chicken breasts
- 3 tablespoons butter
- 3 garlic cloves, minced
- 1 1/2 cups heavy cream
- 1 cup grated Parmesan cheese
- 4 ounces fresh mozzarella cheese
- 8 black olives
- Salt and black pepper to taste
Instructions
- Bring a large pot of salted water to a boil and cook the fettuccine according to package directions until al dente. Drain and set aside.
- Season the chicken breasts with salt and pepper. Melt 1 tablespoon of butter in a large skillet over medium heat and cook the chicken for 6 to 7 minutes per side until fully cooked. Remove the chicken and let it rest before slicing into strips.
- In the same skillet, melt the remaining 2 tablespoons of butter. Add the minced garlic and cook for 1 minute until fragrant.
- Pour in the heavy cream and bring to a gentle simmer. Stir in the Parmesan cheese until the sauce thickens slightly. Season with salt and pepper.
- Add the drained fettuccine to the skillet and toss to coat evenly with the sauce. Return the sliced chicken to the pan and stir to combine.
- Slice the mozzarella into small ghost shapes and place them on top of the pasta. Cut the black olives into thin rounds and add two slices to each mozzarella ghost as eyes.
Extra Tips
Slice the mozzarella ghosts right before serving so they hold their shape on the warm pasta. If the sauce thickens too much after sitting, add a splash of the pasta cooking water to loosen it. Leftovers reheat best in a skillet over low heat with a little extra cream stirred in.Course: Main Course Cuisine: Italian Equipment: Large pot, Large skillet, Colander
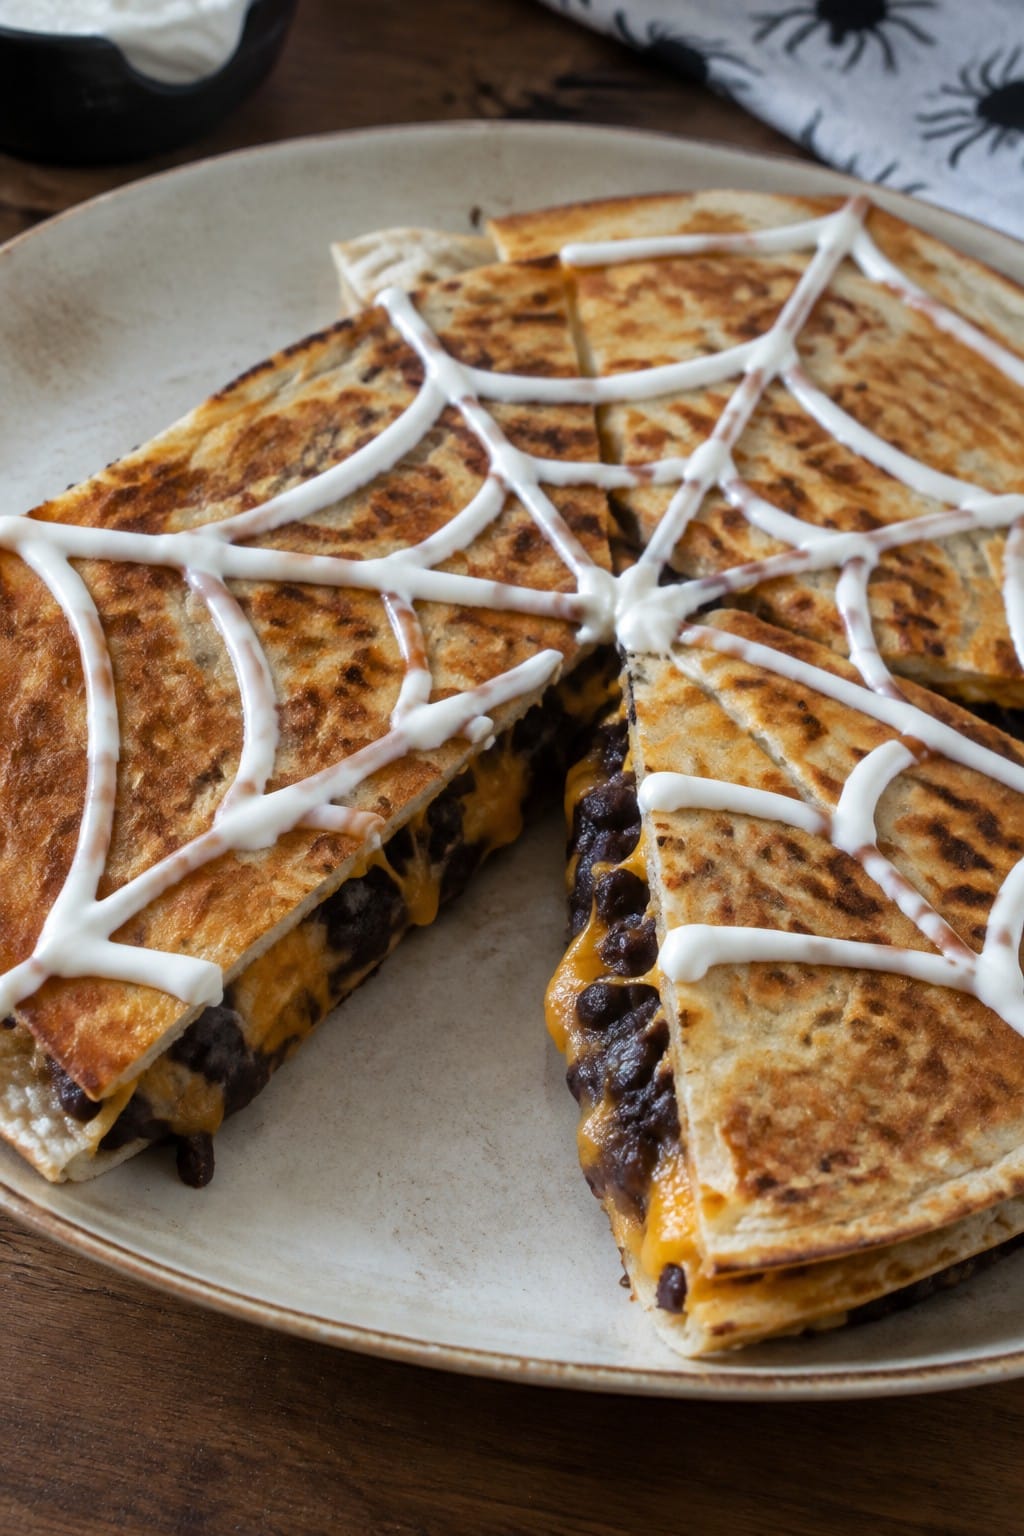
Spiderweb Black Bean and Cheese Quesadillas
These quesadillas bring a simple spooky touch to any Halloween spread. The black bean filling creates a dark base that contrasts with the white sour cream web on top. They work well as a quick savory bite before the main meal or as part of a snack table.
The outside turns crisp while the inside stays melty with cheese and seasoned beans. The flavor stays mild and comforting with a light kick from the spices.
Serves 4 people.
Ingredients
- 8 large flour tortillas
- 1 can (15 oz) black beans, drained and rinsed
- 2 cups shredded cheddar cheese
- 1 teaspoon ground cumin
- 1/2 teaspoon chili powder
- 1/4 teaspoon salt
- 2 tablespoons olive oil
- 1/2 cup sour cream
Instructions
- Place the black beans in a bowl and mash them with a fork until most are broken down but some chunks remain. Stir in the cumin, chili powder, and salt.
- Lay four tortillas on a work surface. Spread the bean mixture evenly over each one, then sprinkle the cheese on top. Cover with the remaining four tortillas.
- Heat 1 tablespoon of olive oil in a large skillet over medium heat. Cook one quesadilla at a time for 2 to 3 minutes per side until the tortilla is golden and the cheese melts. Add the remaining oil as needed for the rest.
- Let the cooked quesadillas rest for one minute. Spoon the sour cream into a small zip-top bag, snip off one corner, and pipe circles on each quesadilla. Drag a knife through the circles from the center outward to form a web pattern. Cut into wedges and serve.
Extra Tips
Pipe the sour cream right after cooking so it sits on the warm surface without soaking in. If you want a milder flavor, reduce the chili powder by half. Leftovers reheat best in a dry skillet over low heat to keep the tortilla crisp.Course: Appetizer Cuisine: Mexican Equipment: Large skillet, Mixing bowl, Spatula, Resealable plastic bag
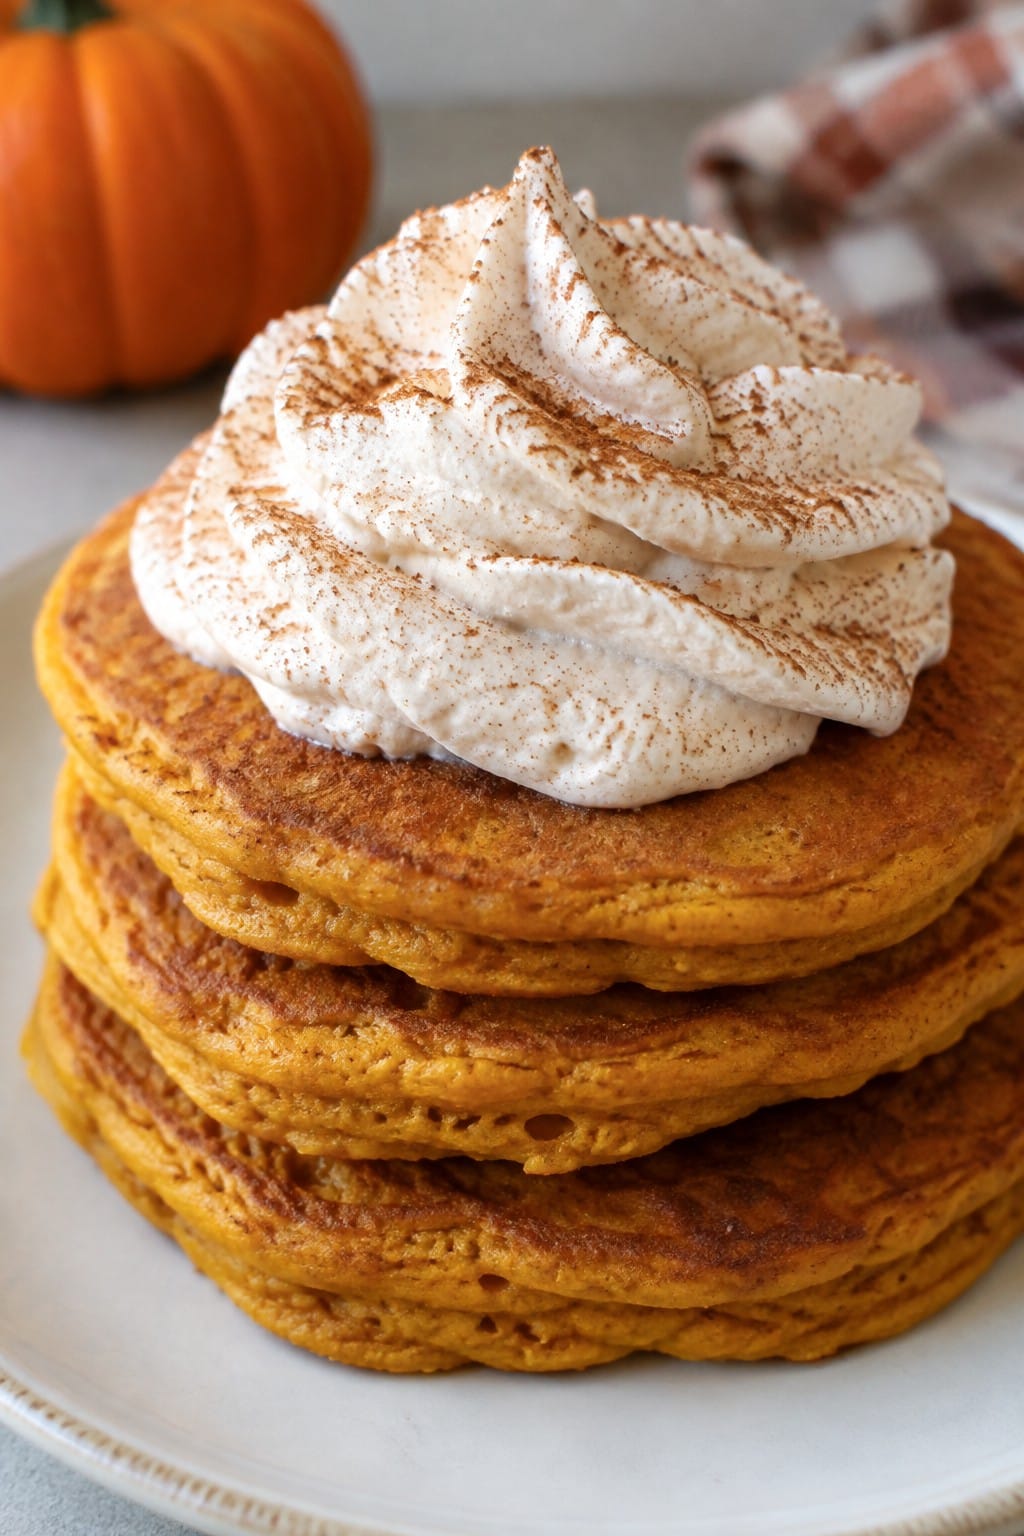
Pumpkin Spice Pancakes with Cinnamon Whipped Cream
These pancakes combine pumpkin puree and warm spices for a soft, fluffy texture with gentle sweetness. They make a good choice for a Halloween morning meal or a fall brunch with family and friends. The cinnamon whipped cream adds a light, creamy finish that pairs well with the spiced batter.
Serves 4 people.
Ingredients
- 2 cups all-purpose flour
- 2 tablespoons baking powder
- 2 tablespoons granulated sugar
- 1 teaspoon pumpkin pie spice
- 1 cup pumpkin puree
- 1 1/2 cups milk
- 1 large egg
- 2 tablespoons unsalted butter, melted
- 1 teaspoon vanilla extract
- 1 cup heavy cream
- 2 tablespoons powdered sugar
- 1 teaspoon ground cinnamon
Instructions
- In a large bowl, whisk together the flour, baking powder, granulated sugar, and pumpkin pie spice until evenly combined.
- In a separate bowl, mix the pumpkin puree, milk, egg, melted butter, and vanilla extract until smooth.
- Pour the wet mixture into the dry ingredients and stir gently until just combined. Small lumps are fine. Do not overmix.
- Heat a griddle or skillet over medium heat and lightly grease it. Scoop 1/4 cup portions of batter onto the surface for each pancake.
- Cook until bubbles form on the top and the edges look set, then flip and cook the other side until golden. Repeat with the remaining batter.
- In a chilled bowl, combine the heavy cream, powdered sugar, and ground cinnamon. Whip with a hand mixer or whisk until soft peaks form.
- Serve the pancakes warm with a dollop of the cinnamon whipped cream on top.
Extra Tips
Use room-temperature milk and egg to help the batter mix smoothly and rise evenly. If the whipped cream is made ahead, cover and chill it, then give it a quick whisk before serving to restore the texture. For a stronger spice note, add an extra pinch of pumpkin pie spice directly to the whipped cream.Course: Breakfast Cuisine: American Equipment: Large mixing bowl, Whisk, Griddle, Hand mixer
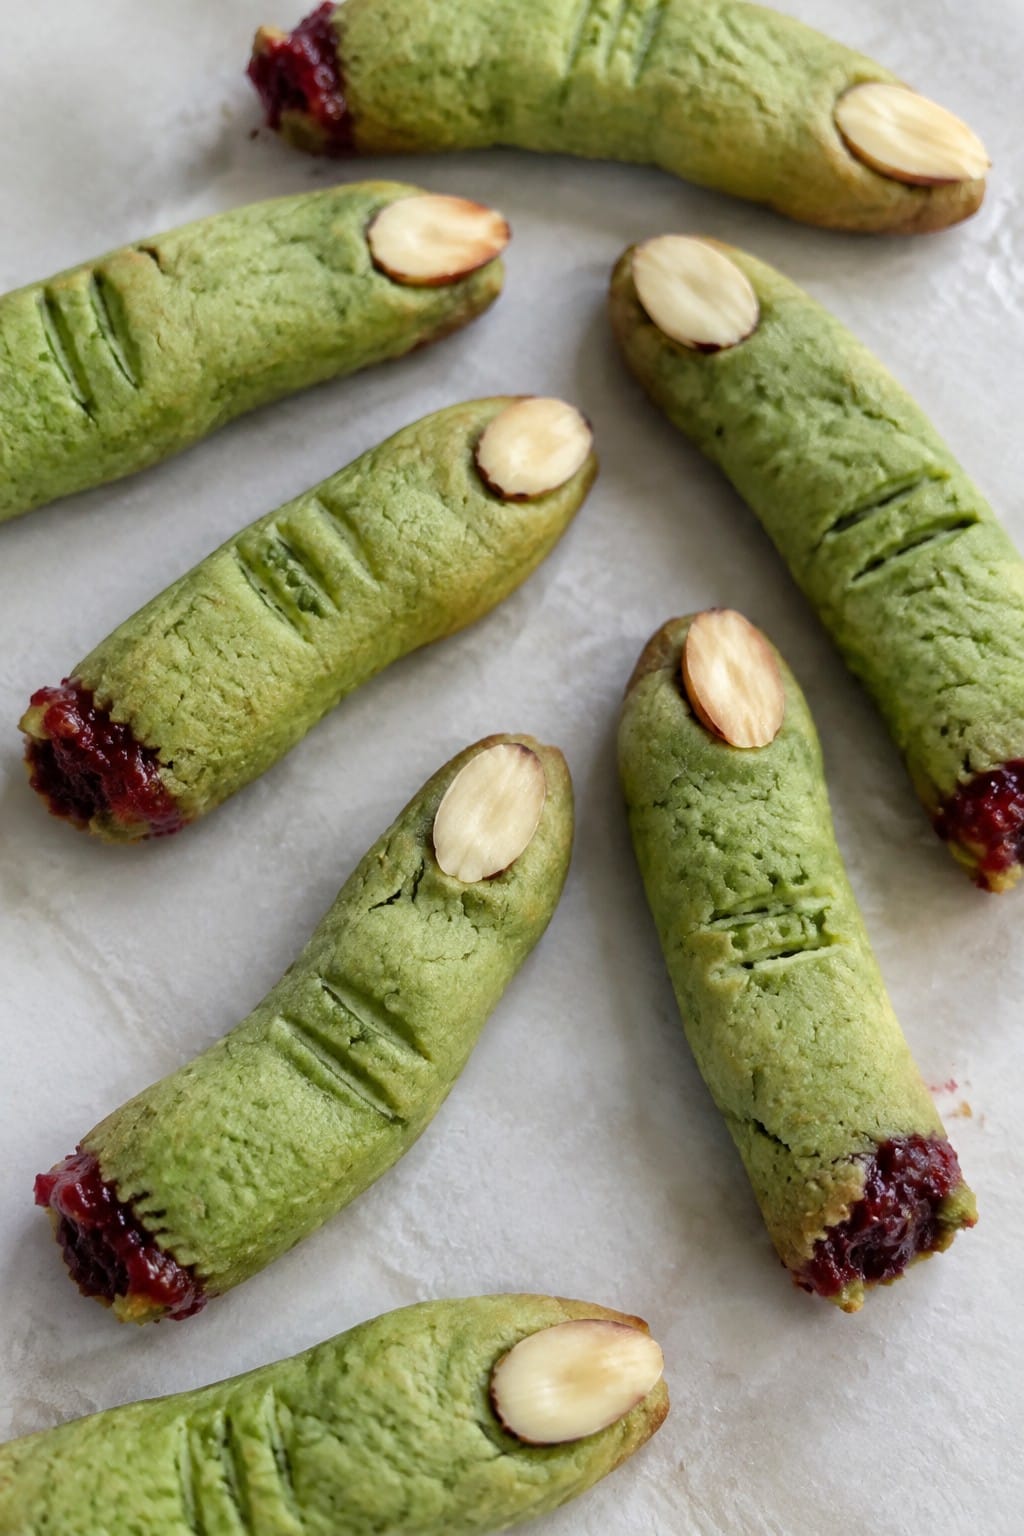
Witch Finger Almond Sugar Cookies
These cookies stand out at Halloween gatherings because of their playful finger shape and simple almond taste. They fit well for a small party or family activity where everyone can help shape them before baking. The result is a lightly sweet cookie with crisp edges and a soft center.
The almond extract adds a clear nutty note that pairs with the sugar cookie base. A touch of green coloring gives them the right spooky look without extra work.
Serves 4 people.
Ingredients
- 1 cup all-purpose flour
- ½ cup unsalted butter, softened
- ⅓ cup granulated sugar
- 1 egg yolk
- 1 teaspoon almond extract
- ¼ teaspoon salt
- 4-5 drops green food coloring
- 12 whole almonds
- 2 tablespoons raspberry jam
Instructions
- Heat the oven to 350°F and line a baking sheet with parchment paper.
- In a mixing bowl, beat the softened butter and sugar until light and creamy.
- Add the egg yolk and almond extract, then mix until combined.
- Stir in the flour and salt until a soft dough forms.
- Add the green food coloring a drop at a time and mix until the dough reaches a light green shade.
- Scoop out small portions of dough and roll each into a thin finger shape about 4 inches long.
- Place the shaped fingers on the baking sheet and press one almond into the end of each to form a nail.
- Use a knife to make light knuckle lines across the middle of each finger.
- Bake for 10-12 minutes until the edges turn lightly golden.
- Cool the cookies on the sheet for 5 minutes, then transfer to a rack.
- Warm the raspberry jam slightly and dab a small amount under each almond to look like blood.
Extra Tips
Shape the dough while it is still at room temperature so the fingers stay smooth. If the dough feels sticky, chill it for 10 minutes before rolling. Store cooled cookies in an airtight container at room temperature for up to three days. For a stronger almond taste, add an extra ¼ teaspoon of extract to the dough.Course: Dessert Cuisine: American Equipment: Mixing Bowl, Baking Sheet, Parchment Paper
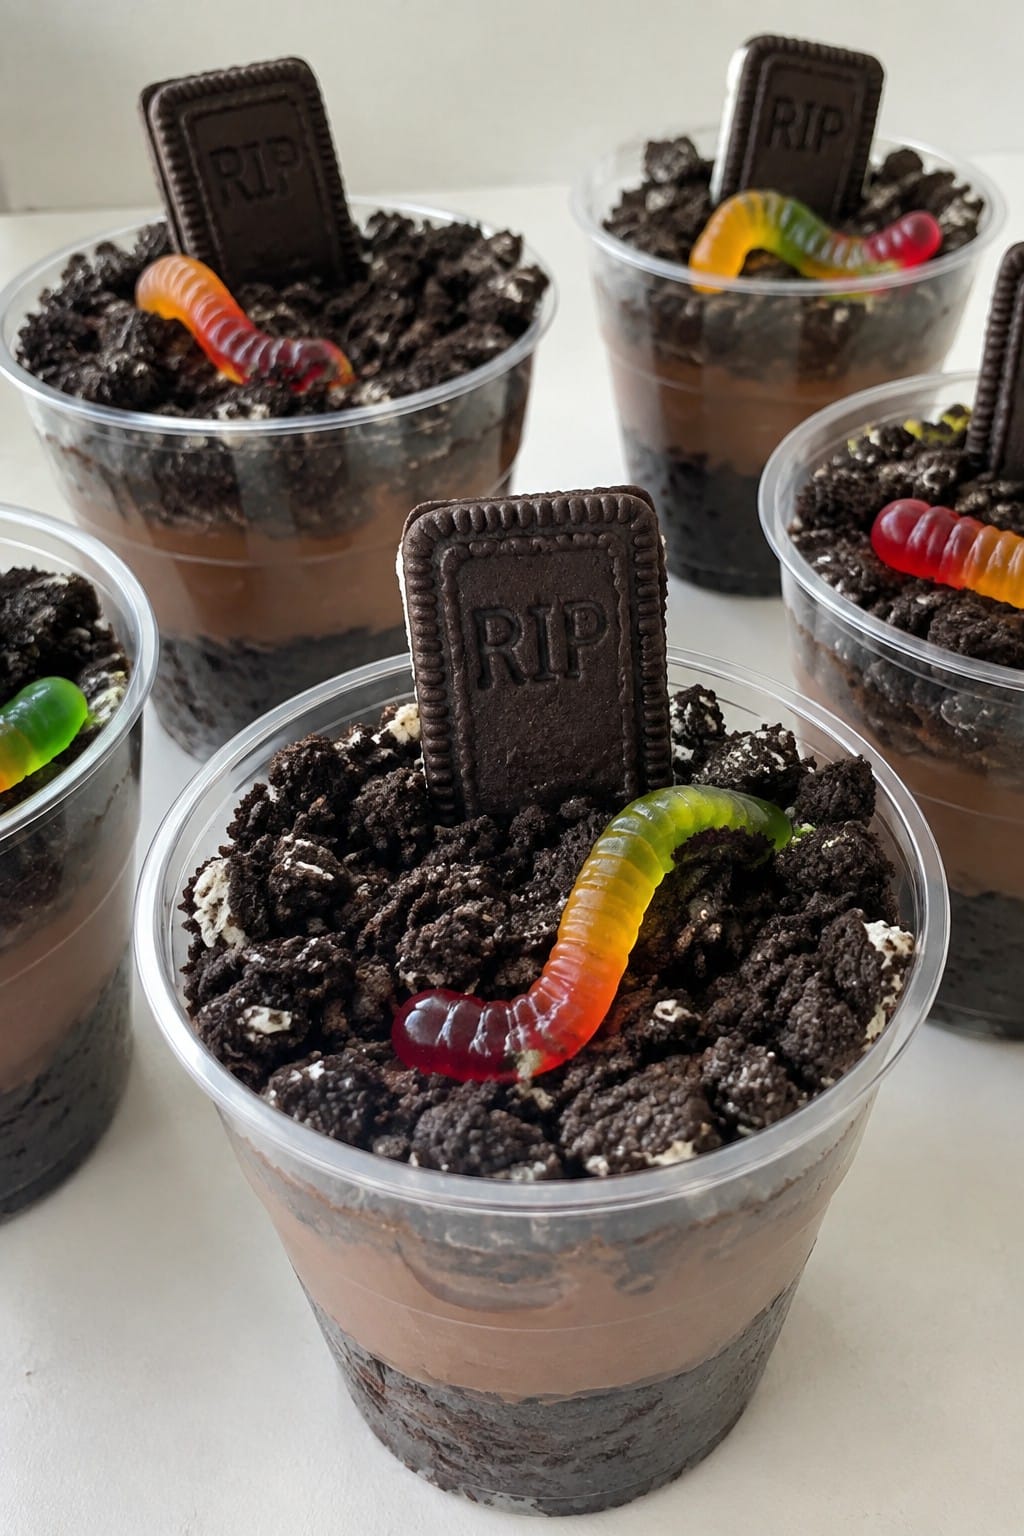
Graveyard Fudge Brownie Dirt Cups
These cups turn simple brownies into a playful Halloween treat. Layers of fudgy brownie, creamy pudding, and crushed cookie dirt create a rich chocolate flavor with a mix of soft and crunchy textures. They suit kid-friendly parties or casual fall gatherings where a lighthearted dessert fits the theme.
The finished cups look like tiny graveyards once the cookie tombstones and gummy worms are added, making them easy to serve without extra decoration.
Serves 4 people.
Ingredients
- ½ cup unsalted butter
- 1 cup granulated sugar
- 2 large eggs
- ⅓ cup unsweetened cocoa powder
- ½ cup all-purpose flour
- ¼ teaspoon salt
- 1 cup prepared chocolate pudding
- 1 cup crushed chocolate sandwich cookies
- 8 gummy worms
- 4 rectangular sandwich cookies
Instructions
- Preheat the oven to 350°F. Line a small baking pan with parchment.
- Melt the butter in a mixing bowl. Stir in the sugar until combined.
- Add the eggs one at a time, mixing well after each addition.
- Stir in the cocoa powder, flour, and salt until the batter is smooth.
- Spread the batter evenly in the prepared pan and bake for 20 minutes. Let the brownies cool completely.
- Crumble the cooled brownies into four small serving cups, dividing them evenly.
- Spoon the prepared chocolate pudding over the brownie layer in each cup.
- Sprinkle the crushed chocolate sandwich cookies on top to create the dirt layer.
- Press two gummy worms into the cookie layer on each cup.
- Stand one rectangular sandwich cookie upright at the back of each cup to form a tombstone.
Extra Tips
Crumble the brownies while they are still slightly warm for easier layering, but let them cool fully before adding pudding so the layers stay distinct. The rectangular cookies stay upright best when pressed into the crushed cookie layer right before serving. Store any leftovers covered in the refrigerator for up to two days.Course: Dessert Cuisine: American Equipment: Mixing Bowl, Baking Pan, 4 Small Cups
Bloody Tomato Basil Soup with Grilled Cheese Dippers
This recipe turns a classic comfort dish into a fun Halloween centerpiece. The deep red soup gives off a bloody look that fits right into festive spreads without extra effort. It comes together with pantry staples and works well for both kids and adults at parties or weeknight meals.
The soup tastes bright from tomatoes and fresh basil, with a smooth finish from cream. The grilled cheese dippers add a crunchy contrast and make it easy to eat while mingling. Serve it in mugs or bowls so guests can dip right in.

Serves 4 people.
Ingredients
- 2 tablespoons olive oil
- 1 medium onion, diced
- 3 garlic cloves, minced
- 2 cans (14.5 ounces each) crushed tomatoes
- 4 cups vegetable broth
- 1 cup fresh basil leaves, chopped
- 1/2 cup heavy cream
- Salt and black pepper to taste
- 8 slices sandwich bread
- 8 slices cheddar cheese
- 4 tablespoons butter
Instructions
- Heat the olive oil in a large pot over medium heat. Add the diced onion and cook until soft, about 5 minutes. Stir in the minced garlic and cook for 1 minute more.
- Pour in the crushed tomatoes and vegetable broth. Bring the mixture to a simmer and cook for 15 minutes. Add the chopped basil, then blend the soup until smooth with an immersion blender or regular blender.
- Stir in the heavy cream and season with salt and black pepper. Keep the soup warm over low heat while you prepare the dippers.
- Butter one side of each bread slice. Place four slices butter-side down in a skillet over medium heat. Add two slices of cheddar to each piece of bread, then top with the remaining bread slices butter-side up. Cook until the bread is golden and the cheese melts, about 3 minutes per side. Cut each sandwich into strips.
- Ladle the soup into bowls and serve with the grilled cheese dippers on the side.
Extra Tips
For a thicker soup, use one can of crushed tomatoes and one can of diced tomatoes with their juice. If the basil tastes too strong after blending, add a splash more cream to mellow it. Leftovers keep in the fridge for three days and reheat gently on the stove with a little extra broth to loosen the texture.Course: Soup Cuisine: American Equipment: Large pot, Immersion blender, Skillet
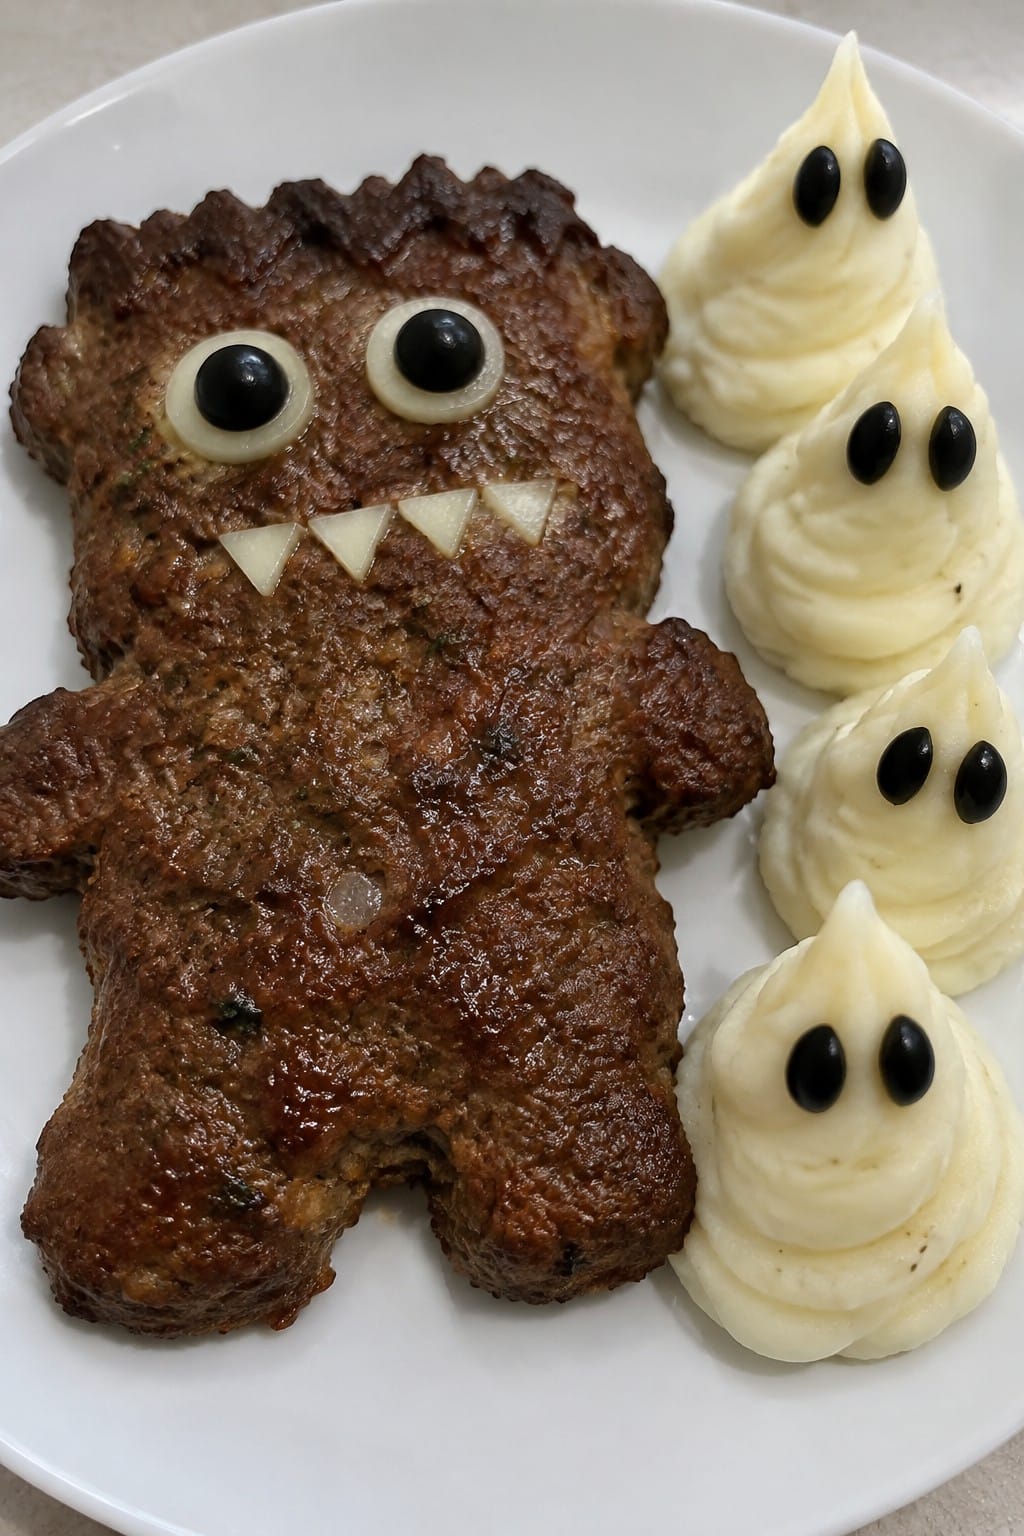
Monster Meatloaf with Mashed Potato Ghosts
This meatloaf gives a classic family dinner a playful Halloween twist. The loaf forms a simple monster shape while piped mashed potatoes create ghost figures on the side. The result is a hearty main with savory meat and creamy potato textures that appeal to both kids and adults.
It works well for weeknight meals or small gatherings around the holiday. The flavors stay familiar with seasoned beef and buttery potatoes.
Serves 4 people.
Ingredients
- 1 pound ground beef
- ½ cup breadcrumbs
- 1 large egg
- 1 small onion, finely chopped
- 2 cloves garlic, minced
- ¼ cup ketchup
- 1 tablespoon Worcestershire sauce
- 1 teaspoon salt
- ½ teaspoon black pepper
- 4 medium russet potatoes, peeled and cubed
- 2 tablespoons butter
- ¼ cup milk
- 4 black olives, halved
Instructions
- Preheat the oven to 350°F. In a large bowl, combine the ground beef, breadcrumbs, egg, onion, garlic, ketchup, Worcestershire sauce, salt, and pepper. Mix until evenly blended.
- Shape the mixture into a loaf and place it in a loaf pan. Press lightly to form a basic monster body shape with a rounded head area at one end.
- Bake for 50 to 60 minutes until the internal temperature reaches 160°F. Let the meatloaf rest for 5 minutes before slicing.
- While the meatloaf bakes, place the potatoes in a large pot and cover with water. Bring to a boil and cook for 15 minutes until tender.
- Drain the potatoes. Add the butter, milk, and a pinch of salt. Mash until smooth.
- Spoon the mashed potatoes into a piping bag or zip-top bag with one corner cut off. Pipe ghost shapes onto plates beside slices of meatloaf. Press olive halves into each ghost to form eyes.
Extra Tips
Pipe the potatoes while they are still warm for the smoothest ghost shapes. If the mash feels too thick, add a splash more milk before piping. Leftovers reheat well in the microwave with a damp paper towel over the top to keep the potatoes from drying out. Skip the olives if serving young children and use small dots of ketchup instead.Course: Main Course Cuisine: American Equipment: Mixing bowl, Loaf pan, Large pot, Potato masher, Piping bag
Vampire Balsamic Caprese Skewers
These skewers give a classic caprese salad a Halloween touch with dark balsamic that stands out against red tomatoes. They work well as a simple appetizer for parties because guests can grab one without needing a plate.
The fresh ingredients stay light while the glaze adds a sweet and tangy finish. Each bite combines soft cheese with crisp tomato and herb.

Serves 4 people.
Ingredients
- 12 cherry tomatoes
- 12 small mozzarella balls
- 12 fresh basil leaves
- 1/4 cup balsamic vinegar
- 2 tablespoons olive oil
- 1/4 teaspoon salt
- 1/4 teaspoon black pepper
- 12 wooden skewers
Instructions
- Thread one cherry tomato, one basil leaf, and one mozzarella ball onto each wooden skewer. Repeat the pattern once more on every skewer until all the tomatoes, basil, and mozzarella are used.
- Pour the balsamic vinegar into a small saucepan and heat over medium heat. Stir occasionally and cook until the liquid thickens and reduces by half, about 5 minutes.
- Remove the pan from heat and let the reduced balsamic cool slightly. Drizzle it evenly over the assembled skewers.
- Drizzle the olive oil over the skewers, then sprinkle with salt and black pepper before serving.
Extra Tips
Make the balsamic reduction ahead and store it in a small jar so you can assemble the skewers just before guests arrive. Use a thicker glaze if you want less liquid on the plate, and add a little more olive oil only if the skewers seem dry after drizzling.Course: Appetizer Cuisine: Italian Equipment: Wooden skewers, Small saucepan
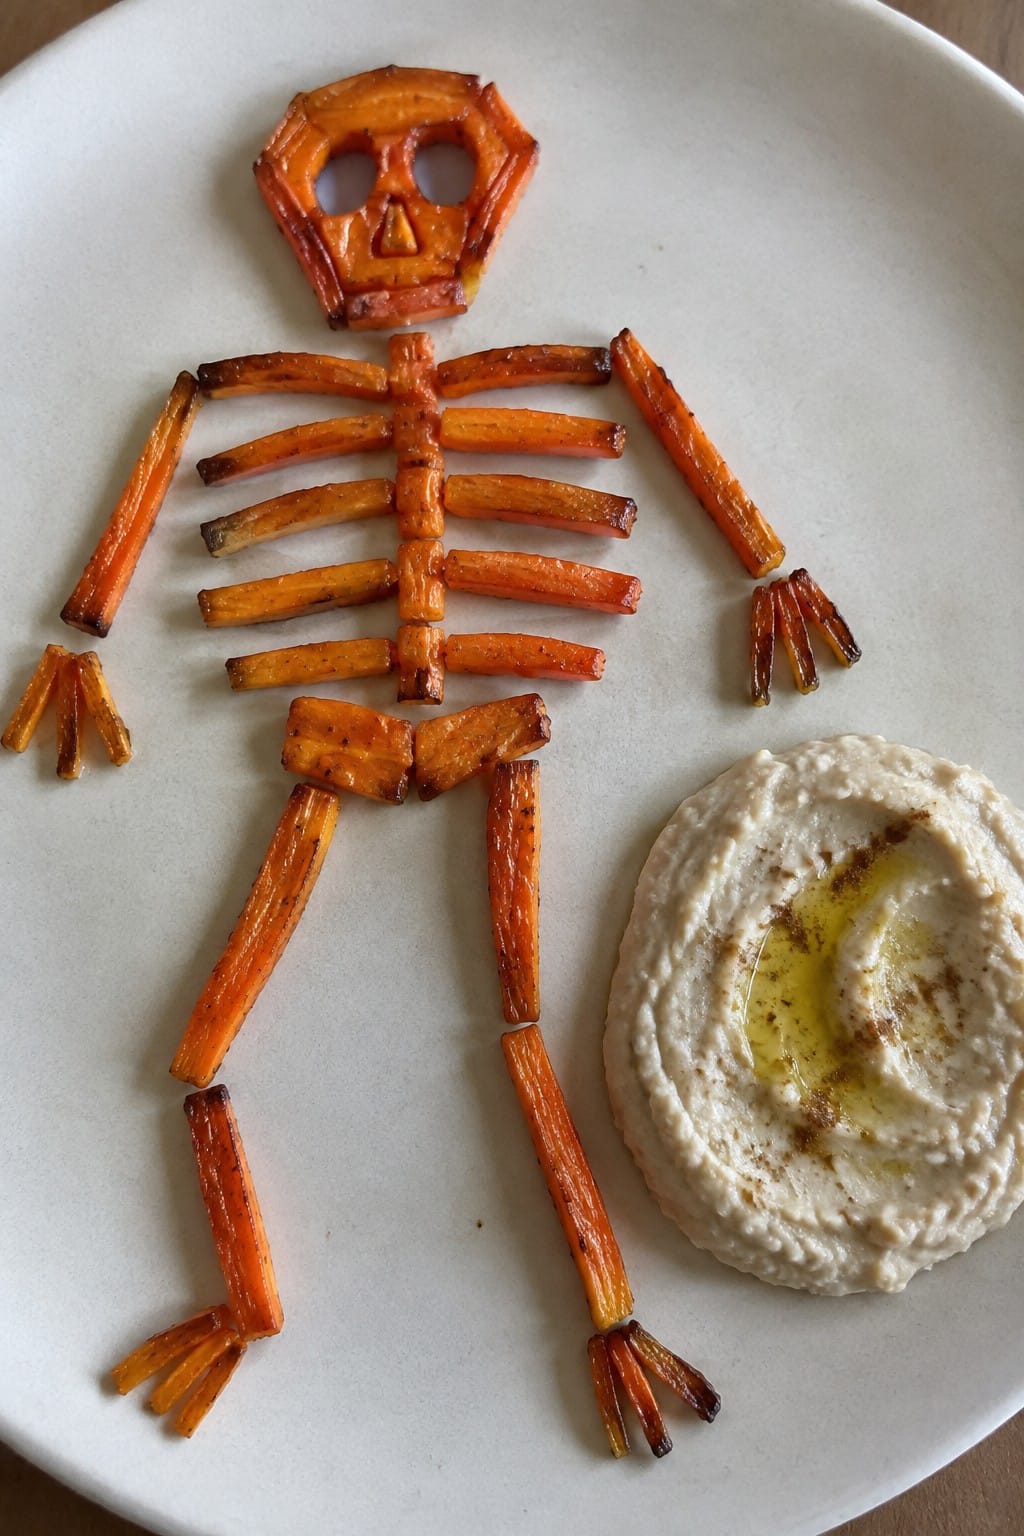
Skeleton Roasted Carrot Sticks with White Bean Hummus
These roasted carrot sticks make a fun addition to a Halloween spread. The carrots get tender in the middle with lightly browned edges, and the white bean hummus adds a creamy, lightly garlicky dip that holds everything together. It works well as a starter for parties or as part of a larger buffet.
The simple shapes let you arrange the carrots into a loose skeleton form on the plate, which adds a playful touch without extra work.
Serves 4 people.
Ingredients
- 8 large carrots, peeled and cut into thin sticks
- 3 tablespoons olive oil, divided
- 1 teaspoon salt, divided
- 1/2 teaspoon black pepper
- 1 (15-ounce) can white beans, drained and rinsed
- 2 tablespoons tahini
- 2 tablespoons lemon juice
- 1 garlic clove
- 1/2 teaspoon ground cumin
Instructions
- Heat the oven to 425 degrees F. Line a baking sheet with parchment paper.
- Place the carrot sticks in a bowl and toss with 2 tablespoons olive oil, 1/2 teaspoon salt, and the black pepper until evenly coated.
- Spread the carrots in a single layer on the baking sheet and roast for 20 to 25 minutes, turning once, until the edges start to brown and the centers soften.
- While the carrots roast, add the white beans, tahini, lemon juice, garlic, cumin, remaining 1 tablespoon olive oil, and remaining 1/2 teaspoon salt to a food processor.
- Blend until smooth, stopping to scrape down the sides as needed. Add a splash of water if the hummus seems too thick.
- Spoon the hummus into the center of a serving plate. Arrange the roasted carrot sticks around it to form a simple skeleton shape.
Extra Tips
Roast the carrots until the tips darken slightly for better flavor. If the hummus thickens after sitting, stir in a teaspoon of water before serving. Leftovers keep in the fridge for two days in a covered container, and the carrots can be warmed briefly in a 350-degree oven to restore some crispness.Course: Appetizer Cuisine: American Equipment: Baking sheet, Food processor, Mixing bowl
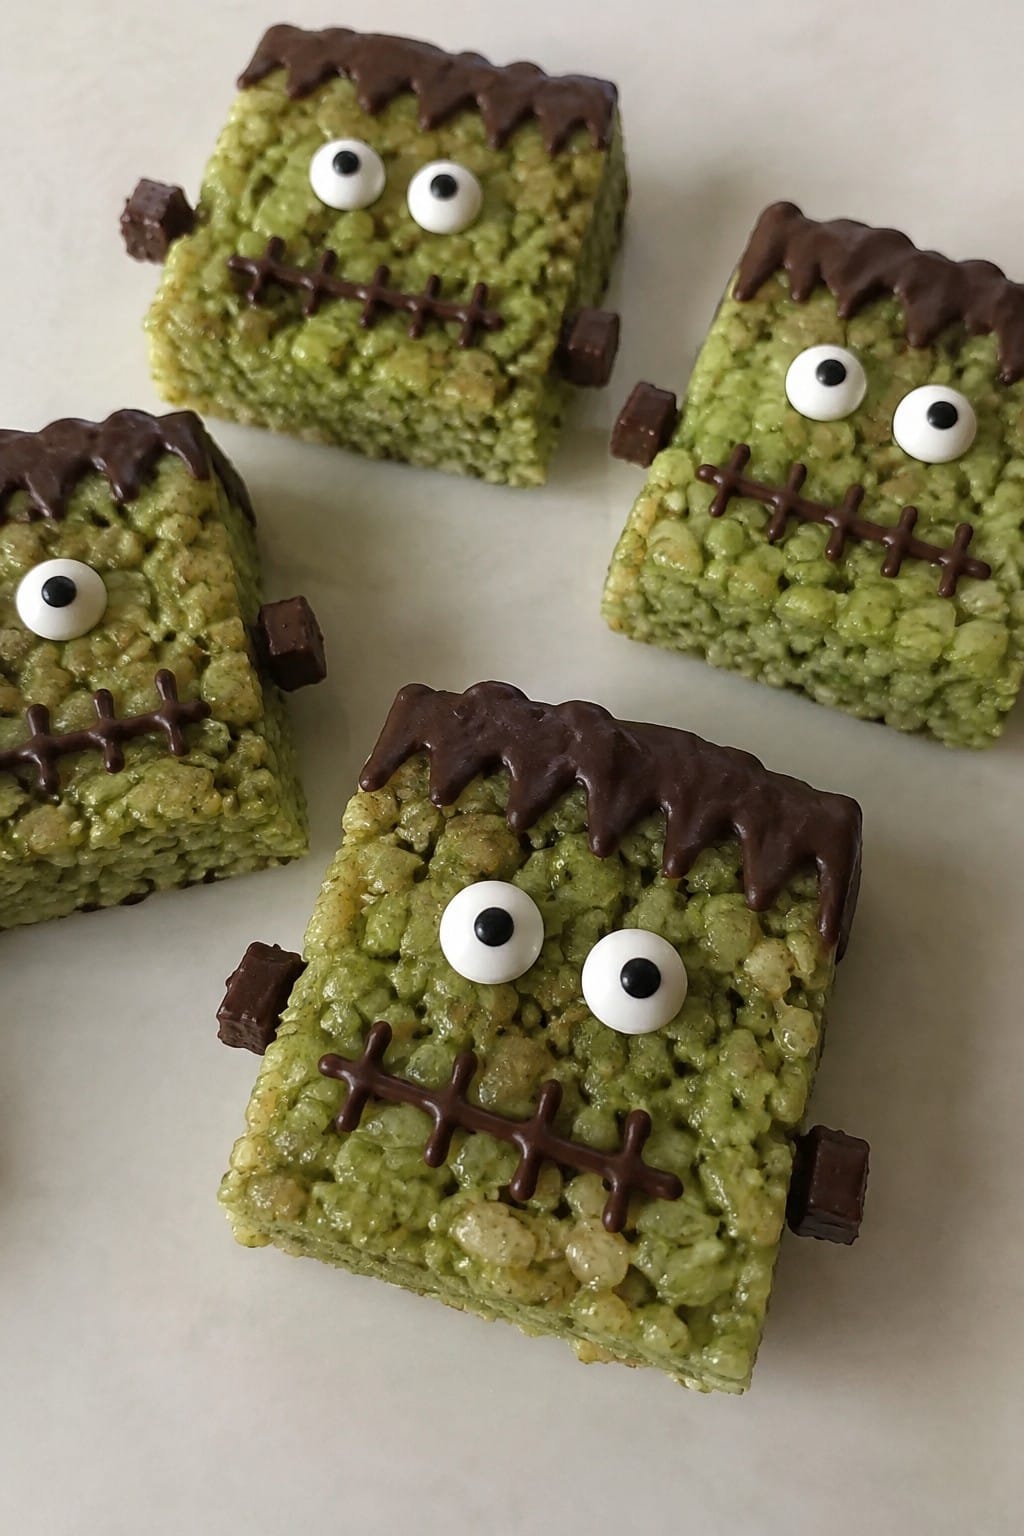
Frankenstein Matcha Rice Krispie Squares
These green squares bring a fun twist to classic Rice Krispie treats with earthy matcha flavor and a playful Frankenstein look. They work well for Halloween parties or as a simple make-at-home activity with kids. The texture stays chewy and crisp, while the matcha adds a mild, slightly grassy note that balances the sweetness.
Serves 4 people.
Ingredients
- 3 tablespoons unsalted butter
- 4 cups mini marshmallows
- 2 teaspoons matcha powder
- 3 cups Rice Krispies cereal
- 1/4 cup dark chocolate chips
- 8 candy eyes
Instructions
- Melt the butter in a large saucepan over medium heat.
- Add the mini marshmallows and stir until fully melted and smooth.
- Remove the pan from heat and stir in the matcha powder until the mixture turns even green.
- Fold in the Rice Krispies cereal until evenly coated.
- Press the mixture firmly into a greased 8×8 inch pan and let it cool for 20 minutes.
- Melt the dark chocolate chips in a microwave-safe bowl in 20-second bursts, stirring between each.
- Cut the cooled sheet into 4 rectangles. Use the melted chocolate to draw hair and a mouth on each square, then press two candy eyes into place.
Extra Tips
Press the cereal mixture firmly into the pan so the squares hold their shape when cut. Melt the chocolate just until smooth to avoid a grainy finish on the faces. Store the squares in a single layer in an airtight container at room temperature for up to two days.Course: Dessert Cuisine: American Equipment: Large saucepan, Mixing bowl, 8×8 inch pan
Haunted Gingerbread Haunted House Cookies
These cookies bring a fun twist to classic gingerbread with a Halloween edge. They work well for family baking sessions or as a hands-on activity at fall gatherings. The result is a spiced cookie with a crisp edge and soft center, finished with simple icing details that create a haunted house look.

Serves 4 people.
Ingredients
- 2 cups all-purpose flour
- 1 teaspoon ground ginger
- 1 teaspoon ground cinnamon
- 1/2 teaspoon baking soda
- 1/4 teaspoon ground cloves
- 1/2 cup unsalted butter, softened
- 1/2 cup brown sugar
- 1/4 cup molasses
- 1 large egg
- 1 teaspoon vanilla extract
- 1 cup powdered sugar
- 2 tablespoons milk
- Black food coloring
- 12 licorice strips
- 8 gummy candies
Instructions
- Preheat the oven to 350 degrees and line two baking sheets with parchment paper.
- In a medium bowl, whisk together the flour, ginger, cinnamon, baking soda, and cloves.
- In a large bowl, beat the butter and brown sugar until light. Add the molasses, egg, and vanilla extract, then mix until smooth.
- Gradually stir the dry ingredients into the wet mixture until a dough forms.
- Divide the dough in half, wrap each portion in plastic, and chill for 30 minutes.
- Roll out one portion of dough on a lightly floured surface to 1/4-inch thickness. Cut into four house shapes using a cutter or template.
- Place the shapes on the prepared baking sheets and bake for 10 to 12 minutes until the edges are firm.
- Let the cookies cool completely on the sheets.
- In a small bowl, stir the powdered sugar and milk until smooth. Mix in black food coloring to reach a deep shade.
- Transfer the icing to a piping bag and pipe outlines and windows on each cookie. Press licorice strips into the icing for doors and add gummy candies as accents.
Extra Tips
Chill the dough fully so the house shapes hold clean edges during baking. Pipe the icing in thin lines first, then let it set for a few minutes before adding the licorice and gummies to prevent sliding. Store finished cookies in a single layer in an airtight container to keep the icing intact.Course: Dessert Cuisine: American Equipment: Mixing bowls, Electric mixer, Baking sheets, Piping bag, Cookie cutters
