
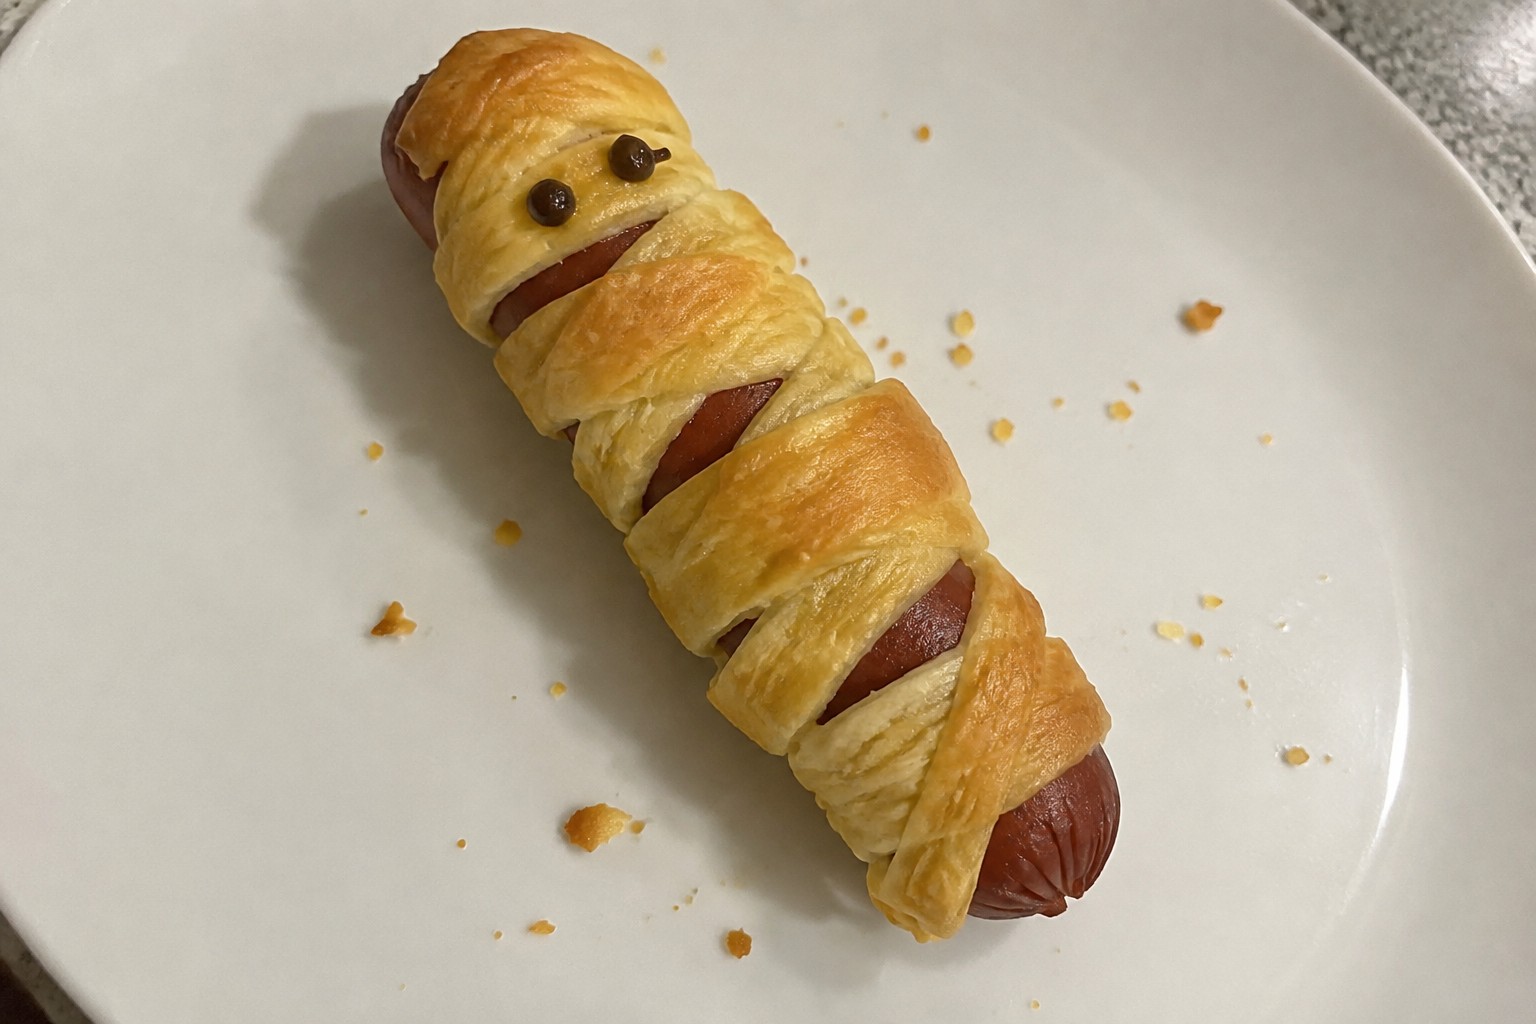
Planning snacks for a Halloween party takes some thought when you want options that guests can pick at throughout the night.
I gathered these recipe ideas to keep things simple and practical for a grazing setup.
Each one is straightforward to prepare and uses common ingredients that do not require special trips.
You can make most of them ahead so the day of the party stays less stressful.
They include a mix of sweet and savory choices that work for different ages.
Helpful Tips Before You Start
These tips will help you create snacks that work well for a casual grazing setup at a Halloween party.
Make Items in Advance
Prepare dips, roasted nuts, and baked goods the day before. This keeps the day of the party focused on assembly and fresh elements like cut fruit or cheese.
Choose Finger Friendly Foods
Pick snacks that guests can grab without plates or utensils. Think skewers, crackers, and small cookies so people can keep moving around the table.
Balance Flavors and Textures
Mix salty options like spiced popcorn with sweet treats such as chocolate covered pretzels. Add a few crunchy and creamy choices to keep the spread interesting over several hours.
Use Seasonal Shapes Sparingly
Add Halloween touches with cookie cutters on sandwiches or cheese slices. Keep the actual recipes simple so you can make enough quantity for all your guests.
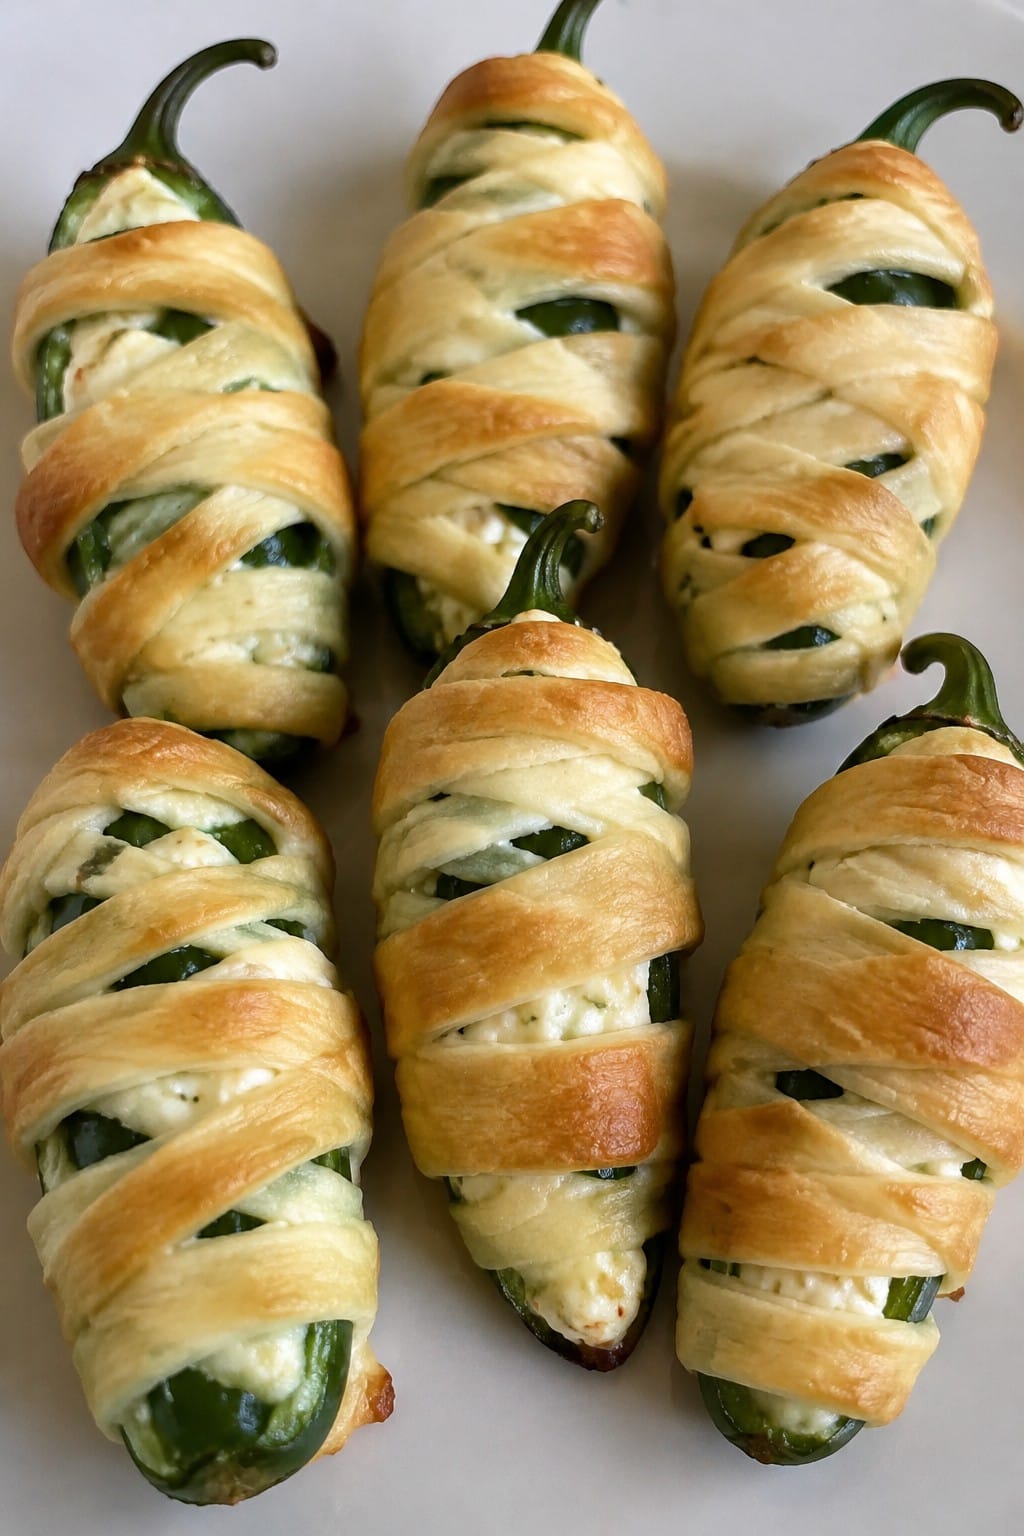
Mummy Jalapeño Poppers with Cream Cheese Filling
These jalapeño poppers get wrapped in strips of dough so they look like little mummies on the snack table. The cream cheese filling cools the heat from the peppers and makes them easy to eat while standing around and chatting. They work well for a Halloween spread because they feel festive without needing much extra decoration.
Serves 4 people.
Ingredients
- 8 medium jalapeño peppers
- 8 ounces cream cheese, softened
- 1 teaspoon garlic powder
- 1/4 teaspoon salt
- 1 package refrigerated crescent roll dough
Instructions
- Preheat the oven to 375°F and line a baking sheet with parchment paper.
- Slice each jalapeño in half lengthwise and remove the seeds and membranes.
- In a mixing bowl, stir the softened cream cheese with the garlic powder and salt until smooth.
- Spoon the cream cheese mixture into each jalapeño half and smooth the tops.
- Unroll the crescent dough and cut it into thin strips about 1/4 inch wide.
- Wrap the dough strips around each stuffed jalapeño to create a mummy effect, leaving a small gap near one end for the face.
- Place the wrapped poppers on the baking sheet and bake for 15 to 18 minutes until the dough is golden.
- Let them cool for a few minutes before serving.
Extra Tips
Leave the seeds in a couple of jalapeños if you want some extra heat for guests who like spice. The crescent dough strips should overlap slightly so they stay in place while baking. If the dough starts to brown too quickly, loosely cover the tray with foil for the last few minutes.Course: Appetizer Cuisine: American Equipment: Baking sheet, Mixing bowl, Knife
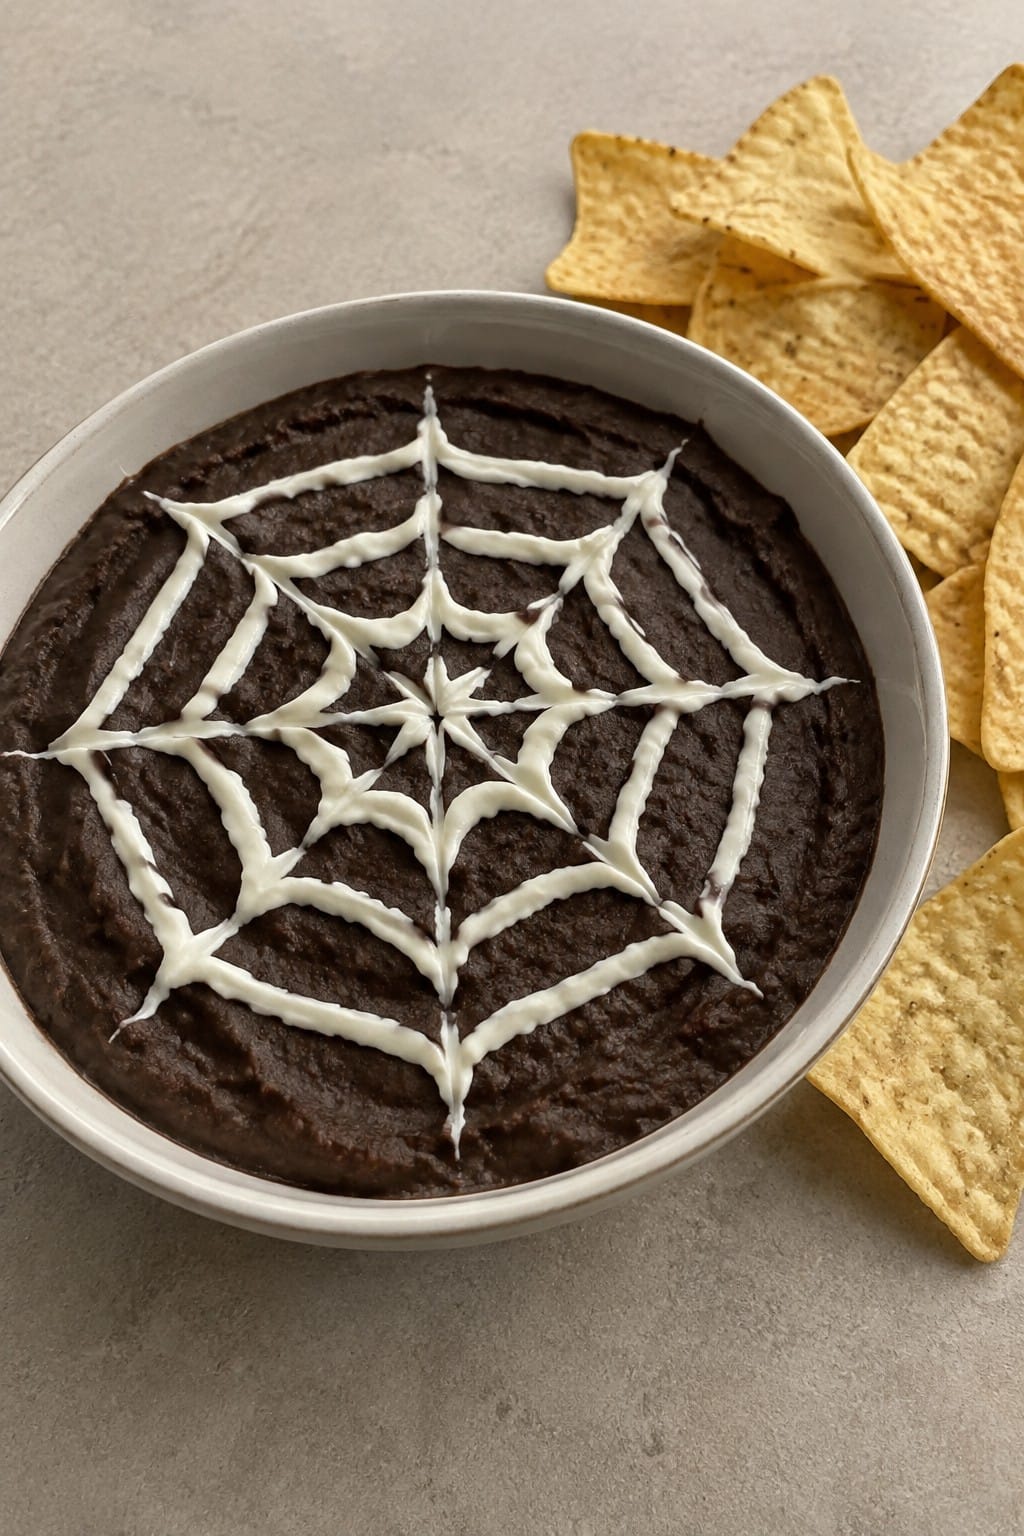
Spiderweb Black Bean Dip with Tortilla Chips
This black bean dip brings a simple spooky touch to any Halloween spread. The dark base and sour cream web make it easy to spot on a grazing table while guests mingle and snack. It offers a creamy texture with earthy, lightly spiced flavor that pairs well with crisp tortilla chips.
The recipe works best when prepared ahead so the flavors settle before the party starts. It stays stable at room temperature for a couple of hours, making it practical for a long grazing setup.
Serves 4 people.
Ingredients
- 2 (15-ounce) cans black beans, drained and rinsed
- 1/2 cup diced onion
- 2 cloves garlic, minced
- 1 teaspoon ground cumin
- 1/2 teaspoon chili powder
- 2 tablespoons lime juice
- 1/2 teaspoon salt
- 1/2 cup sour cream
- Tortilla chips, for serving
Instructions
- Place the black beans, onion, garlic, cumin, chili powder, lime juice, and salt in a food processor. Pulse until the mixture is mostly smooth with a few small chunks remaining for texture.
- Transfer the bean mixture to a serving bowl and smooth the top with a spoon.
- Spoon the sour cream into a small zip-top bag and snip off one corner. Pipe four concentric circles on top of the dip.
- Drag a knife from the center outward through the circles in several places to create a spiderweb pattern.
- Serve with tortilla chips arranged around the bowl.
Extra Tips
Pipe the sour cream circles right before guests arrive so the web stays sharp. If the dip thickens after chilling, stir in a teaspoon of water to loosen it before adding the sour cream design. Leftovers keep in the fridge for two days; stir well before serving again since the sour cream may separate slightly.Course: Appetizer Cuisine: Mexican Equipment: Food processor, serving bowl, knife
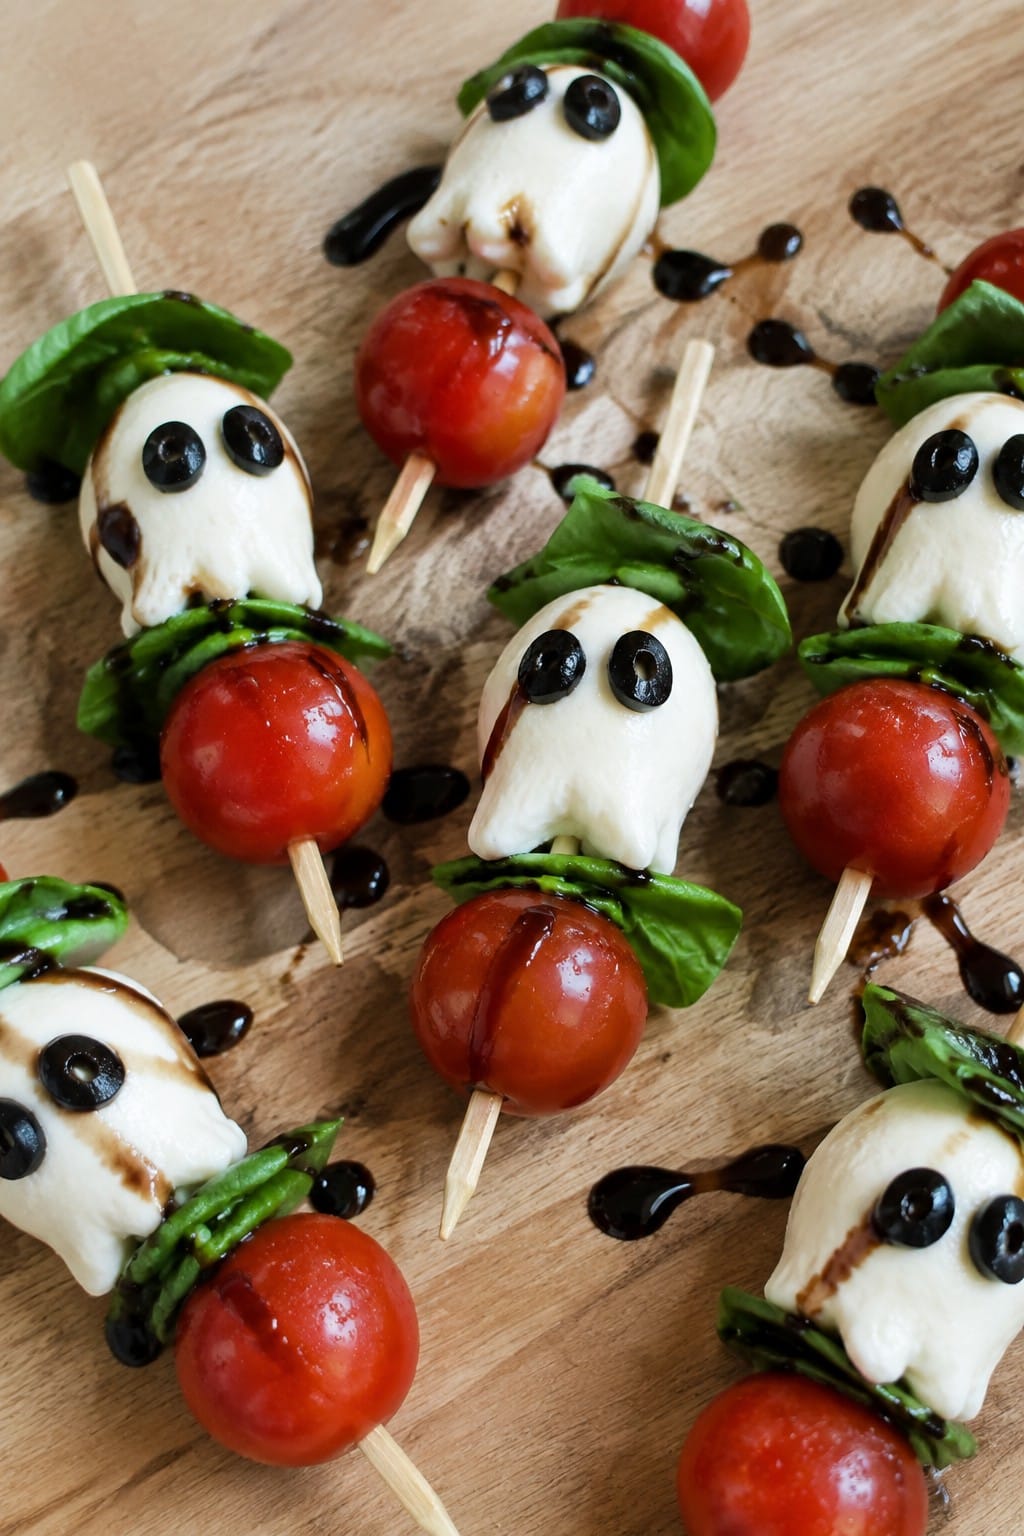
Ghostly Caprese Skewers with Balsamic Glaze
These skewers give a classic Caprese salad a light Halloween touch. Small mozzarella balls become little ghosts with olive eyes, while the fresh tomatoes and basil keep the flavors bright and simple. They work well for a grazing table because guests can pick them up easily without plates or forks.
The combination stays light with juicy tomatoes, creamy cheese, and a sweet balsamic finish. The olive accents add just enough detail to fit the theme without extra work.
Serves 4 people.
Ingredients
- 12 cherry tomatoes
- 12 bocconcini mozzarella balls
- 12 fresh basil leaves
- 2 tablespoons balsamic glaze
- 4 black olives, pitted and sliced thin
- 12 wooden skewers
Instructions
- Lay out the wooden skewers and thread one cherry tomato onto each skewer first.
- Add one basil leaf next to the tomato on every skewer.
- Place one bocconcini mozzarella ball after the basil on each skewer.
- Use the sliced black olives to add two small dots as eyes on the front of each mozzarella ball.
- Arrange the finished skewers on a platter and drizzle the balsamic glaze evenly over the top just before serving.
Extra Tips
Make the olive eyes right before guests arrive so they stay dark and visible. If you need to prepare ahead, assemble the skewers without the eyes and add those at the last minute. Store any leftovers in a covered container in the fridge for one day, then add fresh glaze when you serve them again.Course: Appetizer Cuisine: Italian Equipment: Wooden skewers, Serving platter
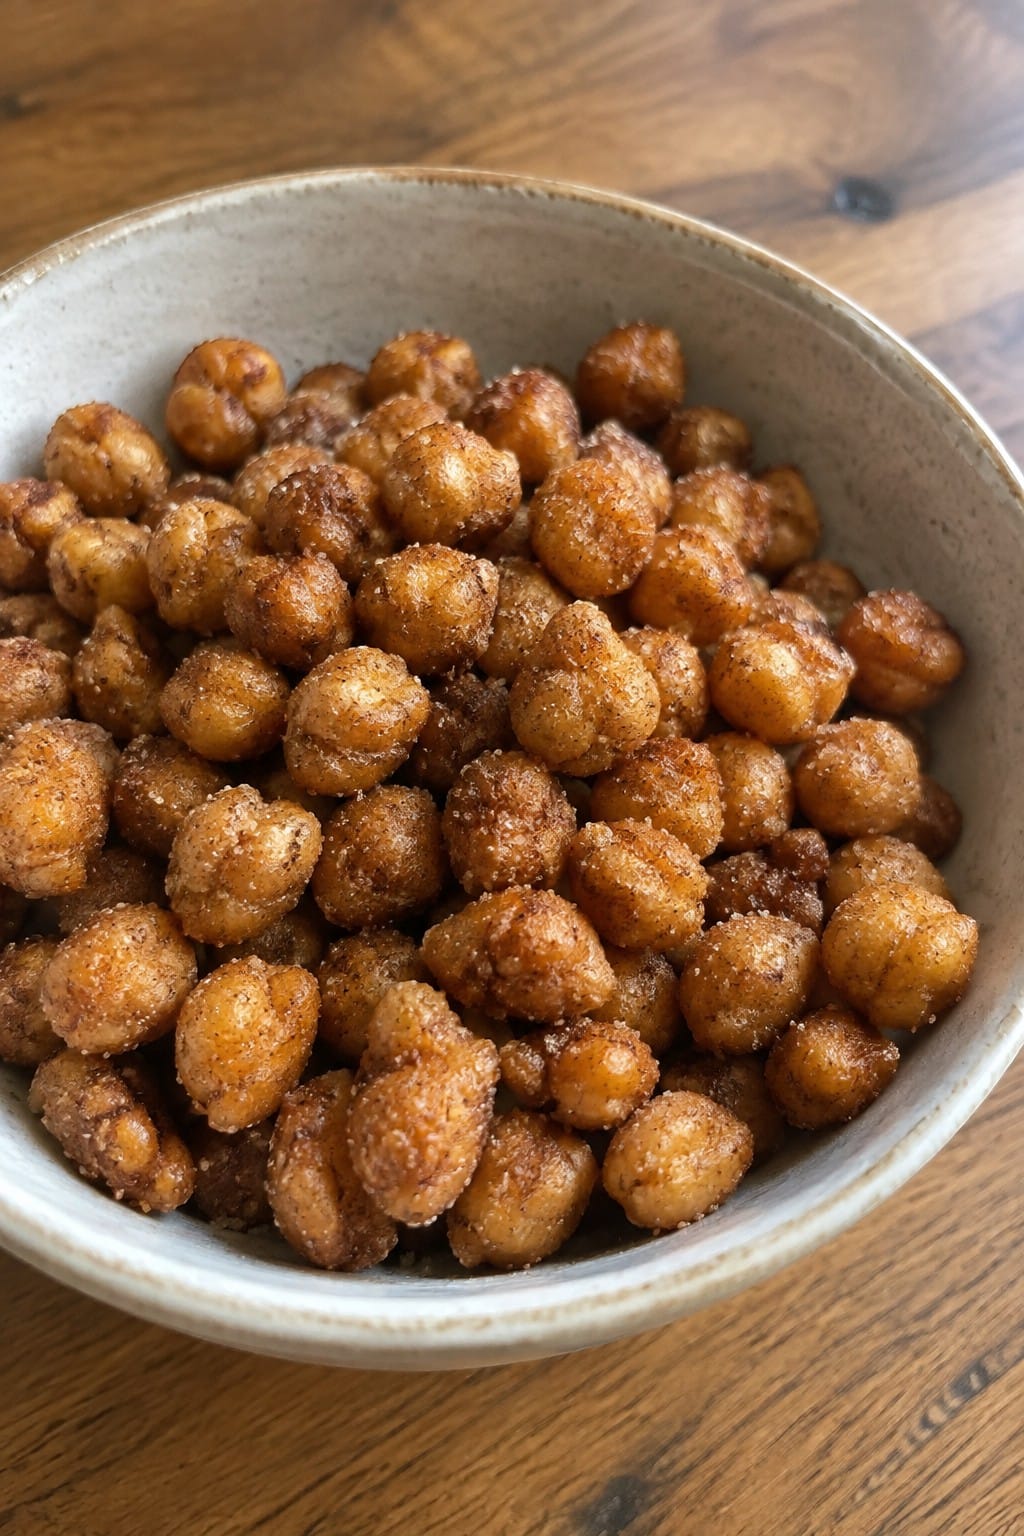
Pumpkin-Spiced Roasted Chickpeas
These roasted chickpeas add a warm, spiced crunch to a Halloween grazing table. The blend of pumpkin pie spice and a touch of sugar gives them a cozy flavor that pairs well with other snacks. They stay crisp for hours, making them easy to set out in bowls for guests to nibble as they mingle.
The recipe turns simple pantry staples into a light, addictive bite. It fits nicely between richer options and works for both kids and adults at a party.
Serves 4 people.
Ingredients
- 2 (15-ounce) cans chickpeas, drained and rinsed
- 2 tablespoons olive oil
- 2 tablespoons pumpkin pie spice
- 1 teaspoon salt
- 1 tablespoon granulated sugar
Instructions
- Preheat the oven to 400 degrees F and line a baking sheet with parchment paper.
- Drain and rinse the chickpeas, then pat them very dry with a clean towel to remove excess moisture.
- Place the dried chickpeas in a mixing bowl and add the olive oil, pumpkin pie spice, salt, and sugar.
- Stir until the chickpeas are evenly coated with the oil and seasonings.
- Spread the chickpeas in a single layer on the prepared baking sheet.
- Roast for 25 to 30 minutes, shaking the pan halfway through, until the chickpeas are golden and crisp.
Extra Tips
Dry the chickpeas thoroughly before tossing them with the oil and spices, or they will steam instead of crisp. Store leftovers in an open container at room temperature to help retain crunch, and avoid airtight jars which can soften them. For a milder flavor, reduce the pumpkin pie spice to one and a half tablespoons.Course: Snack Cuisine: American Equipment: Baking Sheet, Mixing Bowl
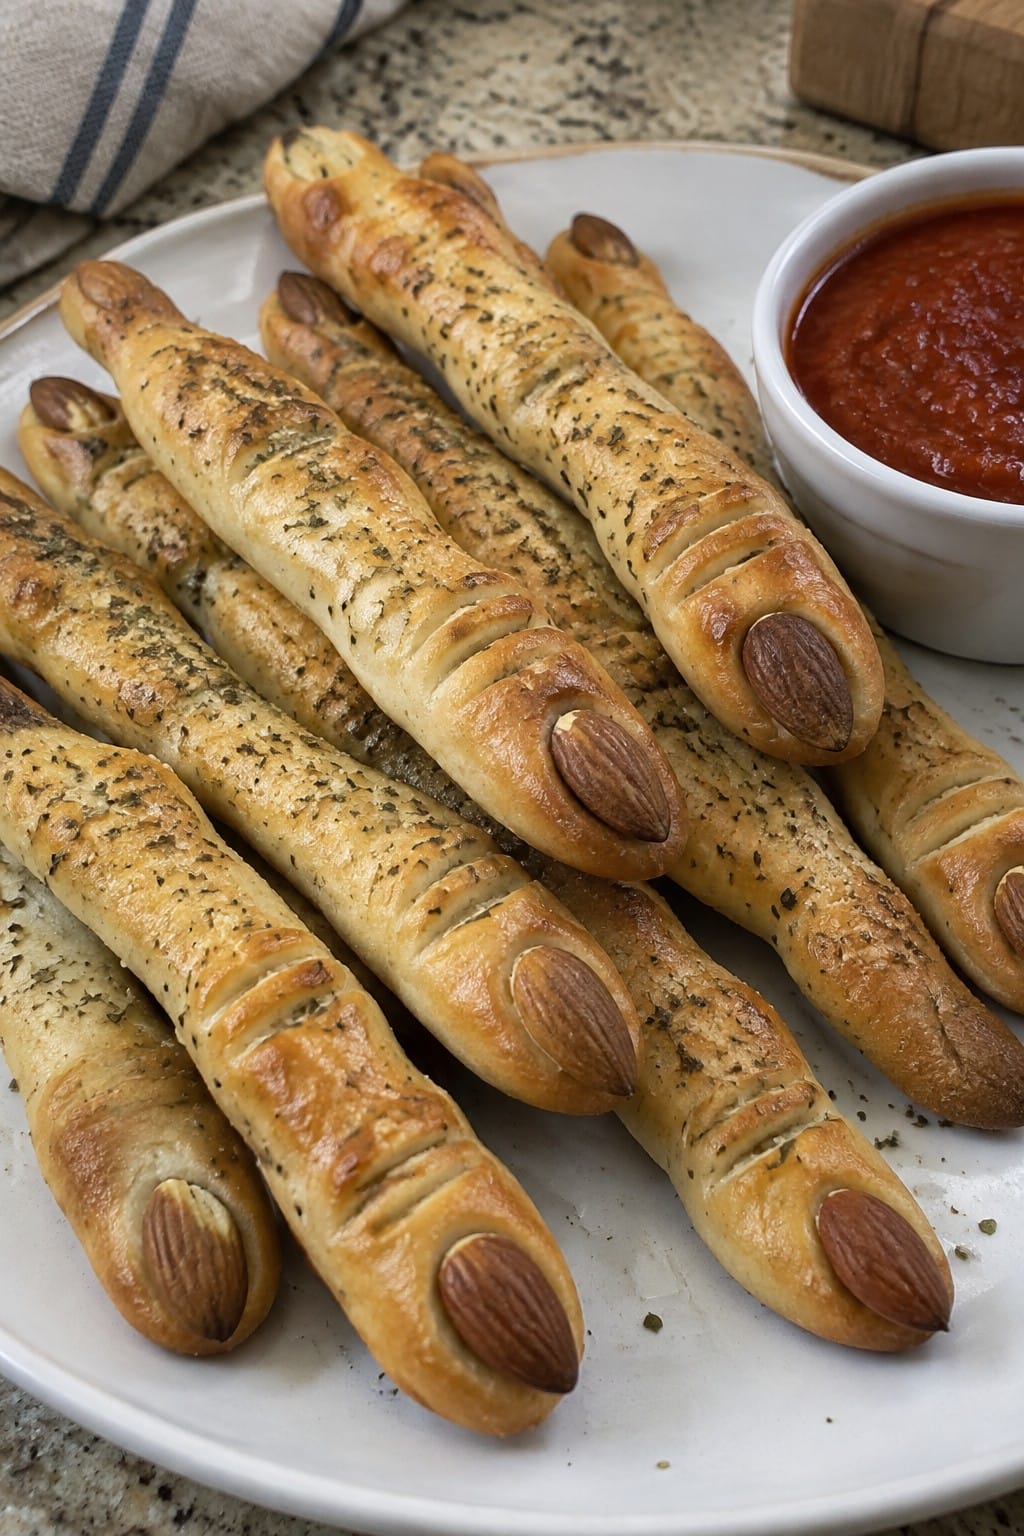
Witch Finger Breadsticks with Marinara
These breadsticks bring a simple spooky touch to a Halloween grazing table. Shaped like witch fingers and served with warm marinara, they give guests something savory to pick at while they mingle. The dough bakes up lightly golden with a soft center and a bit of chew.
They work well as part of a larger spread of snacks because they stay good at room temperature for a while and pair easily with other finger foods.
Serves 4 people.
Ingredients
- 1 pound store-bought pizza dough
- 2 tablespoons olive oil
- 1 teaspoon garlic powder
- 1/2 teaspoon dried oregano
- 1/4 teaspoon salt
- 12 whole almonds
- 1 cup marinara sauce
Instructions
- Preheat the oven to 400 degrees and line a baking sheet with parchment paper.
- Divide the pizza dough into 12 equal pieces and roll each piece into a thin log about 5 inches long, tapering one end to form a fingertip shape.
- Use a knife to make two or three shallow cuts across the middle of each log to create knuckle lines.
- Brush each shaped dough piece lightly with olive oil, then sprinkle evenly with garlic powder, dried oregano, and salt.
- Press one almond firmly into the tapered end of each breadstick to form the fingernail.
- Place the breadsticks on the prepared baking sheet and bake for 12 to 15 minutes until golden.
- Warm the marinara sauce in a small saucepan or microwave and serve it alongside the breadsticks for dipping.
Extra Tips
Score the knuckle lines a little deeper on a few breadsticks so they stand out after baking. If the almonds loosen during baking, press them back in right after removing the pan from the oven. Leftovers keep in an airtight container for one day and reheat best in a 300-degree oven for five minutes.Course: Snack Cuisine: Italian Equipment: Baking sheet, Parchment paper, Small saucepan
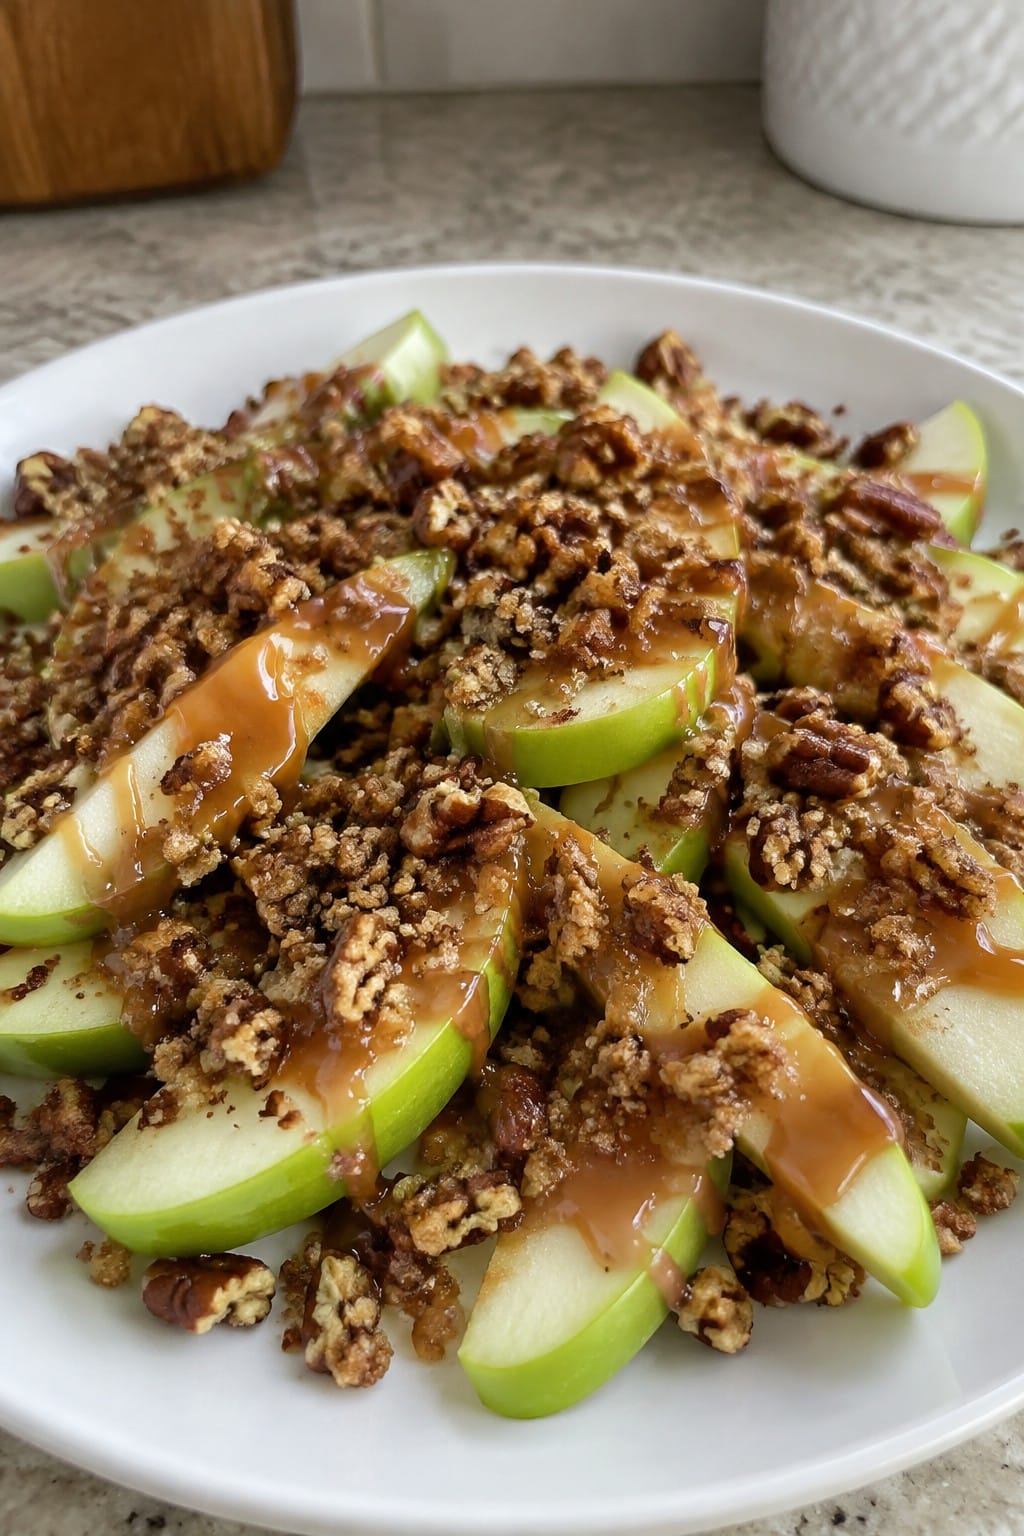
Caramel Apple Nachos with Pecan Crumble
These caramel apple nachos turn fresh apple slices into a shareable snack that guests can pick up with their fingers. The dish works well on a party table because it comes together quickly and stays inviting even after sitting out for a while. Tart apple slices hold up under a warm caramel drizzle and a buttery pecan topping that adds crunch without turning soggy.
Serves 4 people.
Ingredients
- 4 large Granny Smith apples
- 1/2 cup caramel sauce
- 3/4 cup chopped pecans
- 2 tablespoons unsalted butter, melted
- 1/4 cup brown sugar
- 1/2 teaspoon ground cinnamon
- Pinch of salt
Instructions
- Core the apples and cut them into thin wedges. Arrange the slices in a single layer on a large serving platter.
- In a small bowl, stir together the chopped pecans, melted butter, brown sugar, cinnamon, and salt until the nuts are evenly coated.
- Spread the pecan mixture on a small baking sheet and toast at 350°F for 6 to 8 minutes, stirring once, until the crumble smells fragrant and looks lightly golden.
- Drizzle half the caramel sauce over the apple slices. Sprinkle the warm pecan crumble evenly across the top.
- Finish with the remaining caramel sauce drizzled over the crumble so every bite gets a bit of sweet coating.
Extra Tips
Serve the nachos right after assembling so the apples stay crisp and the crumble keeps its crunch. If you need to make it ahead, prepare the pecan mixture up to a day early and store it in an airtight container, then assemble just before guests arrive. A light sprinkle of flaky salt on top balances the sweetness if your caramel is very rich.
Course: Snack Cuisine: American Equipment: Mixing Bowl, Baking Sheet, Serving PlatterBloody Mary Tomato Bruschetta Bites
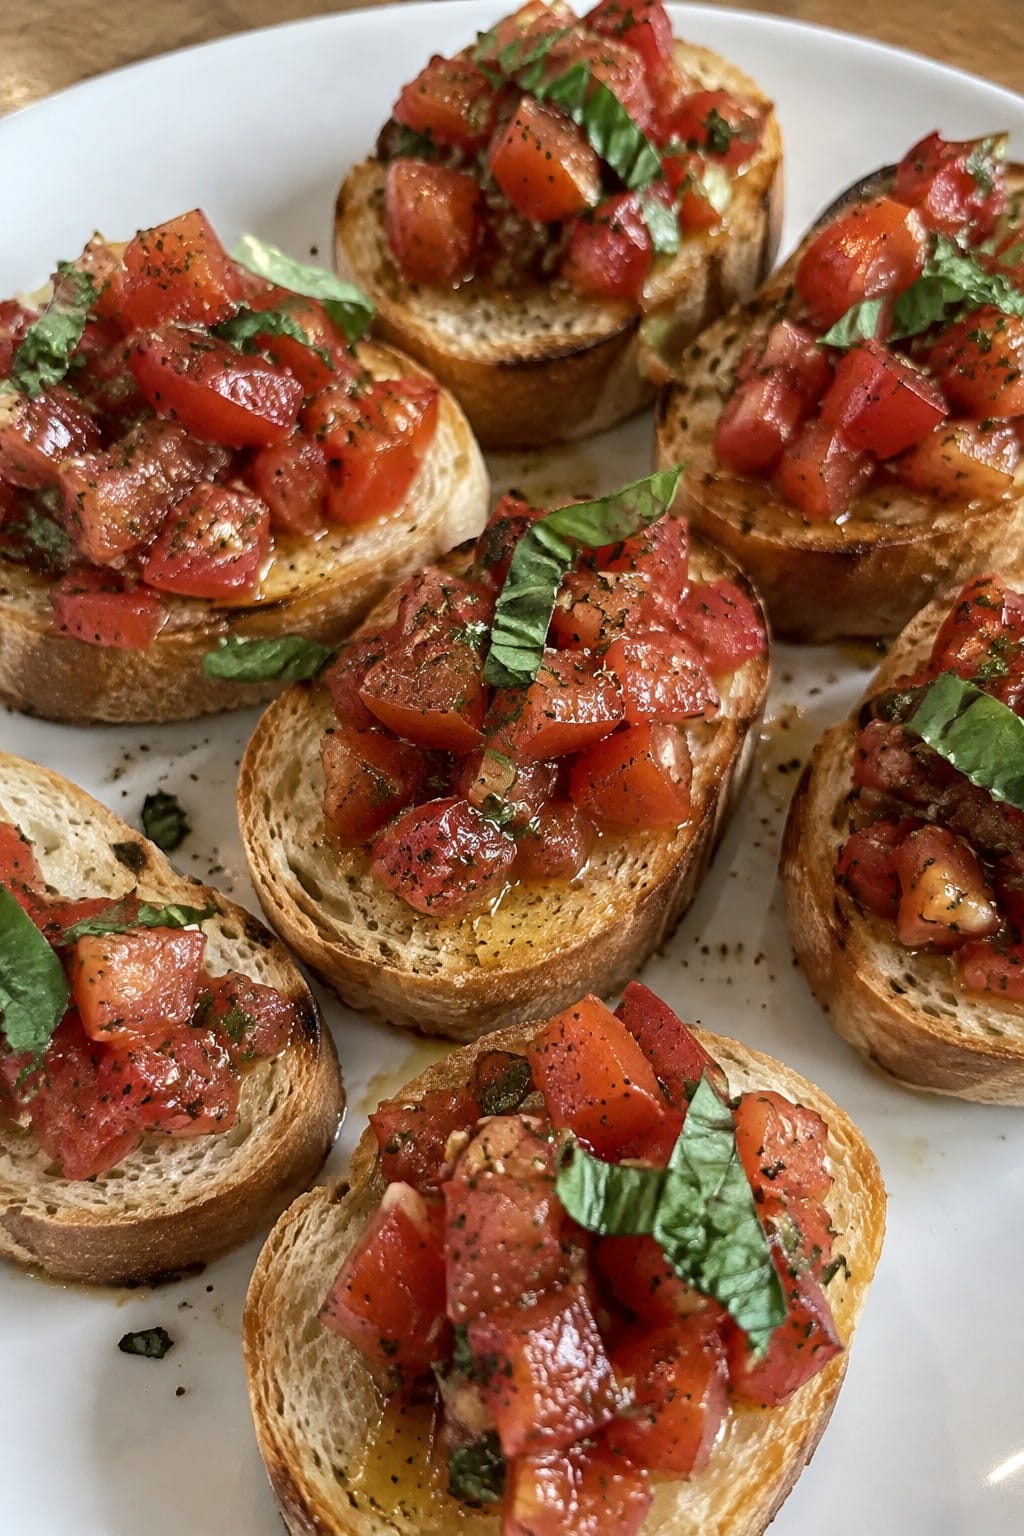
These bites bring the bold flavors of a Bloody Mary to a simple tomato bruschetta. The spicy, savory topping pairs with crisp toasted bread for an easy snack that stands out on a grazing table. They work well for Halloween parties where guests want something handheld and a little different from standard dips or chips.
The red tomatoes give a festive look while the horseradish and Worcestershire add a sharp kick that keeps people coming back. Celery salt and fresh basil round out the profile for a balanced bite.
Serves 4 people.
Ingredients
- 12 slices baguette
- 2 cups diced tomatoes
- 2 tablespoons olive oil
- 1 garlic clove, minced
- 1 tablespoon prepared horseradish
- 1 teaspoon Worcestershire sauce
- 1/2 teaspoon celery salt
- 1/4 teaspoon hot sauce
- 1 tablespoon vodka (optional)
- 8 fresh basil leaves, torn
Instructions
- Preheat the oven to 400 degrees. Arrange the baguette slices on a baking sheet and brush lightly with 1 tablespoon of olive oil. Bake for 6 to 8 minutes until the edges turn golden.
- In a mixing bowl, combine the diced tomatoes, minced garlic, horseradish, Worcestershire sauce, celery salt, hot sauce, vodka if using, and the remaining tablespoon of olive oil. Stir gently to coat the tomatoes without breaking them down too much.
- Spoon the tomato mixture evenly over the toasted baguette slices. Top each bite with torn basil leaves before serving.
Extra Tips
Mix the tomato topping up to two hours ahead and keep it covered in the fridge so the flavors have time to blend. If you prefer less heat, reduce the hot sauce by half. Skip the vodka for a non-alcoholic version that still tastes full. Serve these bites soon after assembling so the bread stays crisp.Course: Appetizer Cuisine: American Equipment: Baking sheet, Mixing bowl, Sharp knife
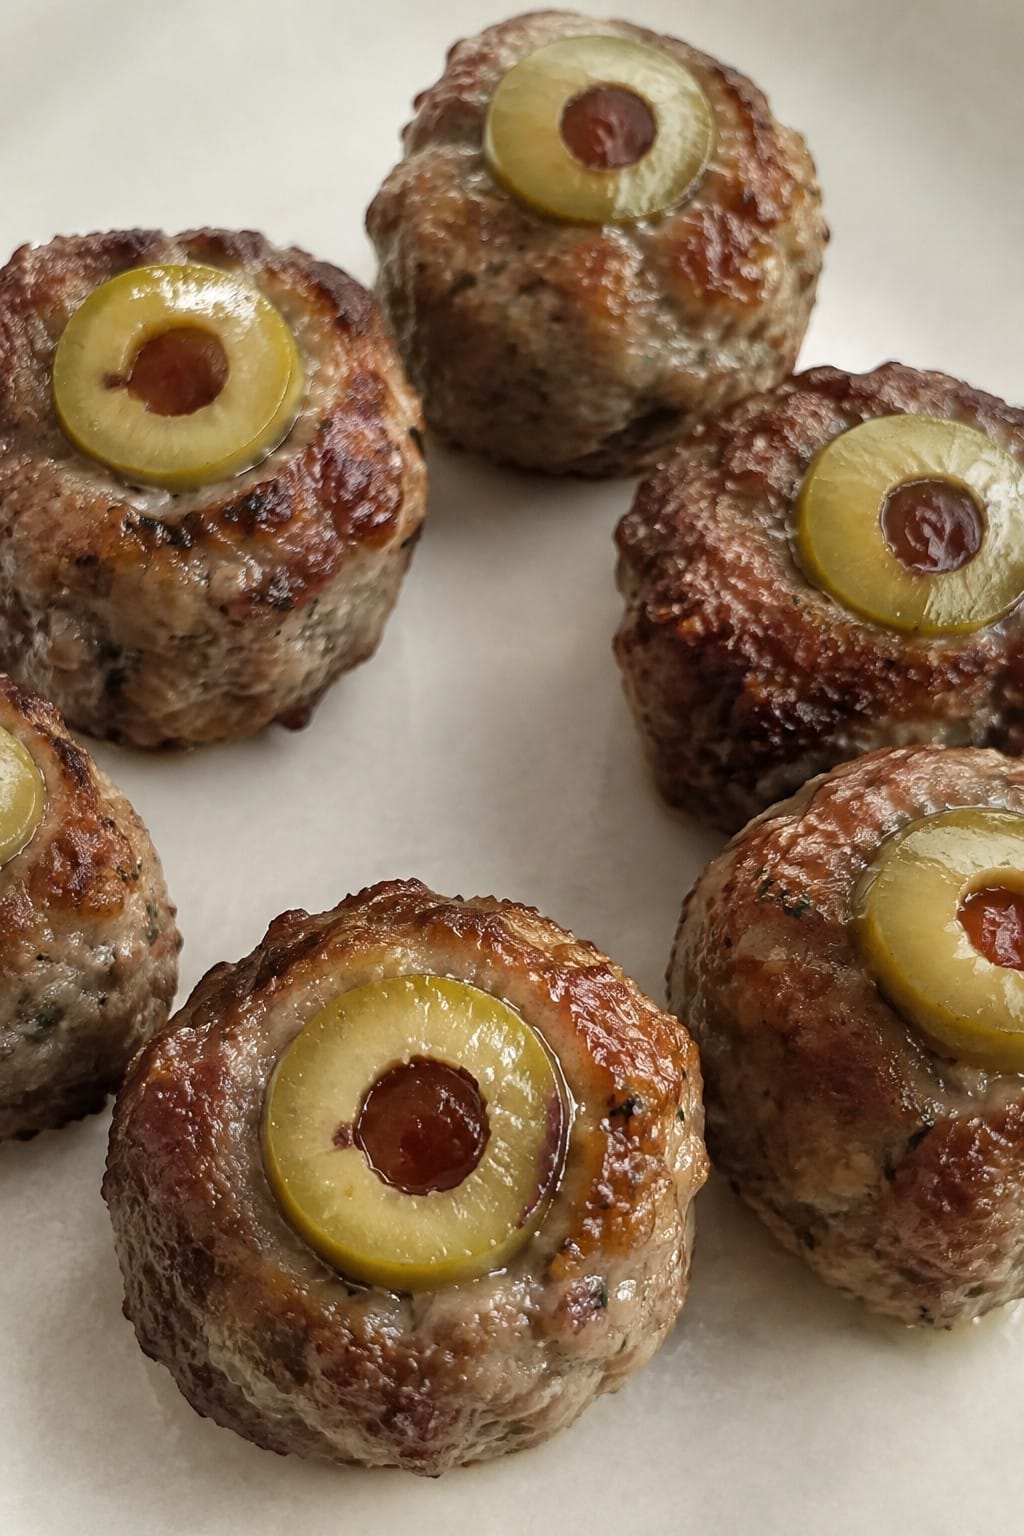
Mini Meatball Eyeballs with Olive Slices
These mini meatballs turn into spooky eyeballs with a slice of olive pressed on top. They fit right in on a Halloween grazing table where guests can grab a few while they chat and mingle.
The meatballs stay tender inside with a light sear on the outside. The briny olives give each bite a salty contrast to the seasoned beef.
Serves 4 people.
Ingredients
- 1 pound ground beef
- 1/2 cup breadcrumbs
- 1 large egg
- 2 cloves garlic, minced
- 1 teaspoon Italian seasoning
- 1/2 teaspoon salt
- 1/4 teaspoon black pepper
- 2 tablespoons olive oil
- 16 green olives, sliced into rounds
Instructions
- Combine the ground beef, breadcrumbs, egg, minced garlic, Italian seasoning, salt, and black pepper in a mixing bowl. Mix gently with your hands until the ingredients are evenly distributed.
- Shape the mixture into 16 small meatballs, each about one inch across.
- Heat the olive oil in a large skillet over medium heat. Add the meatballs and cook, turning them every couple of minutes, until they are browned on all sides and cooked through.
- Remove the skillet from the heat. Place one olive slice on top of each meatball while they are still warm.
Extra Tips
Form the meatballs a few hours ahead and keep them covered in the fridge so you can cook them right before guests arrive. Use a gentle touch when mixing to avoid tough meatballs. Serve them on a platter with toothpicks for easy grazing.Course: Appetizer Cuisine: American Equipment: Mixing Bowl, Large Skillet
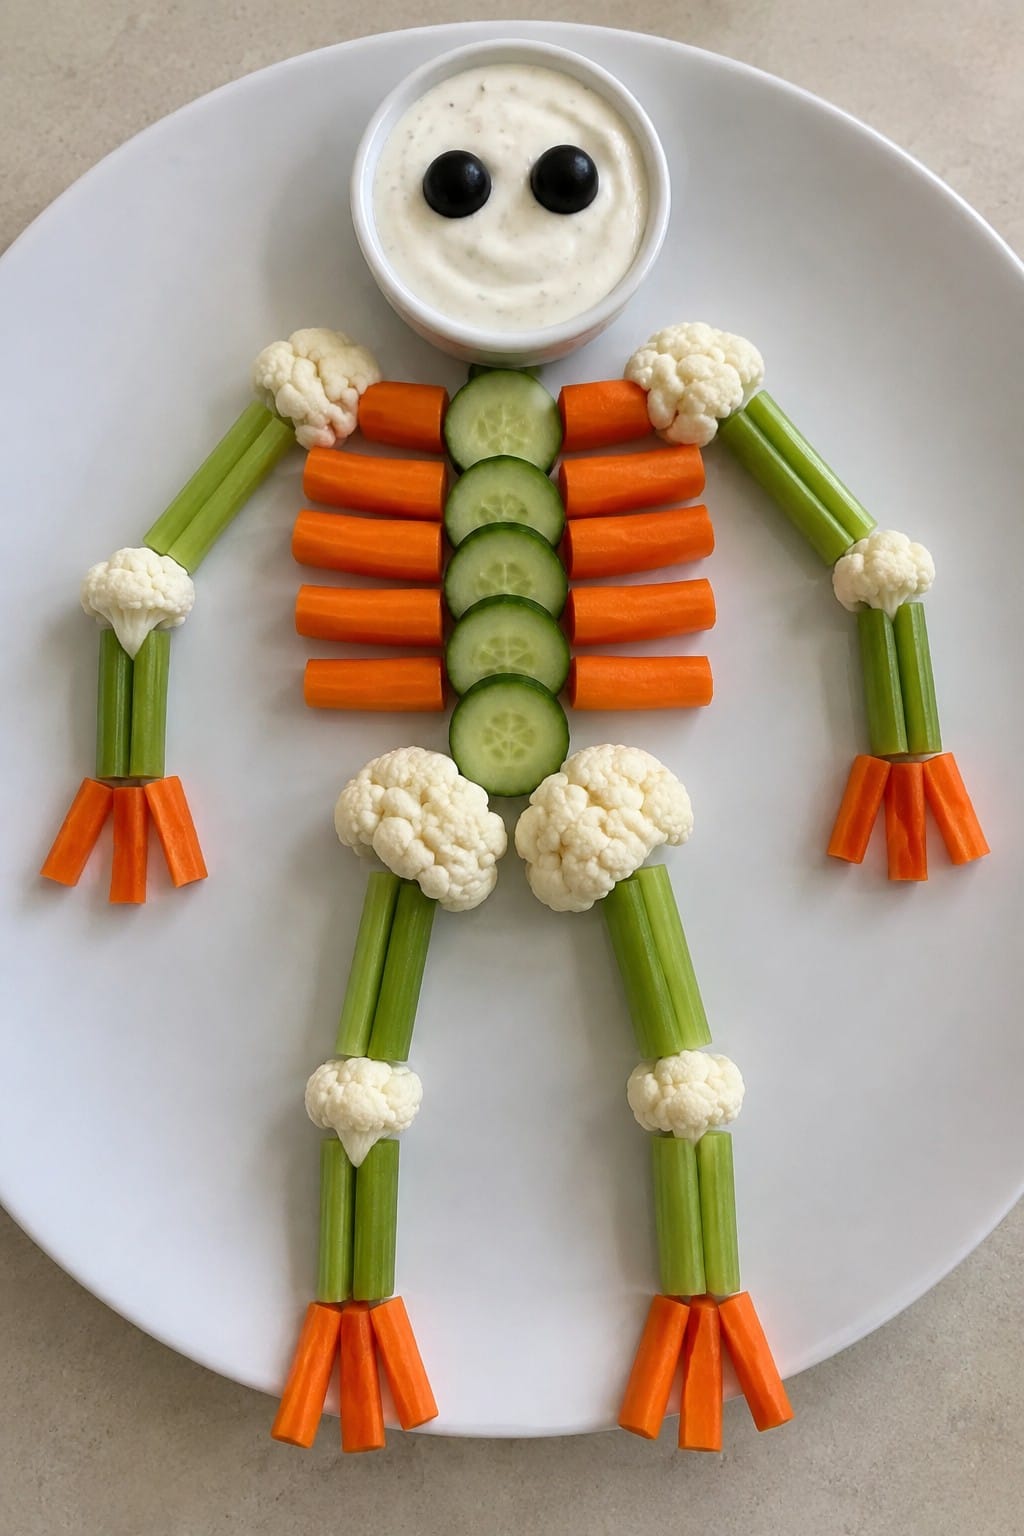
Skeleton Veggie Platter with Ranch Dip
This skeleton veggie platter adds a lighthearted touch to any Halloween gathering. Crisp vegetables form the shape of a skeleton, giving guests something fresh to pick at while they mingle. The cool ranch dip brings a creamy contrast that balances the crunch of the produce.
It works well as a make-ahead option for parties since most of the work is just cutting and arranging. The overall effect feels festive without being overly complicated.
Serves 4 people.
Ingredients
- 5 carrots, cut into sticks
- 4 celery ribs, cut into sticks
- 1 cucumber, sliced into rounds
- 2 cups cauliflower florets
- 1 cup ranch dressing
- 2 black olives
Instructions
- Wash all the vegetables thoroughly under cold water.
- Arrange the carrot and celery sticks on a large platter to create the skeleton’s torso, arms, and legs.
- Place the cauliflower florets at the top of the platter to form the skull.
- Add cucumber rounds along the sides to fill in the rib area and add more bone-like shapes.
- Set the two black olives on the cauliflower to serve as eyes.
- Spoon the ranch dressing into a small bowl and place it beside the platter for dipping.
Extra Tips
Cut the vegetables into similar thicknesses so the skeleton shape holds together neatly on the platter. If you prepare the board in advance, cover it tightly with plastic wrap and keep it in the fridge until guests arrive. A plain white or light-colored platter helps the white and orange vegetables stand out.Course: Appetizer Cuisine: American Equipment: Large platter, Cutting board, Sharp knife, Small bowl
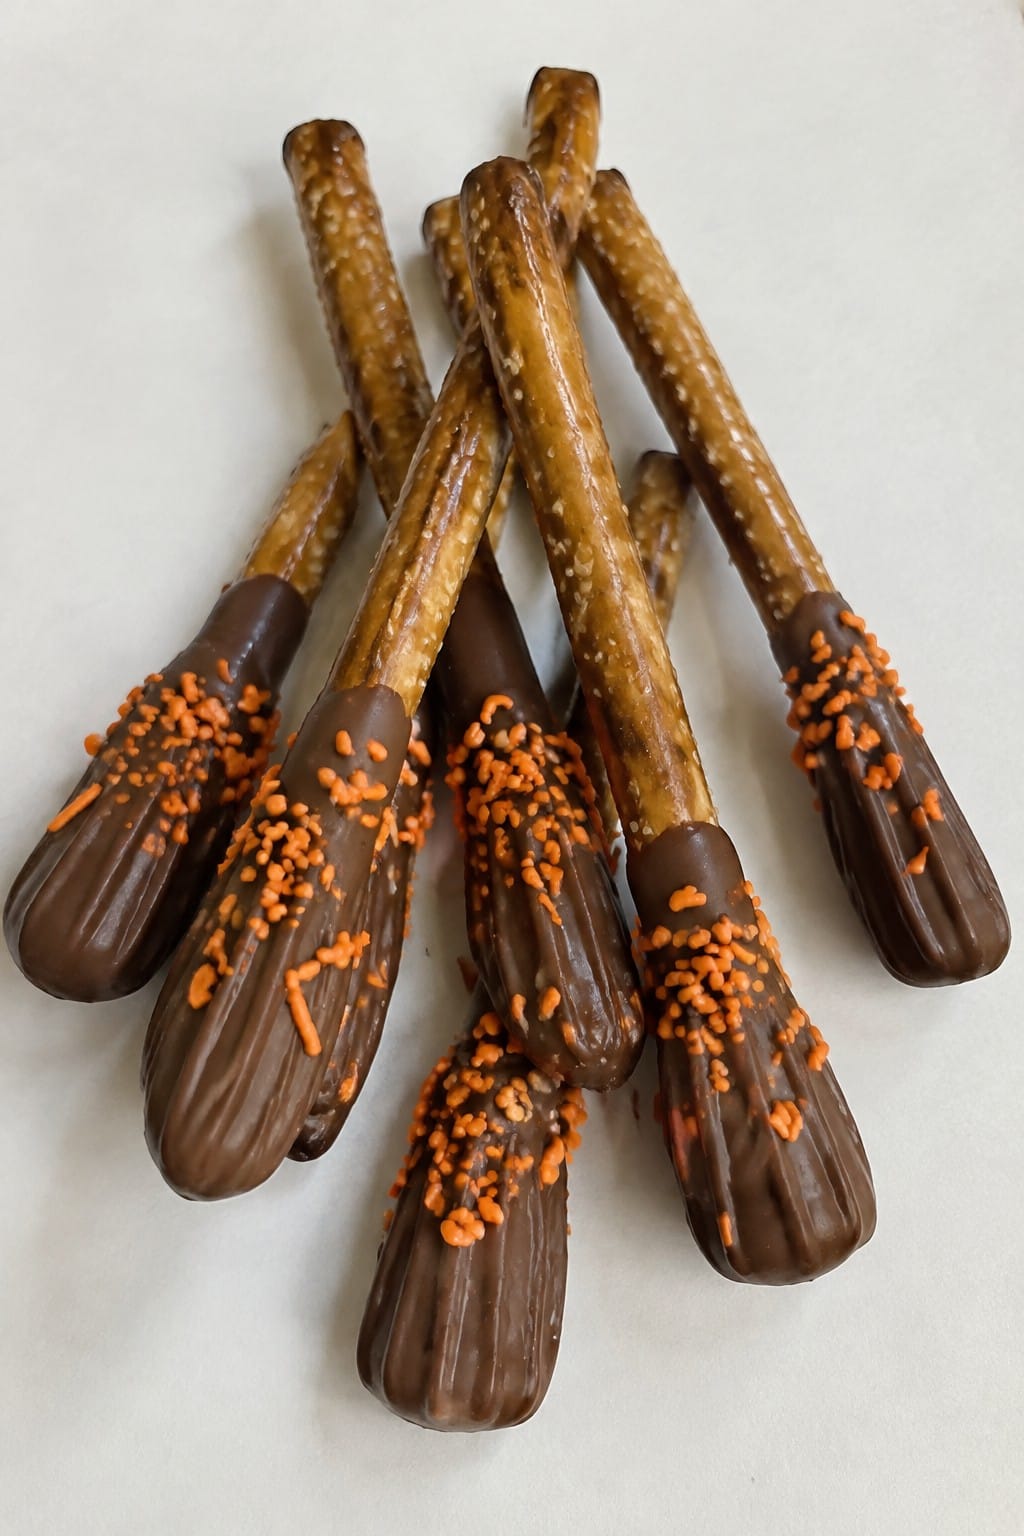
Chocolate-Dipped Pretzel Broomsticks
These chocolate-dipped pretzel broomsticks bring a playful touch to any Halloween spread. Guests can pick them up easily while mingling, and the combination of crunchy pretzel and smooth chocolate makes them a reliable choice for grazing tables. The salty-sweet balance keeps people coming back for another.
The recipe uses basic pantry items and comes together quickly without special skills. It works well for both kids and adults at casual parties.
Serves 4 people.
Ingredients
- 8 pretzel rods
- 1 cup milk chocolate chips
- 2 teaspoons vegetable oil
- 2 tablespoons orange sprinkles
Instructions
- Line a baking sheet with parchment paper and set it aside.
- Place the milk chocolate chips and vegetable oil in a microwave-safe bowl. Heat in 30-second intervals, stirring after each, until the chocolate is fully melted and smooth.
- Hold each pretzel rod by one end and dip the other end into the melted chocolate, coating about two-thirds of the rod. Let excess chocolate drip back into the bowl.
- Immediately sprinkle the chocolate-coated portion with orange sprinkles while the chocolate is still wet.
- Place the dipped pretzel rods on the prepared baking sheet. Repeat with the remaining rods.
- Let the broomsticks sit at room temperature until the chocolate sets completely.
Extra Tips
Store the finished broomsticks in an airtight container at room temperature to keep the pretzels crisp. If your kitchen runs warm, place the container in a cooler spot so the chocolate does not soften. For a different look, swap the orange sprinkles for black and white ones while keeping the same dipping steps.
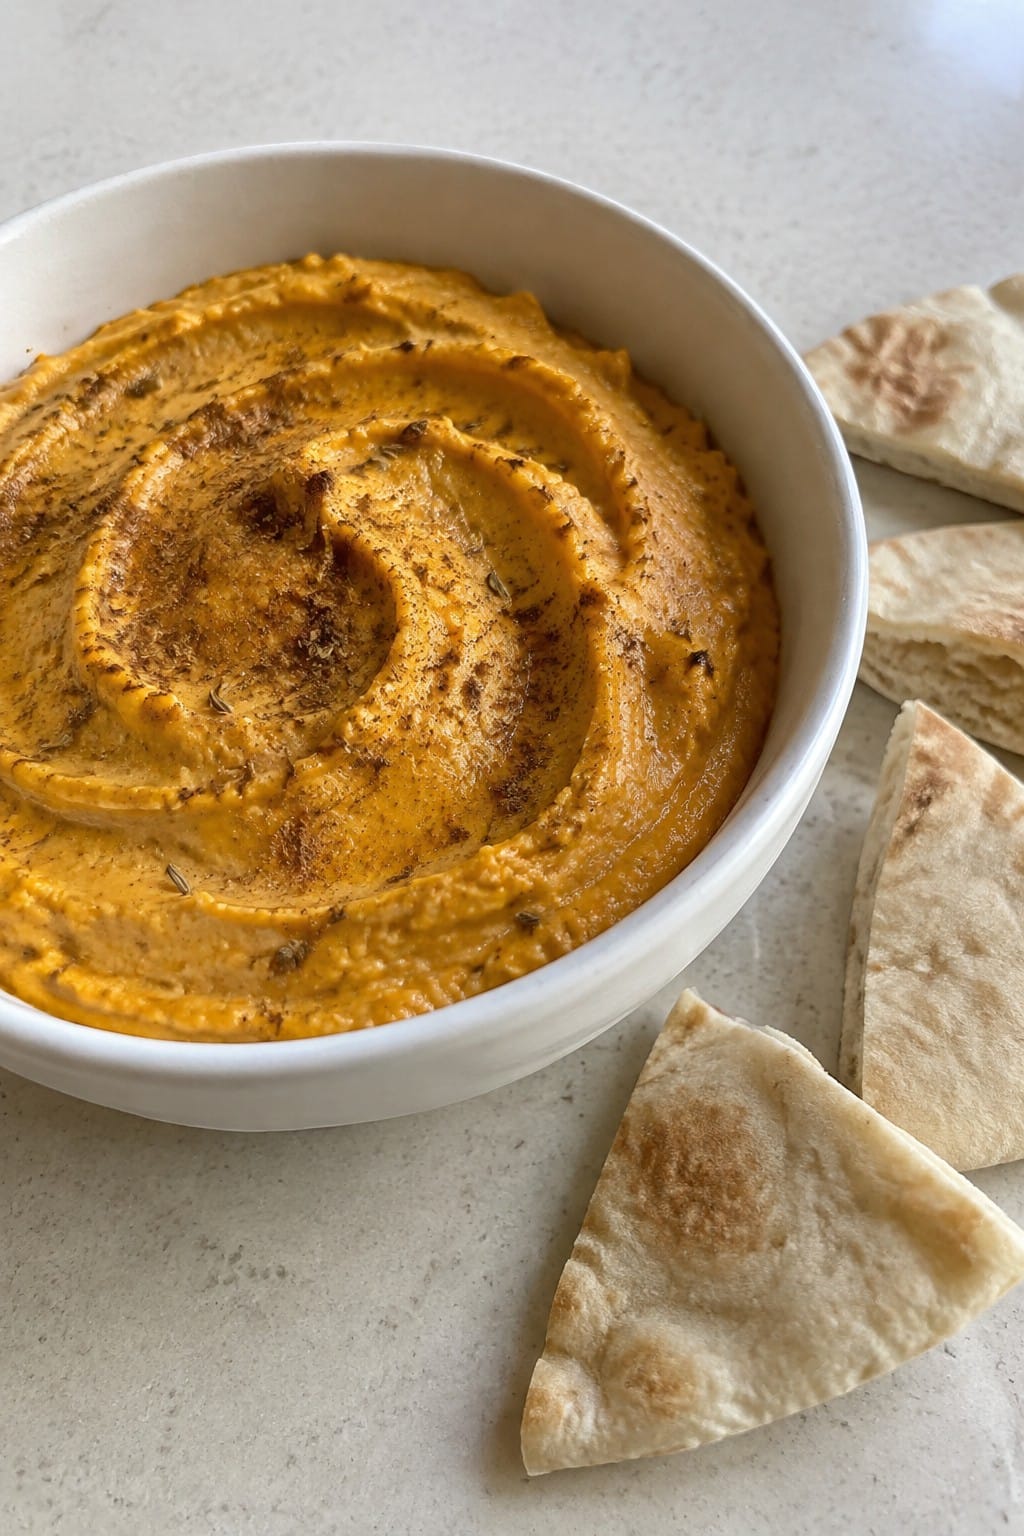
Course: Snack Cuisine: American Equipment: Microwave-safe bowl, Baking sheet, Parchment paperSpiced Pumpkin Hummus with Pita Wedges
This hummus adds a warm orange color and gentle spice to any grazing table. The pumpkin gives it a smooth texture while chickpeas keep it hearty enough for guests to scoop with pita wedges during a long party.
It works well on a snack board because it holds at room temperature for hours and pairs easily with other finger foods. The flavor stays balanced with earthy cumin, a touch of cinnamon, and bright lemon.
Serves 4 people.
Ingredients
- 1 (15-ounce) can chickpeas, drained and rinsed
- ¾ cup pumpkin puree
- 2 tablespoons tahini
- 3 tablespoons olive oil, divided
- 1 garlic clove
- 1 teaspoon ground cumin
- ½ teaspoon ground cinnamon
- ½ teaspoon smoked paprika, divided
- 1 tablespoon lemon juice
- ½ teaspoon salt
- 3 pita rounds
Instructions
- Preheat the oven to 375°F. Cut each pita round into 8 wedges and place them on a baking sheet.
- Drizzle 1 tablespoon olive oil over the pita wedges. Sprinkle with ¼ teaspoon smoked paprika and toss to coat. Bake for 10 minutes until crisp, then set aside to cool.
- Add the chickpeas, pumpkin puree, tahini, remaining 2 tablespoons olive oil, garlic, cumin, cinnamon, remaining ¼ teaspoon smoked paprika, lemon juice, and salt to a food processor.
- Blend until smooth, stopping to scrape down the sides as needed. If the mixture seems thick, add 1 tablespoon water and blend again until creamy.
- Transfer the hummus to a serving bowl and arrange the baked pita wedges alongside for dipping.
Extra Tips
Make the hummus a day ahead and store it covered in the fridge. The flavors settle and taste even better the next day. If it thickens overnight, stir in a teaspoon of water before serving. Skip the cinnamon if you want a more savory version, or add an extra pinch of smoked paprika for deeper color on a Halloween spread.Course: Appetizer Cuisine: American Equipment: Food processor, Baking sheet, Mixing bowl
Cheesy Mummy Sausage Rolls
These Cheesy Mummy Sausage Rolls add a playful Halloween element to a grazing table. Flaky pastry strips wrap around sausages and cheese to form a simple mummy shape that guests can grab easily while mingling.
The result is a savory bite with melted cheese inside and crisp pastry layers outside. They fit well on a shared platter alongside other finger foods.

Serves 4 people.
Ingredients
- 8 cocktail sausages
- 120g cheddar cheese, cut into 8 sticks
- 1 sheet puff pastry (about 320g)
- 1 large egg, beaten
- 8 small pieces black olive
Instructions
- Preheat the oven to 200°C and line a baking sheet with parchment paper.
- Place one cheese stick alongside each cocktail sausage and press them together lightly.
- Unroll the puff pastry sheet and cut it into thin strips about 1cm wide.
- Wrap the pastry strips around each sausage and cheese pair, leaving a small gap at one end for the face and overlapping the strips slightly to create a bandage look.
- Place the wrapped rolls on the baking sheet and brush them all over with the beaten egg.
- Bake for 20 to 25 minutes until the pastry is golden and puffed.
- Remove from the oven and press two black olive pieces into the gap on each roll to form eyes.
Extra Tips
Prepare the rolls up to the baking stage earlier in the day and keep them chilled until you are ready to cook. The olive pieces give a salty contrast that balances the cheese, so avoid adding extra salt elsewhere.Course: Appetizer Cuisine: British Equipment: Baking sheet, Oven, Pastry brush, Knife
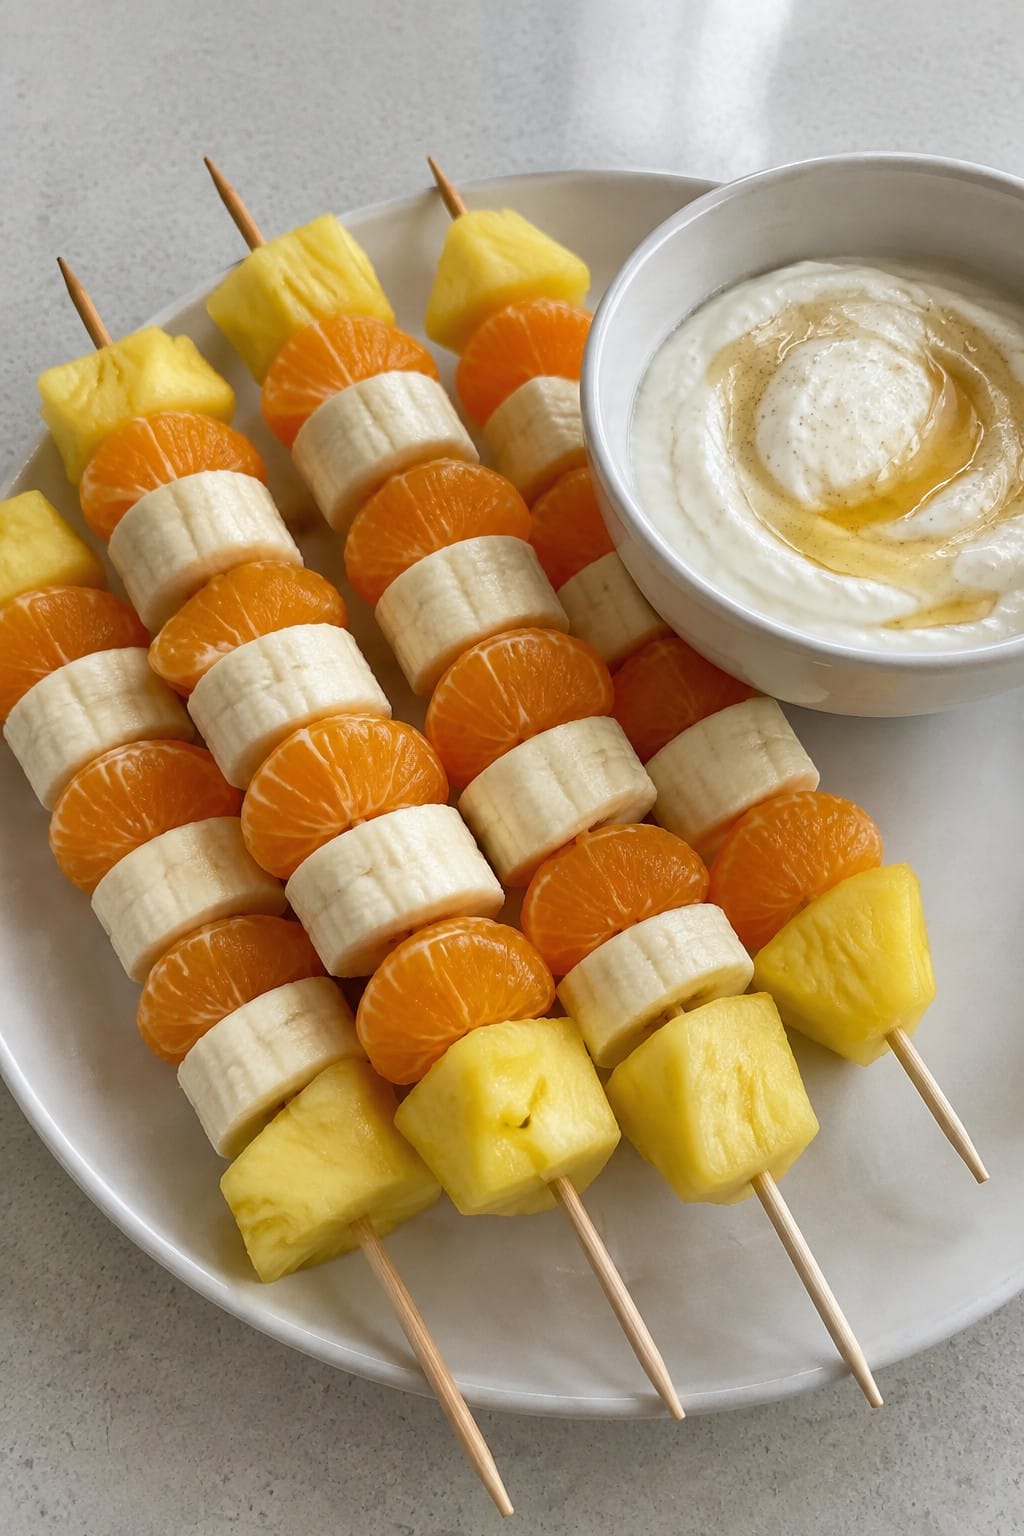
Candy Corn Fruit Skewers with Yogurt Dip
These skewers bring a playful Halloween touch to a grazing table. The fruit layers copy the look of candy corn while staying fresh and light. Guests can pick them up easily between other bites.
The creamy yogurt dip adds a cool contrast to the juicy fruit. Sweet pineapple and citrus pair with mild banana for a balanced bite that feels festive without being heavy.
Serves 4 people.
Ingredients
- 12 wooden skewers
- 2 cups fresh pineapple chunks
- 2 cups mandarin orange segments
- 2 large bananas, sliced into thick rounds
- 1 cup plain Greek yogurt
- 2 tablespoons honey
- 1 teaspoon vanilla extract
Instructions
- Combine the Greek yogurt, honey, and vanilla extract in a small bowl. Stir until the mixture is smooth and evenly blended.
- Thread one pineapple chunk onto each skewer first, followed by one mandarin orange segment, then one banana slice. Repeat this order on all twelve skewers.
- Arrange the finished skewers on a platter with the yogurt dip in a bowl nearby for dipping.
Extra Tips
Prepare the skewers up to two hours ahead and store them in the refrigerator covered with plastic wrap to keep the banana from browning. Use ripe but firm bananas so the slices hold their shape on the skewer. If the yogurt dip thickens after chilling, stir in a teaspoon of milk to loosen it before serving.Course: Snack Cuisine: American Equipment: Mixing Bowl, Wooden Skewers
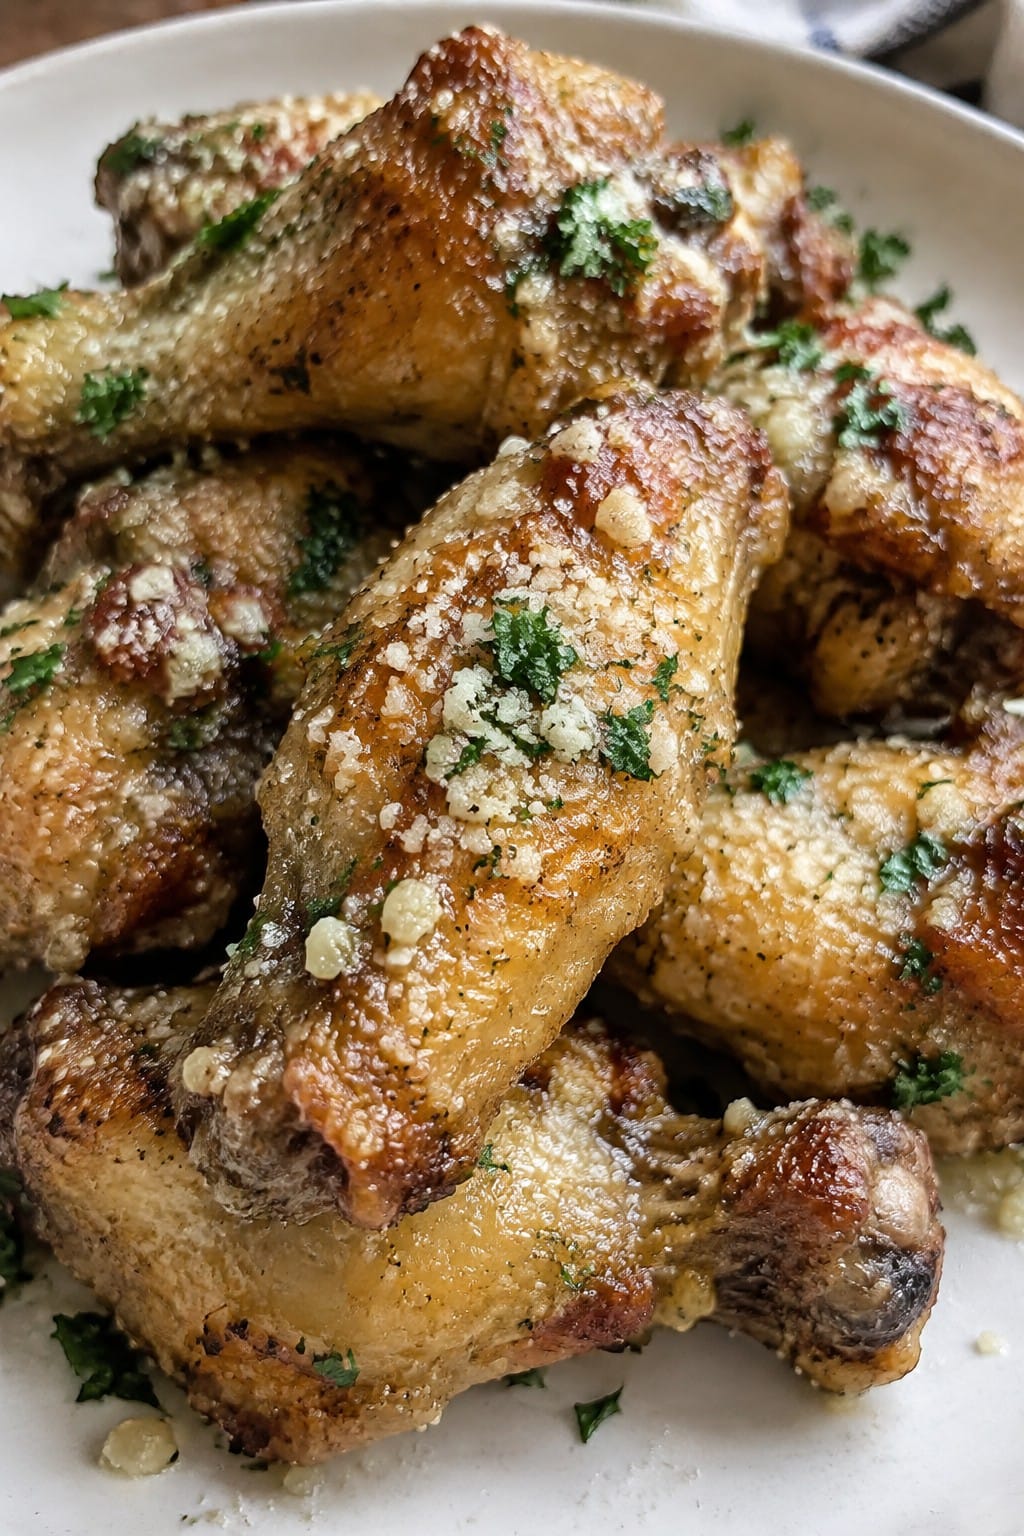
Garlic Parmesan Bat Wing Drumettes
These drumettes bring a savory, cheesy bite to a Halloween grazing table. The name gives them a spooky twist, while the simple seasoning keeps them easy to make ahead for a party crowd.
They turn out crispy on the outside with tender meat inside and a strong garlic Parmesan flavor that pairs well with other snacks. Serve them warm so guests can pick them up while they mingle.
Serves 4 people.
Ingredients
- 2 pounds chicken drumettes
- 2 tablespoons olive oil
- 1 teaspoon salt
- 1/2 teaspoon black pepper
- 4 tablespoons butter
- 4 cloves garlic, minced
- 1/2 cup grated Parmesan cheese
- 2 tablespoons chopped fresh parsley
Instructions
- Preheat the oven to 400 degrees F. Pat the drumettes dry with paper towels, then place them in a large bowl and toss with the olive oil, salt, and black pepper until evenly coated.
- Arrange the drumettes in a single layer on a baking sheet. Bake for 40 minutes, flipping them halfway through, until the skin is golden and crisp.
- While the drumettes bake, melt the butter in a small saucepan over low heat. Add the minced garlic and cook for 1 minute until fragrant, then remove from heat.
- Transfer the baked drumettes to a clean large bowl. Pour the garlic butter over them and toss to coat. Sprinkle with the Parmesan cheese and parsley, then toss once more before serving.
Extra Tips
Pat the drumettes very dry before seasoning to help the skin crisp in the oven. Toss them with the garlic butter right after baking so the Parmesan melts slightly and sticks. Serve them on a dark platter with a small bowl of ranch for dipping to keep the Halloween theme going.Course: Appetizer Cuisine: American Equipment: Baking Sheet, Large Bowl, Oven
