
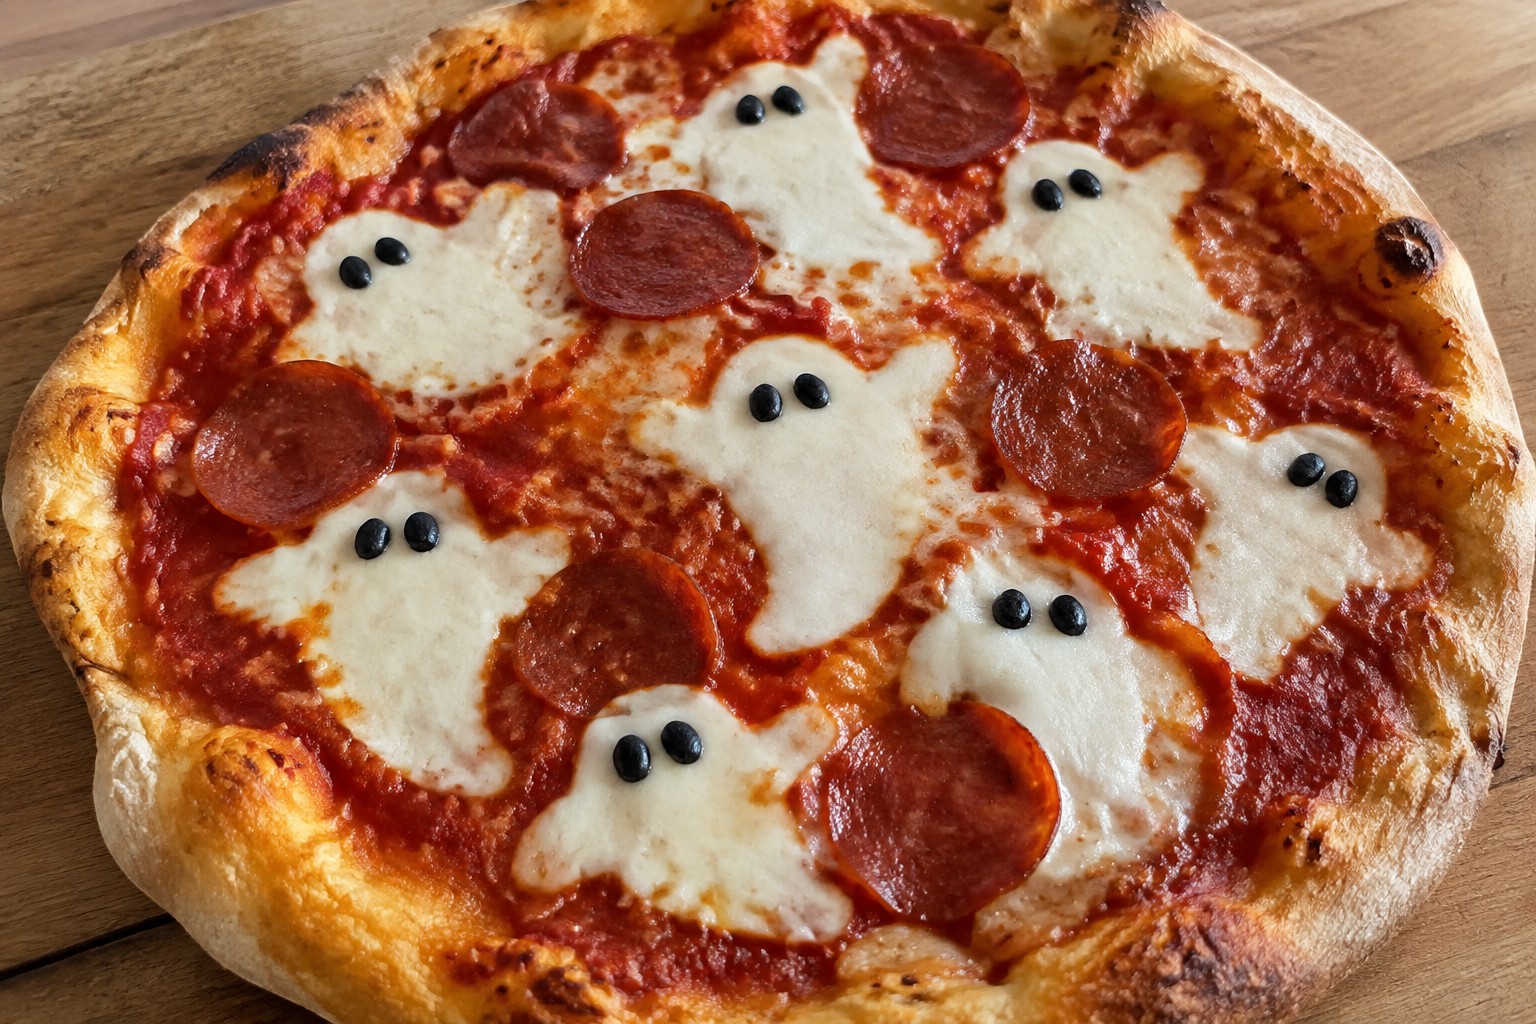
Halloween pizzas are a simple way to make dinner fun for kids during the holiday. The ideas ahead rely on basic ingredients and easy assembly steps. You can find options here that fit different tastes and time limits. Most recipes use tools and toppings you likely keep on hand. Look through them to choose a few that match what your kids enjoy.
Helpful Tips Before You Start
A bit of planning keeps the process smooth when making themed pizzas with kids.
Let Kids Pick Their Toppings
Set out small bowls of ingredients like cheese, pepperoni, and olives. Kids feel more ownership when they build their own pizzas.
Cut Shapes with Cookie Cutters
Press cutters into cheese slices or dough for bats, pumpkins, and ghosts. These details make the pizzas look festive without extra work.
Make Dough Ahead of Time
Prepare or thaw dough the night before and keep it in the fridge. This cuts down on wait time once the kids are ready to assemble.
Use Smaller Bases for Little Hands
Choose mini crusts or divide one large dough ball into several portions. Smaller pizzas cook faster and match kids’ appetites.
Keep Extra Sauce on the Side
Serve marinara or pizza sauce in small cups instead of spreading it first. Some kids prefer less sauce or like to dip their slices.
Jack-o’-Lantern Pepperoni Pizzas
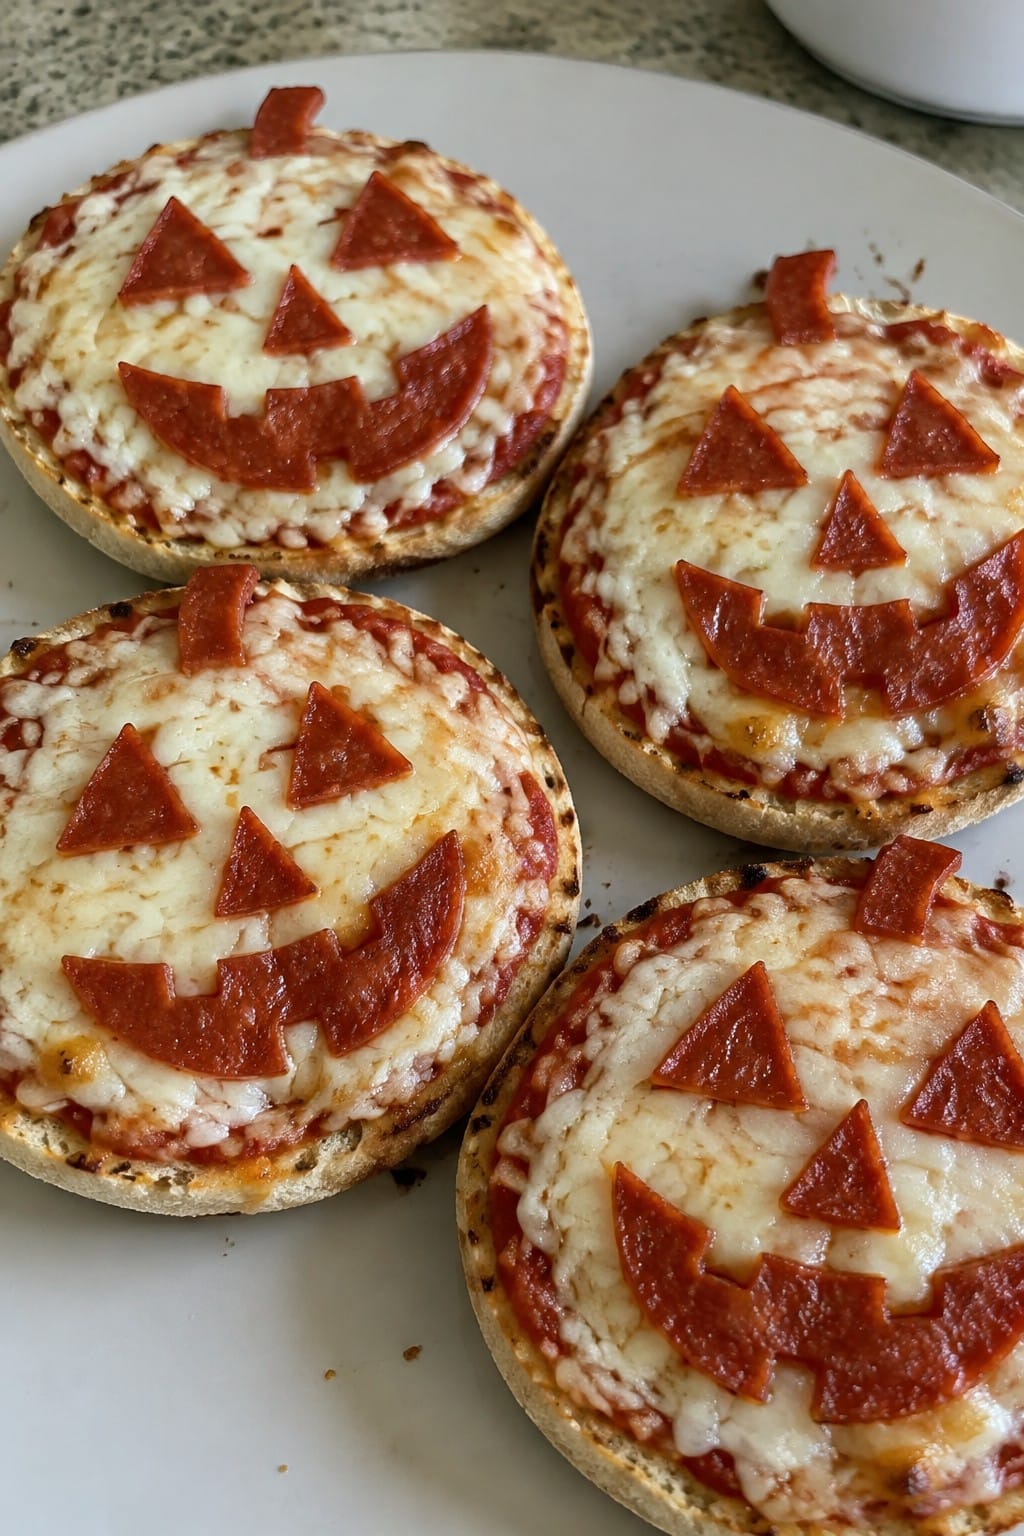
These Jack-o’-Lantern Pepperoni Pizzas turn a simple pizza night into a hands-on activity kids enjoy. The pepperoni gets cut and arranged into faces on each base, creating a playful look that still tastes like classic pizza with tangy sauce and melted cheese.
They suit quick weeknight dinners or small Halloween gatherings. The crisp edges from the English muffins contrast nicely with the soft cheese and chewy pepperoni.
Serves 4 people.
Ingredients
- 4 English muffins
- 1 cup pizza sauce
- 2 cups shredded mozzarella cheese
- 32 pepperoni slices
Instructions
- Preheat the oven to 400 degrees F and line a baking sheet with parchment paper.
- Split each English muffin in half and place the halves cut side up on the baking sheet.
- Spread 2 tablespoons of pizza sauce evenly over each muffin half.
- Sprinkle about ¼ cup of shredded mozzarella cheese over the sauce on each half.
- Cut 4 pepperoni slices per pizza into small triangles and half circles using a sharp knife to form eyes, a nose, and a mouth.
- Arrange the cut pepperoni pieces on the cheese to create jack-o’-lantern faces, then fill in the remaining space with whole pepperoni slices.
- Bake for 8 to 10 minutes until the cheese melts and the edges turn golden.
Extra Tips
Cut the pepperoni shapes on a cutting board right before assembly so the pieces stay neat and do not stick together. If you want to prepare ahead, assemble the pizzas without baking and store them covered in the refrigerator for up to 4 hours, then bake when ready to serve.Course: Appetizer Cuisine: American Equipment: Baking Sheet, Knife, Spoon
Cheesy Mummy Olive-Eye Pizzas
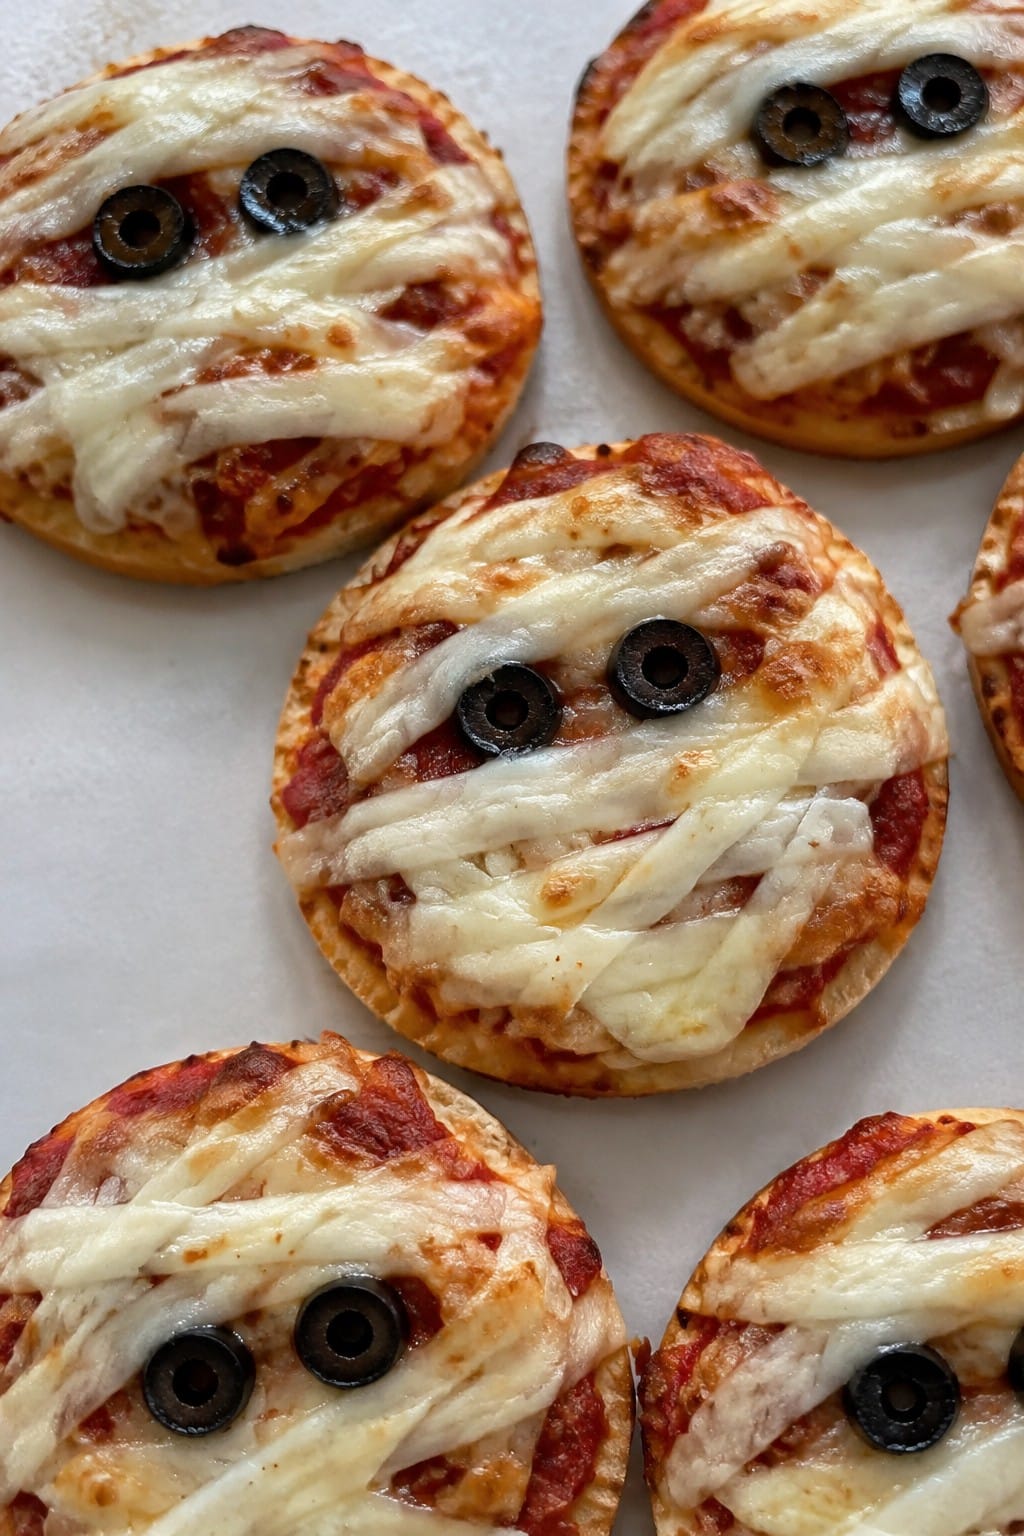
These mini pizzas turn a basic cheese pie into a fun Halloween shape that kids can help assemble. Cheese strips form the mummy bandages while olive slices create the eyes, making them a hit at parties or weeknight dinners before trick-or-treating. The result is a crisp crust with gooey melted cheese and a simple tomato base.
Serves 4 people.
Ingredients
- 1 pound pizza dough
- 1/2 cup pizza sauce
- 8 ounces fresh mozzarella, cut into thin strips
- 8 black olives, sliced in half
Instructions
- Preheat the oven to 425 degrees F and line a baking sheet with parchment paper.
- Divide the pizza dough into four equal pieces and roll each into a small oval shape about 6 inches long.
- Spread 2 tablespoons of pizza sauce over each dough oval, leaving a small border around the edges.
- Arrange the mozzarella strips across each pizza in a crisscross pattern to look like bandages, leaving two small gaps near the top for the eyes.
- Place two olive halves in the gaps on each pizza to form the eyes.
- Bake for 12 to 15 minutes until the crust is golden and the cheese is melted and bubbly.
- Remove from the oven and let cool for 2 minutes before serving.
Extra Tips
Cut the mozzarella strips slightly uneven so the mummies look wrapped rather than perfectly neat. If the cheese browns too fast, tent the pizzas loosely with foil for the last few minutes. These taste best right after baking while the cheese is still stretchy.Course: Appetizer Cuisine: American Equipment: Baking sheet, Rolling pin, Knife
Spiderweb Pesto Mozzarella Pizzas
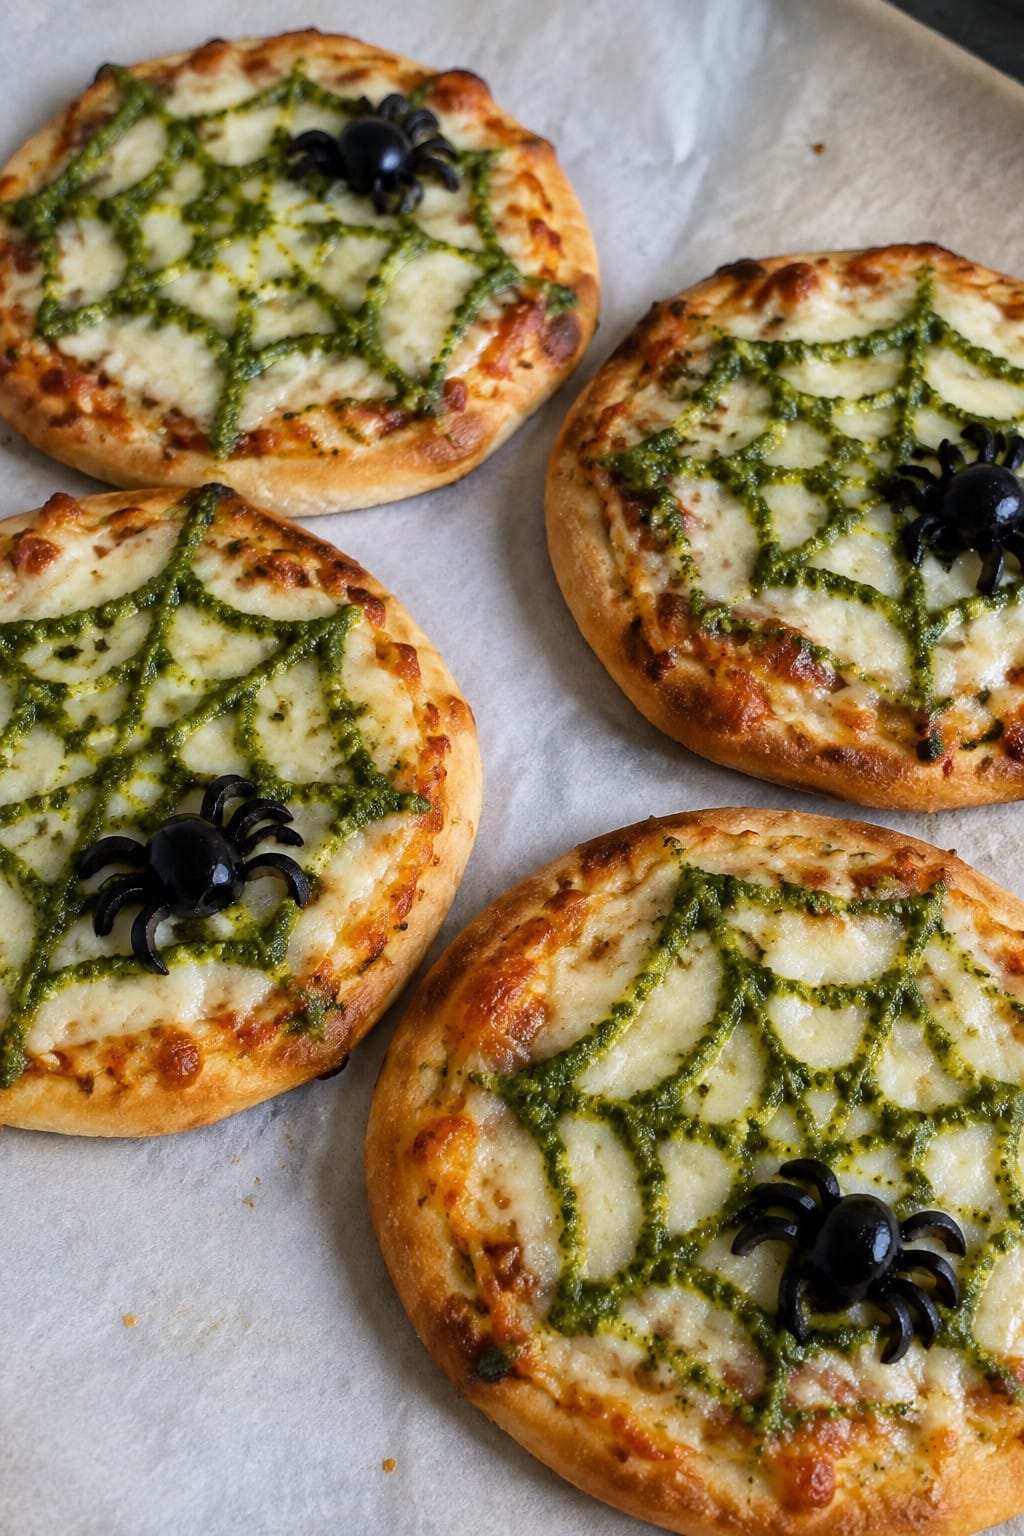
These pizzas bring a fun Halloween twist to a simple pesto and cheese base. Kids enjoy spotting the spiderweb pattern and the little olive spiders on top. The pesto gives a bright herbal note that balances the mild melted mozzarella.
They work well for a quick weeknight dinner before trick-or-treating or as a party snack. The crust stays crisp while the cheese turns gooey, and the web design takes only a few extra minutes to create.
Serves 4 people.
Ingredients
- 1 pound pizza dough, divided into 4 portions
- ¾ cup basil pesto, divided
- 2 cups shredded mozzarella cheese
- 8 black olives
Instructions
- Heat the oven to 450°F and line a baking sheet with parchment paper.
- Roll or stretch each dough portion into a 6-inch circle and place the circles on the prepared sheet.
- Spread ½ cup of the pesto evenly over the four dough circles, leaving a small border around the edge.
- Sprinkle the shredded mozzarella cheese over the pesto on each pizza.
- Bake for 10 to 12 minutes until the crust is golden and the cheese is fully melted and bubbling.
- While the pizzas bake, slice the black olives into spider shapes by cutting four small slits into each olive half.
- Remove the pizzas from the oven. Spoon the remaining ¼ cup pesto into a small zip-top bag, snip a tiny corner, and pipe concentric circles on each pizza. Drag a toothpick from the center outward in several places to form the web lines.
- Add two olive spiders to each pizza while the cheese is still warm so they stick in place.
Extra Tips
Pipe the pesto web right after baking so the lines stay bright green against the cheese. If the pesto is very thick, stir in a teaspoon of olive oil to make piping easier. Leftovers reheat best in a 350°F oven for five minutes to keep the crust crisp.Course: Appetizer Cuisine: Italian Equipment: Oven, Baking sheet, Parchment paper
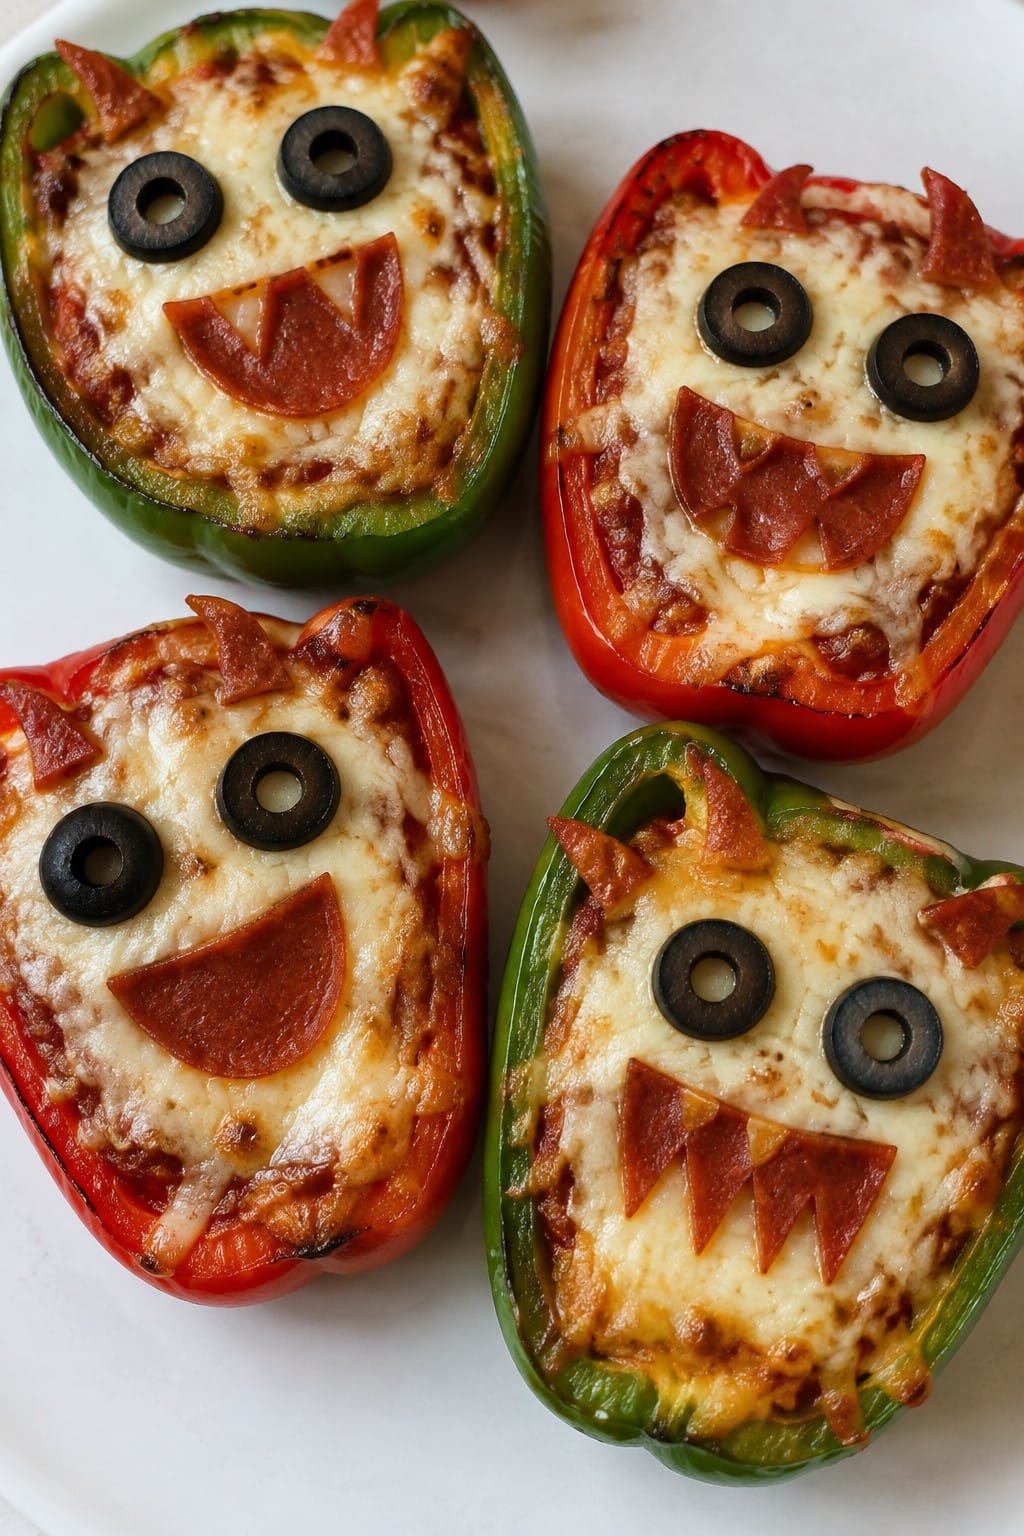
Monster Face Bell Pepper Pizzas
These Monster Face Bell Pepper Pizzas swap crust for fresh bell pepper halves so kids get a built-in veggie base with every bite. The format keeps things light and hands-on, which makes it easy to set up as a quick activity before dinner or a party.
The result is a crisp-tender pepper topped with warm sauce and melted cheese. Simple face details made from olives and pepperoni give each piece its own silly personality without extra steps.
Serves 4 people.
Ingredients
- 4 large bell peppers
- 1 cup pizza sauce
- 2 cups shredded mozzarella cheese
- 16 black olives
- 8 slices pepperoni
Instructions
- Preheat the oven to 375°F and line a baking sheet with parchment paper.
- Slice each bell pepper in half lengthwise and remove the seeds and membranes.
- Spread about 2 tablespoons of pizza sauce inside each pepper half.
- Sprinkle roughly 1/4 cup of mozzarella cheese over the sauce in each half.
- Arrange two black olives as eyes and cut or fold pepperoni pieces to form mouths on each pepper.
- Place the filled peppers on the baking sheet and bake for 15 to 18 minutes until the cheese is melted and bubbly.
Extra Tips
Use a mix of red, yellow, and orange peppers so the monsters stand out on the plate. If you want to prep ahead, assemble the faces up to two hours before baking and keep them covered in the fridge. Leftovers reheat best in a 350°F oven for five minutes to keep the pepper from turning soggy.Course: Appetizer Cuisine: American Equipment: Baking sheet, Oven, Knife
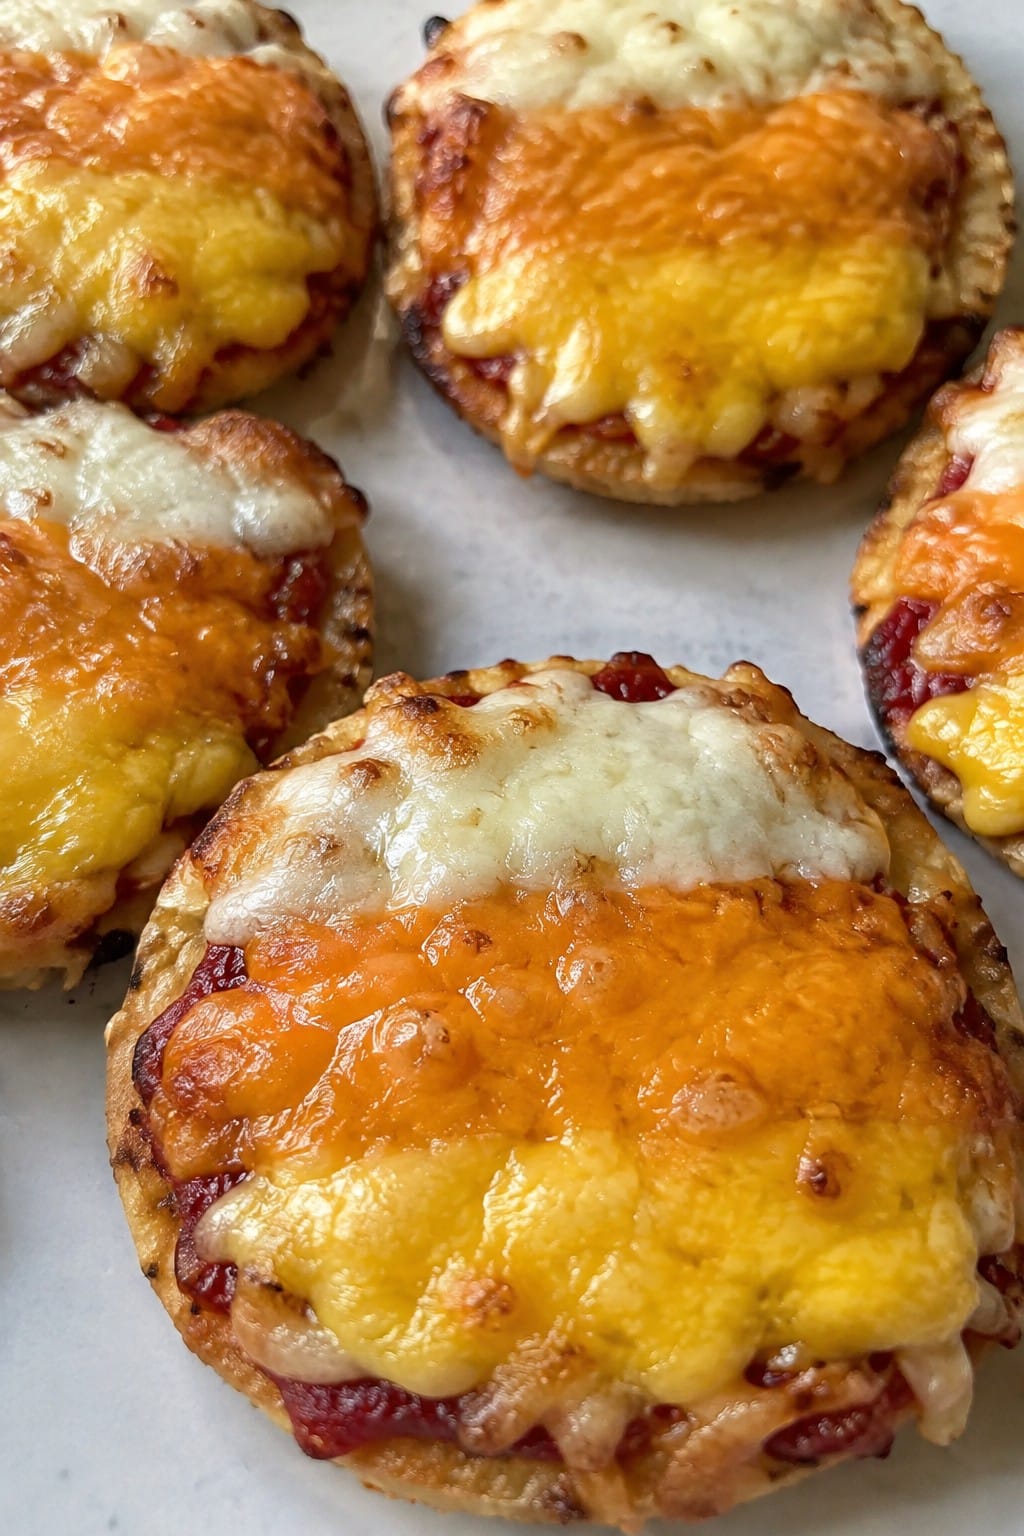
Candy Corn Layered Cheese Pizzas
These Candy Corn Layered Cheese Pizzas turn a simple cheese pizza into a Halloween activity kids can help assemble. The three cheese sections create a striped look that matches the candy corn colors while still tasting like regular pizza.
The result is a mild, melty pie with a crisp base and gooey cheese layers that pull apart easily. It works well for an after-school snack or a quick dinner before trick-or-treating.
Serves 4 people.
Ingredients
- 4 mini pizza crusts or English muffins, split and toasted lightly
- 1/2 cup pizza sauce
- 1 cup shredded yellow cheddar cheese
- 1 cup shredded orange cheddar cheese
- 1 cup shredded mozzarella cheese
Instructions
- Heat the oven to 400 degrees F and line a baking sheet with parchment paper.
- Place the four crusts on the sheet and spread 2 tablespoons of pizza sauce evenly over each one.
- On each crust, sprinkle the yellow cheddar cheese over the bottom third, the orange cheddar cheese over the middle third, and the mozzarella cheese over the top third to form three distinct stripes.
- Bake for 8 to 10 minutes until the cheeses are fully melted and the edges of the crusts are golden.
- Remove from the oven and let the pizzas rest for 2 minutes before slicing.
Extra Tips
Use pre-shredded cheese so the stripes stay neat while melting. If the mozzarella browns faster than the cheddar, tent the baking sheet loosely with foil for the last two minutes. These pizzas are best eaten right away while the layers are still stretchy.Course: Appetizer Cuisine: American Equipment: Baking Sheet, Oven
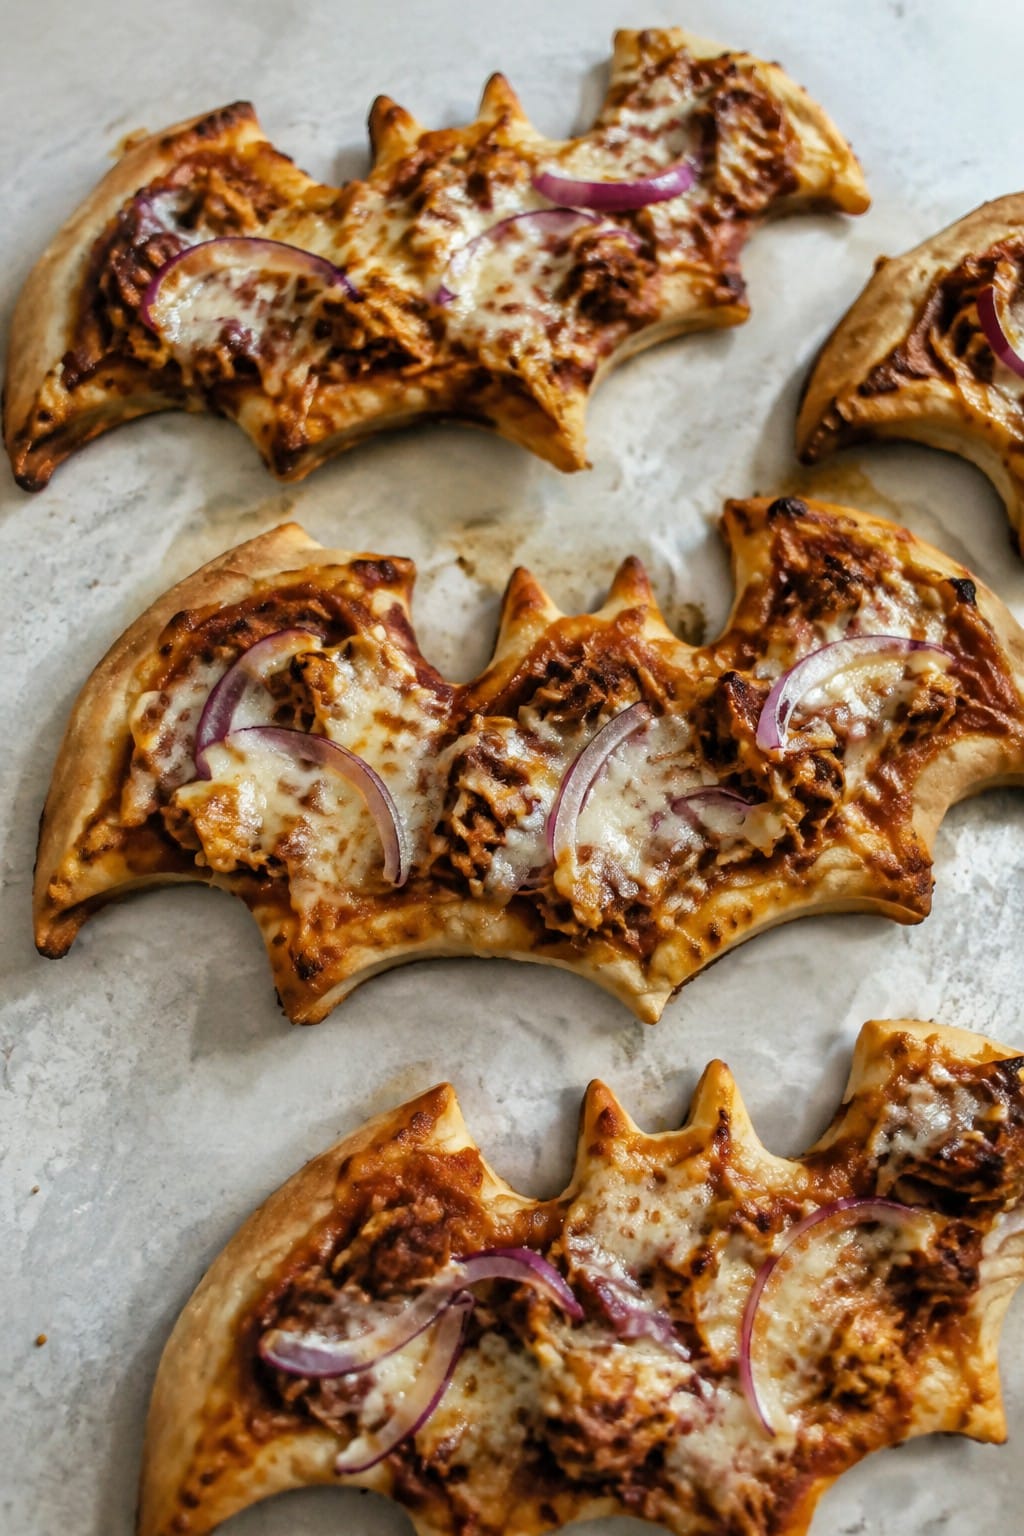
BBQ Chicken Bat Wing Pizzas
These BBQ Chicken Bat Wing Pizzas turn simple ingredients into a fun Halloween shape that kids enjoy cutting and eating. The sweet and tangy BBQ sauce pairs with tender chicken and melted cheese for a familiar flavor that feels like a regular meal rather than a themed snack. They work well for an after-school activity or a quick dinner before trick-or-treating.
Serves 4 people.
Ingredients
- 1 pound pizza dough
- 2 cups shredded cooked chicken
- 3/4 cup BBQ sauce
- 2 cups shredded mozzarella cheese
- 1/2 red onion, thinly sliced
- 1 tablespoon olive oil
Instructions
- Preheat the oven to 425°F and line a baking sheet with parchment paper.
- Divide the pizza dough into four equal pieces. Roll each piece into a rough circle, then cut two curved slits on each side to create a bat wing shape.
- Mix the shredded chicken with the BBQ sauce in a bowl until evenly coated.
- Brush each dough wing lightly with olive oil. Spread the BBQ chicken mixture over the center of each wing, leaving a small border around the edges.
- Top the chicken with shredded mozzarella cheese and scatter the sliced red onion on top.
- Bake for 12 to 15 minutes until the crust is golden and the cheese is bubbly.
- Let the pizzas cool for a few minutes before serving.
Extra Tips
Cut the wings with a pizza cutter or sharp knife right after rolling the dough so the shapes hold together during baking. If the BBQ sauce is very sweet, add a small pinch of chili powder to the chicken mixture for balance without changing the kid-friendly profile. These reheat well in a toaster oven at 350°F for five minutes to restore crisp crust.Course: Main Course Cuisine: American Equipment: Baking sheet, Rolling pin, Mixing bowl, Pizza cutter
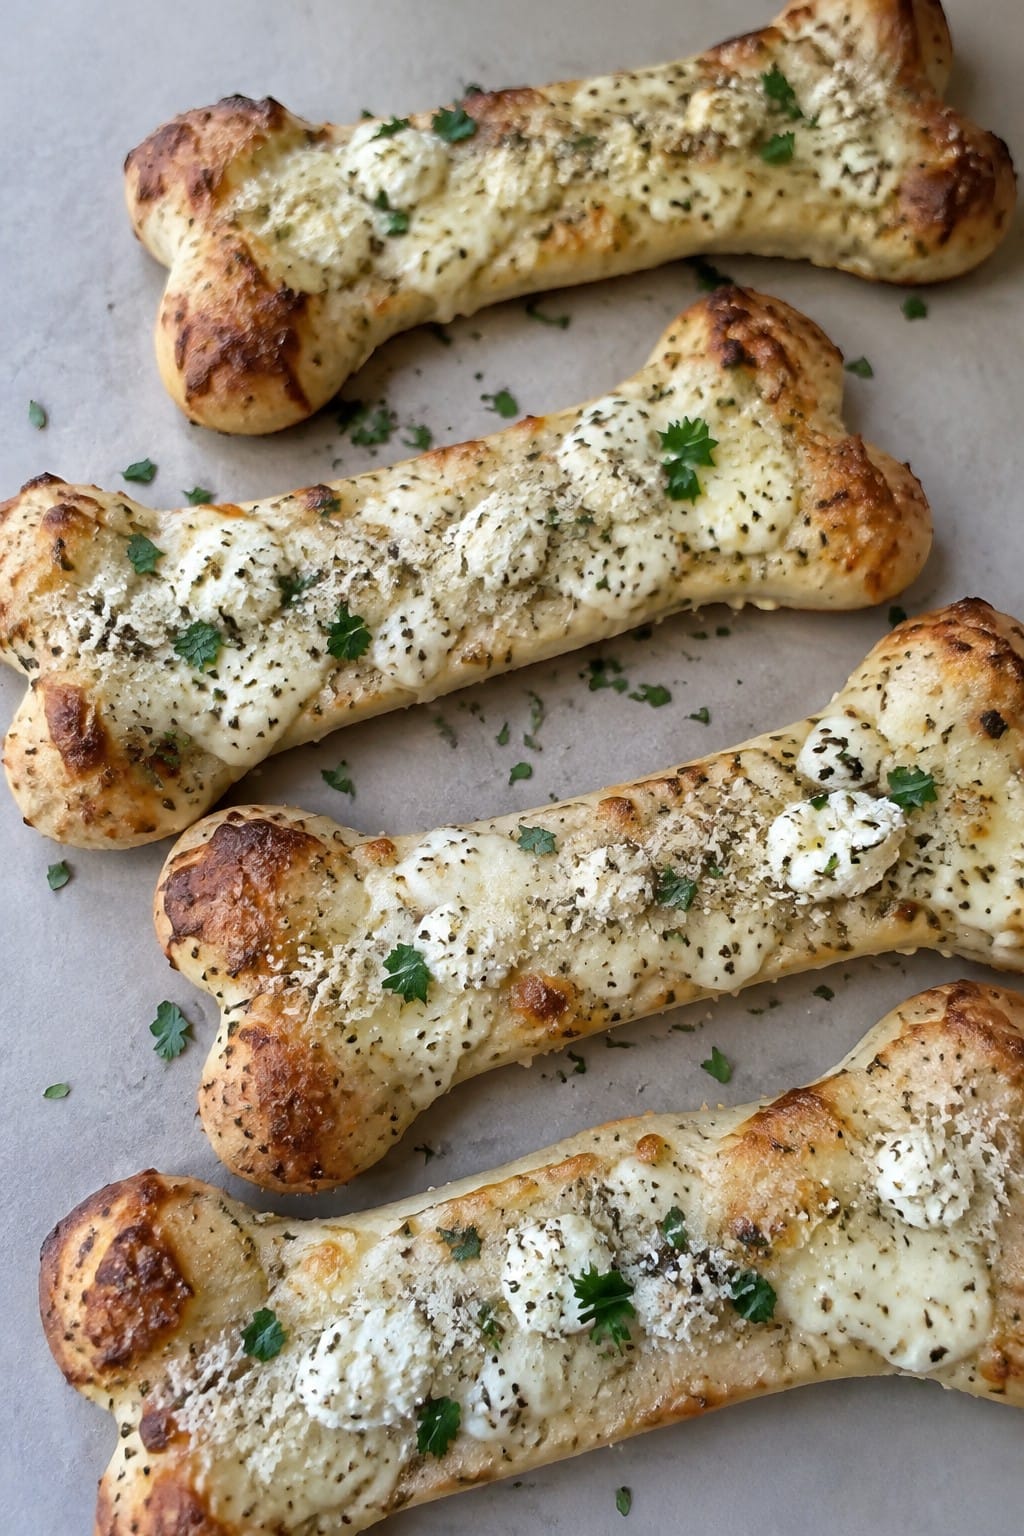
Garlic White Skeleton Bone Pizzas
These bone-shaped pizzas bring a simple Halloween touch to the table with their white garlic sauce and stretchy cheese topping. Kids enjoy the playful shape while parents appreciate the mild, creamy flavor that avoids heavy tomato sauce. The crust stays crisp on the edges and soft in the middle.
The garlic butter base pairs with ricotta and mozzarella for a balanced bite that feels rich without being overwhelming. Shape the dough ahead so the pizzas bake quickly when ready to serve.
Serves 4 people.
Ingredients
- 1 pound pizza dough
- 3 tablespoons butter
- 4 garlic cloves, minced
- 1 cup ricotta cheese
- 2 cups shredded mozzarella cheese
- 1/4 cup grated Parmesan cheese
- 1 teaspoon Italian seasoning
- Salt and pepper to taste
- Fresh parsley, chopped (for garnish)
Instructions
- Preheat the oven to 425°F and line a baking sheet with parchment paper.
- Divide the pizza dough into four equal pieces. Roll each piece into a long bone shape with thicker ends and a thinner middle section. Place the shapes on the baking sheet.
- Melt the butter in a small skillet over medium heat. Add the minced garlic and cook for one minute until fragrant. Remove from heat and stir in the ricotta cheese, Italian seasoning, salt, and pepper until smooth.
- Spread the garlic ricotta mixture evenly over each dough bone.
- Sprinkle the mozzarella and Parmesan cheeses on top of the sauce.
- Bake for 12 to 15 minutes until the crust is golden and the cheese is bubbly and lightly browned.
- Remove from the oven and sprinkle with chopped parsley before serving.
Extra Tips
Shape the dough bones on the parchment paper so they keep their form during baking. If the ricotta mixture feels too thick, stir in a teaspoon of milk to loosen it for easier spreading. Leftovers reheat well in a 350°F oven for five minutes to restore crisp edges.
Course: Appetizer Cuisine: Italian Equipment: Baking sheet, Skillet, Mixing bowlPumpkin-Shaped Sausage and Pepper Pizzas
These individual pizzas turn regular sausage and pepper toppings into a simple Halloween shape that kids can recognize right away. The dough gets formed into plump rounds with a few score marks to suggest pumpkin ridges, and a strip of green pepper stands in as the stem. They bake up with a crisp edge and a gooey center that holds the savory sausage and sweet peppers together.
The flavor stays classic with mild Italian sausage, bell peppers, and melted cheese, so even picky eaters usually finish their slice. They work well for an after-school snack, a small party spread, or a quick weeknight meal when you want something festive without extra steps.

Serves 4 people.
Ingredients
- 1 pound pizza dough, divided into 4 pieces
- 8 ounces Italian sausage, removed from casings
- 1 orange bell pepper, thinly sliced
- 1 green bell pepper, cut into 4 strips
- 1 cup pizza sauce
- 2 cups shredded mozzarella cheese
- 1 tablespoon olive oil
- 1 teaspoon dried oregano
Instructions
- Heat the oven to 450°F and line a baking sheet with parchment paper.
- Roll each piece of dough into a 6-inch round. Use a knife to score three shallow curved lines across each round to look like pumpkin ridges, then place the rounds on the baking sheet.
- Cook the sausage in a skillet over medium heat until browned and no longer pink, breaking it into small pieces as it cooks. Drain any excess fat.
- Spread ¼ cup pizza sauce over each dough round, leaving a small border at the edge.
- Top each pizza with ½ cup mozzarella, then scatter the cooked sausage and orange pepper slices evenly over the cheese.
- Lay one green pepper strip at the top of each pizza to form a stem. Brush the edges lightly with olive oil and sprinkle the oregano over the tops.
- Bake for 12 to 14 minutes until the crust is golden and the cheese is bubbly. Let the pizzas rest for 2 minutes before serving.
Extra Tips
Score the dough lines gently so they show after baking but do not cut all the way through. If the dough springs back while shaping, let it rest five minutes and try again. Leftovers reheat well in a 350°F oven for five minutes to keep the crust from turning soggy.Course: Main Course Cuisine: American Equipment: Baking sheet, Skillet, Rolling pin
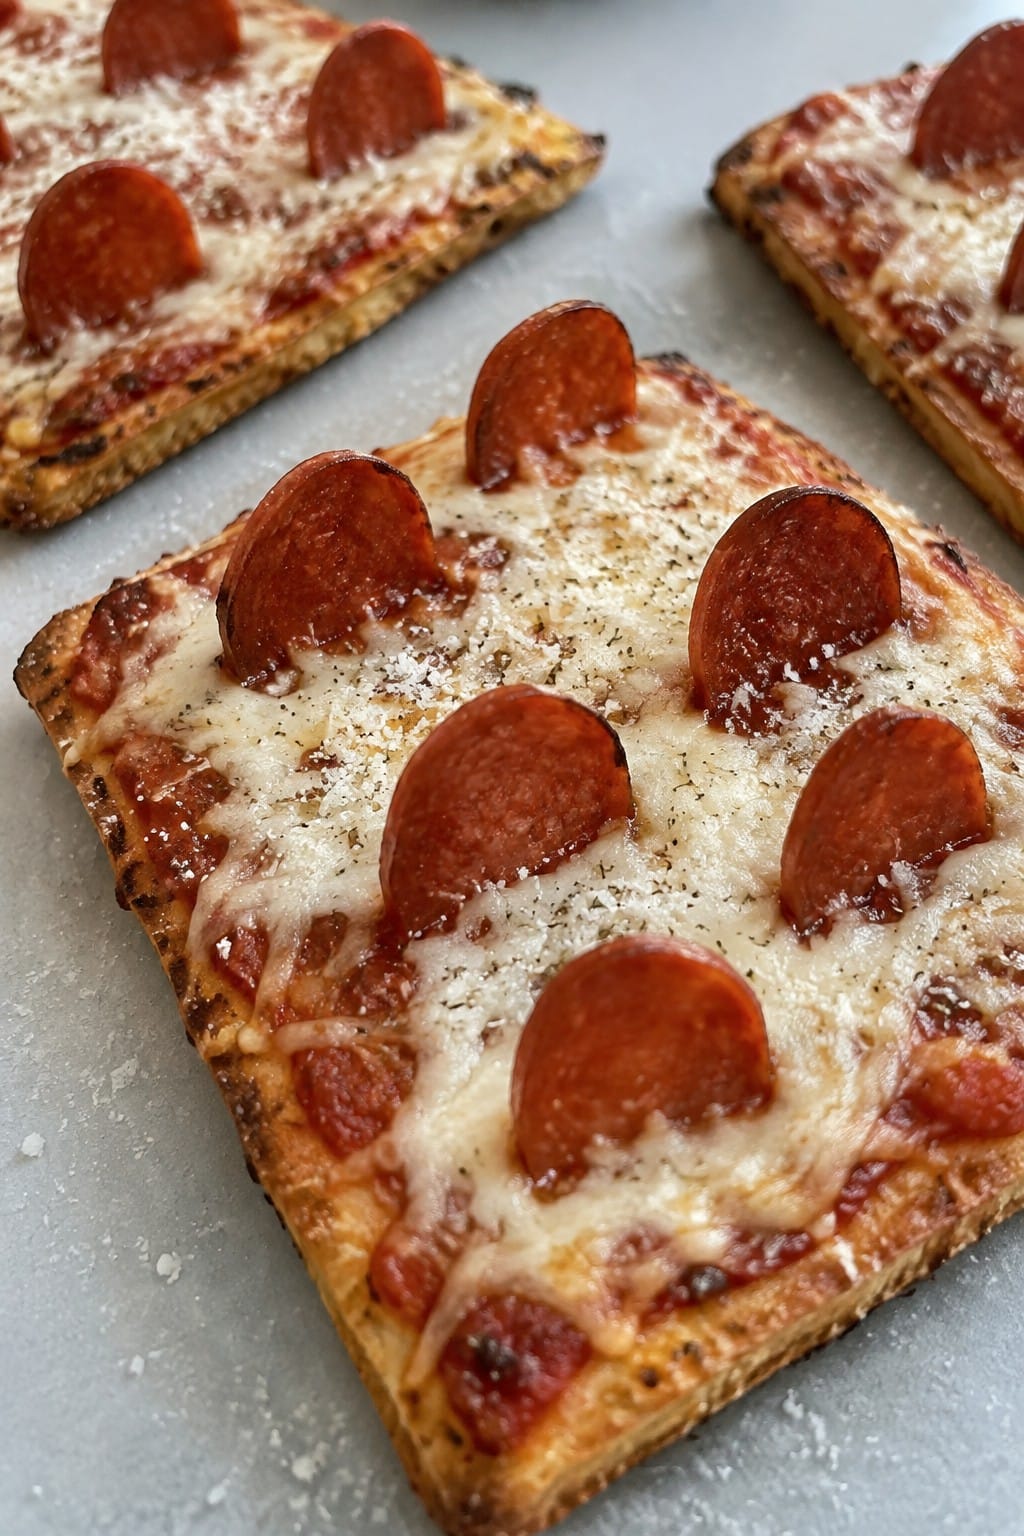
Graveyard Pepperoni Tombstone Pizzas
These pizzas give kids a fun way to enjoy a classic pepperoni pie with a Halloween twist. Rectangular crusts hold sauce and cheese, while pepperoni slices stand upright as tombstones once the pizzas come out of the oven. The result is a savory, cheesy base with crisp edges and a bit of spice from the pepperoni.
They work well for a weeknight dinner before trick-or-treating or as part of a small Halloween gathering. The straightforward toppings keep the focus on the playful presentation without extra steps.
Serves 4 people.
Ingredients
- 1 pound pizza dough
- ¾ cup pizza sauce
- 2 cups shredded mozzarella cheese
- 16 slices pepperoni
- 2 tablespoons grated Parmesan cheese
Instructions
- Preheat the oven to 450°F and line a baking sheet with parchment paper.
- Divide the pizza dough into four equal pieces and shape each into a small rectangle about 6 inches long.
- Place the rectangles on the prepared baking sheet. Spread 3 tablespoons of pizza sauce over each piece of dough, leaving a small border around the edges.
- Sprinkle ½ cup of mozzarella cheese evenly over the sauce on each pizza.
- Bake for 10 to 12 minutes until the crusts are golden and the cheese is melted and bubbly.
- Remove the pizzas from the oven and immediately sprinkle each one with 1½ teaspoons of Parmesan cheese.
- While the pizzas are still hot, press four pepperoni slices upright into the cheese on each pizza to form tombstones.
Extra Tips
Let the pizzas cool for two minutes before adding the upright pepperoni so the cheese sets enough to hold them in place. If the pepperoni slices are very large, cut them in half vertically for better balance. These pizzas taste best served right away while the crust stays crisp.Course: Appetizer Cuisine: American Equipment: Baking sheet, Parchment paper, Oven
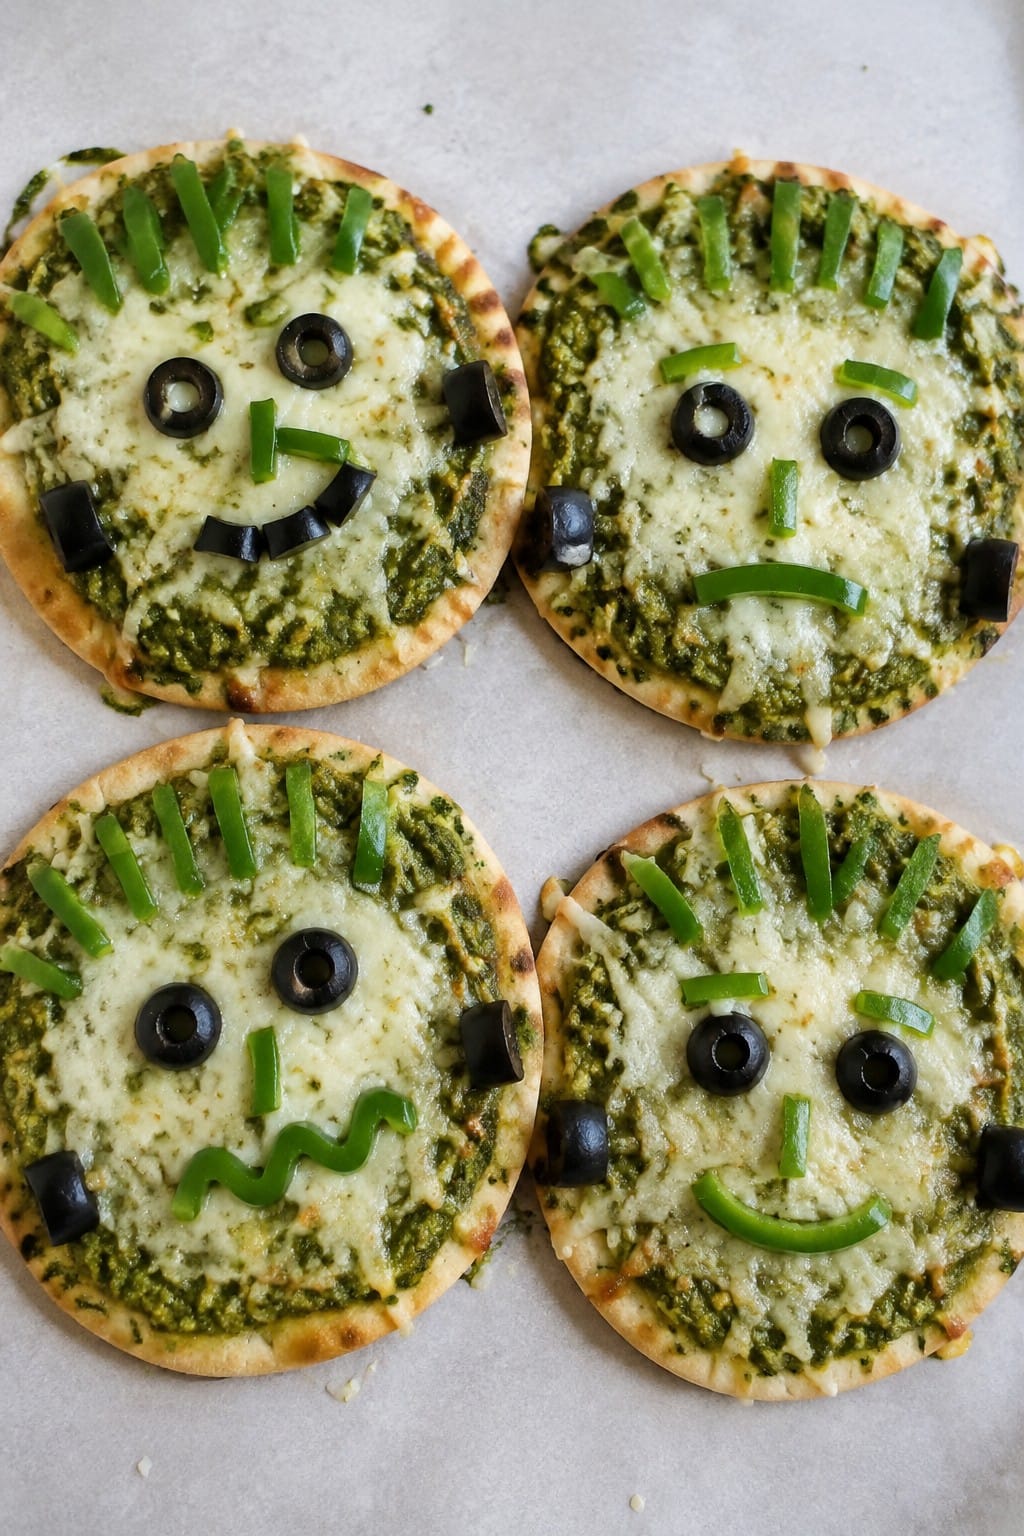
Frankenstein Basil Pesto Pizzas
These Frankenstein Basil Pesto Pizzas give kids a hands-on way to build monster faces on a green base. The pesto creates a bright color that stands out, while simple olive and pepper pieces form the eyes, hair, and bolts. The result is a herby, cheesy pizza with a crisp crust that feels playful without extra work.
Serves 4 people.
Ingredients
- 4 mini pizza crusts (about 6 inches each)
- ½ cup basil pesto
- 1½ cups shredded mozzarella cheese
- 12 black olives, pitted
- ½ green bell pepper, cut into thin strips
Instructions
- Heat the oven to 425°F and line a baking sheet with parchment paper.
- Place the four mini crusts on the sheet. Spread 2 tablespoons of basil pesto evenly over each crust.
- Sprinkle ⅓ cup of mozzarella cheese over the pesto on each pizza.
- Slice eight olives in half to make eyes and mouths. Press a few pieces gently into the cheese on each pizza. Use the green bell pepper strips to create side bolts near the bottom edge.
- Bake for 10 to 12 minutes until the cheese melts and the crust edges turn golden.
- Remove from the oven. Slice the remaining olives into thin rounds and add a few more pieces on top if any features need more definition. Let the pizzas cool for two minutes before serving.
Extra Tips
Cut the olives into different shapes before you start so the faces come together quickly once the pizzas are out of the oven. If the pesto tastes too strong for younger kids, stir in a teaspoon of olive oil to mellow the flavor. Leftovers keep in the fridge for one day and reheat best in a 350°F oven for five minutes to restore crispness.Course: Appetizer Cuisine: Italian Equipment: Baking sheet, Oven, Knife, Spoon
Black Olive Cat Face Pizzas
These Black Olive Cat Face Pizzas turn basic cheese pizzas into a simple Halloween activity that kids can help assemble. The olive details create clear cat faces on each pizza while keeping the overall taste mild and familiar. Expect a crisp crust, melted cheese, and a light salty note from the olives.
They suit an easy weeknight dinner before trick-or-treating or a small party spread. The design uses only one extra topping so the focus stays on the fun without complicating the flavor.

Serves 4 people.
Ingredients
- 4 small pizza dough rounds (about 6 inches each)
- ½ cup tomato sauce
- 2 cups shredded mozzarella cheese
- 1 cup black olives
Instructions
- Heat the oven to 425°F and place the pizza dough rounds on a baking sheet.
- Spread 2 tablespoons of tomato sauce evenly over each dough round.
- Sprinkle ½ cup of mozzarella cheese on top of the sauce on each round.
- Bake the pizzas for 10 to 12 minutes until the cheese is fully melted and the edges turn golden.
- Remove the pizzas from the oven. Cut 12 olives in half lengthwise to use as eyes and noses. Slice the remaining olives into thin strips for whiskers and ear shapes.
- Arrange the olive pieces on each warm pizza to form a cat face before serving.
Extra Tips
Slice the olives right before decorating so they stay neat and do not dry out. Serve the pizzas right after adding the olives so the cheese stays stretchy. If you need to make them ahead, bake the base pizzas without olives and add the faces just before reheating for a few minutes.Course: Appetizer Cuisine: American Equipment: Baking sheet, Oven, Knife
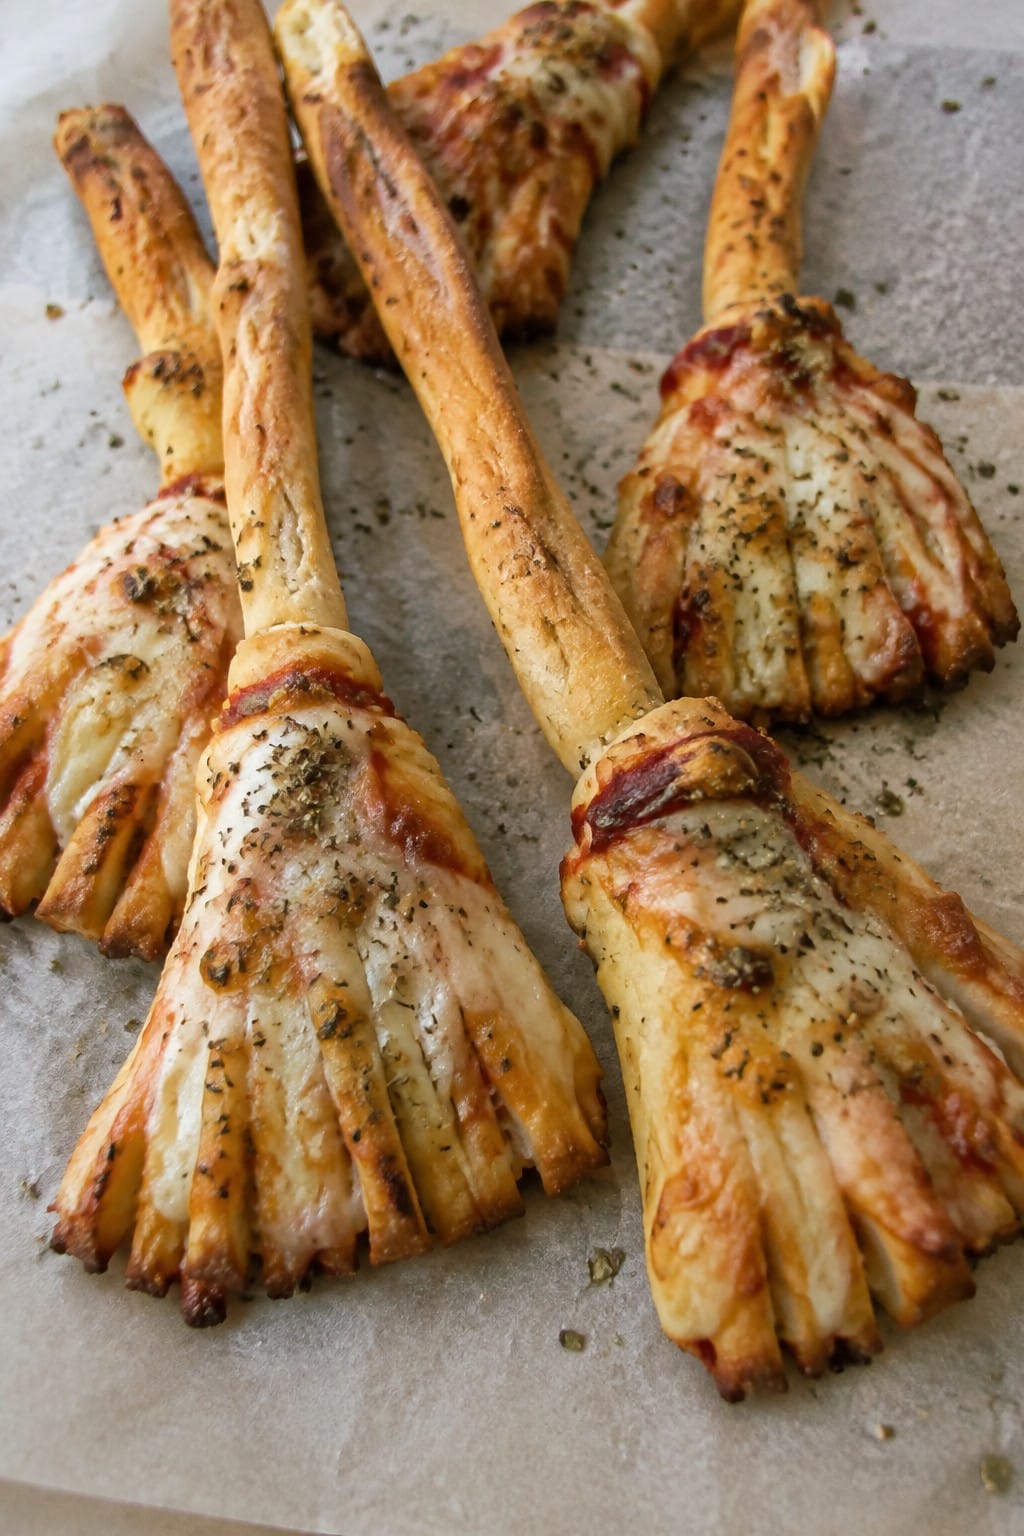
Witch Broom Breadstick Pizzas
These Witch Broom Breadstick Pizzas turn simple dough into a fun Halloween snack that kids can help shape. The breadsticks bake up golden with a crisp edge and soft center, while the melted cheese and sauce give them classic pizza taste without extra fuss.
They work well for an after-school treat or a party platter where little hands want something playful to grab.
Serves 4 people.
Ingredients
- 1 can (11 ounces) refrigerated breadstick dough
- 1/2 cup pizza sauce
- 1 1/2 cups shredded mozzarella cheese
- 2 tablespoons grated Parmesan cheese
- 1 teaspoon Italian seasoning
Instructions
- Preheat the oven to 375 degrees and line a baking sheet with parchment paper.
- Separate the breadstick dough into 8 pieces. For each piece, use a knife to make several small cuts along one end, about two inches long, to create the broom bristles. Leave the other end uncut to form the handle.
- Place the shaped breadsticks on the baking sheet. Spread a thin layer of pizza sauce over the cut bristle section of each breadstick.
- Sprinkle mozzarella cheese evenly over the sauced areas. Finish with a light dusting of Parmesan cheese and Italian seasoning across the cheese.
- Bake for 12 to 15 minutes until the breadsticks are golden and the cheese is melted and bubbly. Let them cool for a few minutes before serving.
Extra Tips
Cut the slits in the dough just deep enough to fan out without breaking the strips apart. If the cheese browns too quickly, loosely cover the baking sheet with foil for the last few minutes. These taste best warm, so serve them right after baking with extra pizza sauce on the side for dipping.Course: Appetizer Cuisine: American Equipment: Baking Sheet, Knife
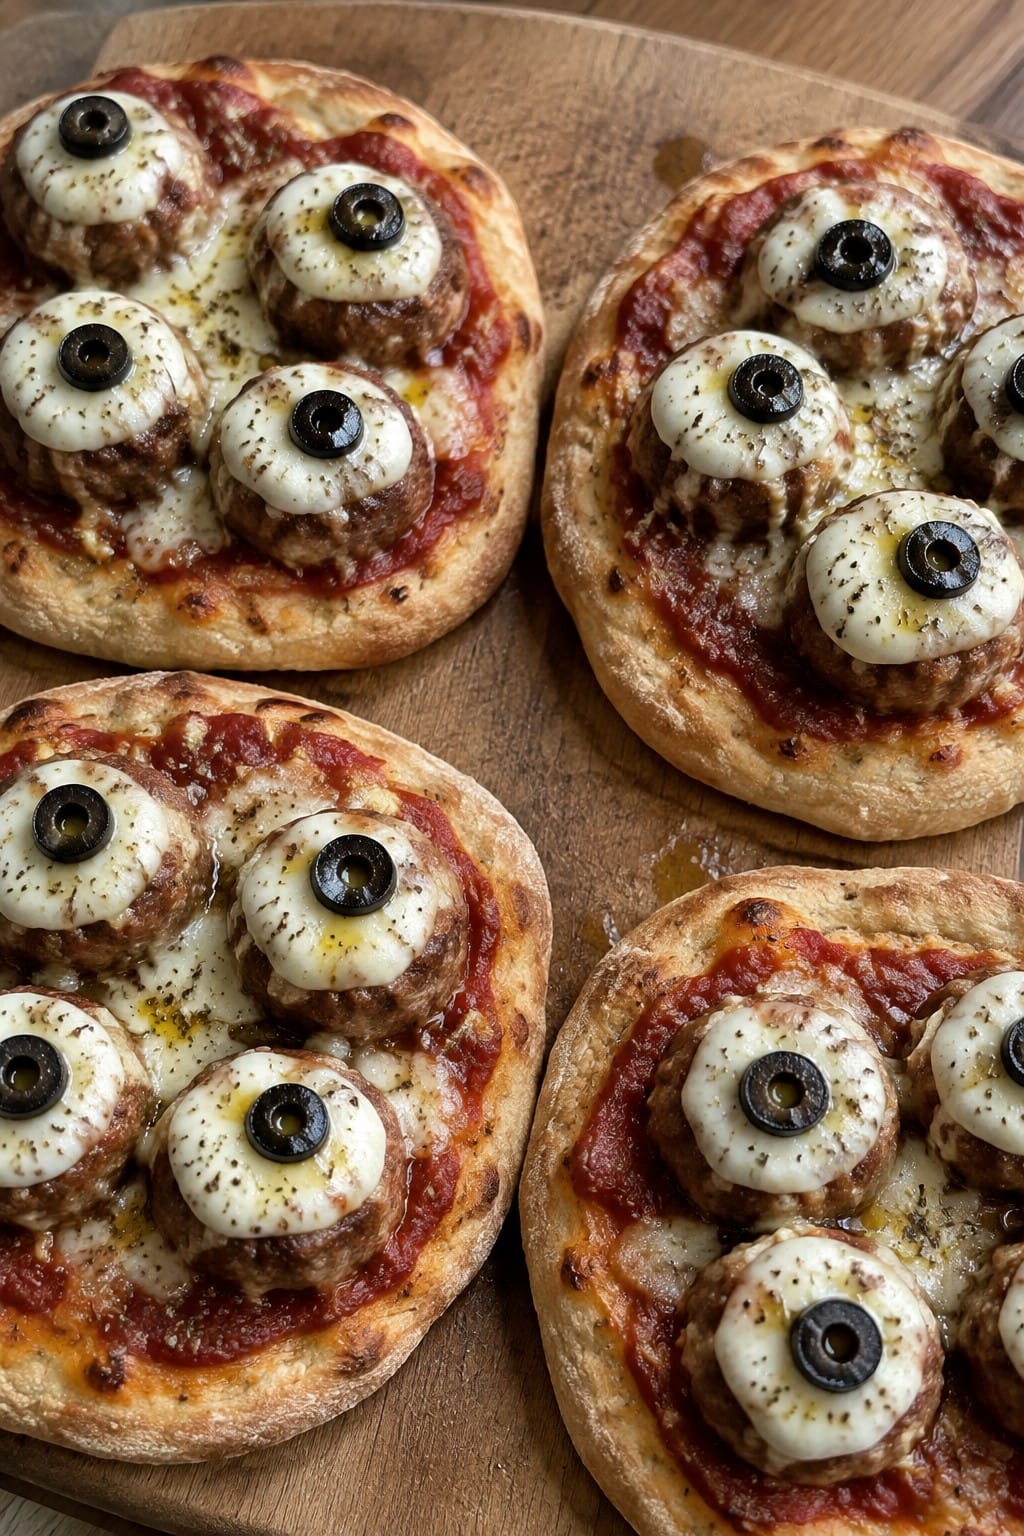
Eyeball Meatball and Mozzarella Pizzas
These pizzas turn classic meatballs and cheese into a fun Halloween detail that kids notice right away. Each meatball gets a round mozzarella topping and a small olive slice in the center to look like an eyeball. The result is a savory pizza with a crisp crust, saucy base, and bites of seasoned meat and melted cheese.
This version works well for a weeknight dinner or a small Halloween gathering. The ingredients stay simple, and the eyeballs come together quickly once the dough is ready.
Serves 4 people.
Ingredients
- 1 pound pizza dough, divided into 4 portions
- 1 cup marinara sauce
- 12 cooked 1-inch meatballs
- 8 ounces fresh mozzarella, cut into 12 slices
- 12 thin black olive slices
- 1 tablespoon olive oil
- 1 teaspoon dried oregano
Instructions
- Heat the oven to 475°F and line two baking sheets with parchment paper.
- Roll or stretch each dough portion into a small round and place on the prepared sheets.
- Spread ¼ cup marinara sauce over each round, leaving a small border.
- Arrange three meatballs on each pizza.
- Top each meatball with one mozzarella slice and one olive slice to create the eyeball look.
- Brush the crust edges with olive oil and sprinkle the oregano over the pizzas.
- Bake for 10 to 12 minutes until the crust is golden and the cheese has melted.
- Remove from the oven and let the pizzas rest for two minutes before slicing.
Extra Tips
Use pre-cooked meatballs from the freezer to keep the steps short. If the mozzarella slides during baking, press it gently onto the meatball before it goes into the oven. Leftovers reheat best on a skillet over medium heat to keep the crust crisp.Course: Main Course Cuisine: American Equipment: Baking sheets, Rolling pin, Oven
Sweet Candy Sprinkle Dessert Pizzas
These mini dessert pizzas give kids a fun way to enjoy something sweet after carving pumpkins or coming home from trick-or-treating. They turn a basic crust into a colorful treat with a creamy layer and plenty of sprinkles on top. The result is a crisp base with a soft, sweet topping and a bit of crunch from the candy.
This version works well for Halloween parties because it is quick to put together and easy for little hands to help decorate.
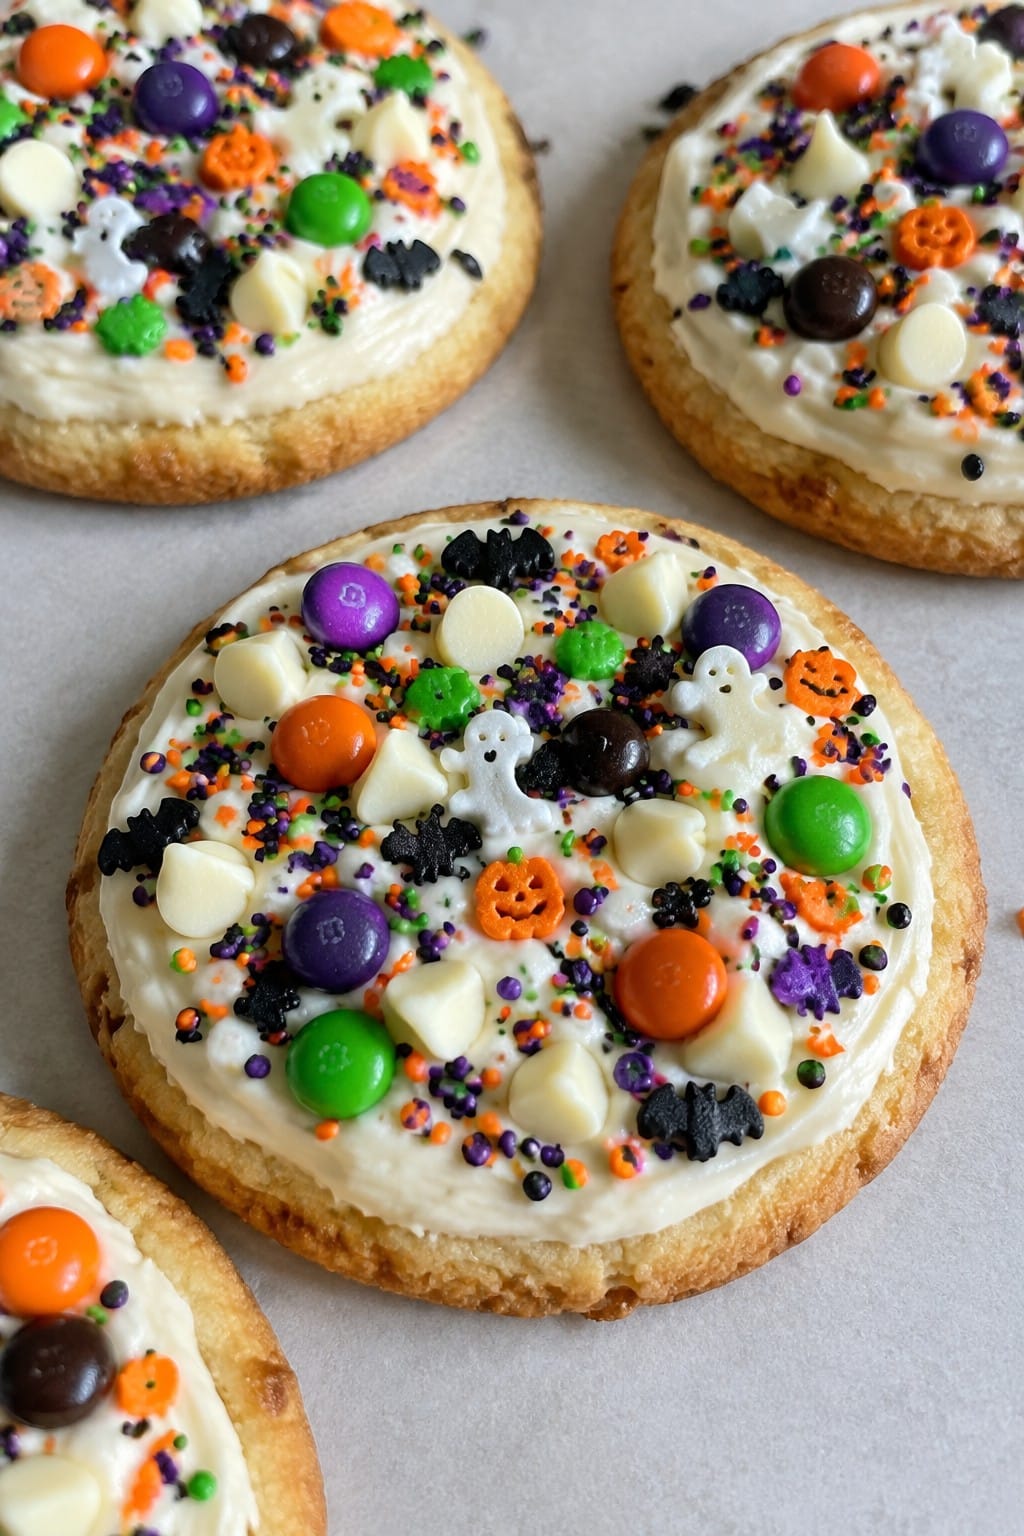
Serves 4 people.
Ingredients
- 1 pound store-bought pizza dough
- 1 cup vanilla frosting
- 1/2 cup white chocolate chips
- 1/2 cup Halloween-themed candy sprinkles
- 1/4 cup mini chocolate candies
Instructions
- Preheat the oven to 400 degrees and line a baking sheet with parchment paper.
- Divide the pizza dough into four equal pieces and roll each one into a small round or oval shape.
- Place the dough rounds on the prepared baking sheet and bake for 10 to 12 minutes until the edges turn golden.
- While the crusts cool slightly, melt the white chocolate chips in a microwave-safe bowl in 20-second bursts, stirring between each burst.
- Spread a layer of vanilla frosting over each warm crust, then drizzle the melted white chocolate on top.
- Scatter the Halloween sprinkles and mini chocolate candies evenly over the frosting while it is still soft.
Extra Tips
Let the crusts cool for a few minutes before adding the frosting so it does not melt too much. If the white chocolate firms up while you work, warm it again briefly. These pizzas taste best the same day, but you can store any leftovers in an airtight container at room temperature for one day and refresh them in a low oven for a few minutes.Course: Dessert Cuisine: American Equipment: Baking sheet, Parchment paper, Microwave-safe bowl
Bloody Handprint Tomato and Cheese Pizzas
These pizzas turn a simple tomato and cheese base into a fun Halloween activity. Kids enjoy pressing or spooning the sauce into handprint shapes on top of the melted cheese, creating a spooky red design that still tastes like classic pizza. They work well for small gatherings or an easy weeknight meal before trick-or-treating.
The finished pies have a crisp crust, gooey cheese, and bright tomato flavor with a light garlic seasoning.

Serves 4 people.
Ingredients
- 1 pound pizza dough, divided into 4 portions
- 1 cup tomato sauce
- 2 cups shredded mozzarella cheese
- 1 tablespoon olive oil
- 1/2 teaspoon garlic powder
- 1/4 teaspoon salt
Instructions
- Preheat the oven to 450 degrees F and line a baking sheet with parchment paper.
- Roll or stretch each dough portion into a 6-inch circle and place on the prepared sheet.
- Brush the dough lightly with olive oil, then sprinkle evenly with garlic powder and salt.
- Bake the crusts for 5 minutes.
- Remove the sheet from the oven and spread 1/2 cup mozzarella over each crust.
- Return to the oven and bake for 6 to 8 minutes until the cheese is melted and bubbly.
- Spoon the tomato sauce onto each pizza in a handprint shape, using a spoon or clean fingers to form the palm and fingers on top of the cheese.
- Let the pizzas cool for 2 minutes before serving.
Extra Tips
Press the sauce gently so it stays on the surface rather than soaking into the cheese. If the sauce is too thin, let it drain in a fine mesh strainer for a few minutes first. These pizzas are best eaten right away while the crust stays crisp.Course: Appetizer Cuisine: American Equipment: Baking sheet, Rolling pin, Parchment paper
