
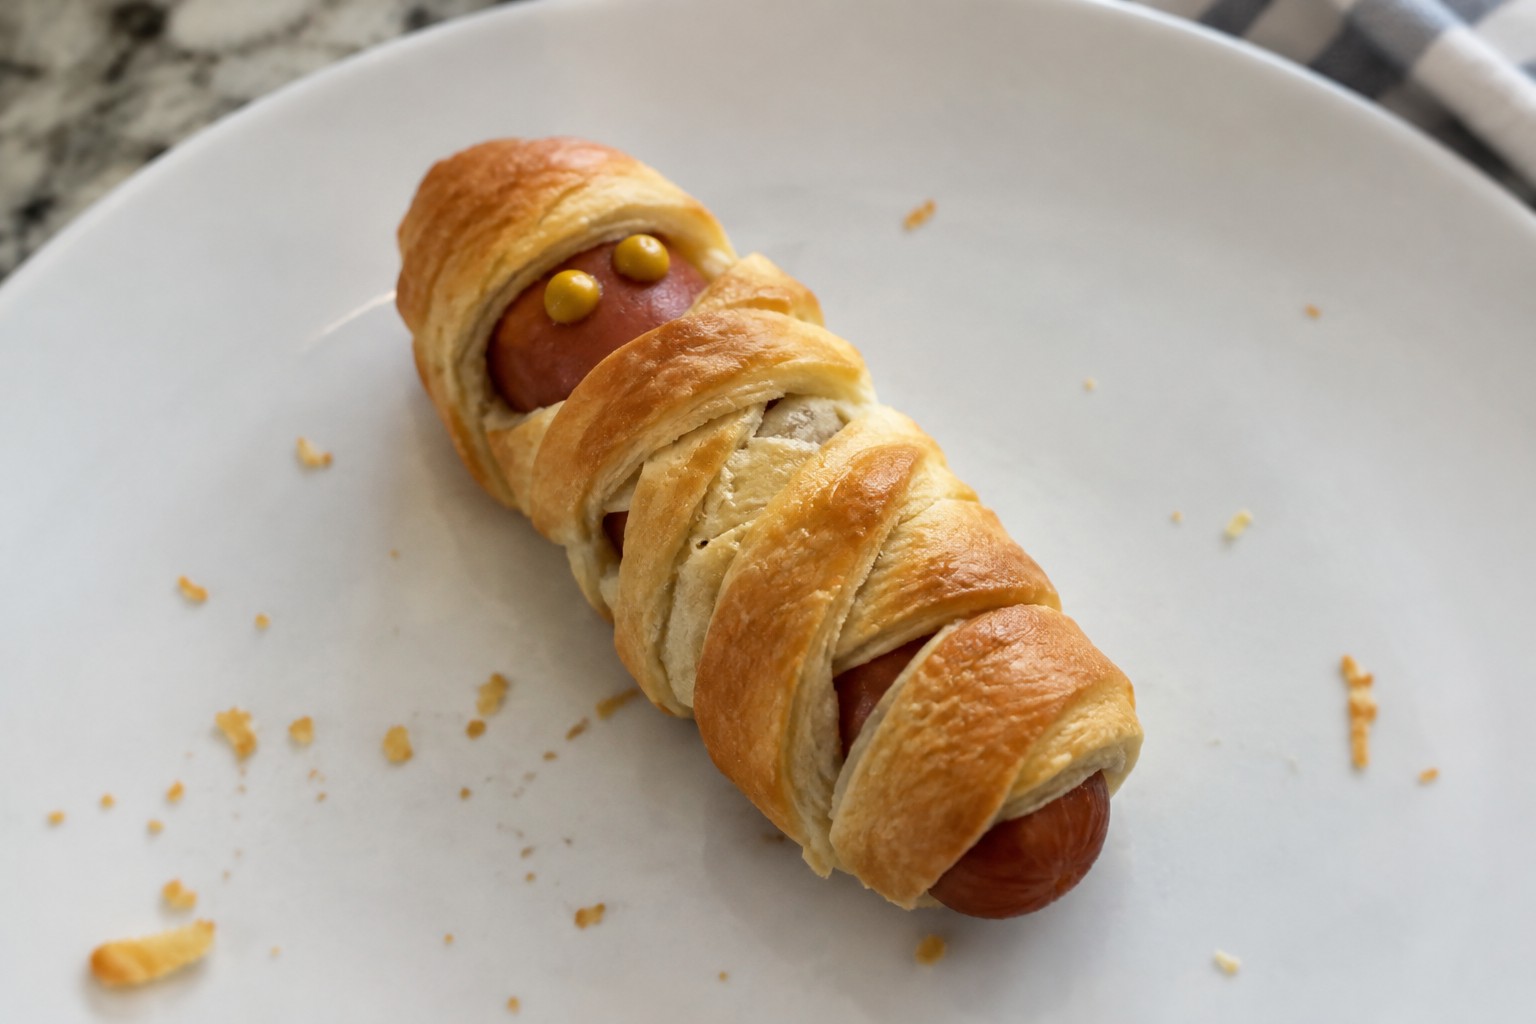
Halloween parties need appetizers that are simple to put together. These 12 ideas use ingredients you can find at most stores. Each recipe works with different themes like spooky or fun and colorful. They are quick to prep so you can focus on other party details. You will see options that suit both kids and adult guests.
Helpful Tips Before You Start
A bit of planning keeps these appetizers simple to make and easy to serve.
Prep as Much as Possible Ahead
Mix dips, slice vegetables, and shape any dough the day before. Store them covered in the fridge so assembly takes just minutes on party day.
Use Simple Shapes for Decoration
Cut cheese or bread with cookie cutters to create bats, pumpkins, or ghosts. This adds a Halloween touch without extra time or special skills.
Stick to Bite Sized Portions
Make everything small enough to eat in one or two bites. Guests move around more at parties and prefer food they can grab quickly.
Check for Common Allergens
Note which appetizers include nuts, dairy, or gluten on a small card nearby. This helps guests choose safely without extra questions.
Spooky Spider Deviled Eggs
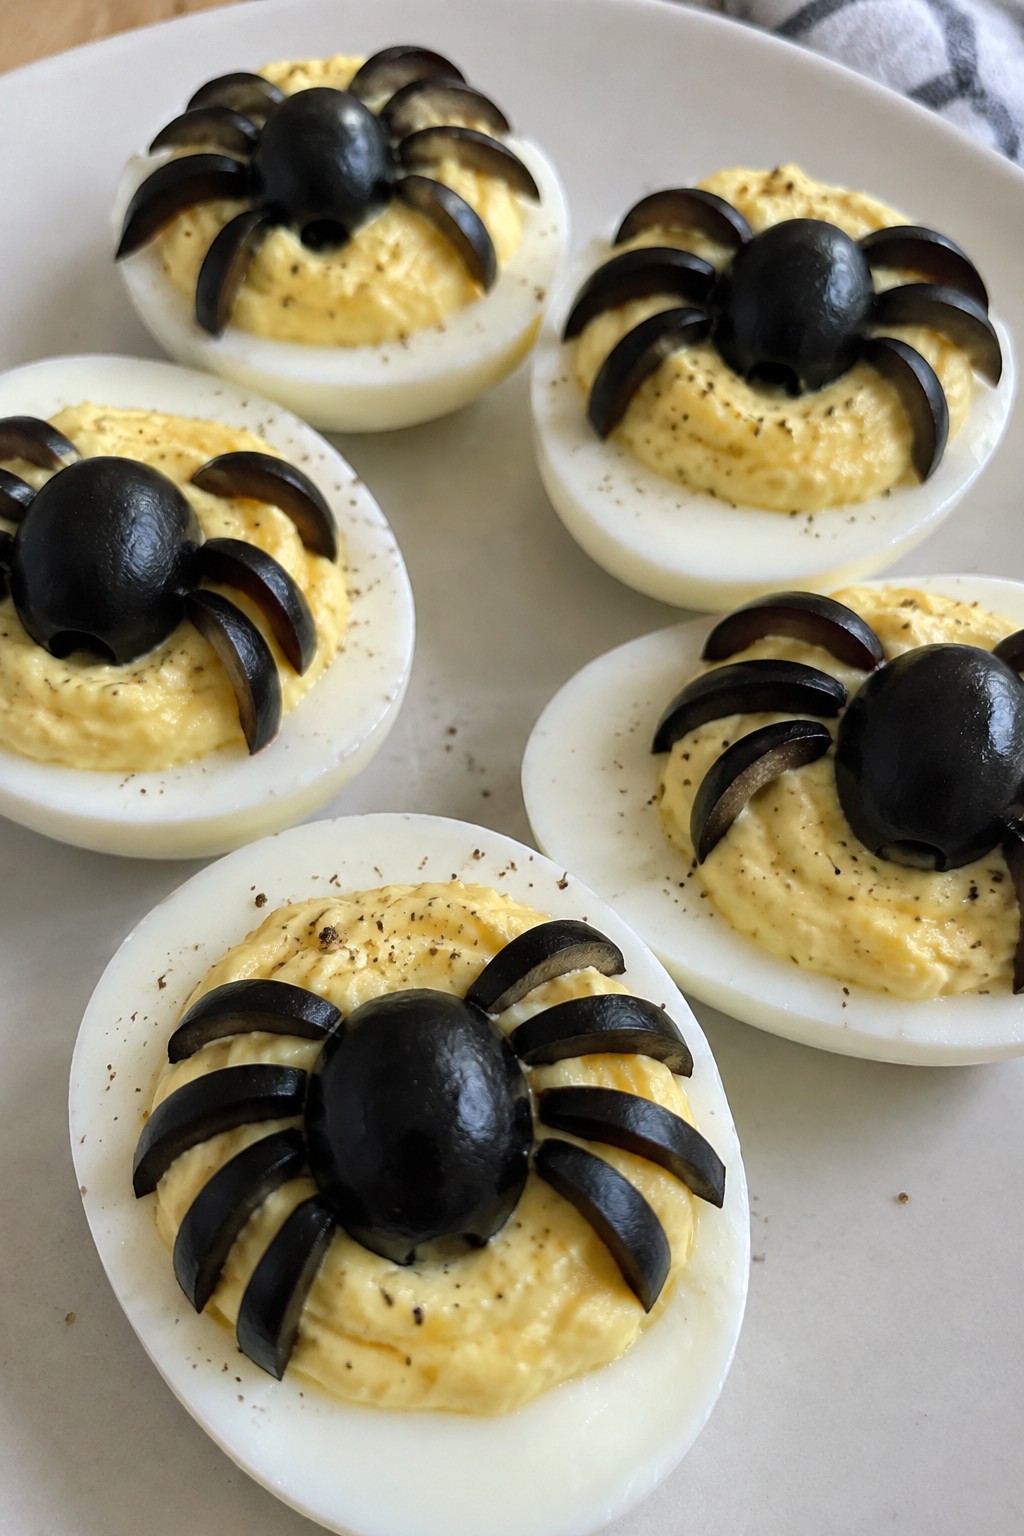
These deviled eggs get a fun Halloween twist with olive spiders on top. They work well for parties because they come together with basic ingredients and look striking on a platter without much extra effort.
The flavor stays classic with creamy yolk filling and a touch of mustard. The olives add a salty bite that pairs nicely with the eggs.
Serves 4 people.
Ingredients
- 6 large eggs
- 3 tablespoons mayonnaise
- 1 teaspoon Dijon mustard
- 1/4 teaspoon salt
- 1/4 teaspoon black pepper
- 12 pitted black olives
Instructions
- Place the eggs in a pot and cover with water. Bring to a boil over medium heat, then remove from heat and let sit covered for 12 minutes.
- Drain the eggs and run them under cold water until cool enough to handle. Peel off the shells.
- Slice each egg in half lengthwise. Scoop the yolks into a mixing bowl.
- Add the mayonnaise, Dijon mustard, salt, and black pepper to the yolks. Mash until smooth.
- Spoon the yolk mixture back into the egg white halves.
- Cut 6 olives in half lengthwise for the spider bodies. Slice the remaining olives into thin strips for the legs. Place one olive half in the center of each filled egg and arrange 8 strips around it to form legs.
Extra Tips
Make the eggs up to a day ahead and store them covered in the fridge, then add the olive spiders right before serving so they stay neat. Use a small spoon or piping bag for the filling if you want cleaner edges. If the yolk mixture seems too thick, stir in a tiny bit more mayonnaise to loosen it.Course: Appetizer Cuisine: American Equipment: Large Pot, Mixing Bowl, Sharp Knife
Mummy Wrapped Sausage Bites
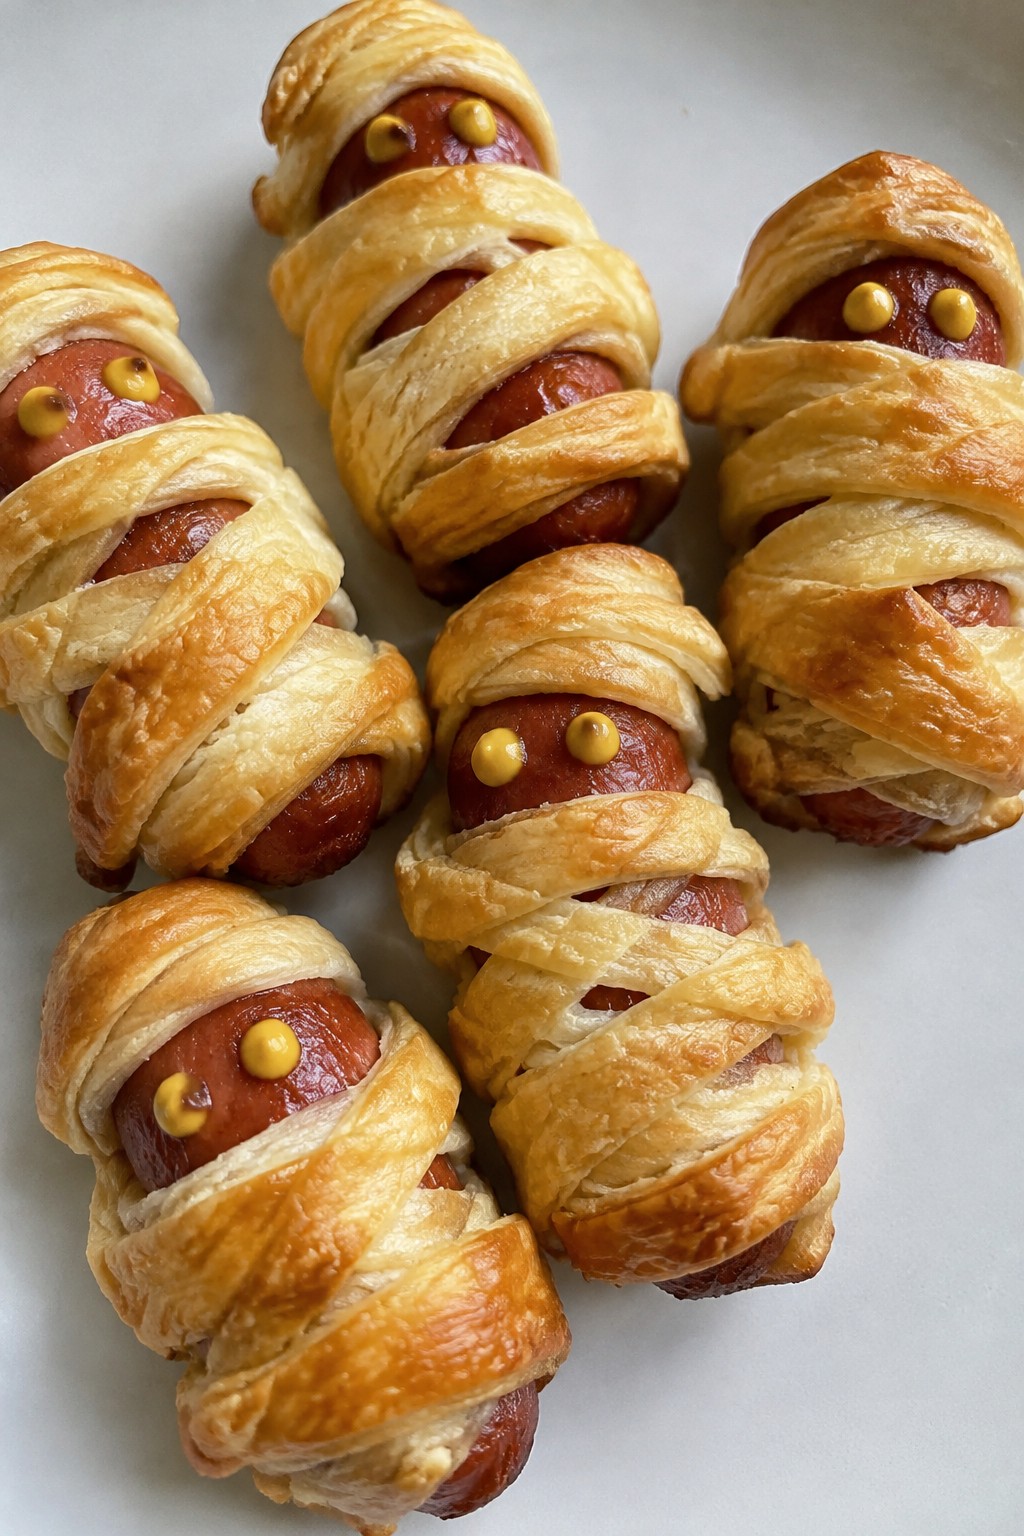
These sausage bites bring a playful Halloween touch to any party spread. The flaky dough wraps around savory sausages to create a fun mummy look that guests of all ages enjoy. They work well for casual get-togethers or themed nights when you need something simple yet eye-catching.
The texture combines crisp pastry with juicy sausage inside. A touch of mustard adds a mild tang that balances the richness. Serve them warm so the wraps stay light and the filling stays moist.
Serves 4 people.
Ingredients
- 12 cocktail sausages
- 1 package crescent roll dough
- 2 tablespoons yellow mustard
Instructions
- Preheat the oven to 375 degrees and line a baking sheet with parchment paper.
- Unroll the crescent roll dough on a clean surface and cut it into thin strips about half an inch wide.
- Wrap each strip around a cocktail sausage in a loose crisscross pattern, leaving small gaps near one end for the face.
- Place the wrapped sausages on the baking sheet with space between them.
- Bake for 12 to 15 minutes until the dough turns golden brown.
- Remove from the oven and let them cool for two minutes. Use a small spoon or toothpick to dot yellow mustard in the gaps to form eyes.
Extra Tips
Wrap the dough loosely so it puffs and creates visible bandage layers after baking. If you prepare the bites ahead, cover the tray and refrigerate them up to four hours before baking. Leftovers reheat best in a 350-degree oven for five minutes to restore crispness.Course: Appetizer Cuisine: American Equipment: Baking sheet, Oven, Knife
Pumpkin Shaped Spinach Artichoke Dip with Tortilla Chips
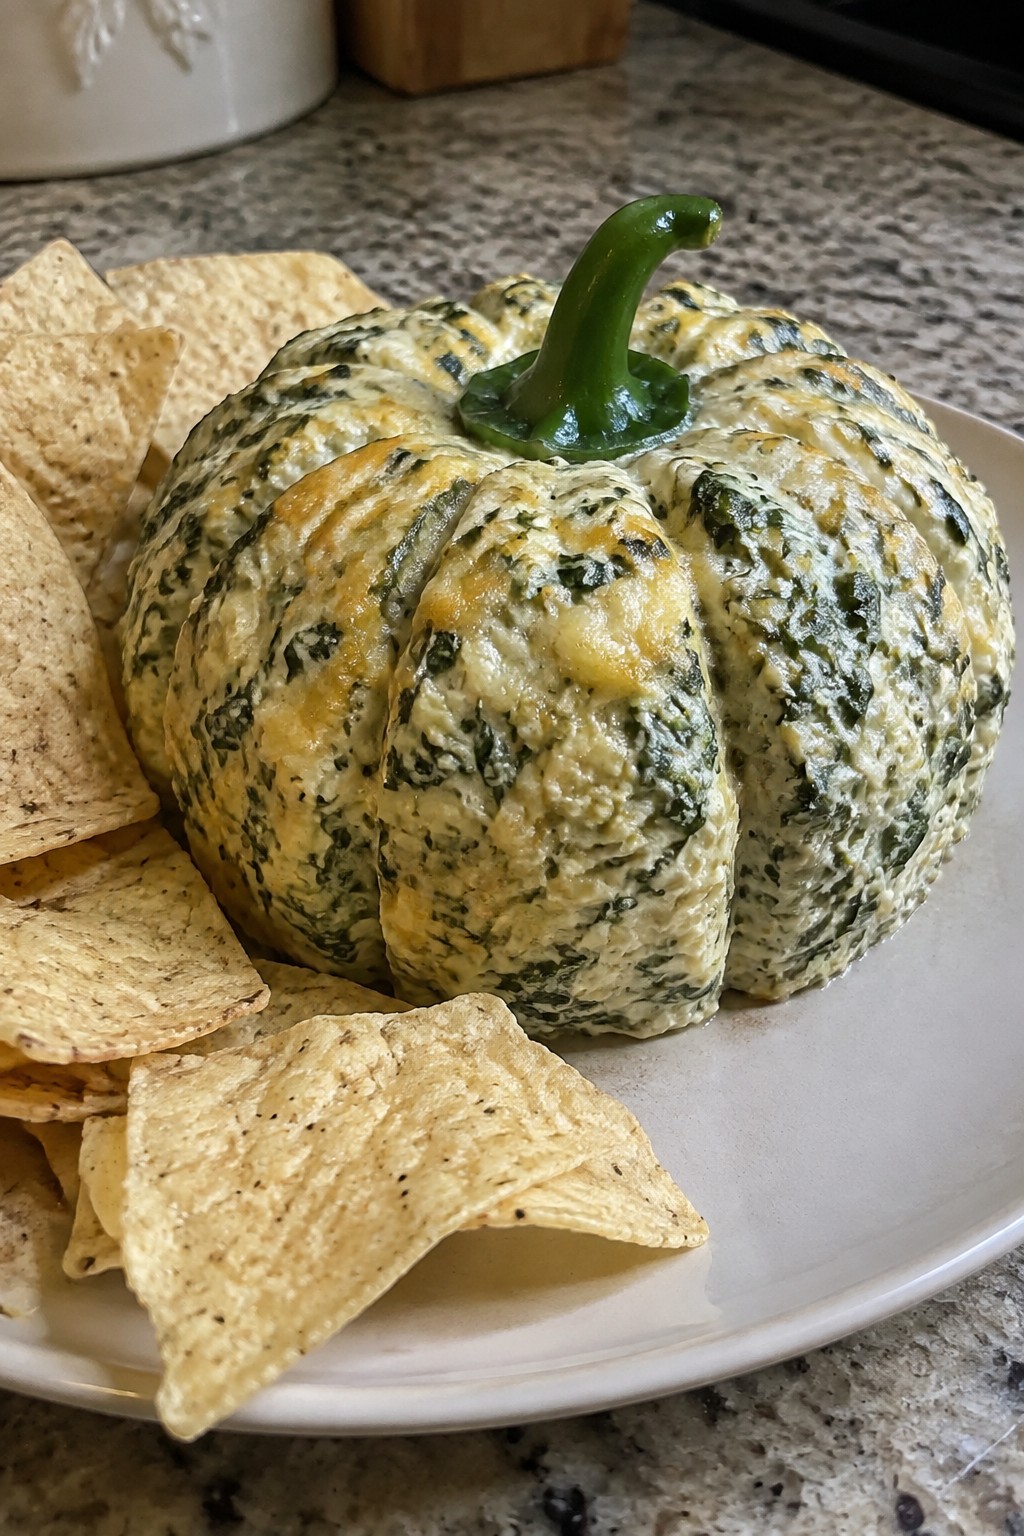
This spinach artichoke dip gets shaped into a pumpkin for a simple Halloween touch. It works well at parties where guests want something warm and creamy to scoop while they mingle. The dip has a rich, cheesy base with tender spinach and artichokes, and the tortilla chips add a steady crunch.
Serves 4 people.
Ingredients
- 8 ounces cream cheese, softened
- 10 ounces frozen spinach, thawed and squeezed dry
- 1 cup canned artichoke hearts, drained and chopped
- 1/2 cup mayonnaise
- 1/2 cup grated Parmesan cheese
- 1 cup shredded mozzarella cheese
- 2 garlic cloves, minced
- 1/2 teaspoon salt
- 1/4 teaspoon black pepper
- 1 small green bell pepper
- 4 cups tortilla chips
Instructions
- Preheat the oven to 375 degrees and line a small baking sheet with parchment paper.
- In a mixing bowl, combine the cream cheese, spinach, artichoke hearts, mayonnaise, Parmesan, mozzarella, garlic, salt, and pepper. Stir until the mixture is evenly blended.
- Scoop the mixture onto the prepared baking sheet and use your hands or a spatula to shape it into a rounded pumpkin form.
- Cut the top off the green bell pepper and trim a short stem piece. Press the stem gently into the top of the shaped dip.
- Bake for 20 minutes until the dip is hot and the cheese on top has melted and started to brown.
- Remove from the oven and let it sit for 5 minutes. Serve warm with the tortilla chips on the side.
Extra Tips
Shape the dip while the mixture is still cool so it holds its form better during baking. If you want a bit more color on the surface, lightly press a few extra mozzarella shreds on top before it goes into the oven. Leftovers can be covered and stored in the fridge for up to two days, then reheated in a 350 degree oven until warmed through.Course: Appetizer Cuisine: American Equipment: Mixing Bowl, Baking Sheet, Oven
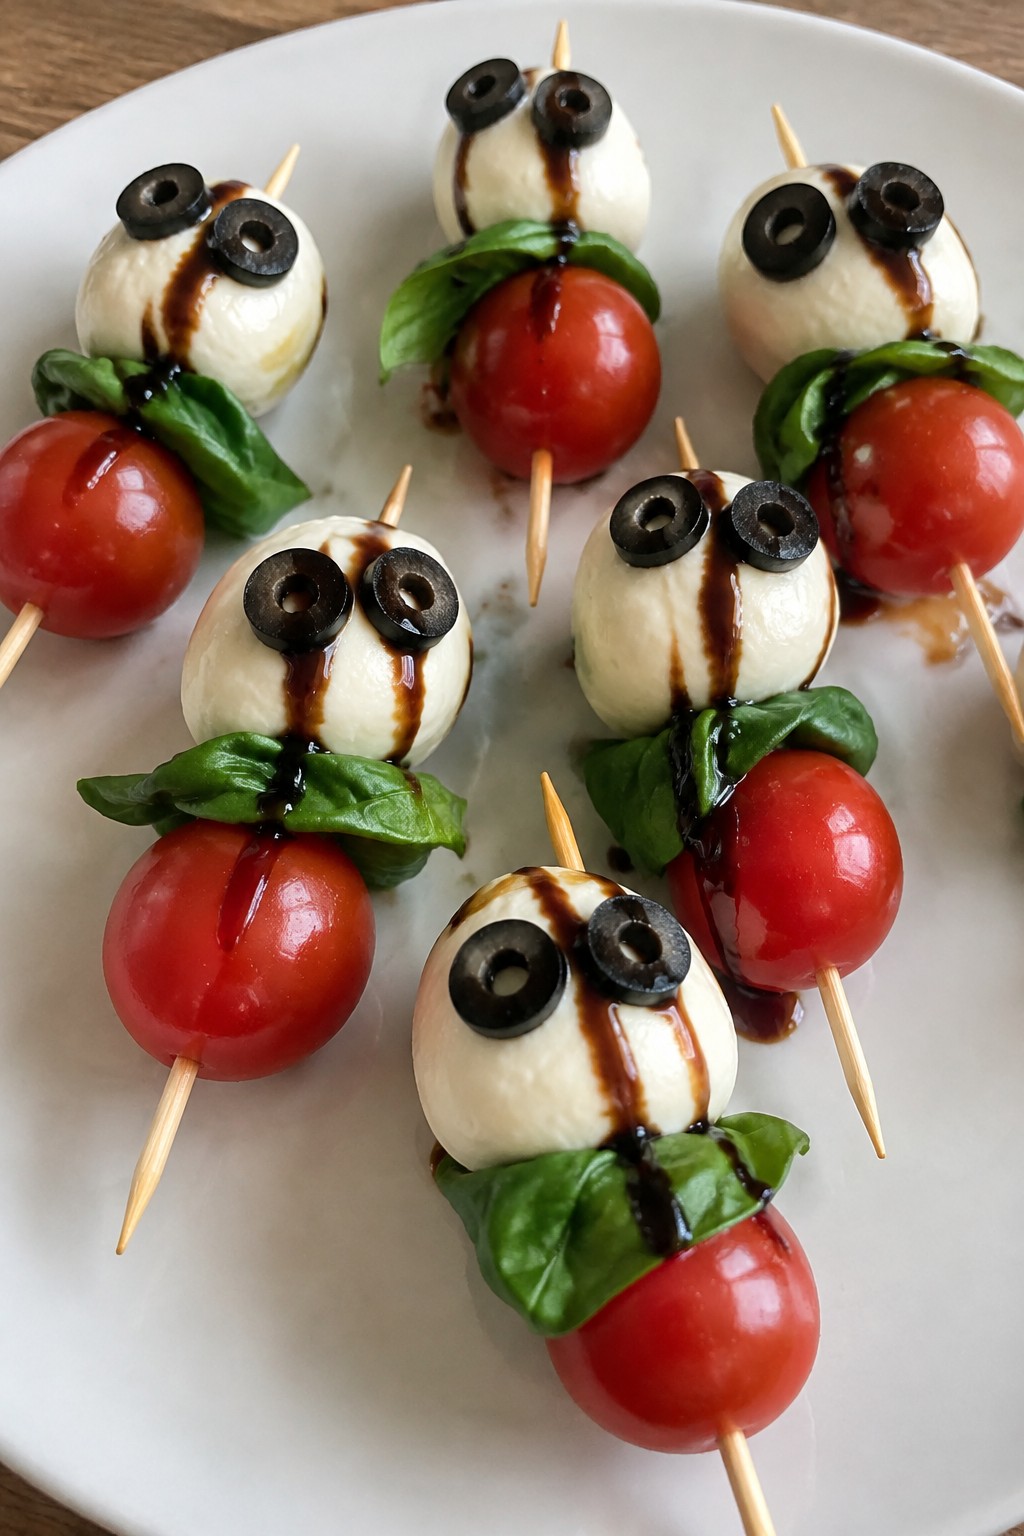
Ghostly Caprese Skewers with Balsamic Drizzle
These ghostly Caprese skewers bring a light and fresh option to a Halloween spread. They come together fast and work well for parties where you need something simple yet themed.
The juicy tomatoes and creamy mozzarella balance the sharp balsamic drizzle, while the basil adds a bright note. Olive eyes turn each mozzarella ball into a small ghost that fits the season without extra work.
Serves 4 people.
Ingredients
- 12 wooden skewers
- 12 cherry tomatoes
- 12 small mozzarella balls
- 12 fresh basil leaves
- 1/4 cup balsamic glaze
- 6 black olives, sliced into rounds
Instructions
- Lay out the mozzarella balls on a clean surface. Press two olive slices onto each ball to form eyes.
- Thread one cherry tomato onto each skewer, followed by one basil leaf and one prepared mozzarella ball.
- Arrange the finished skewers on a serving plate.
- Drizzle the balsamic glaze evenly over the skewers just before serving.
Extra Tips
Make the ghosts right before assembly so the olive eyes stay in place. If the balsamic glaze is too thick, warm it slightly for easier drizzling. These skewers taste best fresh, so prepare them no more than two hours ahead and keep them covered in the fridge until guests arrive.Course: Appetizer Cuisine: Italian Equipment: Wooden skewers, Knife, Serving plate
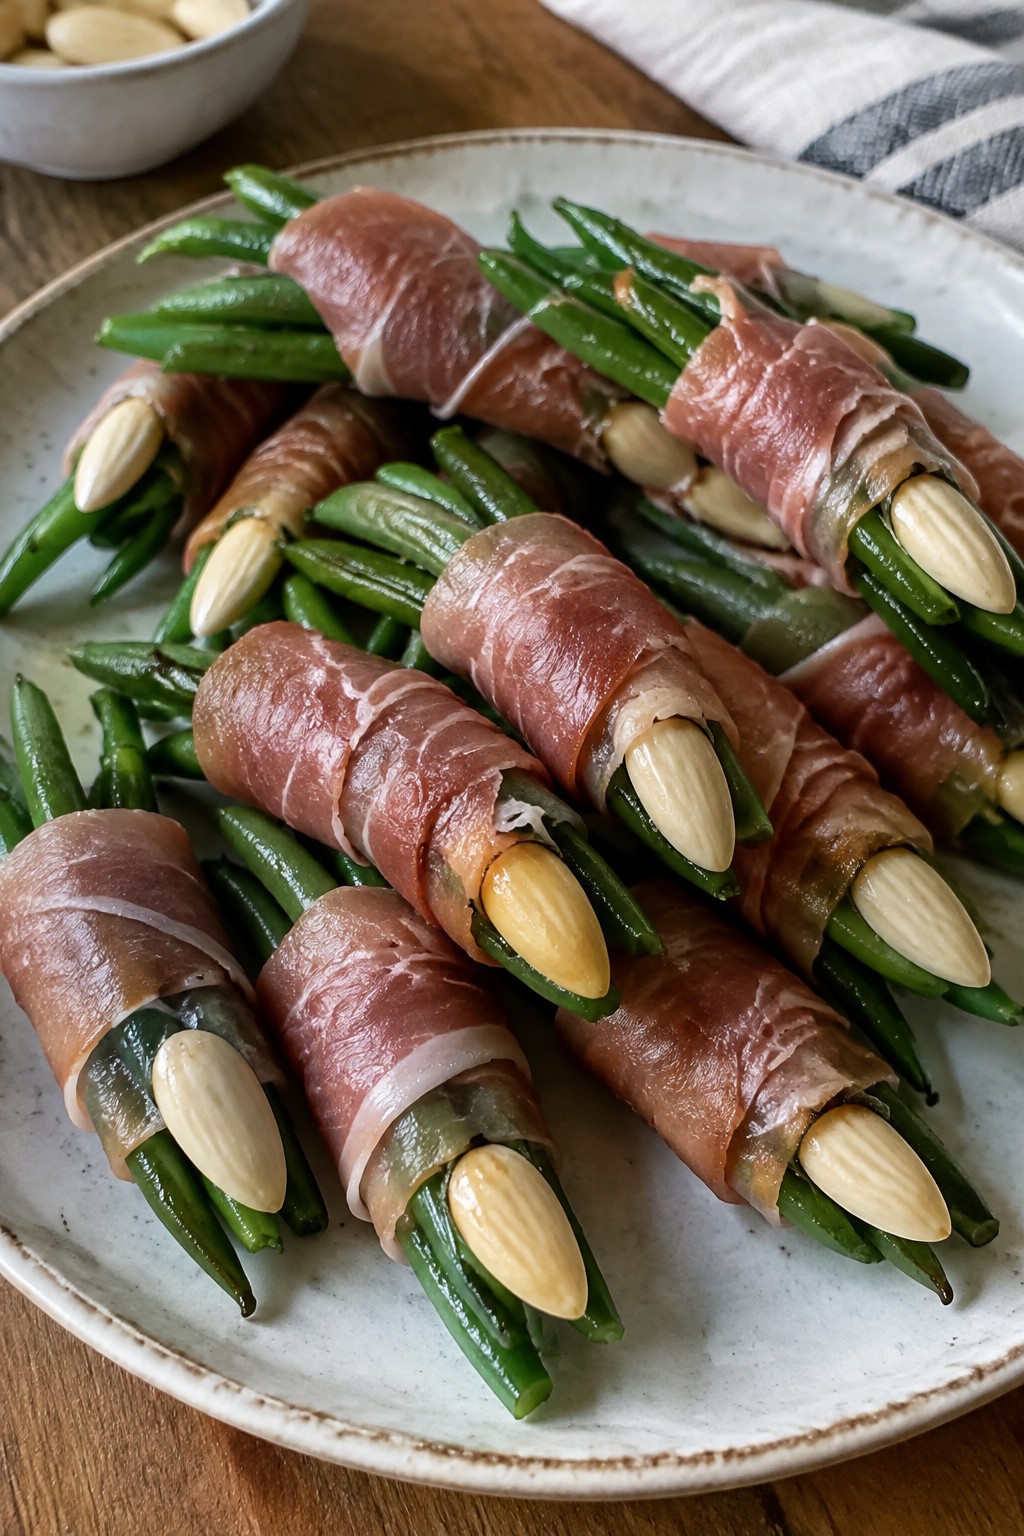
Witch Finger Green Bean Bundles
These bundles turn simple green beans into a fun finger shape that fits right into a Halloween spread. They work well for parties because they come together with little effort and can sit at room temperature for a bit before serving. The prosciutto adds a salty bite while the green beans stay crisp-tender underneath.
Serves 4 people.
Ingredients
- 1 pound fresh green beans, trimmed
- 4 thin slices prosciutto
- 8 blanched almonds
- 1 tablespoon olive oil
- 1/2 teaspoon salt
- 1/4 teaspoon black pepper
Instructions
- Preheat the oven to 400 degrees and line a baking sheet with parchment paper.
- Bring a large pot of water to a boil. Add the green beans and cook for 3 minutes, then drain and rinse under cold water to stop the cooking.
- Divide the green beans into four equal groups. Wrap each group with one slice of prosciutto to form a bundle.
- Place the bundles on the prepared baking sheet. Tuck one almond at the tip of each bundle to look like a fingernail.
- Brush the bundles lightly with olive oil and sprinkle with salt and black pepper.
- Bake for 12 to 15 minutes until the prosciutto is crisp at the edges.
Extra Tips
Press the almonds firmly into the ends of the bundles right after wrapping so they stay in place during baking. If you want a smokier flavor, swap the prosciutto for thin bacon slices. Leftovers keep in the fridge for one day and reheat best on a baking sheet at 350 degrees for a few minutes to restore crispness.Course: Appetizer Cuisine: American Equipment: Baking Sheet, Large Pot, Pastry Brush
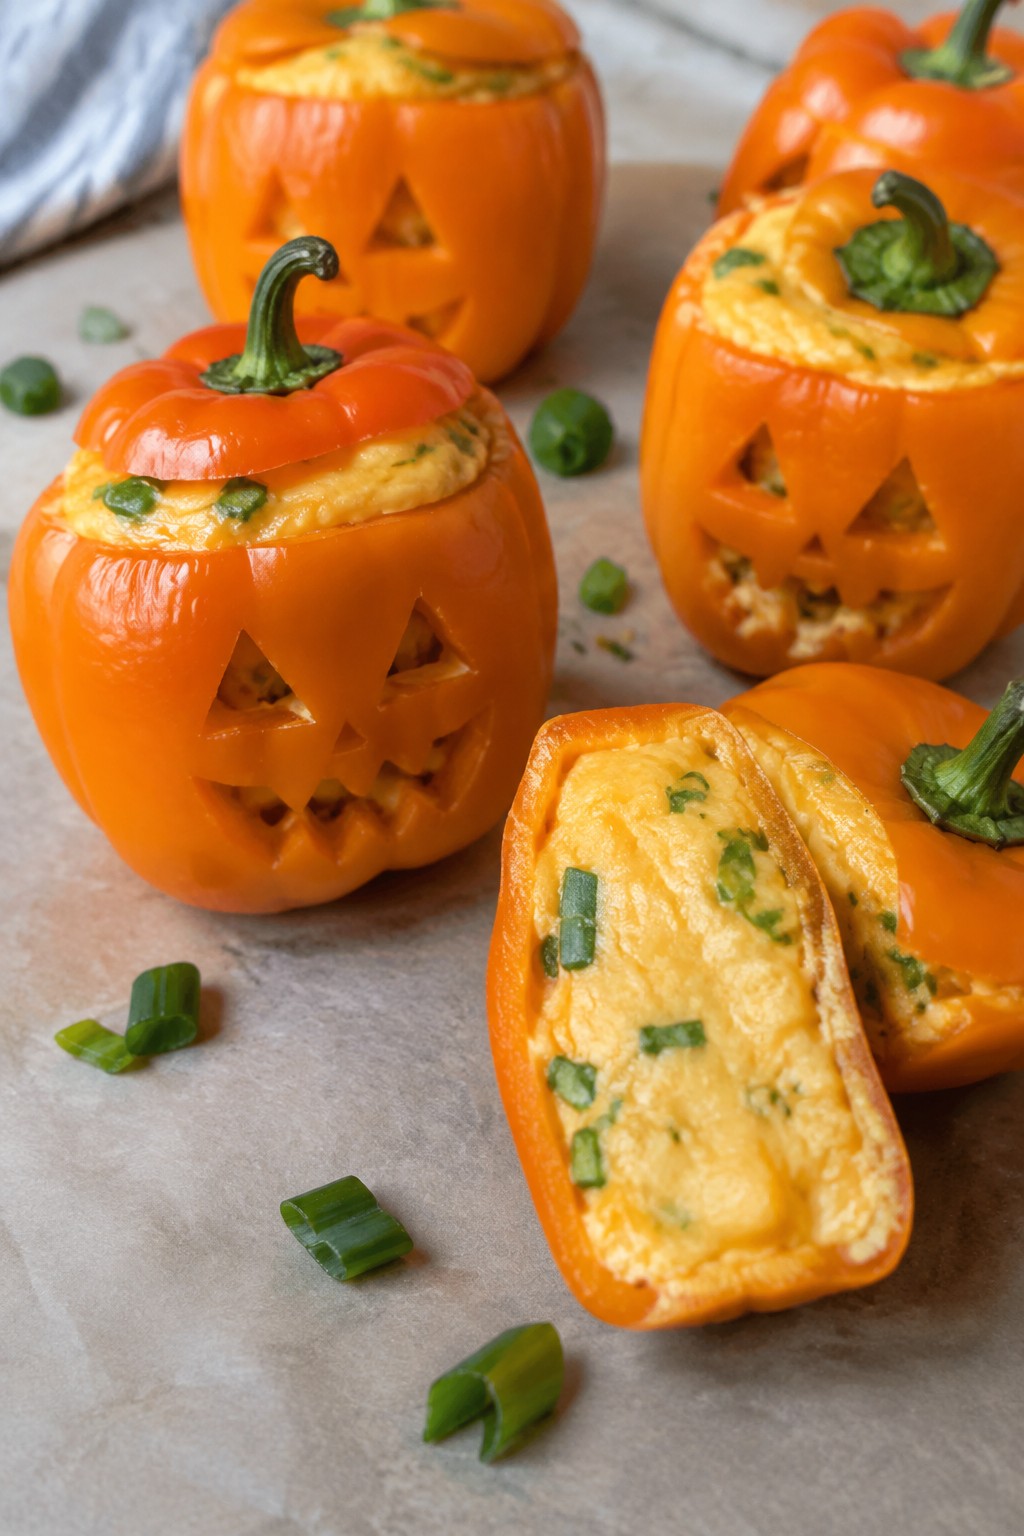
Jack-O’-Lantern Stuffed Mini Bell Peppers
These mini peppers turn into jack-o’-lanterns with simple carved faces and a creamy filling inside. They add a playful touch to any Halloween table without much effort. The crisp pepper shells hold a smooth, cheesy mixture that balances mild spice with a bit of tang.
Serves 4 people.
Ingredients
- 12 mini orange bell peppers
- 8 ounces cream cheese, softened
- 1 cup shredded cheddar cheese
- 2 tablespoons mayonnaise
- 1 teaspoon garlic powder
- 1/2 teaspoon salt
- 1/4 teaspoon black pepper
- 2 green onions, finely chopped
Instructions
- Rinse the mini bell peppers and pat them dry. Slice off the tops and remove the seeds and membranes with a small spoon.
- Use a sharp paring knife to carve simple jack-o’-lantern faces into one side of each pepper. Set the carved peppers aside.
- Place the softened cream cheese in a mixing bowl. Add the shredded cheddar cheese, mayonnaise, garlic powder, salt, and black pepper. Stir until the mixture is smooth and evenly combined.
- Fold the chopped green onions into the cheese mixture until they are distributed throughout.
- Spoon the filling into each carved pepper, pressing gently so the mixture fills the cavity without spilling out the faces. Replace the tops if desired for presentation.
Extra Tips
Chill the stuffed peppers for 30 minutes before serving so the filling firms up and holds its shape. If you want a warmer version, place them on a baking sheet and warm in a 350°F oven for 8 minutes. Swap the cheddar for pepper jack if you prefer more heat, but keep the mayonnaise to maintain the creamy texture.Course: Appetizer Cuisine: American Equipment: Baking Sheet, Mixing Bowl, Sharp Knife
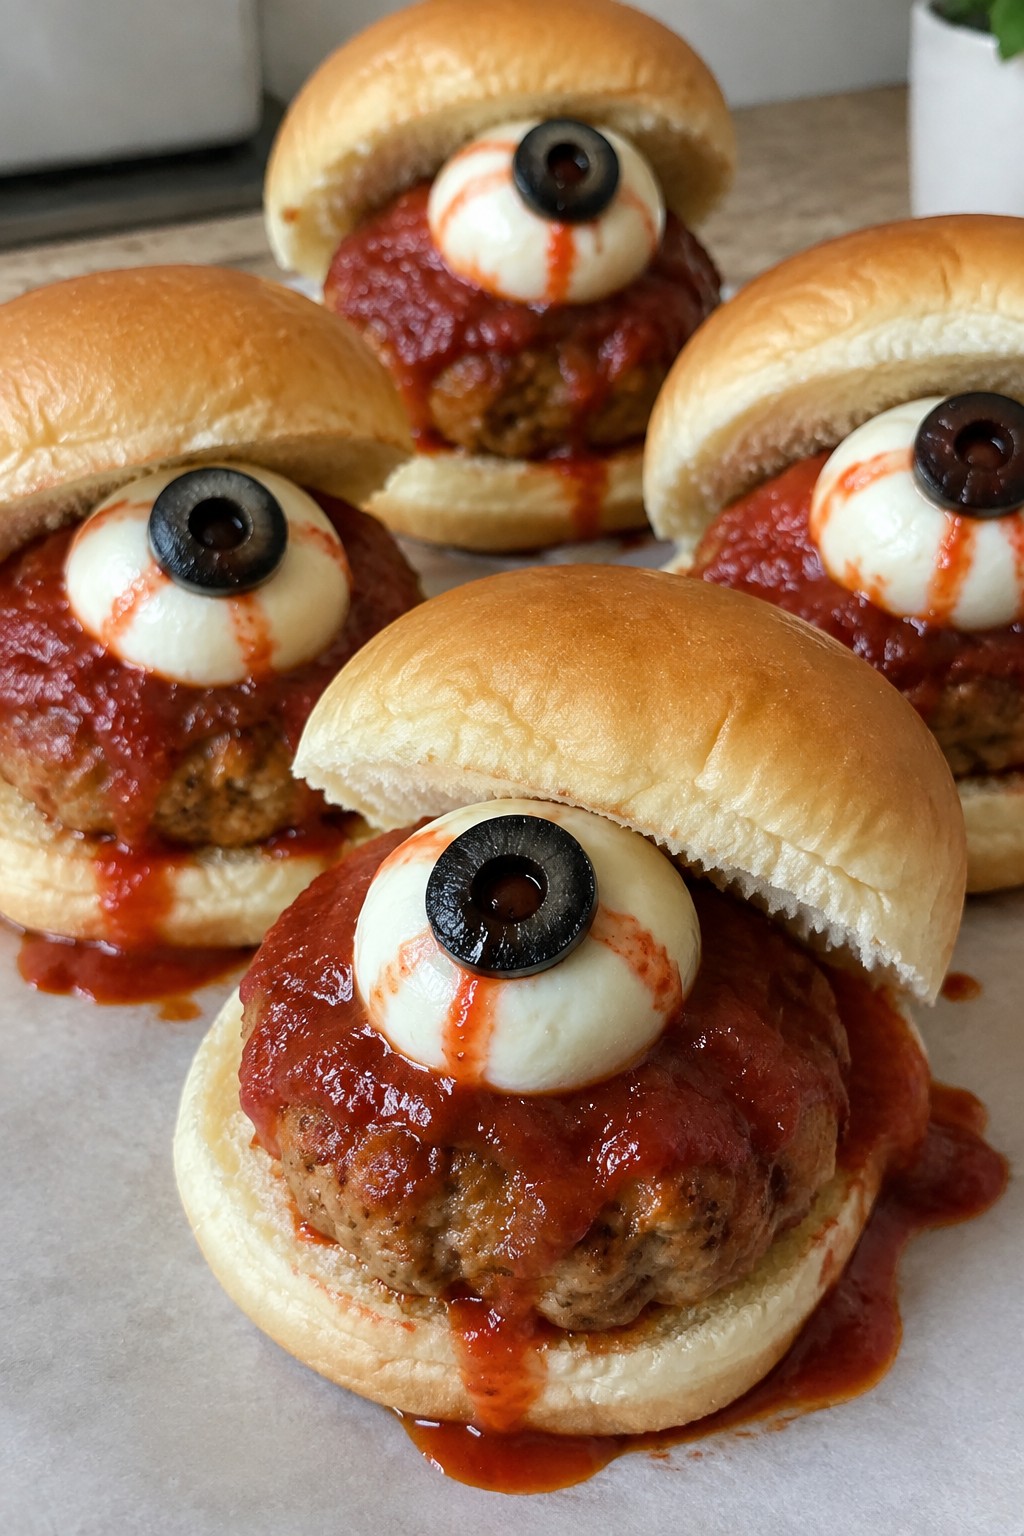
Bloody Eyeball Turkey Meatball Sliders
These sliders turn simple turkey meatballs into a fun Halloween snack with a spooky twist. The meatballs sit in soft buns and get topped with marinara that looks like blood, plus mozzarella and olive pieces that form eyeballs. They fit well at any party where you want something easy to eat by hand.
The flavor stays savory and mild, with juicy meatballs and tangy sauce that balance the soft bread. Kids and adults both reach for them, and they hold up well on a buffet table.
Serves 4 people.
Ingredients
- 1 lb ground turkey
- 1/2 cup plain breadcrumbs
- 1 large egg
- 1 tsp garlic powder
- 1 tsp dried Italian seasoning
- 1/2 tsp salt
- 1/4 tsp black pepper
- 8 small mozzarella balls
- 8 black olives
- 1 cup marinara sauce
- 8 slider buns
Instructions
- Preheat the oven to 400°F and line a baking sheet with parchment paper.
- In a mixing bowl, combine the ground turkey, breadcrumbs, egg, garlic powder, Italian seasoning, salt, and black pepper. Mix until just combined.
- Shape the mixture into 8 meatballs, each about 2 inches wide. Place them on the baking sheet.
- Bake the meatballs for 18 to 20 minutes until they reach an internal temperature of 165°F.
- While the meatballs cook, warm the marinara sauce in a small skillet over low heat.
- Slice each black olive into thin rounds to create the pupils.
- Place one mozzarella ball on top of each cooked meatball. Add one olive slice to the center of each mozzarella ball.
- Spoon a little warm marinara over each meatball so it drips down like blood.
- Set one meatball on each slider bun and serve right away.
Extra Tips
Warm the buns briefly in the oven before assembly so they stay soft but do not get soggy from the sauce. If you need to make the meatballs ahead, bake them earlier in the day and reheat in the sauce just before serving. Swap the marinara for a spicy version if you want more heat without changing anything else.Course: Appetizer Cuisine: American Equipment: Mixing Bowl, Baking Sheet, Skillet
Vampire Garlic Knots with Marinara
These Vampire Garlic Knots with Marinara offer a simple way to add a savory bite to a Halloween spread. The garlic ties into the party theme while the warm marinara gives a nice contrast in color and flavor. They work well as finger food at any casual gathering.
The knots bake up soft on the inside with a lightly crisp exterior. Garlic butter coats each piece for bold taste, and the marinara stays on the side for dipping.

Serves 4 people.
Ingredients
- 1 pound store-bought pizza dough
- 3 tablespoons unsalted butter
- 4 garlic cloves, minced
- 2 tablespoons chopped fresh parsley
- 1/4 cup grated Parmesan cheese
- 1 cup marinara sauce
- 1/2 teaspoon salt
Instructions
- Preheat the oven to 400 degrees and line a baking sheet with parchment paper.
- Divide the pizza dough into 8 equal pieces and roll each into a rope about 6 inches long. Tie each rope into a simple knot and place on the baking sheet.
- Bake the knots for 12 to 15 minutes until golden.
- While the knots bake, melt the butter in a small saucepan over low heat. Add the minced garlic and salt, then cook for 1 minute until fragrant.
- Remove the knots from the oven and brush them with the garlic butter. Sprinkle with the chopped parsley and Parmesan cheese.
- Warm the marinara sauce in the same saucepan and serve it alongside the knots for dipping.
Extra Tips
Shape the dough knots loosely so they have room to expand during baking. Leftovers reheat best in a 350-degree oven for five minutes to restore crisp edges. If the marinara is too thick, stir in a splash of water while warming. Swap the parsley for dried oregano if fresh herbs are not on hand.Course: Appetizer Cuisine: Italian Equipment: Baking sheet, Saucepan, Mixing bowl
Skeleton Crudité Platter with Roasted Red Pepper Hummus
This platter turns simple vegetables into a skeleton shape that fits right into a Halloween spread. The roasted red pepper hummus adds a smoky, slightly sweet flavor that balances the crisp vegetables. It works well for parties because it needs almost no cooking and still looks festive on the table.
The hummus stays creamy while the vegetables provide a fresh crunch. Arrange everything on one large platter so guests can dip as they mingle.

Serves 4 people.
Ingredients
- 1 can (15 oz) chickpeas, drained and rinsed
- 1 jarred roasted red pepper
- 2 tablespoons tahini
- 1 garlic clove
- 1 lemon, juiced
- 3 tablespoons olive oil
- 1/2 teaspoon salt
- 4 carrots, peeled and cut into sticks
- 3 celery stalks, cut into sticks
- 1 cucumber, sliced into rounds
- 1 red bell pepper, sliced
- 1 yellow bell pepper, sliced
- 4 black olives
Instructions
- Add the chickpeas, roasted red pepper, tahini, garlic clove, lemon juice, olive oil, and salt to a food processor. Blend until the mixture turns smooth and creamy.
- Spoon the hummus into a small bowl and place it at the top of a large platter to form the skeleton head.
- Lay celery sticks in a straight line down the center of the platter to create the spine.
- Arrange carrot sticks on either side of the celery to form the ribs.
- Place cucumber rounds and bell pepper slices around the edges to represent arms and legs.
- Set the black olives on the hummus to mark the eyes.
Extra Tips
Make the hummus a day ahead and store it in the fridge so the flavors have time to settle. Use the longest celery pieces for the spine so the skeleton shape stays clear on the platter. If the hummus feels too thick after blending, add a teaspoon of water at a time until it reaches a good dip consistency.Course: Appetizer Cuisine: Mediterranean Equipment: Food Processor, Cutting Board, Knife, Serving Platter
Black Cat Olive Tapenade Crostini
These Black Cat Olive Tapenade Crostini add a dark, savory option to a Halloween spread. The black olive base gives each piece a rich color that fits the theme while staying simple to prepare ahead of time.
The tapenade brings a briny, garlicky flavor that contrasts with the crisp bread. It works well as a finger food that holds up during a party without much fuss.

Serves 4 people.
Ingredients
- 1 baguette, sliced into 12 pieces
- 1 cup pitted black olives
- 2 tablespoons capers, drained
- 2 garlic cloves
- 3 tablespoons olive oil, divided
- 1 teaspoon lemon juice
- 1/4 teaspoon salt
- Sliced black olives for garnish
Instructions
- Preheat the oven to 375°F. Brush the baguette slices with 1 tablespoon of olive oil and place them on a baking sheet. Toast for 8 to 10 minutes until the edges turn golden.
- Add the black olives, capers, garlic cloves, remaining olive oil, lemon juice, and salt to a food processor. Pulse until the mixture forms a coarse paste.
- Spread the tapenade evenly over the toasted baguette slices.
- Top each crostini with sliced black olives arranged as simple cat shapes.
Extra Tips
Make the tapenade up to a day ahead and keep it in the fridge so the flavors meld. Taste before adding extra salt, since the olives and capers already provide plenty. Use a steady hand when arranging the olive slices so the cat shapes stay clear on top.Course: Appetizer Cuisine: Mediterranean Equipment: Food Processor, Baking Sheet
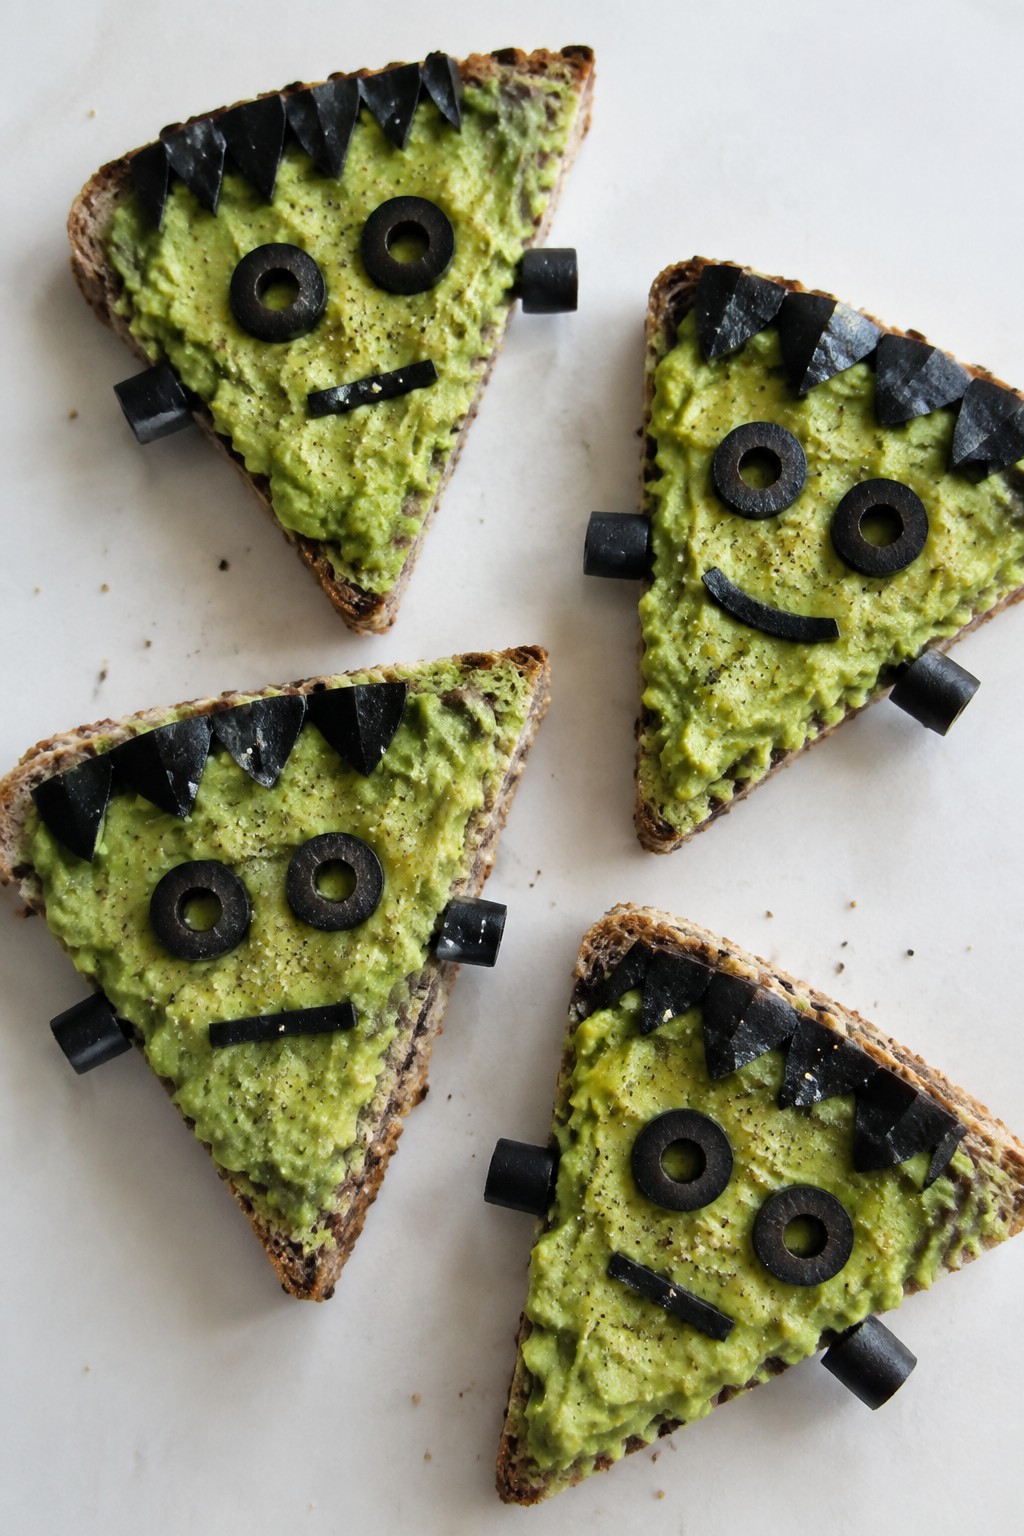
Frankenstein Avocado Toast Triangles
These avocado toast triangles bring a fun green base to any Halloween spread. They work well for parties because they come together quickly and look playful without much fuss. The creamy avocado pairs with crisp toast for a simple bite that feels fresh and light.
Serves 4 people.
Ingredients
- 4 slices whole grain bread
- 2 ripe avocados
- 1 tablespoon lemon juice
- 1/4 teaspoon salt
- 1/4 teaspoon black pepper
- 8 black olives
Instructions
- Toast the 4 slices of whole grain bread until golden and crisp.
- Cut each slice of toast into 2 triangles for a total of 8 pieces.
- Slice the 2 avocados in half, remove the pits, and scoop the flesh into a mixing bowl.
- Add the lemon juice, salt, and black pepper to the avocados. Mash with a fork until mostly smooth but still a bit chunky.
- Spread the mashed avocado evenly over each toast triangle.
- Slice the black olives and place pieces on the triangles to form simple faces with eyes and mouths.
Extra Tips
Use firm but ripe avocados so the mash holds its shape on the toast. Cut the olives into thin rounds or small strips right before adding them so the details stay neat. If making ahead, mash the avocado and cover the bowl tightly with plastic wrap pressed against the surface to slow browning.Course: Appetizer Cuisine: American Equipment: Toaster, Mixing bowl, Knife, Cutting board
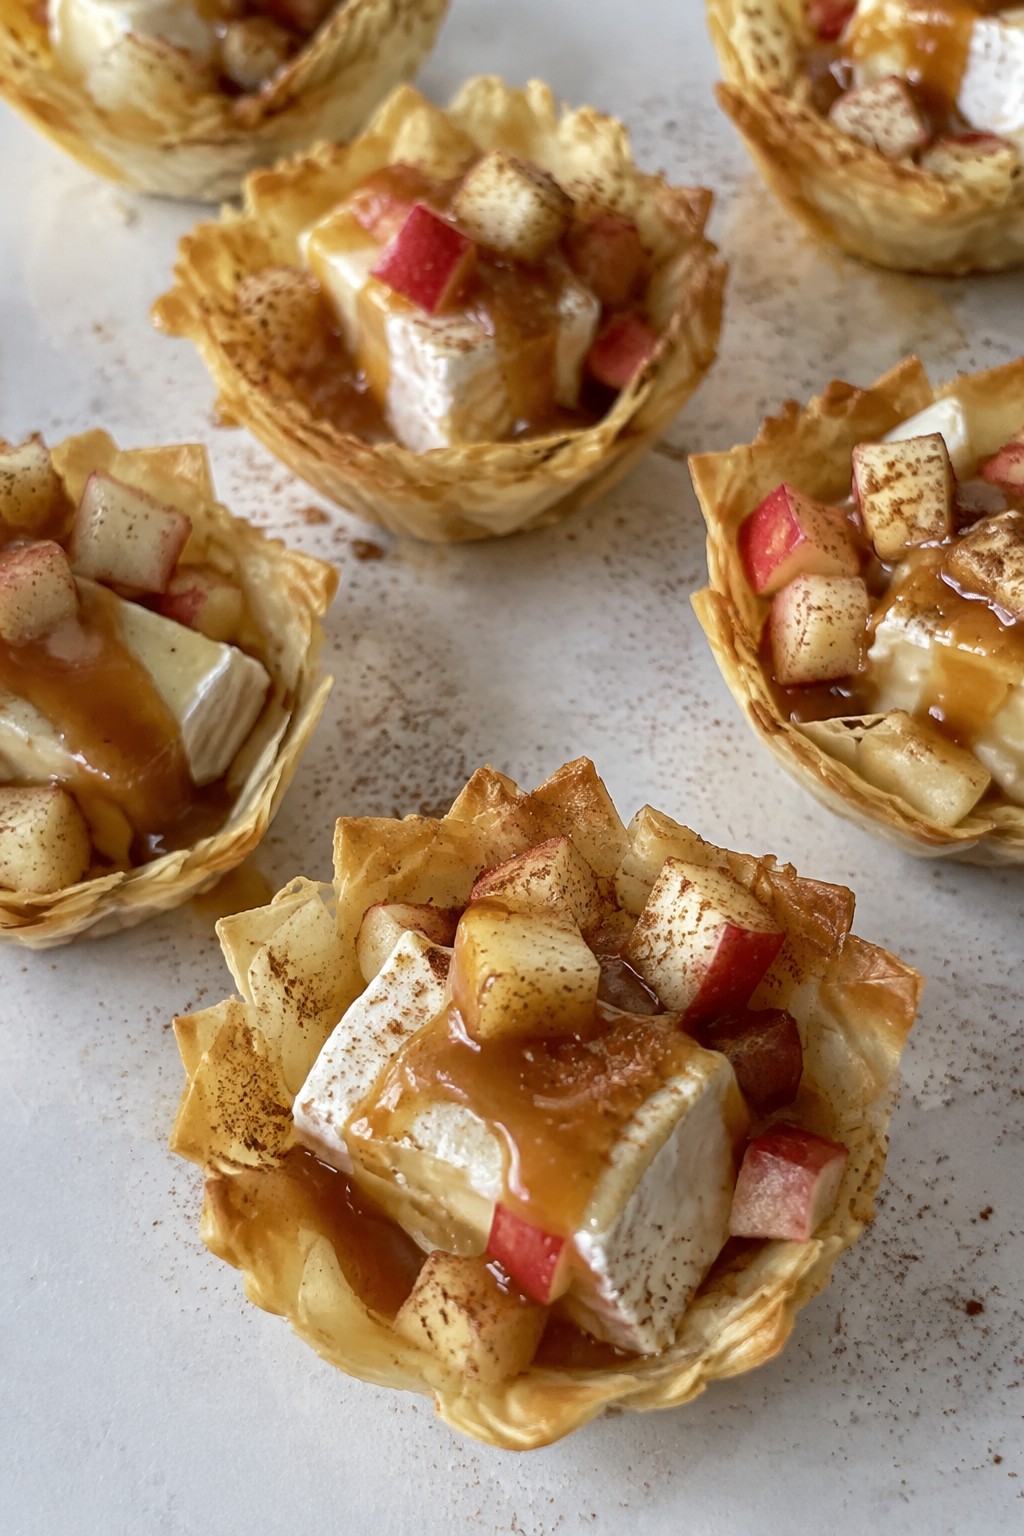
Caramel Apple Brie Phyllo Cups
These cups bring together crisp phyllo shells with creamy brie, tart apple pieces, and a drizzle of caramel. They suit Halloween parties or casual gatherings because they come together quickly and offer a mix of sweet and savory in one bite.
The texture stays light from the baked shells while the filling turns soft and warm. The flavors balance rich cheese with fresh fruit and sticky caramel.
Serves 4 people.
Ingredients
- 12 mini phyllo cups
- 4 ounces brie cheese, cut into small cubes
- 1 medium apple, finely diced
- 1/4 cup caramel sauce
- 1/4 teaspoon ground cinnamon
Instructions
- Preheat the oven to 350 degrees F and line a baking sheet with parchment paper.
- Arrange the 12 mini phyllo cups on the prepared baking sheet.
- Place one or two cubes of brie into each phyllo cup.
- Top the brie evenly with the diced apple pieces.
- Sprinkle the ground cinnamon over the apple in each cup.
- Bake for 8 to 10 minutes until the brie melts and the cups turn lightly golden.
- Remove from the oven and let the cups cool for 2 minutes.
- Drizzle the caramel sauce over each cup before serving.
Extra Tips
Warm the caramel sauce slightly before drizzling so it flows easily over the warm cups. Use a firm apple like Granny Smith to keep the pieces from turning mushy during baking. If you prepare the cups ahead, assemble them without the caramel, store them covered in the fridge, and add the drizzle just before serving.Course: Appetizer Cuisine: American Equipment: Baking sheet, Oven, Knife
