
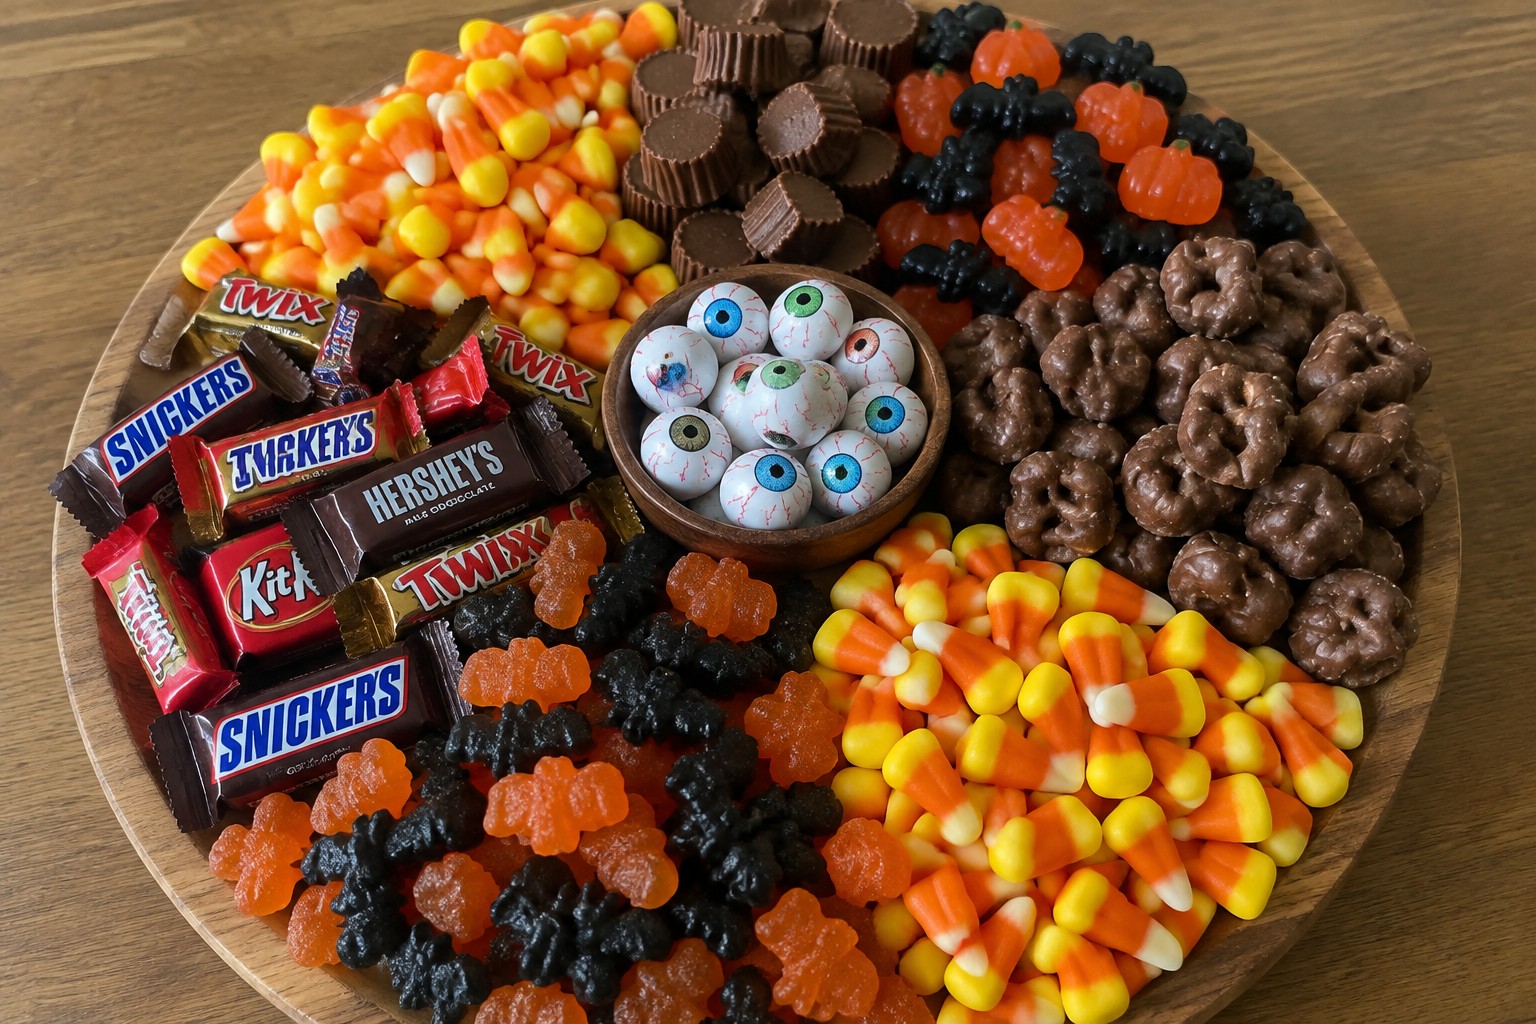
Halloween candy charcuterie boards make it easy to serve a mix of sweets at parties. You can pull one together with items from the grocery store and a few minutes of arranging. This post shares 14 different board ideas that fit kids events or casual adult gatherings. Each one focuses on practical combinations that hold up well on the table. You can scale them based on how many people you need to feed.
Helpful Tips Before You Start
These tips will help you build boards that stay neat and show off the candy well.
Pick the Right Size Board
Choose a board that fits your guest count. A crowded surface makes it hard to grab pieces.
Sort Candies by Type
Keep wrapped and unwrapped items in separate sections. This prevents sticky pieces from clinging to everything else.
Use Small Containers
Place loose candies in mini bowls or cupcake liners. They stay contained and add height to the layout.
Match Colors to the Theme
Group orange, black, and purple candies together. This creates a quick Halloween look without extra decorations.
Check for Allergies
Read labels and set aside nut-free or gluten-free options. Clear labels help guests choose safely.
Spooky Skeleton Candy Charcuterie Board
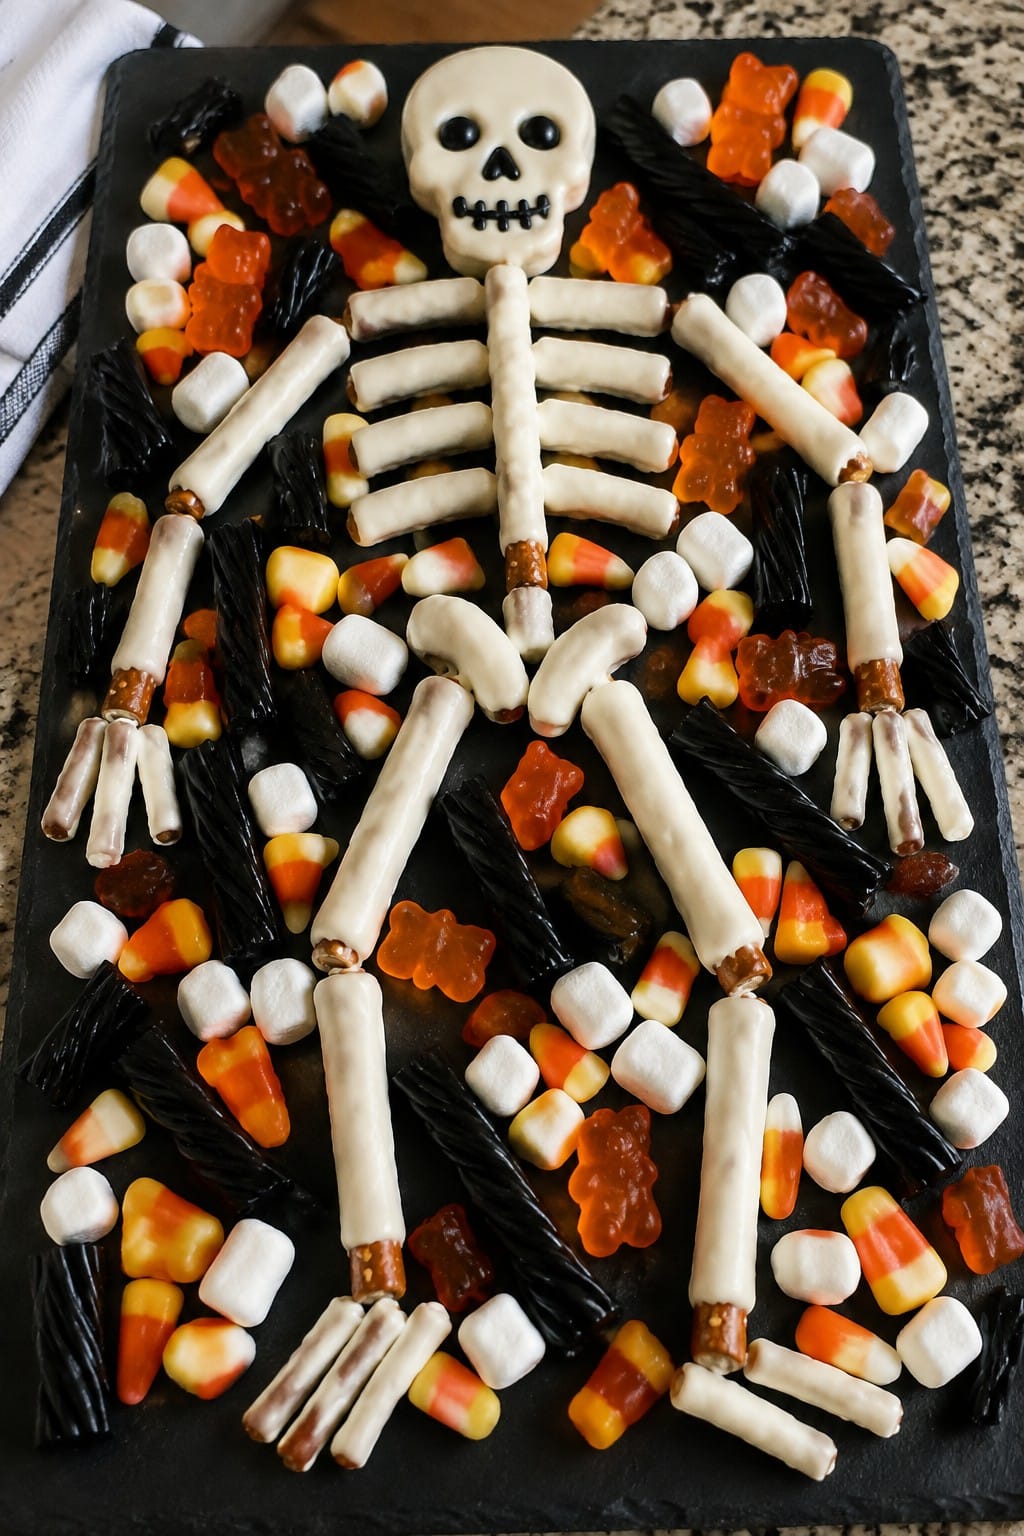
This candy board turns a simple assortment of sweets into a fun Halloween display. The white chocolate elements create bone shapes that stand out against darker candies, giving the whole board a playful skeleton look. It works well for a family movie night or a small gathering where guests can pick and choose their favorite pieces.
The flavors mix sweet chocolate with chewy and crunchy textures from the gummies and licorice. Kids enjoy spotting the skeleton details while adults appreciate how quickly it comes together.
Serves 4 people.
Ingredients
- 20 pretzel rods
- 2 cups white chocolate chips
- 1 cup black licorice twists
- 1 cup candy corn
- 1 cup orange gummy bears
- 1/2 cup mini marshmallows
Instructions
- Place the white chocolate chips in a microwave-safe bowl and heat in 30-second intervals, stirring after each, until fully melted and smooth.
- Dip one end of each pretzel rod into the melted white chocolate, then set the rods on a sheet of parchment paper to harden.
- Lay the black licorice twists on a large serving board to form the outline of a skeleton, including a round head at the top and long lines for the body and limbs.
- Arrange the chocolate-dipped pretzel rods inside the licorice outline to create the main bones, spacing them evenly to suggest arms, legs, and a spine.
- Fill in the rib area with candy corn and scatter the orange gummy bears around the lower part of the board.
- Place mini marshmallows in small clusters near the head and joints to add texture and complete the skeleton shape.
Extra Tips
Melt the white chocolate just until smooth to avoid a thick coating that cracks when it sets. If the licorice feels too stiff to shape, warm it briefly in the microwave for a few seconds so it bends more easily around the board edges.Course: Dessert Cuisine: American Equipment: Microwave-safe bowl, Large serving board, Parchment paper
Witch’s Cauldron Gummy Candy Board
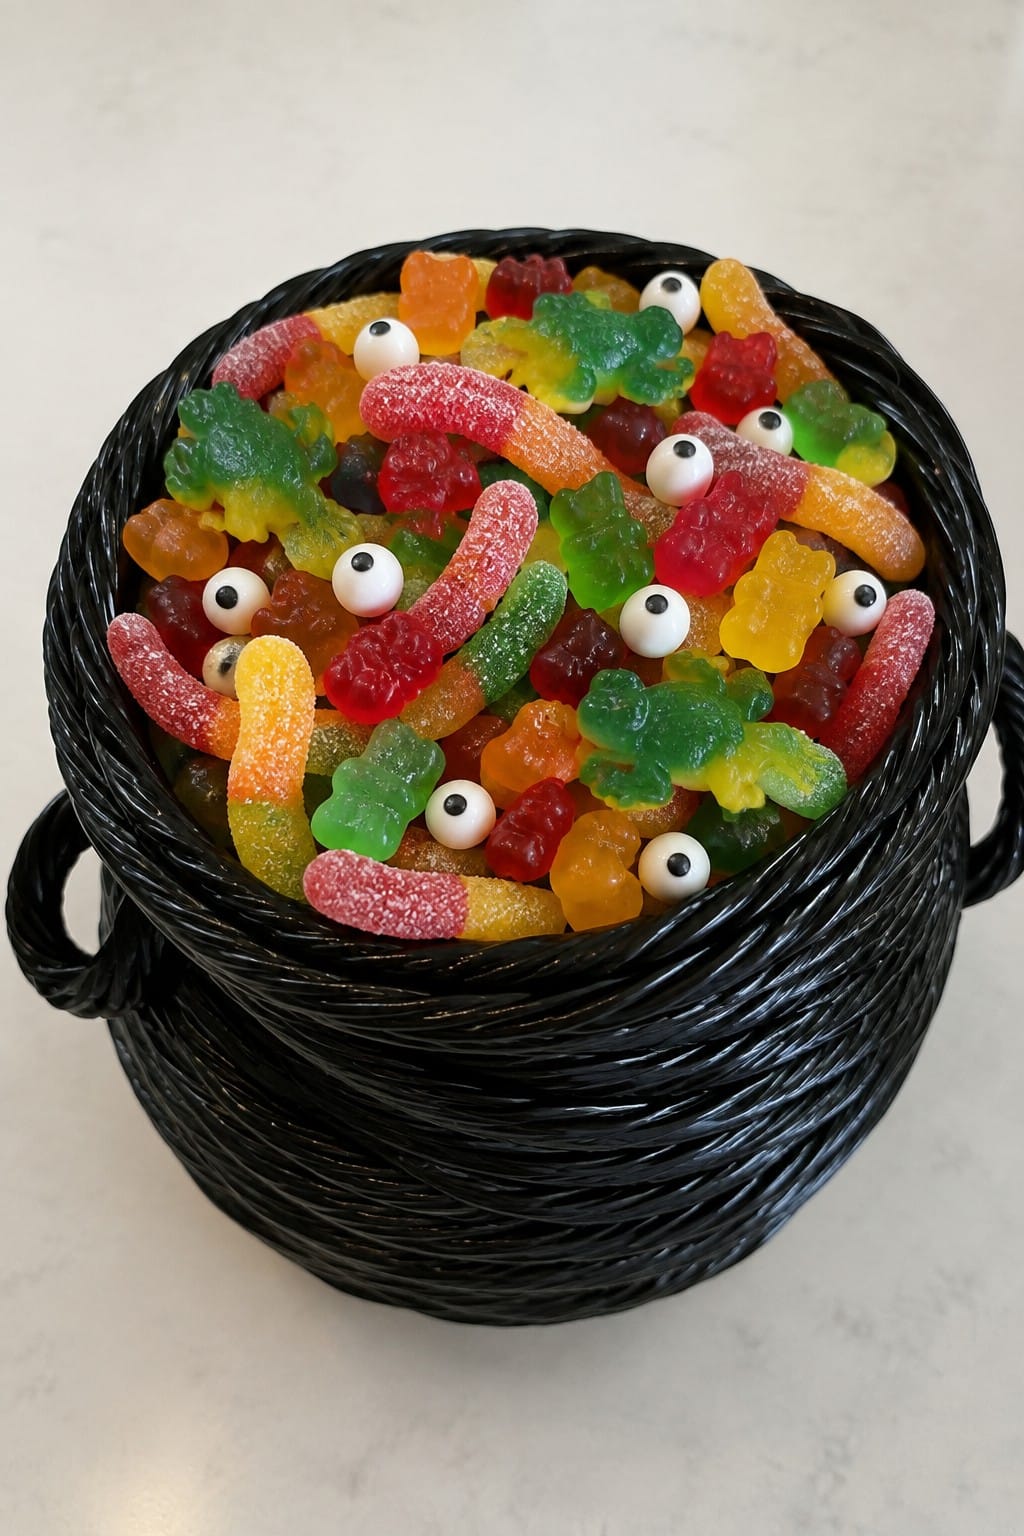
This board turns a simple mix of gummies into a fun Halloween display. A dark circle of licorice forms the cauldron shape while colorful gummies pile inside and candy eyeballs add spooky detail. The result is sweet, chewy, and lightly sour in spots, which makes it easy to serve at parties or movie nights.
The board works well when you want a no-bake option that still feels themed. Kids and adults both reach for it because the candies offer different textures and flavors without any heavy prep.
Serves 4 people.
Ingredients
- 8 oz gummy worms
- 8 oz gummy bears
- 8 oz sour gummy worms
- 6 oz gummy frogs
- 4 oz black licorice ropes
- 1/2 cup candy eyeballs
Instructions
- Cut the black licorice ropes into short segments and arrange them in a loose circle in the center of a large serving board to create the outline of the cauldron.
- Place the gummy worms, gummy bears, sour gummy worms, and gummy frogs inside the licorice circle, piling them so they look like they are bubbling over the edge.
- Scatter the candy eyeballs around the outer edges of the board and tuck a few into the gummy pile for extra detail.
Extra Tips
Cut the licorice ropes just before arranging so they stay flexible and hold the circle shape. If the gummies start to stick together, toss them lightly with a small amount of cornstarch before placing them on the board. Leftovers keep best in an airtight container at room temperature for up to two days.Course: Snack Cuisine: American Equipment: Large serving board, Knife
Monster Mash Chocolate Board
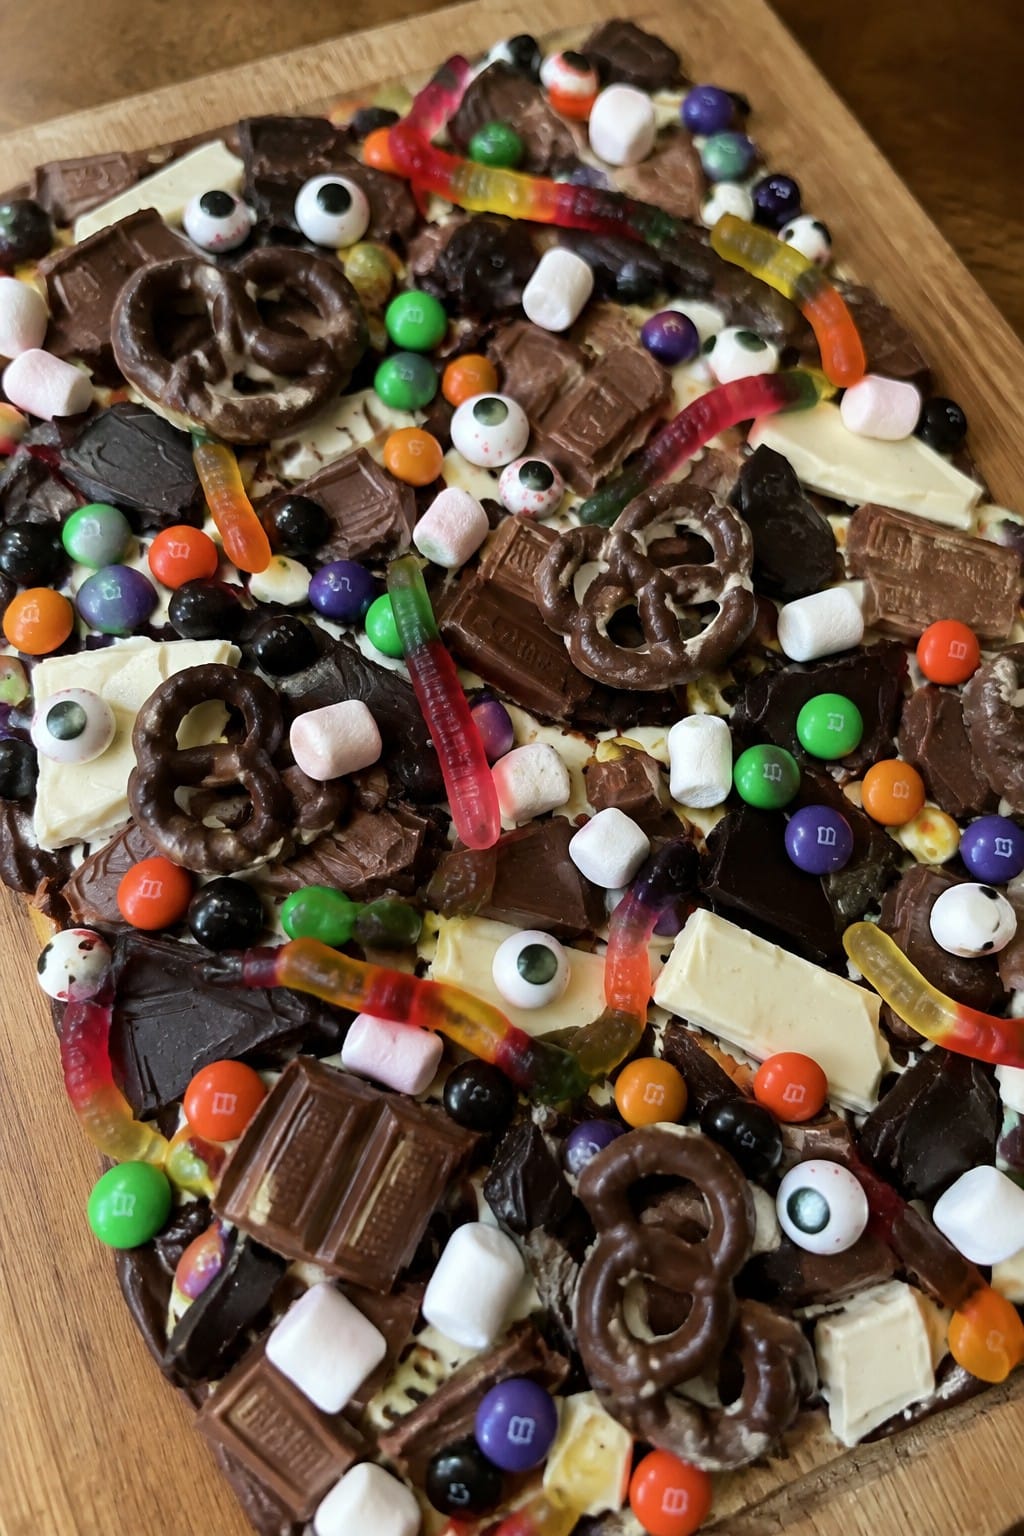
This Monster Mash Chocolate Board combines broken chocolate bars with a selection of Halloween candies for a simple yet festive spread. It works well at parties or as an easy dessert option when you want something sweet without much prep.
The board delivers creamy chocolate alongside chewy and crunchy candy pieces that give it a playful mix of textures and flavors.
Serves 4 people.
Ingredients
- 8 ounces milk chocolate bars
- 4 ounces dark chocolate bars
- 4 ounces white chocolate
- 1 cup Halloween M&Ms
- 1/2 cup gummy worms
- 1 cup mini marshmallows
- 20 candy eyeballs
- 1/2 cup chocolate-covered pretzels
Instructions
- Break the milk chocolate bars and dark chocolate bars into bite-sized pieces and spread them across a large board in a single layer.
- Chop the white chocolate into small chunks and scatter them evenly over the milk and dark chocolate pieces.
- Add the Halloween M&Ms and chocolate-covered pretzels in small piles around the chocolate.
- Place the gummy worms and mini marshmallows in open spaces on the board.
- Finish by tucking the candy eyeballs among the other items so they sit on top.
Extra Tips
Arrange the candies in clusters rather than spreading them too thin so guests can easily grab a mix of items in one scoop. If the board sits out for more than an hour, keep it away from direct heat to prevent the chocolate from softening. You can swap the gummy worms for any other chewy candy you already have on hand as long as it fits the same size and texture.Course: Dessert Cuisine: American Equipment: Charcuterie board, Knife
Pumpkin Patch Caramel Treat Board
This board turns a simple spread of caramel sweets into a playful pumpkin patch scene. It works well for Halloween movie nights or after-school snacks when you want something quick yet festive that feels a little special.
The mix of soft caramel, chewy candies, and crisp bits creates layers of sweetness that hold up well on a table for a couple of hours.
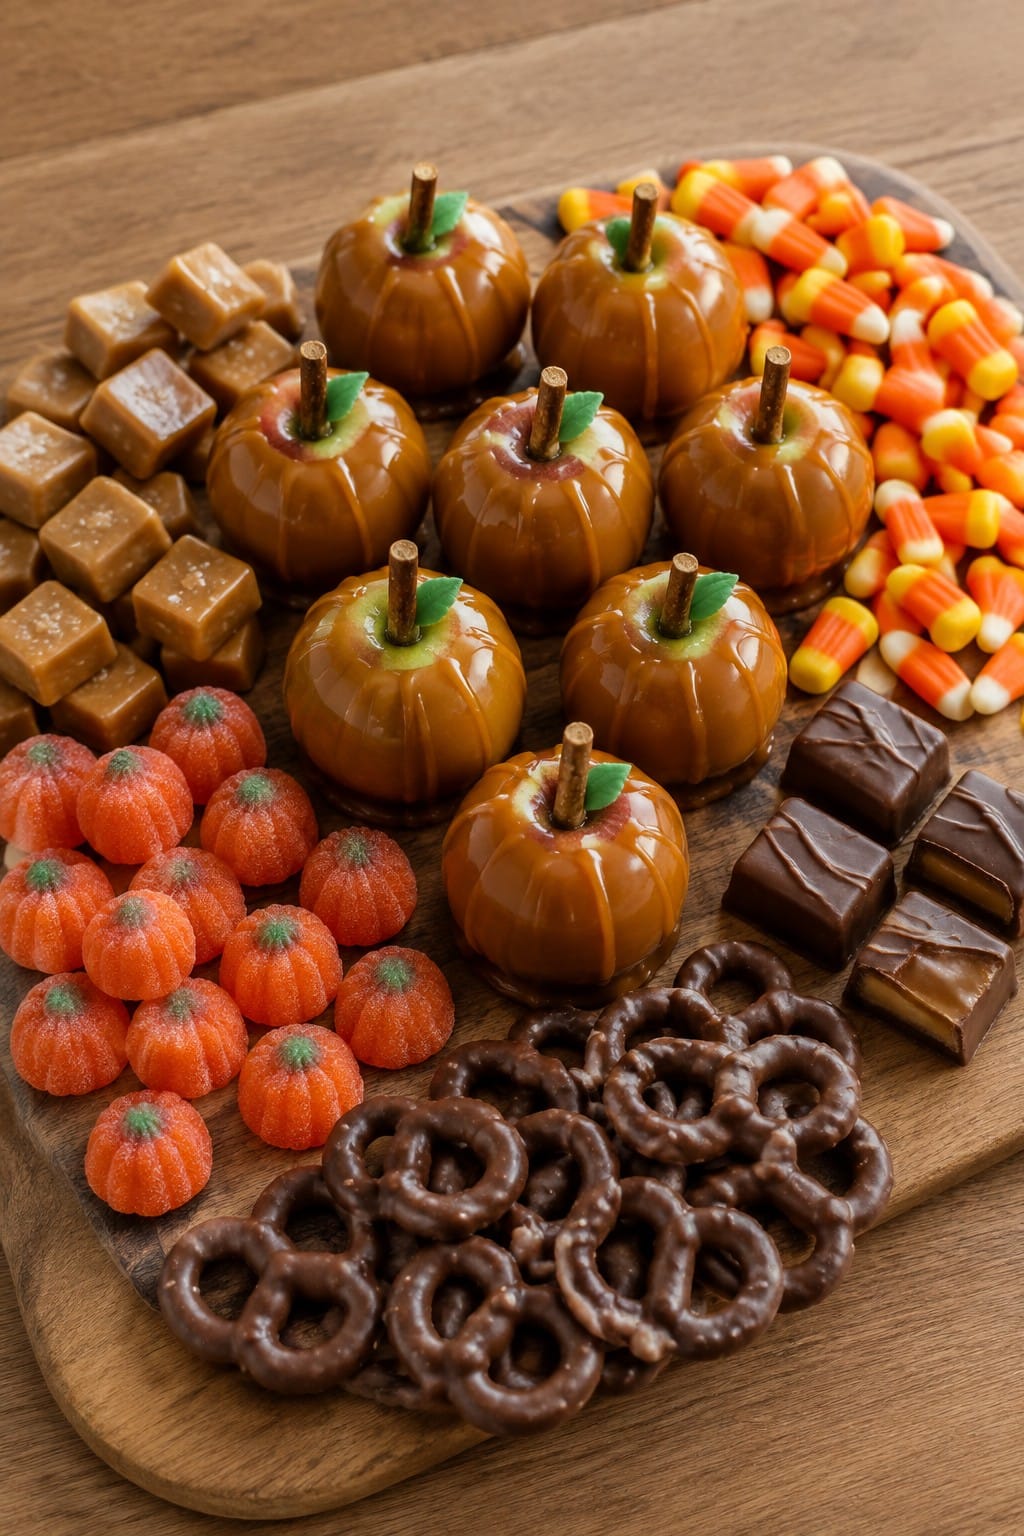
Serves 4 people.
Ingredients
- 8 mini caramel apples
- 16 soft caramel squares
- 1 cup candy corn
- 12 pumpkin-shaped gummies
- 1/2 cup chocolate-covered pretzels
- 4 caramel-filled chocolate squares
Instructions
- Set a large wooden board on the counter and place the eight mini caramel apples in two rows down the center to form the main patch rows.
- Unwrap the sixteen caramel squares and tuck them around the apples so they fill gaps and create a base layer of chewy caramel.
- Scatter the cup of candy corn along the edges of the board to add bright color and a crunchy contrast.
- Place the twelve pumpkin-shaped gummies in small clusters near the apples so they look like they are growing in the patch.
- Add the half cup of chocolate-covered pretzels in two piles on opposite sides for extra crunch and a touch of salt.
- Finish by setting the four caramel-filled chocolate squares in the remaining open spots so every section of the board has a different treat within easy reach.
Extra Tips
Warm the caramel squares for ten seconds in the microwave before placing them on the board so they stay soft and easy to pull apart. Keep the mini caramel apples chilled until just before serving to prevent the caramel from running.Course: Dessert Cuisine: American Equipment: Serving board, Microwave-safe plate
Ghostly Marshmallow White Chocolate Board
This board turns simple marshmallows into friendly ghosts by coating them in smooth white chocolate. It works well for a Halloween dessert spread or a casual party table where guests can grab a few sweet bites.
The flavor is mild and creamy with a light chew from the marshmallows and a bit of crunch if you add white chocolate pieces around the edges.
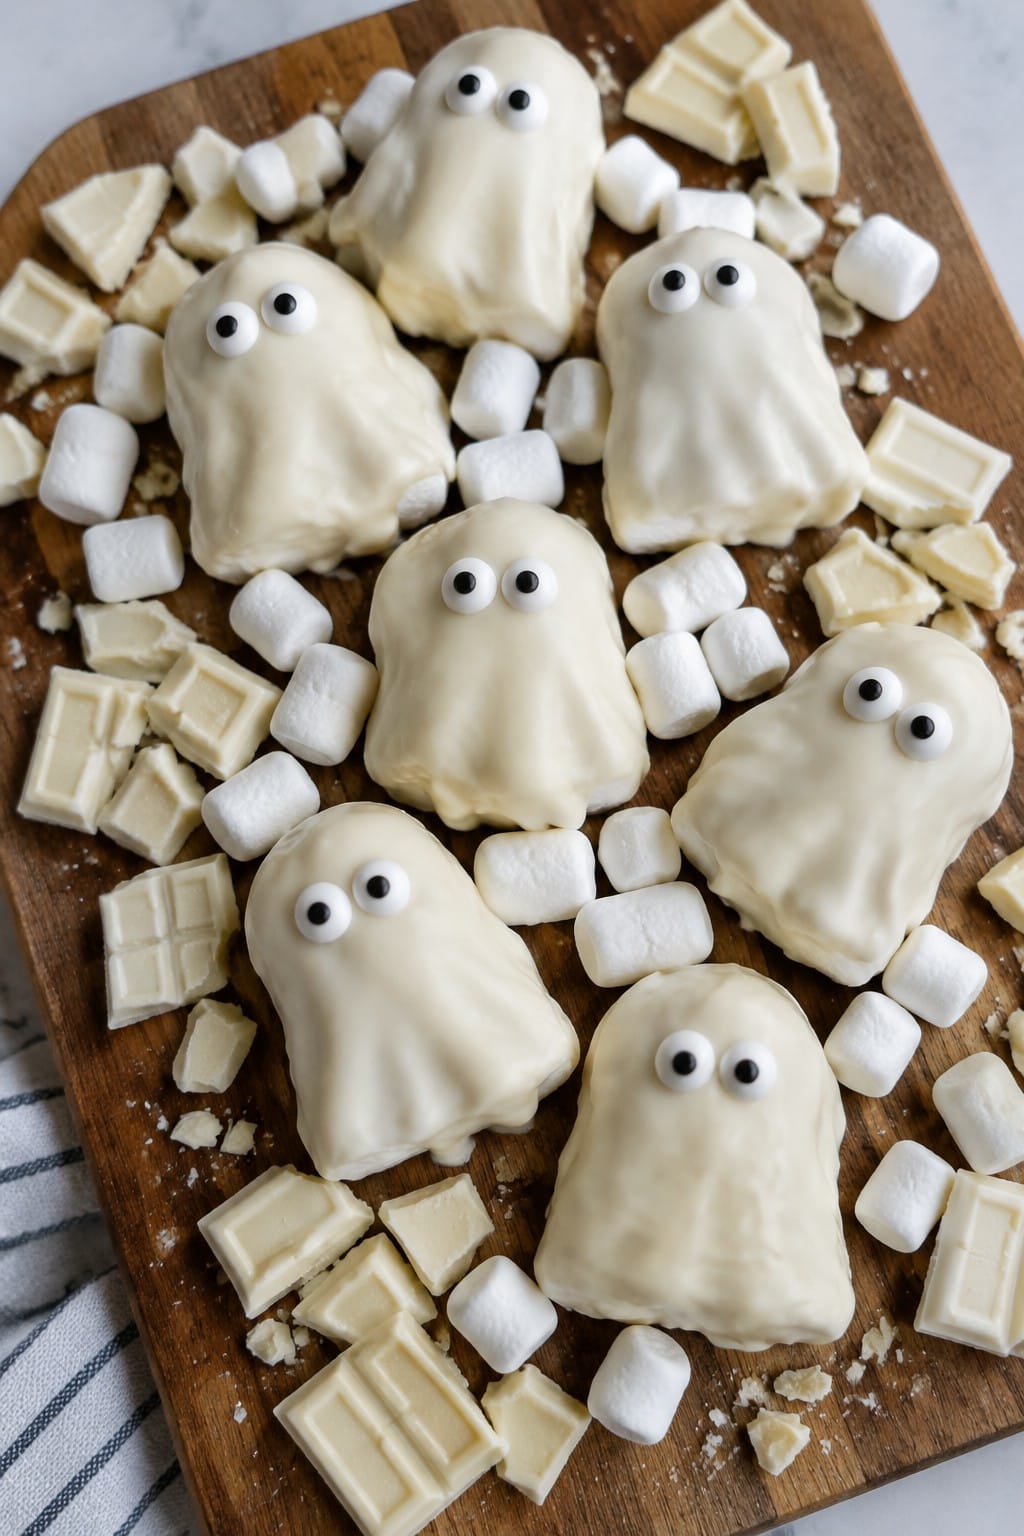
Serves 4 people.
Ingredients
- 12 ounces white chocolate chips
- 2 tablespoons coconut oil
- 16 large marshmallows
- 32 candy eyes
- 8 ounces white chocolate bars, broken into pieces
- 1 cup mini marshmallows
Instructions
- Place the white chocolate chips and coconut oil in a microwave-safe bowl. Heat in 30-second intervals, stirring after each, until fully melted and smooth.
- Dip each large marshmallow into the melted white chocolate, leaving the bottom third uncovered so it stands upright.
- Set the dipped marshmallows on a parchment-lined baking sheet. Immediately press two candy eyes onto each one while the chocolate is still soft.
- Let the ghost marshmallows sit at room temperature for 20 minutes until the coating firms up.
- Arrange the ghost marshmallows on a serving board. Fill the spaces with broken white chocolate bar pieces and mini marshmallows.
Extra Tips
Use a slightly chilled board if your kitchen is warm so the white chocolate stays set longer. You can prepare the dipped ghosts a few hours ahead and store them in a single layer in an airtight container at room temperature. Swap the candy eyes for small dots of dark chocolate if you run out.Course: Dessert Cuisine: American Equipment: Microwave-safe bowl, Baking sheet, Charcuterie board
Sour Patch Nightmare Candy Board
This Sour Patch Nightmare Candy Board turns classic sour candies into a Halloween centerpiece. Bright colors stand out against darker accents for a bold look that fits right into any spooky spread. It works well for parties or movie nights when you want something quick to put together and easy to share.
The board balances sharp sour notes with chewy textures and a bit of sweetness from chocolate. Guests can pick and mix flavors as they go, making it simple to customize each bite.
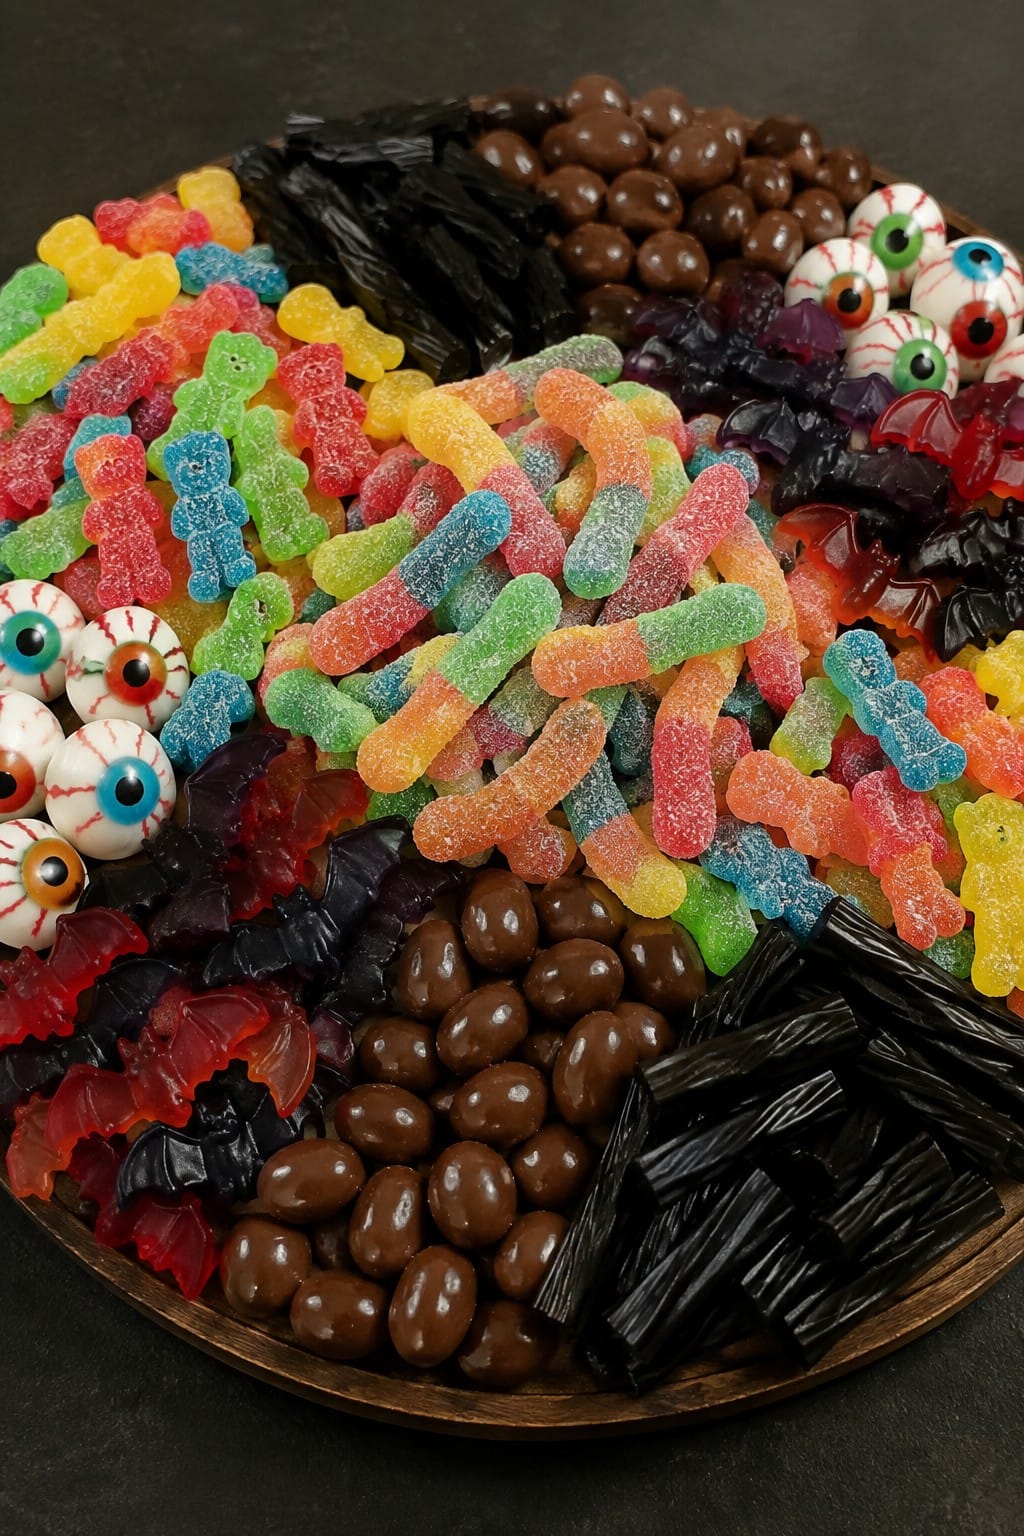
Serves 4 people.
Ingredients
- 2 cups Sour Patch Kids, mixed flavors
- 1 cup sour gummy worms
- 1/2 cup black licorice pieces
- 1 cup chocolate-covered raisins
- 1/2 cup gummy bats
- 1/4 cup candy eyeballs
Instructions
- Choose a large wooden board or platter and set it on a flat surface. Place the Sour Patch Kids in a loose pile near the center to form the main section.
- Lay the sour gummy worms in curved lines around the Sour Patch Kids so they look like they are crawling outward.
- Scatter the black licorice pieces along one side of the board to create a dark contrast next to the brighter candies.
- Add the chocolate-covered raisins in small clusters on the opposite side from the licorice.
- Tuck the gummy bats into any open spaces and finish by sprinkling the candy eyeballs across the top for a final spooky touch.
Extra Tips
Keep the sour gummy worms and Sour Patch Kids separate from the chocolate-covered raisins so the chocolate stays firm. If you need to make the board ahead, cover it loosely with plastic wrap and store it at room temperature for up to two hours. For a stronger sour flavor, add an extra handful of Sour Patch Kids right before serving.
Course: Snack Cuisine: American Equipment: Serving board, Small bowlsVampire Bite Red Licorice Board
This board turns red licorice into the star of a simple Halloween spread. The bright red colors and chewy sweets make it easy to pull together for parties or a family movie night.
The mix stays focused on bold flavors like cherry and cinnamon with plenty of texture from twists, gummies, and hard candies. Everything stays on theme without needing extra decorations.
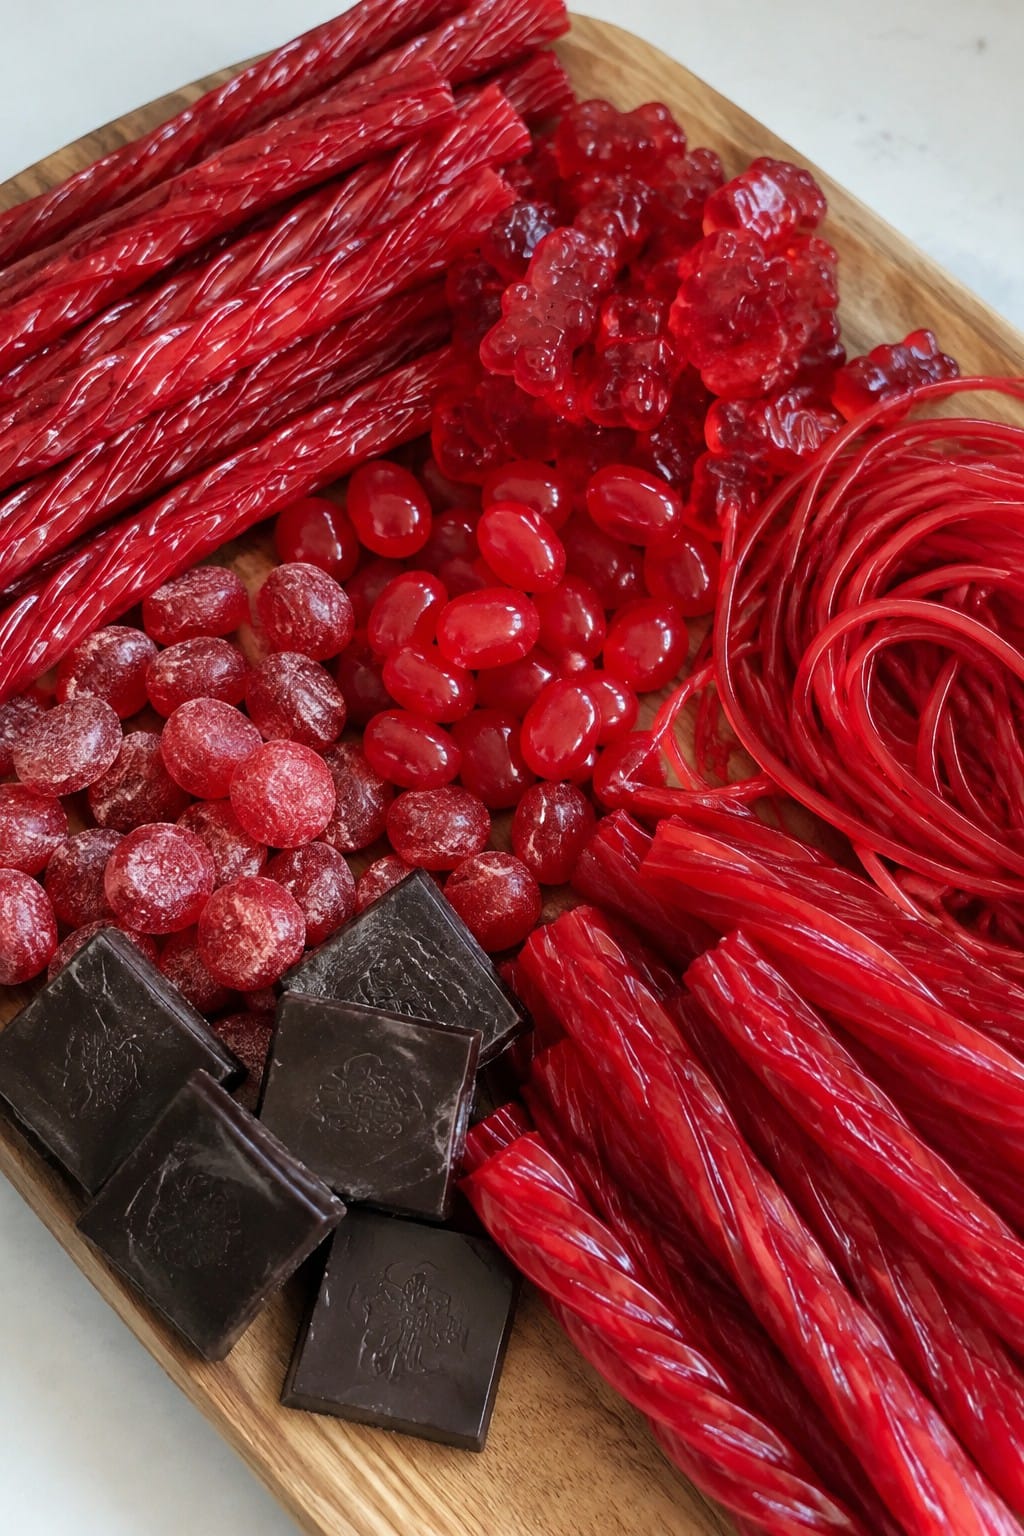
Serves 4 people.
Ingredients
- 8 ounces red licorice twists
- 1 cup cherry gummy bears
- 1 cup red jelly beans
- ½ cup strawberry licorice laces
- ½ cup cinnamon imperials
- 4 ounces dark chocolate squares
Instructions
- Lay the red licorice twists across the center of a large board to create the main section.
- Scatter the cherry gummy bears in small piles on both sides of the licorice.
- Fill two open areas with the red jelly beans, keeping the piles separate from the gummies.
- Arrange the strawberry licorice laces in loose loops near the edges of the board.
- Add small clusters of cinnamon imperials in the remaining spaces for extra color and crunch.
- Place the dark chocolate squares in two neat rows at the top and bottom to frame the red candies.
Extra Tips
Cut any extra-long licorice twists in half before arranging so the board stays balanced and easy to grab from all sides. Keep the cinnamon imperials away from the gummies if you want to avoid color bleeding. Leftovers store best in an airtight container at room temperature for up to two days.Course: Dessert Cuisine: American Equipment: Large serving board, Small bowls
Frankenstein’s Peanut Butter Cup Lab Board
This board builds a fun Frankenstein lab scene around peanut butter cups. It suits Halloween gatherings or after-school treats when you want something quick to assemble yet visually striking. The creamy peanut butter centers pair with smooth chocolate and a few crisp or chewy candy pieces for contrast.
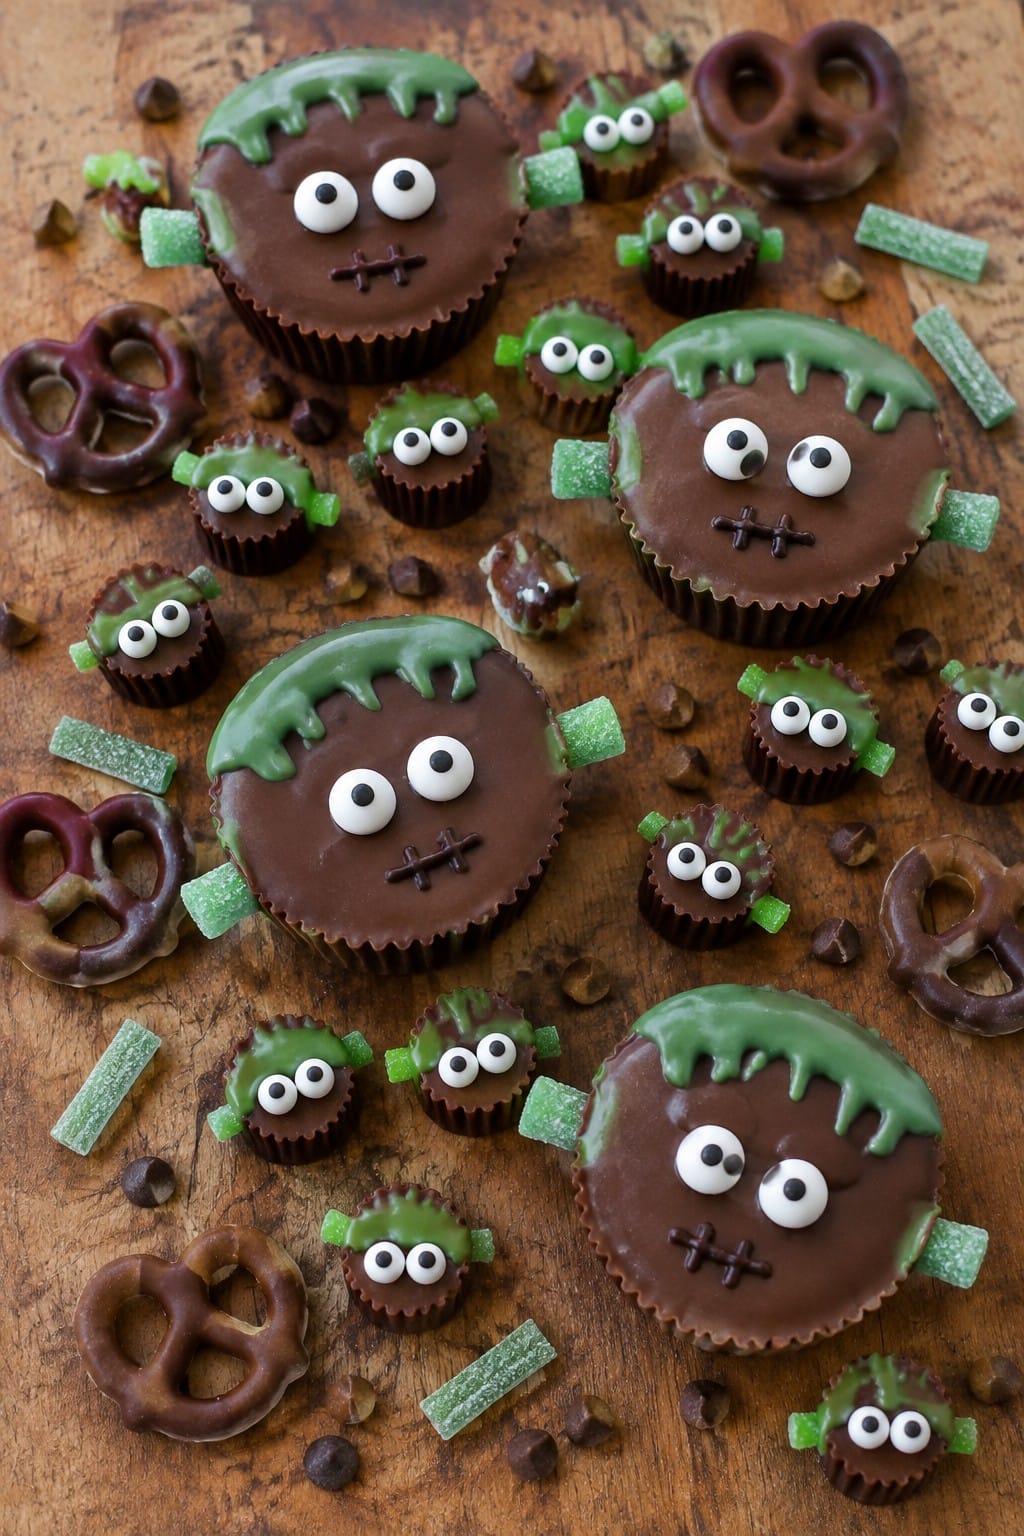
Serves 4 people.
Ingredients
- 12 mini Reese’s Peanut Butter Cups
- 4 large Reese’s Peanut Butter Cups
- 1 cup green candy melts
- 1/2 cup mini chocolate chips
- 20 candy eyeballs
- 1/2 cup green sour straws, cut into 2-inch pieces
- 8 chocolate-covered pretzels
Instructions
- Place the mini and large peanut butter cups across a large board, grouping the larger ones toward the center to form the main lab shapes.
- Melt the green candy melts in a microwave-safe bowl in 20-second bursts, stirring until smooth.
- Spoon small dots of melted green candy onto the tops of several peanut butter cups and press two candy eyeballs into each dot to create faces.
- Melt the mini chocolate chips in the same way until fully liquid, then drizzle thin lines over the board for a lab-table effect.
- Tuck the chocolate-covered pretzels around the edges as tools and scatter the green sour straw pieces between the cups for color.
- Let the melted candy and chocolate set for 10 minutes before serving.
Extra Tips
Melt the green candy melts just until smooth to avoid a dull finish. The sour straw pieces add a tart note that cuts through the sweetness, so keep a few extras on hand in case some guests want more. Assemble the board no more than two hours ahead so the candy eyeballs stay firmly in place.Course: Dessert Cuisine: American Equipment: Charcuterie board, Microwave-safe bowls, Spoon
Candy Corn Harvest Festival Board
This board highlights candy corn as the centerpiece with other autumn candies arranged around it. It suits Halloween parties or family movie nights when you want a simple sweet spread that feels festive without much effort. The result combines chewy textures from the corn with creamy and crunchy bites for a balanced treat.
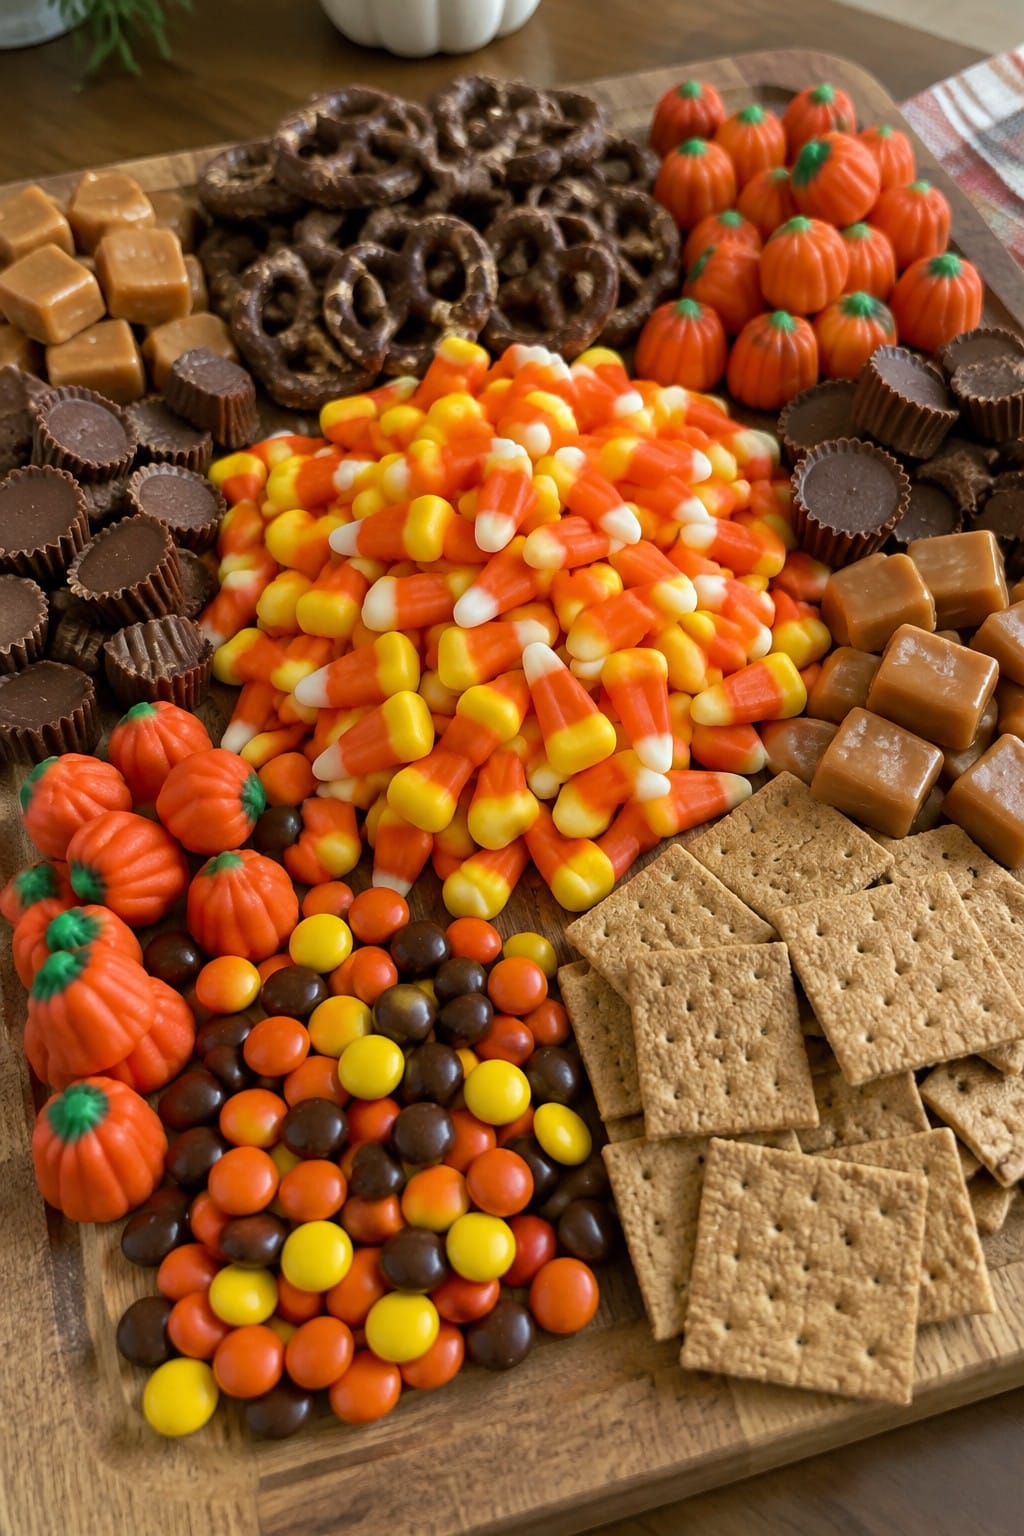
Serves 4 people.
Ingredients
- 1 1/2 cups candy corn
- 1 cup mellowcreme pumpkins
- 12 chocolate-covered pretzels
- 1 cup mini peanut butter cups
- 1/2 cup caramel squares
- 8 graham cracker squares
- 1 cup candy-coated chocolates in fall colors
Instructions
- Choose a large wooden or slate board and set it on the counter. Place the candy corn in two or three loose piles across the center to create the main visual focus.
- Add the mellowcreme pumpkins in small clusters near the candy corn piles so the orange and yellow shades blend together.
- Arrange the chocolate-covered pretzels along one edge of the board in a single row for easy grabbing.
- Scatter the mini peanut butter cups and caramel squares in the remaining open spaces, keeping similar items together for a tidy look.
- Break the graham cracker squares in half and tuck them into any gaps around the edges.
- Finish by sprinkling the candy-coated chocolates over the top in small handfuls to fill spaces and add extra color.
Extra Tips
Group the candy corn and pumpkins first so they stand out as the harvest theme. If the caramel squares feel too firm, let them sit at room temperature for 20 minutes before placing them on the board. Leftovers keep well in an airtight container for two days if you separate the chocolate items from the graham crackers.Course: Dessert Cuisine: American Equipment: Charcuterie Board, Small Bowls
Haunted Graveyard Cookie Board
This board turns cookies into a spooky graveyard scene that fits right into any Halloween spread. It works well for parties or movie nights when you want a sweet option that feels themed without much effort. The crunchy cookies pair with chewy candies for a mix of textures that keeps everyone reaching for more.
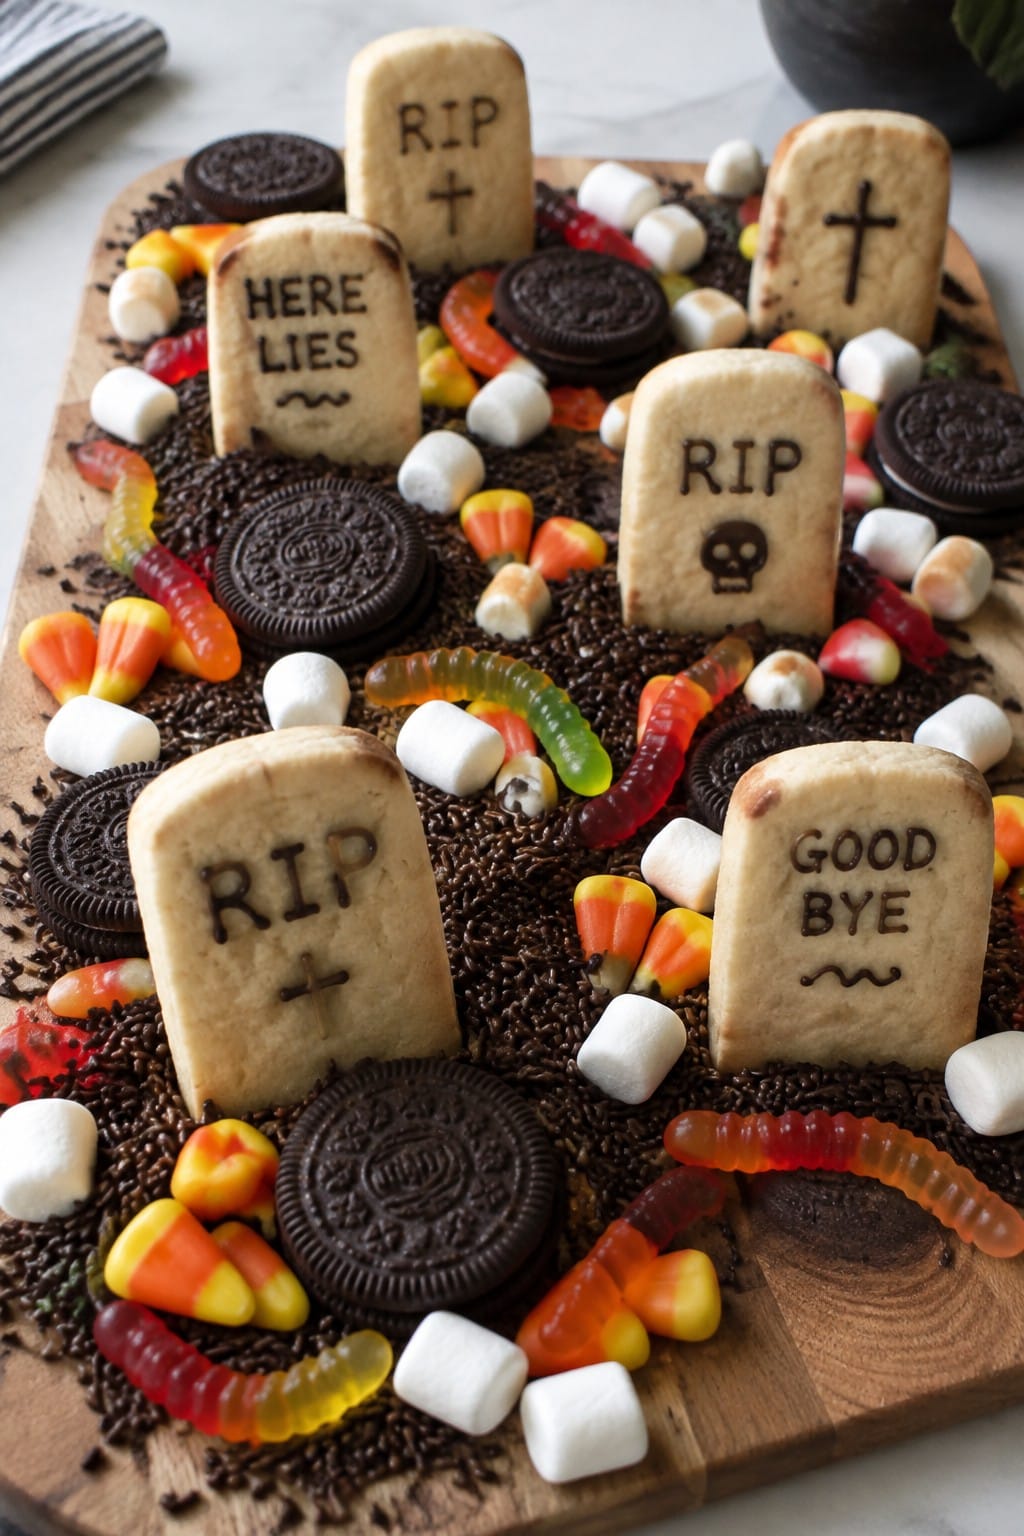
Serves 4 people.
Ingredients
- 8 rectangular shortbread cookies
- 12 chocolate sandwich cookies
- 1 cup gummy worms
- ½ cup candy corn
- ¼ cup chocolate sprinkles
- ½ cup mini marshmallows
Instructions
- Place the rectangular shortbread cookies upright in two rows on a large serving board to form the tombstones.
- Break a few chocolate sandwich cookies in half and scatter them around the base of the tombstones to create the look of disturbed ground.
- Lay the remaining whole chocolate sandwich cookies flat across the board to fill in the empty spaces.
- Tuck the gummy worms between the cookies so they appear to emerge from the ground.
- Sprinkle the chocolate sprinkles lightly over the broken cookie pieces to add texture and color.
- Add clusters of candy corn and mini marshmallows in the open areas to finish the board.
Extra Tips
Use a dark wood or black tray to make the colors stand out. If the shortbread cookies will not stand on their own, press the base into a bit of the broken chocolate cookies for support. Leftovers keep in an airtight container for one day, though the gummy worms may soften.Course: Dessert Cuisine: American Equipment: Serving board, Small bowls
Rainbow Jelly Bean Spook Board
This board turns a simple mix of colorful jelly beans into a fun Halloween display. The bright rainbow stripes stand out against darker spooky candies, making it a hit at parties or movie nights with kids. The mix gives chewy bites with a bit of crunch from added treats.
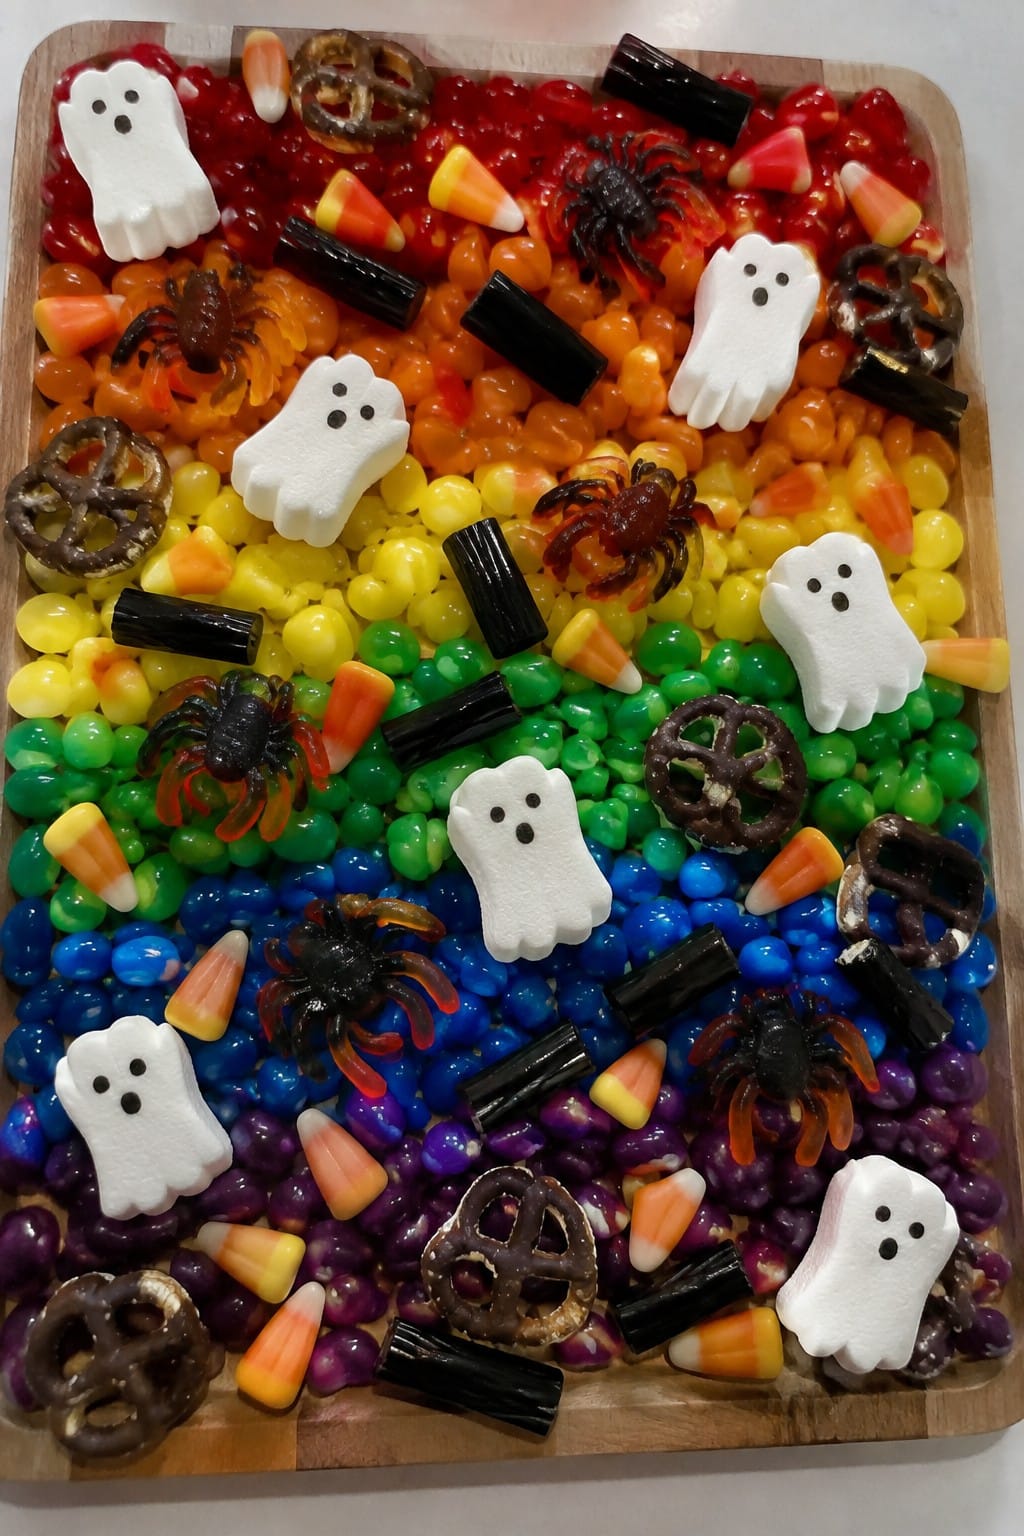
Serves 4 people.
Ingredients
- 2 cups rainbow jelly beans
- 1 cup gummy spiders
- 1 cup candy corn
- 1/2 cup black licorice ropes, cut into 2-inch pieces
- 8 marshmallow ghosts
- 1/2 cup chocolate-covered pretzels
Instructions
- Choose a large flat board and place four small bowls along the center line to hold separate sections.
- Sort the rainbow jelly beans by color and fill the bowls in order from red to purple to create stripes.
- Scatter the gummy spiders around the outer edges of the board for a spooky touch.
- Add clusters of candy corn between the bowls and along the sides.
- Tuck the black licorice pieces into the spaces between the candy corn for contrast.
- Place the marshmallow ghosts at the corners of the board.
- Fill any remaining gaps with the chocolate-covered pretzels.
Extra Tips
Sort the jelly beans ahead of time so the rainbow stripes stay neat once guests start picking. If you need a nut-free version, swap the pretzels for more licorice. Keep the board covered with plastic wrap until serving to prevent the jelly beans from drying out.Course: Dessert Cuisine: American Equipment: Large serving board, Small bowls
Black Cat Licorice and Taffy Board
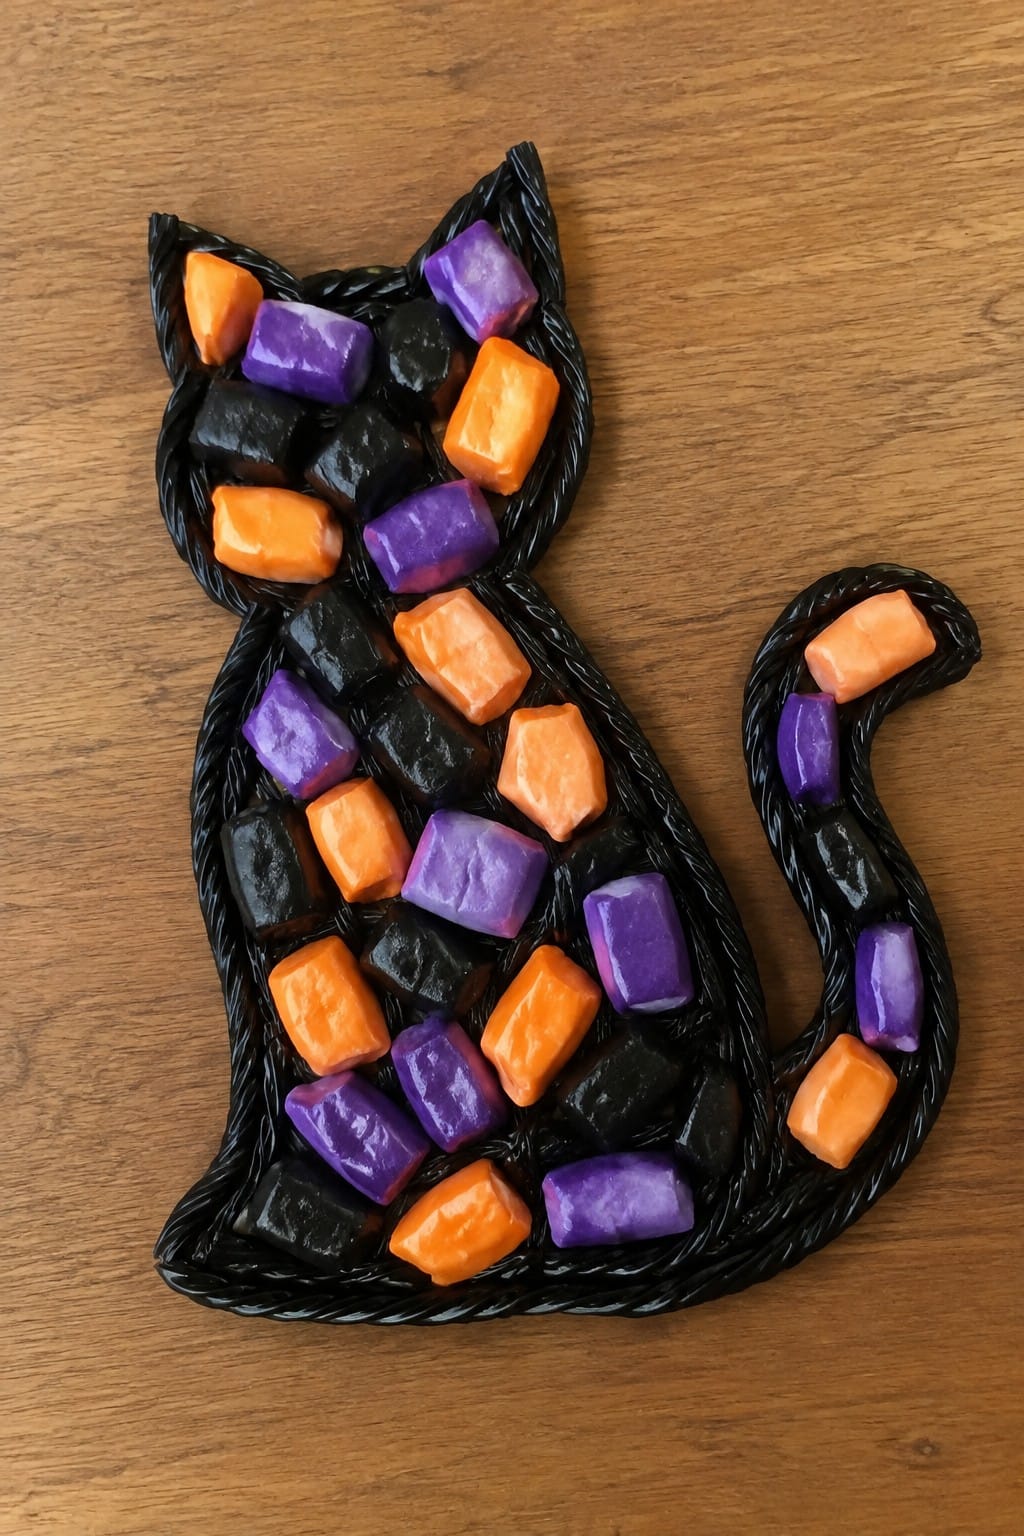
This Black Cat Licorice and Taffy Board pairs bold black licorice with soft, colorful taffy for a simple Halloween candy board. It suits parties, movie nights, or after-school treats when you want something sweet and easy to share. The mix gives a chewy texture with strong anise notes from the licorice and fruity flavors from the taffy.
The dark licorice pieces form the base for a black cat theme, while the taffy adds bright contrast and variety. Everyone can grab pieces they like without extra prep.
Serves 4 people.
Ingredients
- 12 black licorice ropes
- 16 orange taffy pieces
- 16 purple taffy pieces
- 8 black taffy pieces
Instructions
- Cut four black licorice ropes into short 2-inch segments to use as whiskers and tails.
- Lay the remaining eight black licorice ropes on the board in a loose cat shape, with a round head and curved body.
- Place the cut licorice segments around the head to form whiskers and add a tail at the back.
- Scatter the orange and purple taffy pieces around the licorice cat to fill the outer areas of the board.
- Tuck the black taffy pieces near the cat shape for extra color contrast and to keep the dark theme.
Extra Tips
Cut the licorice with clean kitchen scissors for quick, even pieces. If the taffy feels too firm, let it sit at room temperature for 10 minutes before arranging so it stays pliable. Leftovers keep best in an airtight container at cool room temperature for up to three days.Course: Dessert Cuisine: American Equipment: Serving board, Kitchen scissors
Full Moon Chocolate Truffle Board
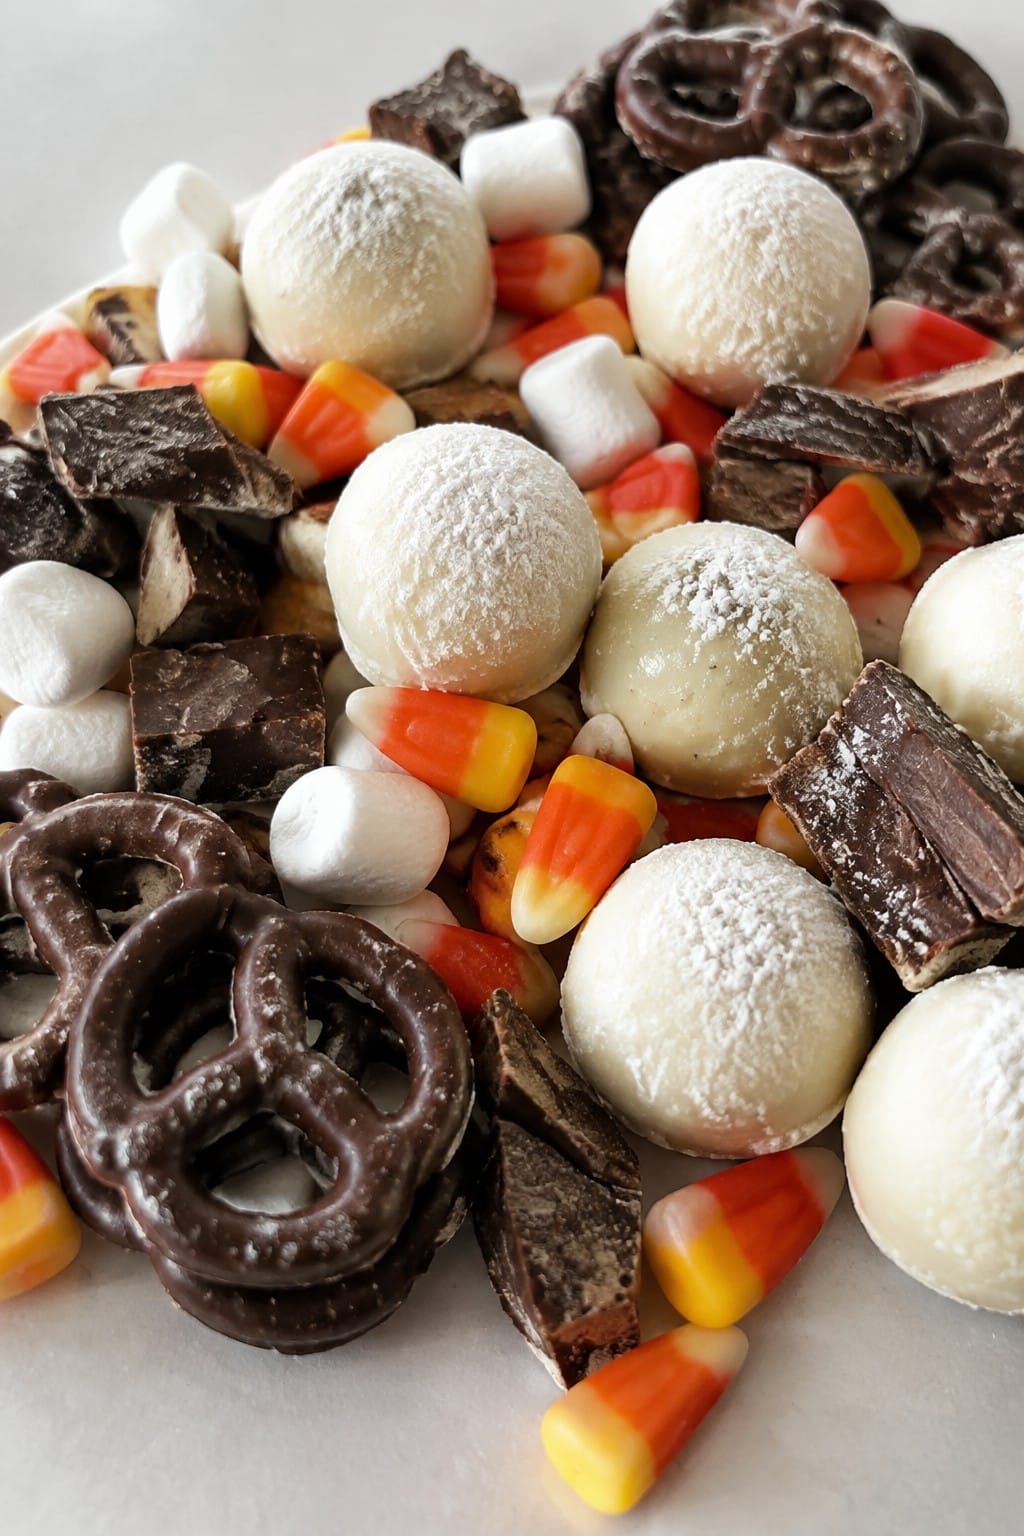
This board brings together creamy white chocolate truffles and a mix of Halloween candies for a simple sweet spread. It works well for parties or movie nights when you want something easy to share without much fuss. The truffles have a smooth, rich center with a light coating, while the candies add crunch and chew.
The overall effect feels balanced with both soft and crisp textures alongside mild sweetness from the white chocolate and bolder candy flavors.
Serves 4 people.
Ingredients
- 8 ounces white chocolate, chopped
- 1/2 cup heavy cream
- 1 teaspoon vanilla extract
- 1/4 cup powdered sugar
- 1 cup candy corn
- 1/2 cup mini marshmallows
- 1/2 cup chocolate-covered pretzels
- 1/2 cup broken chocolate bar pieces
Instructions
- Heat the heavy cream in a small saucepan over medium heat until it just starts to steam. Pour the hot cream over the chopped white chocolate in a mixing bowl and let it sit for one minute. Stir in the vanilla extract until the mixture becomes smooth and fully combined.
- Cover the bowl and chill the mixture for one hour until it firms up. Scoop out small portions and roll them into balls between your palms. Roll each ball in powdered sugar to coat the outside.
- Arrange the truffles in the center of a serving board. Place the candy corn, mini marshmallows, chocolate-covered pretzels, and chocolate bar pieces around the truffles to fill the board.
Extra Tips
Chill the truffle mixture a bit longer if your kitchen is warm to keep the balls from softening during rolling. Break the chocolate bars into uneven chunks so they fit neatly between the round truffles on the board.Course: Dessert Cuisine: American Equipment: Saucepan, Mixing Bowl, Serving Board
Trick-or-Treat Lollipop Graveyard Board
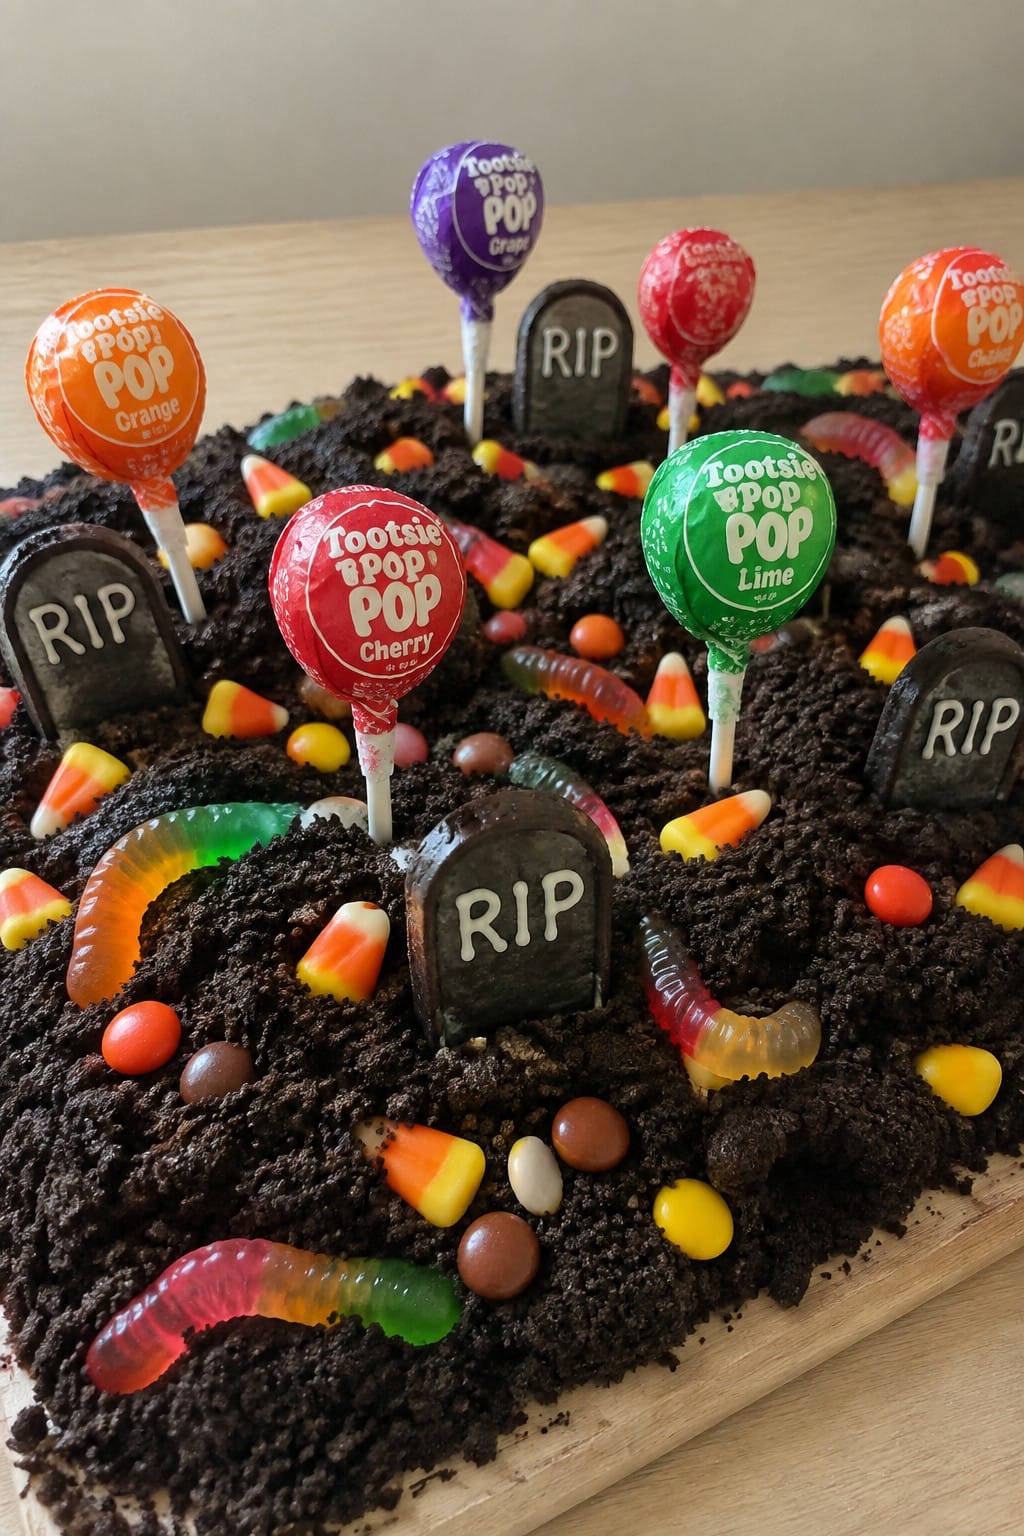
This board creates a simple graveyard scene using lollipops as tombstones and cookie crumbs as dirt. Gummy worms add movement while candy corn and chocolate pieces fill out the space. It works well for a Halloween party or movie night and gives a balance of crunchy crumbs, chewy candies, and hard lollipops.
The layout is quick to assemble and easy for guests to pick from. Different lollipop flavors keep the sweet taste interesting without extra work.
Serves 4 people.
Ingredients
- 12 lollipops in assorted flavors
- 2 cups chocolate cookie crumbs
- 8 gummy worms
- 1 cup candy corn
- 1 cup chocolate candy pieces
Instructions
- Spread the chocolate cookie crumbs in an even layer across a large serving board to form the dirt base.
- Push the sticks of the lollipops straight down into the crumbs so they stand upright like tombstones.
- Tuck the gummy worms partially into the cookie crumbs so they look like they are emerging from the ground.
- Scatter the candy corn and chocolate candy pieces around the lollipops to fill the remaining space on the board.
Extra Tips
Make the cookie crumbs right before assembling so they stay dry and loose. Choose lollipops with different colors to create visual contrast against the dark crumbs. If you need to transport the board, press the lollipops in firmly and carry it flat to keep the scene intact.Course: Dessert Cuisine: American Equipment: Large serving board
