
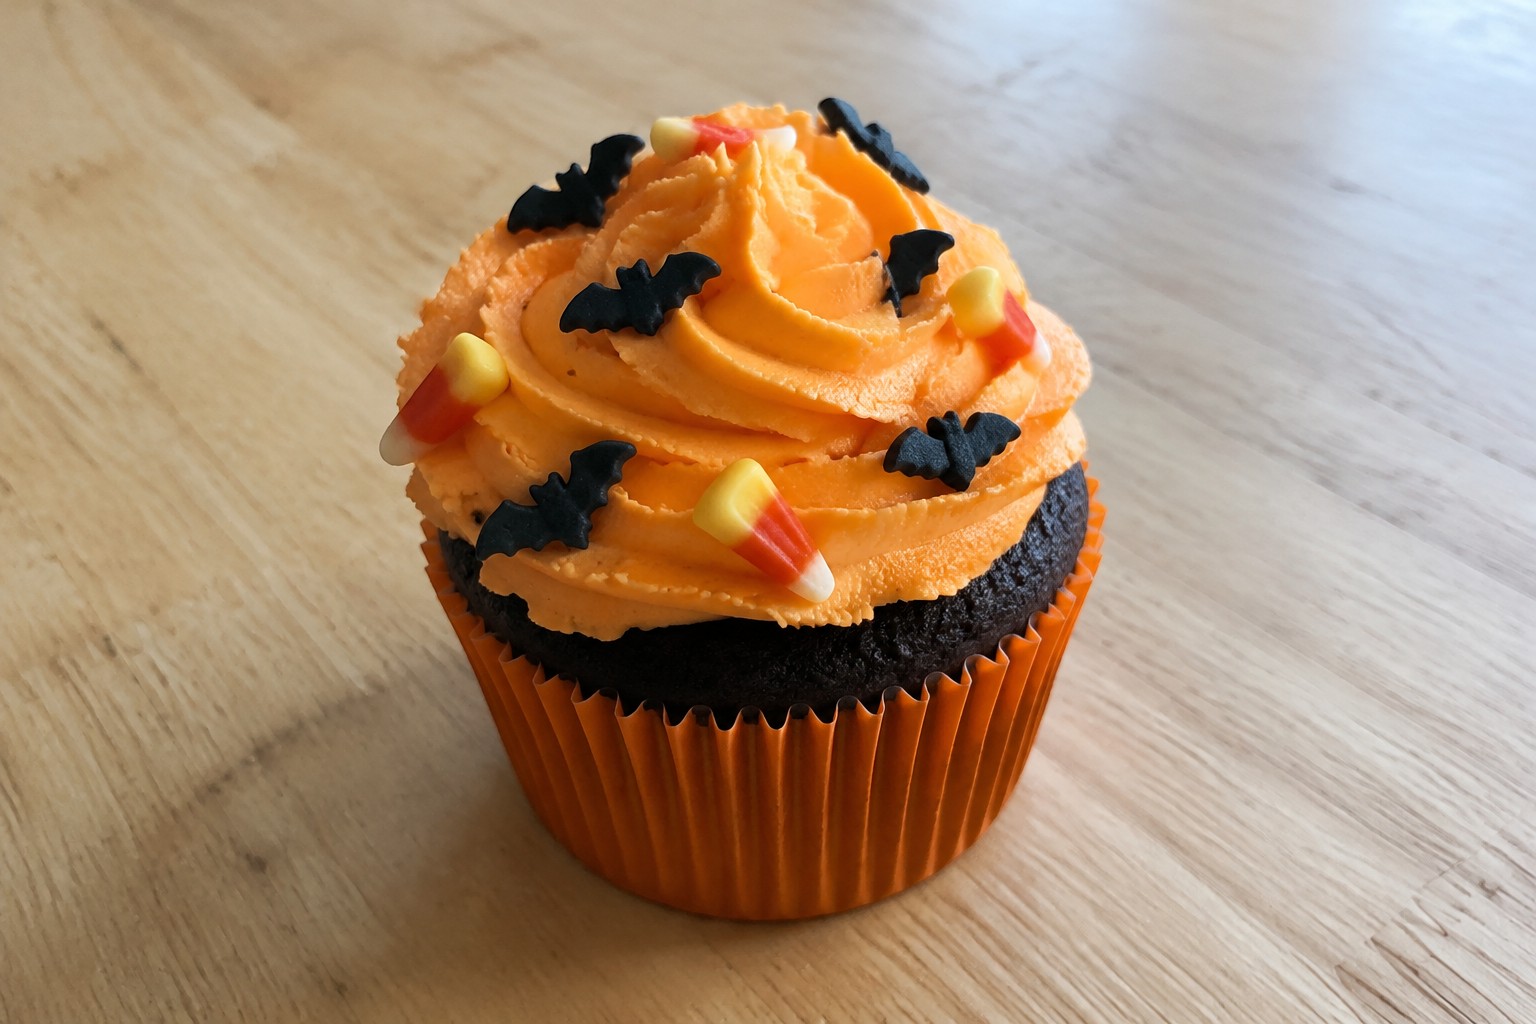
Halloween cupcakes are a fun way to celebrate the season with family and friends. This list has 15 different ideas to choose from. Each one comes with steps that are straightforward to follow. You will see options with common ingredients and easy decorating tips. They work well for parties or just a weekend baking project.
Helpful Tips Before You Start
A little planning keeps Halloween cupcakes neat and colorful.
Use Gel Food Coloring
Gel colors create bright orange, black, and green shades without making batter or frosting too thin.
Cool Cupcakes Completely
Frost only after the cupcakes reach room temperature so the topping stays in place.
Prepare Toppers Ahead
Roll fondant eyes or cut candy shapes the day before to speed up final assembly.
Pick Sturdy Bases
Chocolate or spice cupcakes support heavier decorations better than lighter vanilla ones.
Spooky Spiderweb Black Cocoa Cupcakes
These cupcakes stand out with their deep black color and rich cocoa flavor. They work well for Halloween parties or casual fall gatherings when you want a simple treat that still feels festive. The texture stays moist with a tender crumb, while the spiderweb design on top adds a playful touch without extra fuss.

Serves 4 people.
Ingredients
- 1/2 cup all-purpose flour
- 1/4 cup black cocoa powder
- 1/2 cup granulated sugar
- 1/2 teaspoon baking soda
- 1/4 teaspoon salt
- 1/2 cup milk
- 1/4 cup vegetable oil
- 1 large egg
- 1 teaspoon vanilla extract
- 1/2 cup unsalted butter, softened
- 1 1/2 cups powdered sugar
- 2 tablespoons milk
- 1 teaspoon vanilla extract
- 1/4 cup white chocolate chips
Instructions
- Preheat the oven to 350°F and line a muffin tin with 4 cupcake liners. In a medium bowl, whisk together the flour, black cocoa powder, sugar, baking soda, and salt until evenly combined.
- In a separate bowl, whisk the milk, vegetable oil, egg, and 1 teaspoon vanilla extract until smooth. Pour the wet mixture into the dry ingredients and stir just until no streaks remain.
- Divide the batter evenly among the 4 liners and bake for 18 to 20 minutes, or until a toothpick inserted in the center comes out clean. Let the cupcakes cool completely in the tin before removing.
- While the cupcakes cool, beat the softened butter in a medium bowl until creamy. Gradually add the powdered sugar, then mix in the remaining 2 tablespoons milk and 1 teaspoon vanilla extract until the frosting reaches a spreadable consistency.
- Frost each cooled cupcake with a smooth layer of buttercream. Melt the white chocolate chips in a small microwave-safe bowl in 20-second bursts, stirring between each until smooth.
- Spoon the melted white chocolate into a piping bag or zip-top bag with a tiny corner snipped off. Pipe three concentric circles on each cupcake, then drag a toothpick from the center outward in several lines to create the spiderweb pattern.
Extra Tips
Pipe the white chocolate webs right after frosting so the lines stay sharp and do not sink. If the white chocolate thickens while you work, warm it for a few seconds to loosen it again. Store finished cupcakes in an airtight container at room temperature for up to two days.Course: Dessert Cuisine: American Equipment: Mixing bowls, muffin tin, whisk, electric mixer, piping bag
Pumpkin Patch Spice Cupcakes with Toasted Marshmallow Frosting
These cupcakes bring warm pumpkin and spice flavors together with a fluffy marshmallow topping that gets toasted for a light campfire note. They work well for Halloween gatherings or a simple fall weekend treat when you want something seasonal without too much fuss. The cake stays moist from the pumpkin while the frosting adds a sweet, airy contrast.

Serves 4 people.
Ingredients
- 3/4 cup all-purpose flour
- 1/2 cup granulated sugar
- 1/3 cup pumpkin puree
- 1 large egg
- 3 tablespoons vegetable oil
- 1 teaspoon baking powder
- 1 teaspoon ground cinnamon
- 1/4 teaspoon ground nutmeg
- 1/4 teaspoon salt
- 1/2 teaspoon vanilla extract
- 20 large marshmallows
- 2 tablespoons unsalted butter
- 1 cup powdered sugar
- 2 tablespoons milk
Instructions
- Preheat the oven to 350 degrees F and line a muffin tin with 4 paper liners.
- In a mixing bowl, whisk together the flour, granulated sugar, baking powder, cinnamon, nutmeg, and salt.
- In a separate bowl, combine the pumpkin puree, egg, vegetable oil, and vanilla extract until smooth.
- Pour the wet mixture into the dry ingredients and stir until just combined with no large lumps remaining.
- Divide the batter evenly among the 4 liners and bake for 18 to 20 minutes until a toothpick comes out clean.
- Let the cupcakes cool completely in the tin before frosting.
- Melt the marshmallows and butter together in a small saucepan over low heat, stirring until smooth.
- Remove from heat and stir in the powdered sugar and milk until the frosting reaches a spreadable consistency.
- Spread the frosting on each cooled cupcake and toast the tops lightly with a kitchen torch until golden.
Extra Tips
For a stronger toasted flavor, pass the torch over the frosting a second time right before serving. The frosting sets quickly once cooled, so apply it while still warm. Store leftovers in an airtight container at room temperature for up to two days.Course: Dessert Cuisine: American Equipment: Muffin tin, Mixing bowls, Whisk, Small saucepan, Kitchen torch
Ghost Meringue Vanilla Bean Cupcakes
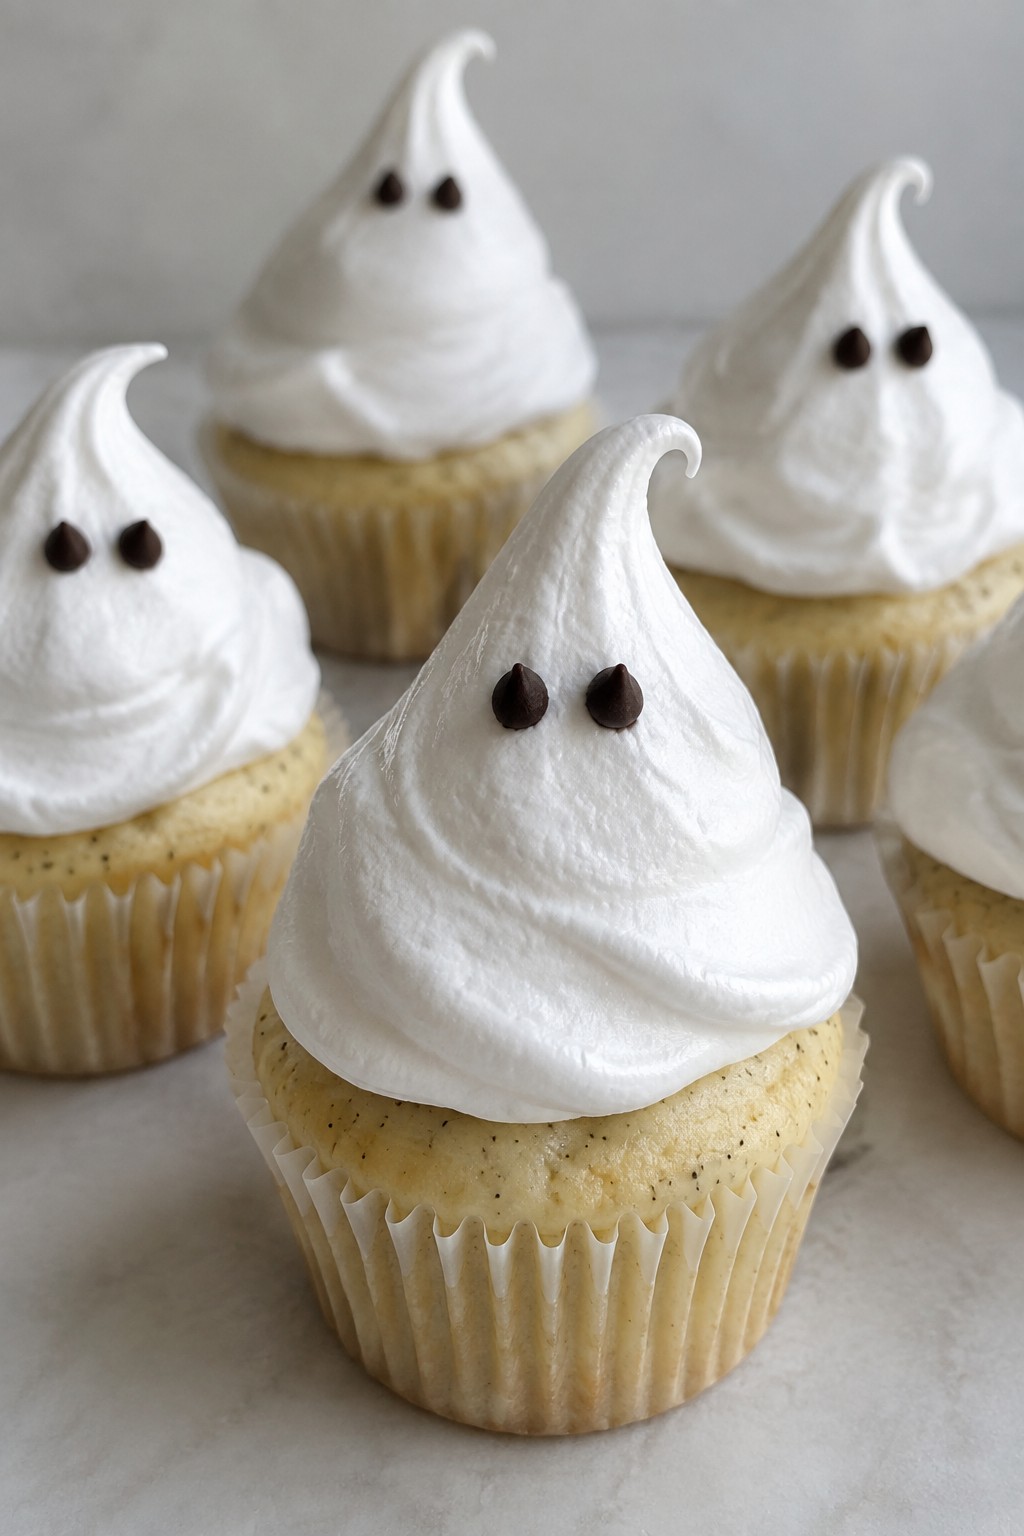
These cupcakes pair a light vanilla bean base with tall, fluffy meringue ghosts on top. The meringue bakes into crisp peaks that hold their shape, making them a simple yet striking choice for Halloween gatherings or fall dessert tables.
The vanilla flavor stays front and center while the meringue adds a sweet, airy contrast. Kids and adults both enjoy spotting the little chocolate chip eyes peeking out from the ghost shapes.
Serves 4 people.
Ingredients
- 1 cup all-purpose flour
- 1/2 cup granulated sugar
- 1/4 cup unsalted butter, softened
- 1 large egg
- 1 vanilla bean, seeds scraped
- 1 teaspoon baking powder
- 1/4 cup milk
- 1/4 teaspoon salt
- 2 large egg whites
- 1/2 cup granulated sugar
- 1/4 teaspoon cream of tartar
- 8 mini chocolate chips
Instructions
- Preheat the oven to 350°F and line a muffin tin with four paper liners.
- In a mixing bowl, cream the butter and 1/2 cup sugar until light. Beat in the egg and vanilla bean seeds.
- Whisk together the flour, baking powder, and salt in a separate bowl. Add half the dry mixture to the butter mixture, then pour in the milk and mix. Add the remaining dry mixture and stir until smooth.
- Divide the batter evenly among the four liners. Bake for 18 minutes or until a toothpick comes out clean. Cool the cupcakes completely on a wire rack.
- Lower the oven to 200°F. In a clean bowl, beat the egg whites and cream of tartar until soft peaks form. Gradually add the remaining 1/2 cup sugar and continue beating until stiff, glossy peaks hold.
- Spoon the meringue into a piping bag fitted with a large round tip. Pipe tall ghost shapes onto each cooled cupcake. Press two mini chocolate chips into each meringue ghost for eyes.
- Bake the topped cupcakes for 2 hours until the meringue feels dry and crisp to the touch. Turn off the oven and let them cool inside with the door slightly open.
Extra Tips
Pipe the meringue in one steady upward motion so the ghosts stand tall without spreading. If the day is humid, leave the finished cupcakes in the turned-off oven a little longer to keep the meringue crisp. Store any leftovers in an airtight container at room temperature for up to one day.
Course: Dessert Cuisine: American Equipment: Mixing Bowls, Muffin Tin, Electric Mixer, Piping Bag, OvenWitch Hat Chocolate Cupcakes with Waffle Cone Tops
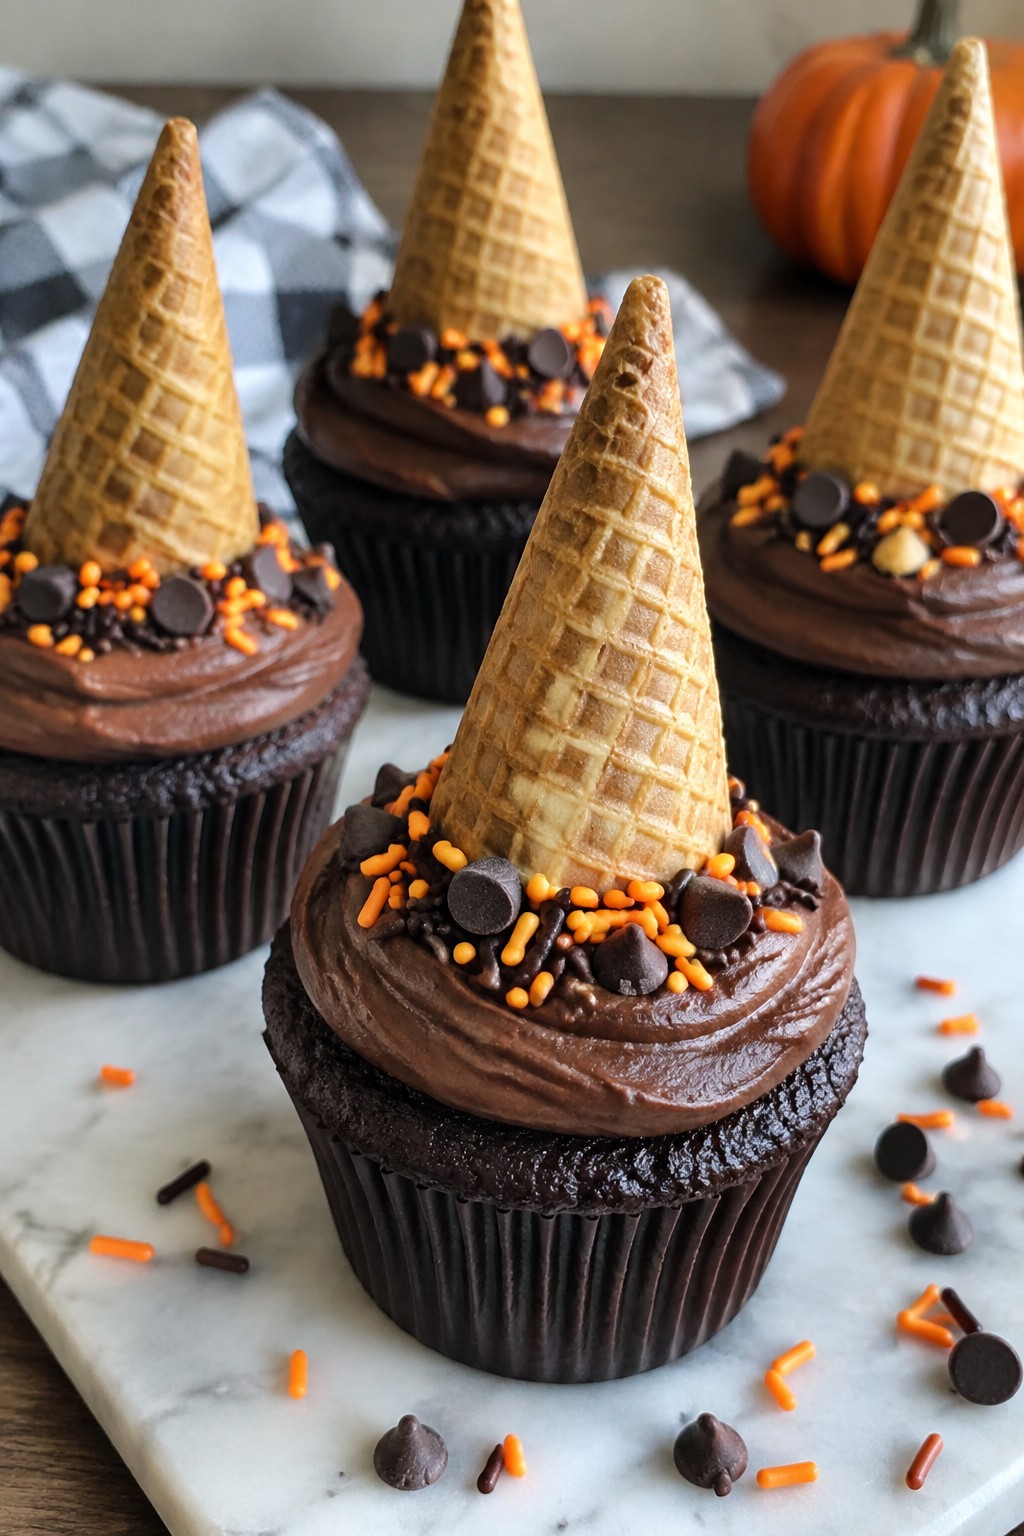
These cupcakes bring a simple Halloween touch with their chocolate base and pointed cone tops. The soft crumb pairs with a crisp cone for a nice mix of textures that feels festive without much fuss. They work well for small gatherings or as a quick project with kids.
The flavor stays straightforward with cocoa richness balanced by a light sweetness from the frosting and sprinkles. The cone adds height and crunch that holds up during serving.
Serves 4 people.
Ingredients
- 1 cup all-purpose flour
- 1/2 cup unsweetened cocoa powder
- 3/4 cup granulated sugar
- 1 teaspoon baking powder
- 1/4 teaspoon salt
- 1/2 cup milk
- 1/4 cup vegetable oil
- 1 large egg
- 1 teaspoon vanilla extract
- 1 cup chocolate frosting
- 4 waffle cones
- 1/2 cup chocolate chips
- 2 tablespoons orange sprinkles
Instructions
- Preheat the oven to 350 degrees F and line a muffin tin with 4 cupcake liners.
- In a mixing bowl, stir together the flour, cocoa powder, sugar, baking powder, and salt.
- Add the milk, vegetable oil, egg, and vanilla extract to the dry ingredients. Mix until the batter is smooth.
- Divide the batter evenly among the 4 liners and bake for 18 to 20 minutes until a toothpick comes out clean. Let the cupcakes cool completely.
- Melt the chocolate chips in the microwave in short bursts, stirring between each until smooth.
- Dip the pointed end of each waffle cone into the melted chocolate and set aside to harden.
- Spread chocolate frosting on each cooled cupcake. Place one cone on top of each cupcake to form the hat shape and add orange sprinkles around the base.
Extra Tips
Melt the chocolate chips slowly to keep the coating thin so the cones stay light and crisp on the cupcakes. Store any leftovers in a single layer in an airtight container at room temperature to prevent the cones from softening. If the frosting feels too stiff after cooling the cupcakes, warm it slightly for easier spreading.Course: Dessert Cuisine: American Equipment: Mixing Bowl, Muffin Tin, Oven, Microwave
Bloody Red Velvet Cupcakes with Raspberry Filling
These red velvet cupcakes fit right into a Halloween spread with their deep red color and a raspberry filling that spills out like blood when you cut into one. The cocoa base stays moist from buttermilk and oil, while the cream cheese frosting adds a cool, tangy finish that balances the fruit. They suit a party table or a small family night when you want something themed but still simple to make.
The flavor combines mild chocolate with bright berry notes, and the soft crumb gives way to the juicy center. They work best served the same day so the filling stays fresh and visible.

Serves 4 people.
Ingredients
- ½ cup all-purpose flour
- 1 tablespoon unsweetened cocoa powder
- ¼ teaspoon baking soda
- ¼ teaspoon salt
- ¼ cup granulated sugar
- ¼ cup buttermilk
- 2 tablespoons vegetable oil
- 1 large egg
- 1 teaspoon red food coloring
- ½ teaspoon vanilla extract
- 1 teaspoon white vinegar
- ½ cup fresh raspberries
- 2 tablespoons granulated sugar
- 4 ounces cream cheese, softened
- 2 tablespoons unsalted butter, softened
- ½ cup powdered sugar
Instructions
- Preheat the oven to 350°F and line a cupcake pan with 4 paper liners.
- In a medium bowl, whisk together the flour, cocoa powder, baking soda, and salt.
- In a separate bowl, mix the ¼ cup granulated sugar, buttermilk, oil, egg, red food coloring, vanilla extract, and vinegar until smooth. Add the dry ingredients to the wet mixture and stir just until combined.
- Divide the batter evenly among the 4 liners and bake for 18 to 20 minutes, or until a toothpick comes out clean. Let the cupcakes cool completely on a wire rack.
- While the cupcakes bake, place the raspberries and 2 tablespoons granulated sugar in a small saucepan over medium heat. Cook for 5 minutes, stirring often, until the berries break down and the mixture thickens slightly. Remove from heat and let cool.
- Once the cupcakes are cool, use a small knife to cut a cone-shaped piece from the center of each cupcake. Spoon the cooled raspberry filling into each hole.
- In a mixing bowl, beat the cream cheese and butter until smooth. Add the powdered sugar and beat until creamy. Spread or pipe the frosting over the filled cupcakes.
Extra Tips
Warm any leftover raspberry filling slightly before serving so it flows more freely when the cupcakes are cut. Store finished cupcakes in the refrigerator and bring them to room temperature for 15 minutes before serving to soften the frosting. If you want a stronger red hue, add an extra drop of food coloring to the batter before baking.Course: Dessert Cuisine: American Equipment: Mixing Bowls, Cupcake Pan, Oven, Small Saucepan, Wire Rack
Caramel Apple Crumble Cupcakes with Streusel
These cupcakes bring together tender apple cake, warm spices, and a crunchy streusel topping finished with caramel drizzle. The mix of soft crumb and crisp bits creates a satisfying contrast that fits right into autumn gatherings.
They suit Halloween parties or casual fall baking when you want something handheld and seasonal. The flavors stay balanced without being overly sweet.

Serves 4 people.
Ingredients
- 1 cup all-purpose flour
- 1/2 cup granulated sugar
- 1 teaspoon baking powder
- 1/2 teaspoon ground cinnamon
- 1/4 cup unsalted butter, softened
- 1 large egg
- 1/2 cup milk
- 1 medium apple, peeled and diced
- 1/4 cup all-purpose flour (for streusel)
- 2 tablespoons brown sugar
- 2 tablespoons unsalted butter, cold and cubed (for streusel)
- 1/4 cup caramel sauce
Instructions
- Preheat the oven to 350 degrees F and line a muffin tin with four paper liners.
- In a medium bowl, whisk together 1 cup flour, granulated sugar, baking powder, and cinnamon.
- Add the softened butter, egg, and milk to the dry mixture. Stir until a smooth batter forms.
- Fold the diced apple into the batter until evenly distributed.
- Divide the batter among the four liners, filling each about three-quarters full.
- In a small bowl, combine the remaining 1/4 cup flour and brown sugar. Cut in the cold cubed butter until the mixture forms coarse crumbs.
- Sprinkle the streusel evenly over the top of each cupcake.
- Bake for 18 to 20 minutes until a toothpick inserted in the center comes out clean.
- Remove the cupcakes from the oven and let them cool in the tin for 5 minutes before transferring to a wire rack.
- Once cooled, drizzle caramel sauce over each cupcake.
Extra Tips
Make the streusel ahead and store it in the fridge so it stays cold and forms better crumbs when baked. Use a firm apple like Granny Smith to keep pieces from turning mushy during baking. If the caramel is too thick to drizzle, warm it briefly in the microwave for a few seconds.Course: Dessert Cuisine: American Equipment: Mixing bowls, muffin tin, whisk, oven, wire rack
Monster Green Velvet Cupcakes with Candy Eyeballs
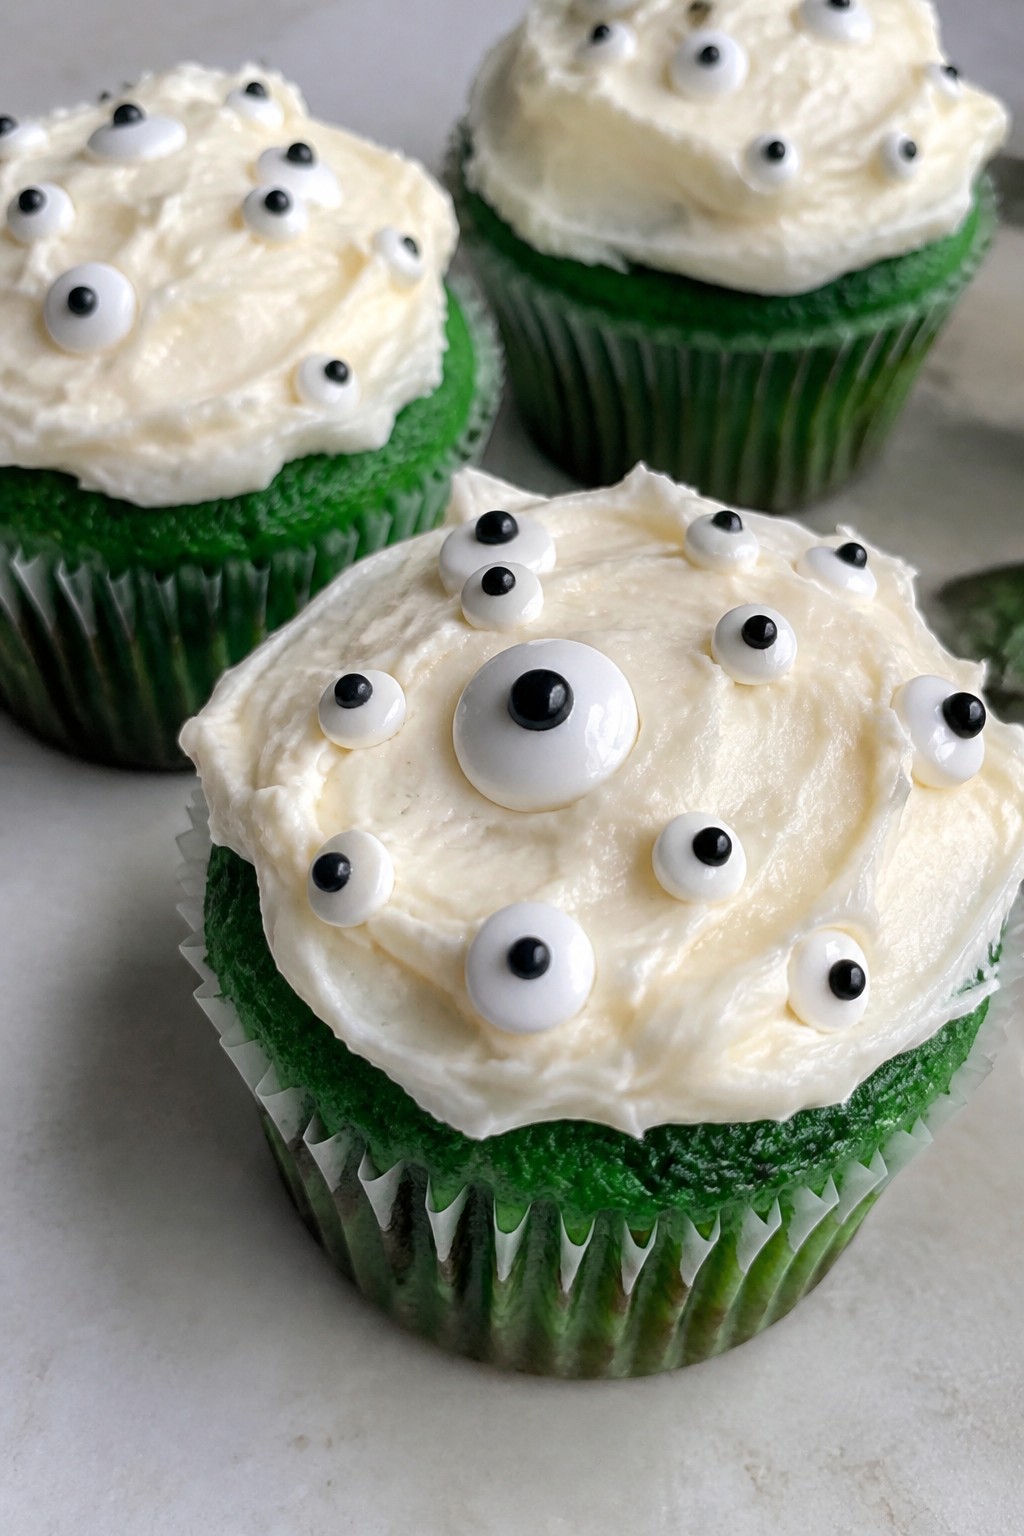
These cupcakes offer a bright green take on classic velvet cake. They have a mild chocolate flavor and a soft, moist crumb that holds up well under a layer of tangy frosting. The candy eyeballs add a playful touch that suits Halloween gatherings or family baking sessions.
They work well for small batches when you want something seasonal without extra leftovers. The cream cheese topping balances the cake’s slight tang, and the overall texture stays light.
Serves 4 people.
Ingredients
- 1/2 cup all-purpose flour
- 1/4 cup granulated sugar
- 1 tablespoon unsweetened cocoa powder
- 1/4 teaspoon baking soda
- 1/8 teaspoon salt
- 1/4 cup buttermilk
- 2 tablespoons vegetable oil
- 1 large egg
- 1 teaspoon white vinegar
- 1 teaspoon vanilla extract
- Several drops green food coloring
- 4 ounces cream cheese, softened
- 2 tablespoons unsalted butter, softened
- 3/4 cup powdered sugar
- 12 candy eyeballs
Instructions
- Preheat the oven to 350 degrees F and line a muffin pan with 4 cupcake liners.
- In a medium bowl, stir together the flour, granulated sugar, cocoa powder, baking soda, and salt.
- In a separate bowl, whisk the buttermilk, vegetable oil, egg, white vinegar, vanilla extract, and green food coloring until the color is even.
- Pour the wet mixture into the dry ingredients and stir until the batter is smooth with no dry streaks.
- Divide the batter evenly among the 4 liners. Bake for 18 to 20 minutes until a toothpick comes out clean. Let the cupcakes cool in the pan for 5 minutes, then transfer to a wire rack to cool completely.
- In a clean bowl, beat the cream cheese and unsalted butter until smooth. Gradually add the powdered sugar and continue beating until the frosting is creamy and spreadable.
- Spread or pipe the frosting on each cooled cupcake. Press three candy eyeballs onto the top of each one.
Extra Tips
Cool the cupcakes fully before frosting so the cream cheese layer stays firm. Gel food coloring gives a stronger green hue without thinning the batter. Keep any extras in the refrigerator to maintain the frosting texture.Course: Dessert Cuisine: American Equipment: Mixing Bowls, Muffin Pan, Electric Mixer, Oven
Graveyard Dirt Cupcakes with Oreo Crumb Topping
These cupcakes bring a playful graveyard theme to any Halloween spread. The rich chocolate base pairs with a thick layer of frosting and a generous sprinkle of crushed Oreos that mimic fresh dirt. They come together quickly and look striking on a dessert table.
The flavor stays deeply chocolatey with a satisfying crunch from the cookie topping. They work well for kids parties or casual gatherings where you want something festive without much fuss.

Serves 4 people.
Ingredients
- ½ cup all-purpose flour
- ¼ cup unsweetened cocoa powder
- ½ cup granulated sugar
- ¼ teaspoon baking powder
- ¼ teaspoon baking soda
- ¼ teaspoon salt
- ¼ cup vegetable oil
- 1 large egg
- ¼ cup buttermilk
- ½ teaspoon vanilla extract
- ½ cup chocolate buttercream frosting
- 8 Oreo cookies, crushed into coarse crumbs
Instructions
- Preheat the oven to 350°F and line a muffin tin with four cupcake liners.
- In a mixing bowl, whisk together the flour, cocoa powder, sugar, baking powder, baking soda, and salt.
- Add the oil, egg, buttermilk, and vanilla extract to the dry ingredients. Stir until the batter is smooth and no dry streaks remain.
- Divide the batter evenly among the four liners, filling each about two-thirds full.
- Bake for 18 to 20 minutes, or until a toothpick inserted in the center comes out clean. Let the cupcakes cool completely in the pan.
- Once cooled, spread a thick layer of chocolate buttercream frosting on each cupcake.
- Sprinkle the crushed Oreo crumbs generously over the frosting to create the dirt topping. Press lightly so the crumbs stick.
Extra Tips
Crush the Oreos by hand or in a zip-top bag for uneven crumbs that look more like soil. If the frosting feels too stiff after sitting, give it a quick stir before spreading. These cupcakes taste best the day they are made but can be stored in an airtight container at room temperature for one day.Course: Dessert Cuisine: American Equipment: Mixing Bowl, Muffin Tin, Whisk, Oven
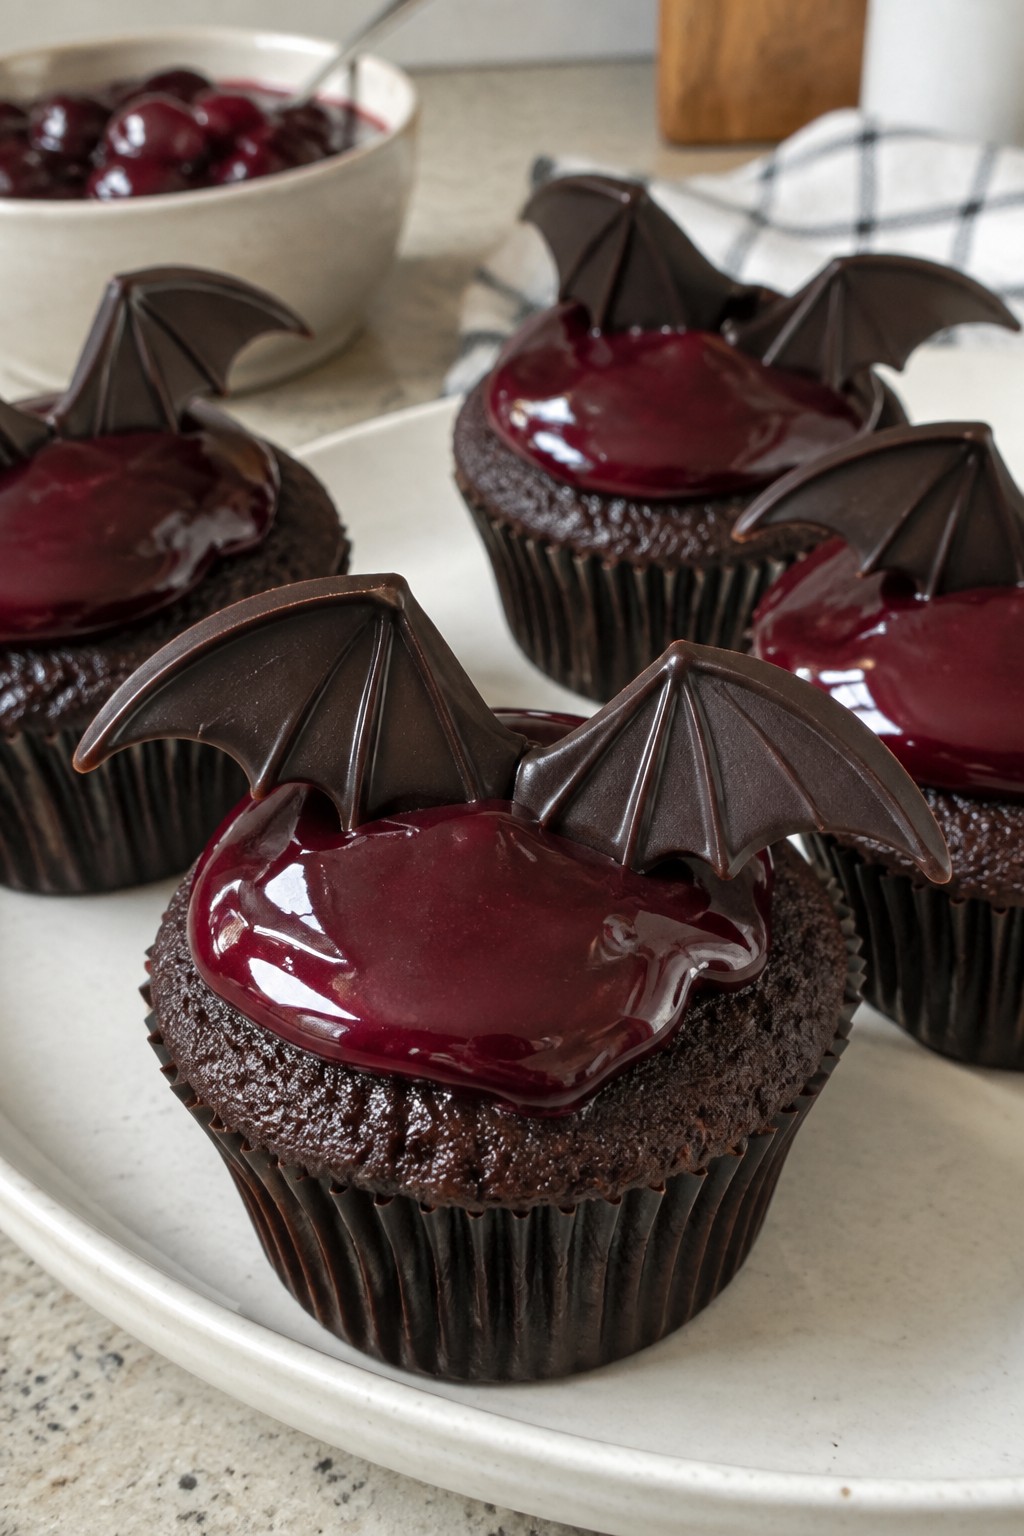
Bat Wing Dark Chocolate Cupcakes with Cherry Ganache
These cupcakes bring a fun Halloween touch with their dark chocolate base and rich cherry ganache topping. The bat wing shapes on top make them stand out at any fall gathering or party. They offer a balance of deep cocoa flavor and bright cherry notes in each bite.
The texture stays moist from the oil and coffee in the batter, while the ganache adds a smooth finish. This recipe works well for small gatherings or as a seasonal project with kids.
Serves 4 people.
Ingredients
- ½ cup all-purpose flour
- ¼ cup dark cocoa powder
- ½ cup sugar
- 1 teaspoon baking powder
- ¼ teaspoon salt
- 1 large egg
- ¼ cup milk
- 2 tablespoons vegetable oil
- ½ teaspoon vanilla extract
- ¼ cup hot brewed coffee
- 4 ounces dark chocolate, chopped
- ½ cup heavy cream
- 2 tablespoons cherry preserves
- 2 ounces dark chocolate (for bat wings)
Instructions
- Preheat the oven to 350 degrees and line a muffin tin with four paper liners.
- In a medium bowl, whisk together the flour, dark cocoa powder, sugar, baking powder, and salt.
- In a separate bowl, beat the egg with the milk, vegetable oil, and vanilla extract until smooth. Pour the wet mixture into the dry ingredients and stir just until combined. Add the hot coffee and mix until the batter turns glossy.
- Divide the batter evenly among the four liners. Bake for 18 to 20 minutes, or until a toothpick inserted in the center comes out clean. Let the cupcakes cool completely in the tin.
- While the cupcakes cool, place the 4 ounces of chopped dark chocolate in a heatproof bowl. Heat the heavy cream in a small saucepan until it just begins to simmer, then pour it over the chocolate. Let it sit for one minute, then stir until smooth. Stir in the cherry preserves until fully blended. Let the ganache cool slightly until it thickens enough to spread.
- Spread the cherry ganache over each cooled cupcake. Melt the remaining 2 ounces of dark chocolate and pipe or spread it into small bat wing shapes on parchment paper. Once set, place two wings on top of each cupcake.
Extra Tips
Let the ganache cool to room temperature before spreading so it sits in a thick layer rather than soaking into the cake. Shape the bat wings while the melted chocolate is still warm but not hot, and chill them briefly for clean edges. Store any leftovers in an airtight container in the fridge for up to two days.Course: Dessert Cuisine: American Equipment: Mixing bowls, muffin tin, saucepan, whisk, oven
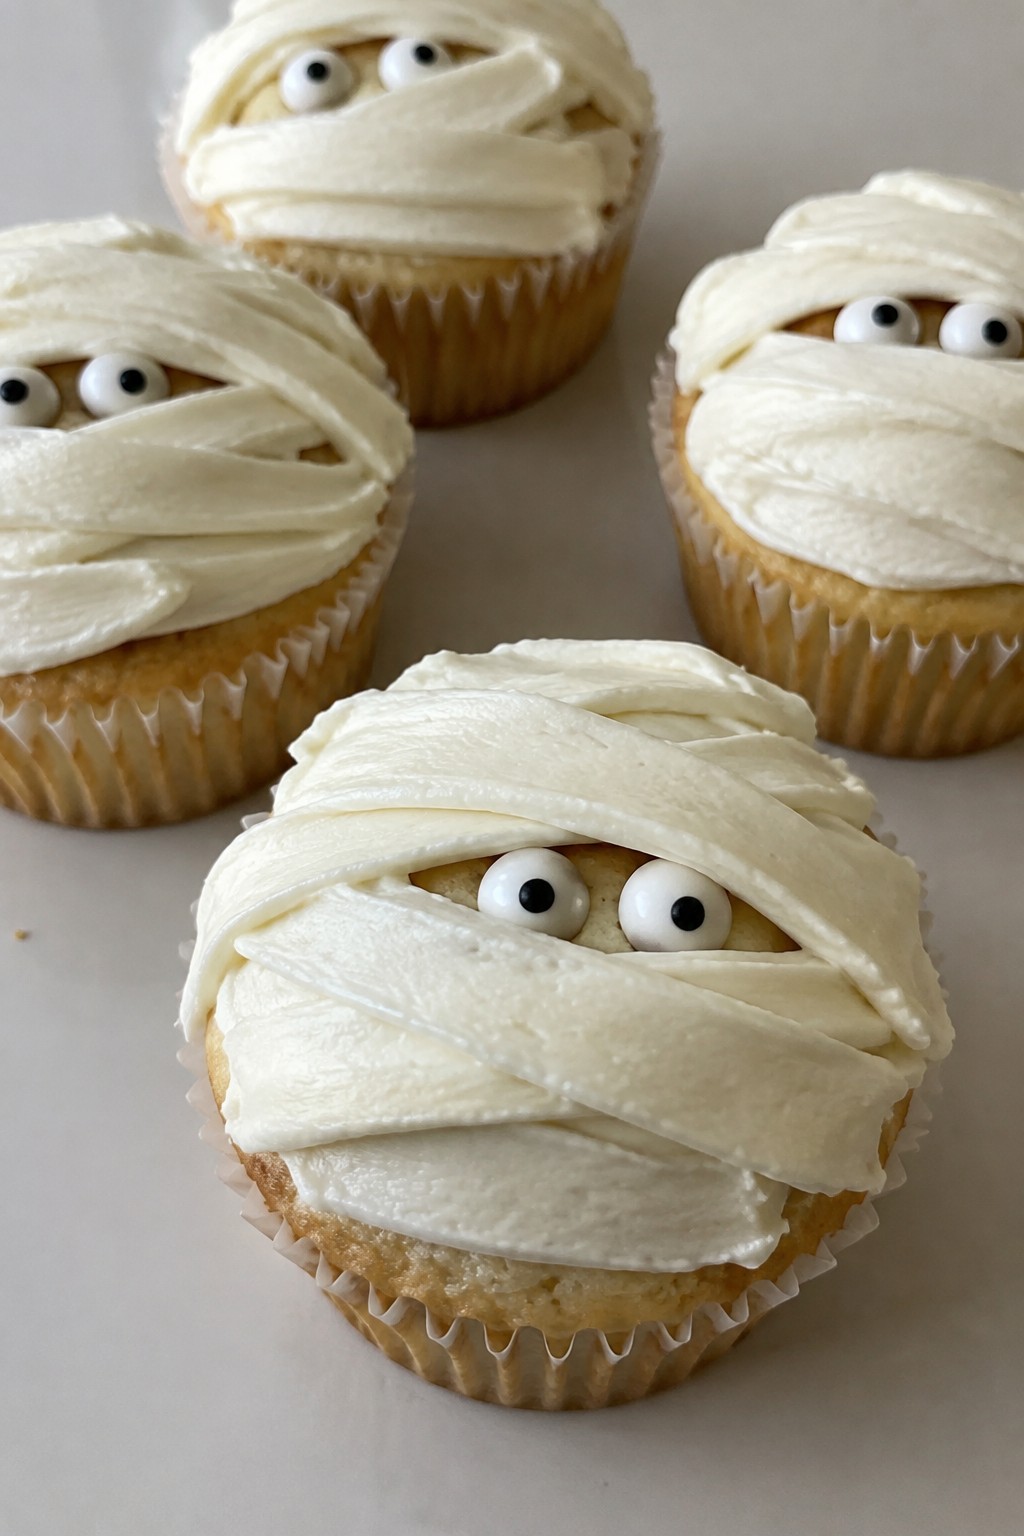
Mummy Wrapped Vanilla Cupcakes with Cream Cheese Icing
These cupcakes add a playful touch to Halloween gatherings with their bandage-style icing design. The vanilla cupcakes stay light and moist while the cream cheese icing brings a slight tang that balances the sweetness. They suit afternoon baking sessions or small parties where a simple themed treat fits the season.
The finished cupcakes offer a soft crumb under smooth layers of icing. Candy eyes peek out from the wraps to complete the look without extra fuss.
Serves 4 people.
Ingredients
- 1 cup all-purpose flour
- 3/4 cup granulated sugar
- 1/2 cup unsalted butter, softened
- 2 large eggs
- 2 teaspoons vanilla extract
- 1 1/2 teaspoons baking powder
- 1/2 cup milk
- 8 ounces cream cheese, softened
- 1/4 cup unsalted butter, softened
- 2 cups powdered sugar
- 8 candy eyes
Instructions
- Preheat the oven to 350°F and line a muffin tin with four cupcake liners.
- In a mixing bowl, cream together the granulated sugar and 1/2 cup softened butter until light. Add the eggs one at a time along with 1 teaspoon vanilla extract and mix until combined.
- Stir in the flour, baking powder, and milk until the batter is smooth. Divide the batter evenly among the four liners.
- Bake for 18 to 20 minutes until a toothpick inserted in the center comes out clean. Let the cupcakes cool completely on a wire rack.
- In a separate bowl, beat the cream cheese with the remaining 1/4 cup butter until smooth. Add the powdered sugar and remaining 1 teaspoon vanilla extract and mix until the icing reaches a spreadable consistency.
- Spread a thin base layer of icing over each cooled cupcake. Spoon the remaining icing into a piping bag fitted with a small flat tip and pipe overlapping horizontal strips across each cupcake to form the mummy wraps.
- Press two candy eyes onto each cupcake while the icing is still soft.
Extra Tips
Pipe the icing strips while the base layer is still slightly tacky so they hold without sliding. Store any leftovers in an airtight container in the refrigerator for up to two days and let them sit at room temperature for 15 minutes before serving to soften the icing again.Course: Dessert Cuisine: American Equipment: Mixing bowls, Muffin tin, Wire rack, Piping bag
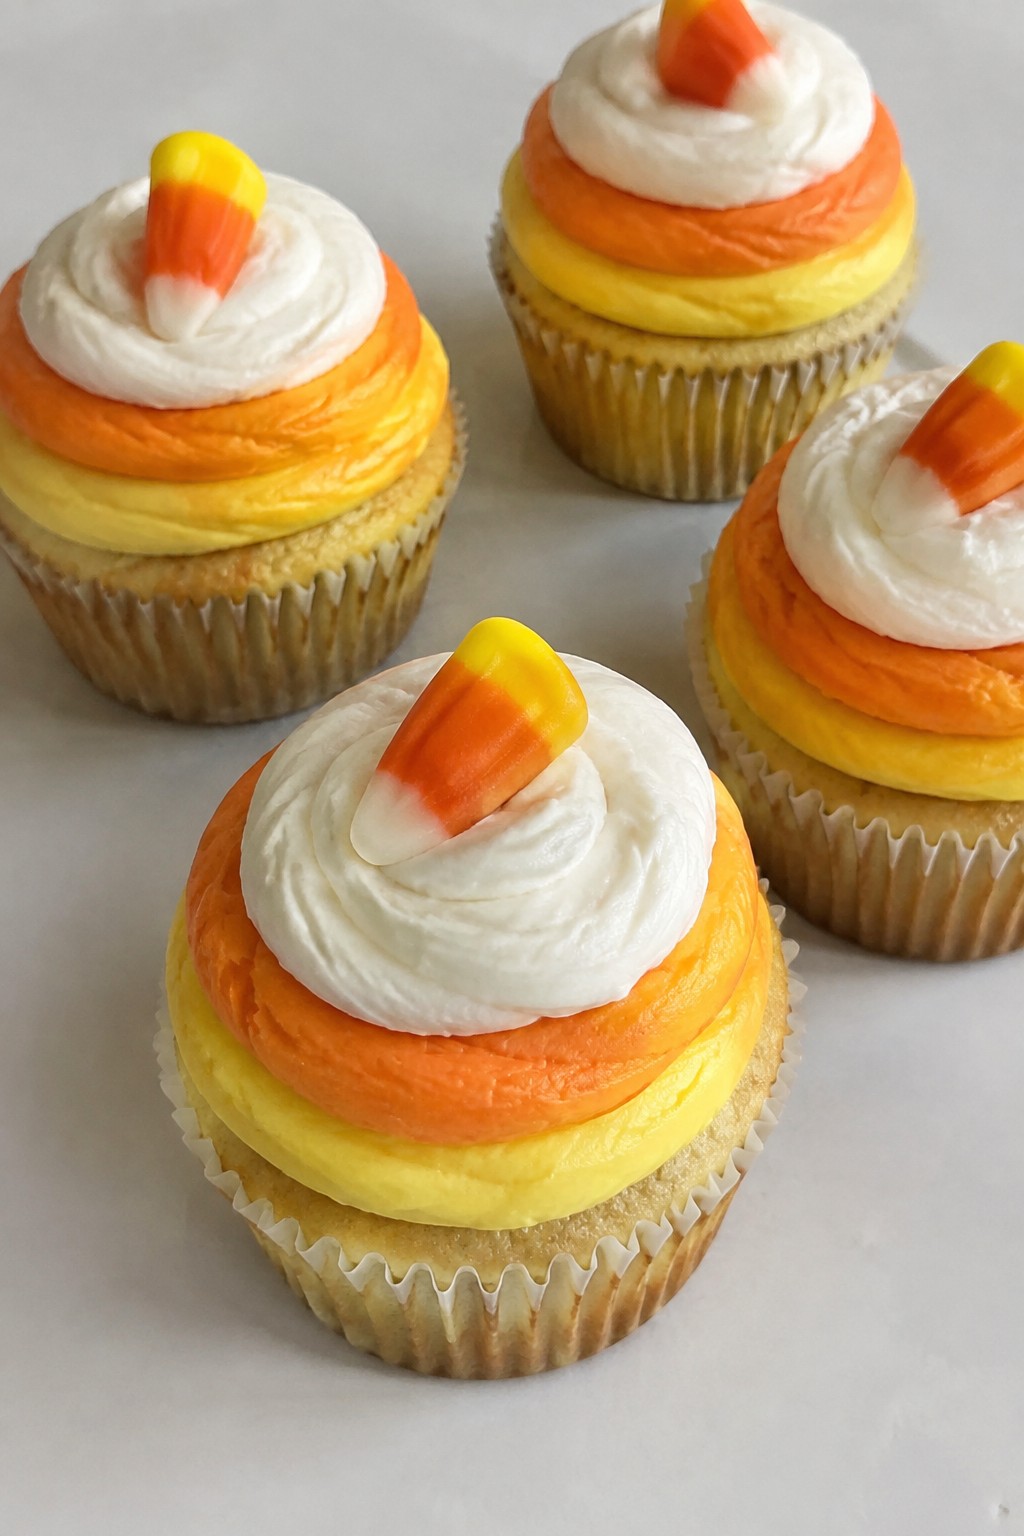
Candy Corn Layered Buttercream Cupcakes
These cupcakes capture the look of candy corn with stripes of yellow, orange, and white buttercream on a simple vanilla base. They suit Halloween parties or autumn treats when you want something festive without much fuss. The result is a soft crumb topped with smooth, sweet frosting and a chewy candy finish.
The layered buttercream gives each bite a mix of vanilla flavor and varying sweetness levels from the colored sections.
Serves 4 people.
Ingredients
- ½ cup all-purpose flour
- ¼ cup granulated sugar
- ¼ cup unsalted butter, softened
- 1 large egg
- ½ cup milk
- 1 teaspoon vanilla extract
- 1 teaspoon baking powder
- ¼ teaspoon salt
- ½ cup unsalted butter, softened
- 1½ cups powdered sugar
- 1 tablespoon milk
- Yellow food coloring
- Orange food coloring
- 12 candy corn pieces
Instructions
- Preheat the oven to 350°F and line a muffin tin with four cupcake liners.
- In a bowl, cream together the ¼ cup softened butter and granulated sugar until light. Add the egg, ½ cup milk, and vanilla extract, then mix until combined.
- Stir in the flour, baking powder, and salt until the batter is smooth. Divide the batter evenly among the four liners.
- Bake for 18 minutes or until a toothpick inserted in the center comes out clean. Let the cupcakes cool completely.
- In a separate bowl, beat the ½ cup softened butter with the powdered sugar and 1 tablespoon milk until fluffy. Divide the buttercream into three portions.
- Leave one portion white. Tint the second portion yellow and the third portion orange with the food colorings.
- Pipe a layer of yellow buttercream on each cupcake, followed by an orange layer, then finish with a white layer on top.
- Press three candy corn pieces into the white buttercream on each cupcake to finish.
Extra Tips
Pipe the buttercream layers while the frosting is at room temperature to keep the stripes even. If the buttercream feels too stiff, add a few drops of milk to loosen it before coloring. Store any leftovers in an airtight container at room temperature for up to two days to maintain the soft texture.Course: Dessert Cuisine: American Equipment: Mixing bowls, Muffin tin, Electric mixer, Piping bags
Poisoned Green Apple Cupcakes with Sour Candy Drizzle
These Poisoned Green Apple Cupcakes with Sour Candy Drizzle offer a tart twist on classic Halloween cupcakes. The green apple flavor gives each bite a bright, slightly sharp taste that stands out from sweeter options.
The sour candy drizzle adds chew and extra tang on top of a soft cake base. This recipe works well for small gatherings or as a make-ahead treat for October parties.

Serves 4 people.
Ingredients
- 3/4 cup all-purpose flour
- 1/2 cup granulated sugar
- 1/4 cup unsalted butter, softened
- 1 large egg
- 1 teaspoon baking powder
- 1/3 cup green apple juice
- 4 drops green food coloring
- 1 cup powdered sugar
- 2 tablespoons unsalted butter, softened
- 1/2 cup sour apple candies, chopped
Instructions
- Preheat the oven to 350 degrees and line a cupcake pan with four liners.
- In a mixing bowl, stir together the flour, granulated sugar, and baking powder.
- Add the softened butter, egg, green apple juice, and green food coloring. Mix until the batter is smooth and evenly tinted.
- Divide the batter evenly among the four liners and bake for 18 to 20 minutes until a toothpick comes out clean.
- While the cupcakes cool, make the frosting by beating the powdered sugar and remaining softened butter until creamy. Spread the frosting over the cooled cupcakes.
- Place the chopped sour apple candies in a small microwave-safe bowl and heat in 10-second bursts until melted. Drizzle the melted candy over the frosted cupcakes.
Extra Tips
Melt the sour apple candies just until they turn liquid to keep the drizzle thin and easy to pour. If the frosting feels too thick, add a teaspoon of green apple juice to loosen it. Store finished cupcakes in an airtight container at room temperature for up to two days.Course: Dessert Cuisine: American Equipment: Mixing Bowl, Cupcake Pan, Oven
Skull Face Chocolate Cupcakes with White Chocolate Skulls
These cupcakes bring a fun Halloween touch to any gathering. The dark chocolate base pairs with smooth white chocolate skulls on top for a striking look that kids and adults enjoy. They work well for parties or as a simple seasonal treat.
The flavor is rich and chocolatey with a creamy contrast from the skulls. The texture stays moist in the cake and firm on the topping.

Serves 4 people.
Ingredients
- 1/2 cup all-purpose flour
- 1/4 cup unsweetened cocoa powder
- 1/2 cup granulated sugar
- 1/4 cup unsalted butter, softened
- 1 large egg
- 1/4 cup milk
- 1 teaspoon baking powder
- 1/2 teaspoon vanilla extract
- 6 ounces white chocolate
Instructions
- Preheat the oven to 350 degrees F and line a cupcake pan with four paper liners.
- In a mixing bowl, cream the softened butter and sugar until light. Add the egg and vanilla extract, then mix until combined.
- In a separate bowl, whisk the flour, cocoa powder, and baking powder. Add half the dry mixture to the wet ingredients, followed by the milk, then the remaining dry mixture. Stir until smooth.
- Divide the batter evenly among the four liners. Bake for 18 to 20 minutes until a toothpick comes out clean. Cool the cupcakes completely on a wire rack.
- Melt the white chocolate in a microwave-safe bowl in 20-second bursts, stirring between each until smooth. Spoon the melted chocolate into skull-shaped silicone molds and let set in the refrigerator until firm.
- Once set, remove the white chocolate skulls from the molds and place one on top of each cooled cupcake.
Extra Tips
Make the skulls a day ahead and store them in the fridge so they stay firm when placed on the cupcakes. If the white chocolate thickens while working, warm it gently for a few seconds to restore a pourable consistency. These cupcakes taste best the day they are assembled.Course: Dessert Cuisine: American Equipment: Mixing bowls, cupcake pan, wire rack, microwave-safe bowl
Harvest Pumpkin Cheesecake Swirl Cupcakes
These cupcakes bring together spiced pumpkin cake and a creamy cheesecake swirl for a treat that suits Halloween gatherings or cozy fall evenings. The combination gives a moist crumb with a tangy ribbon running through each one. They work well when you want something seasonal without too much fuss.
The flavor balances warm spices with the richness of cream cheese. Each bite offers a soft texture from the pumpkin base and a smooth finish from the swirl.

Serves 4 people.
Ingredients
- ½ cup all-purpose flour
- ¼ cup granulated sugar
- ½ teaspoon baking powder
- ½ teaspoon ground cinnamon
- ¼ teaspoon ground nutmeg
- ¼ cup pumpkin puree
- 2 tablespoons vegetable oil
- 1 large egg
- 4 ounces cream cheese, softened
- 2 tablespoons granulated sugar
- ½ teaspoon vanilla extract
Instructions
- Preheat the oven to 350 degrees and line a muffin tin with four paper liners.
- In a bowl, stir together the flour, ¼ cup sugar, baking powder, cinnamon, and nutmeg.
- Add the pumpkin puree, vegetable oil, and half of the egg to the dry mixture. Stir until the batter is smooth.
- In a separate bowl, beat the cream cheese with the remaining 2 tablespoons sugar, vanilla extract, and the other half of the egg until the mixture is creamy.
- Divide the pumpkin batter evenly among the four liners. Spoon the cream cheese mixture on top of each one.
- Use a toothpick to gently swirl the two mixtures together in each liner.
- Bake for 20 to 22 minutes until a toothpick inserted in the center comes out clean. Cool the cupcakes before serving.
Extra Tips
Make the cream cheese mixture slightly thicker than the pumpkin batter so the swirl stays defined after baking. If you want a stronger spice note, add an extra pinch of cinnamon to the dry ingredients before mixing. Store leftovers in an airtight container in the refrigerator for up to three days.Course: Dessert Cuisine: American Equipment: Mixing Bowls, Muffin Tin, Whisk
Vampire Bite Red Velvet Cupcakes with Dark Chocolate Ganache
These cupcakes bring a bold red velvet base together with a rich dark chocolate topping for a striking Halloween treat. The raspberry filling adds a bright contrast that looks like a bite mark once the cupcakes are cut or bitten into. They work well for small gatherings or as a festive addition to a dessert table.
The flavor balances mild cocoa with tangy notes from buttermilk and a deep chocolate finish from the ganache. The texture stays moist inside with a smooth, firm ganache layer on top.

Serves 4 people.
Ingredients
- ¾ cup all-purpose flour
- ½ cup granulated sugar
- 1 tablespoon unsweetened cocoa powder
- ½ teaspoon baking soda
- ¼ teaspoon salt
- ½ cup buttermilk
- 1 large egg
- ¼ cup vegetable oil
- 1 teaspoon red food coloring
- ½ teaspoon vanilla extract
- ½ teaspoon white vinegar
- 4 ounces dark chocolate, chopped
- ½ cup heavy cream
- 2 tablespoons raspberry jam
Instructions
- Preheat the oven to 350°F and line a cupcake pan with 4 paper liners.
- In a medium bowl, whisk together the flour, sugar, cocoa powder, baking soda, and salt.
- In a separate bowl, whisk the buttermilk, egg, oil, red food coloring, vanilla, and vinegar until smooth.
- Pour the wet mixture into the dry ingredients and stir until just combined with no large streaks of flour remaining.
- Divide the batter evenly among the 4 liners and bake for 18 to 20 minutes until a toothpick inserted in the center comes out clean. Let the cupcakes cool completely.
- Place the chopped dark chocolate in a heatproof bowl. Heat the heavy cream in a small saucepan until it just begins to simmer, then pour it over the chocolate. Let it sit for 2 minutes before stirring until smooth and glossy.
- Use a small knife or piping tip to cut a shallow hole in the center of each cooled cupcake. Fill each hole with 1½ teaspoons of raspberry jam.
- Spoon or spread the ganache over the top of each cupcake, letting it drip slightly down the sides. Allow the ganache to set for 10 minutes before serving.
Extra Tips
Let the ganache cool just until it thickens slightly before topping the cupcakes so it holds a clean edge instead of running off completely. If the raspberry jam is too thick to pipe easily, stir in a drop of warm water to loosen it. Store any leftovers in an airtight container at room temperature for up to two days.Course: Dessert Cuisine: American Equipment: Mixing bowls, Cupcake pan, Oven, Saucepan, Whisk
