
Planning a kids Halloween party means finding food that is fun without being too complicated. You need ideas that look good on the table and that children will actually eat. This list has 14 simple recipes that work well for a group. They cover both sweet and savory options with steps that fit a busy schedule. You can pick a few that match what you already have on hand.
Helpful Tips Before You Start
A little planning keeps the food fun and stress low for a kids’ party.
Shop with Simple Ingredients
Stick to items kids already like. This cuts down on waste and picky eaters at the table.
Prep What You Can Ahead
Make dips, cut veggies, or bake bases the day before. You will have more time to set up the party space.
Add Kid Tasks
Let children place candy eyes or stir sprinkles. Small jobs help them feel part of the fun.
Label Everything Clearly
Use signs for any treats with nuts or common allergens. Parents will feel more at ease.
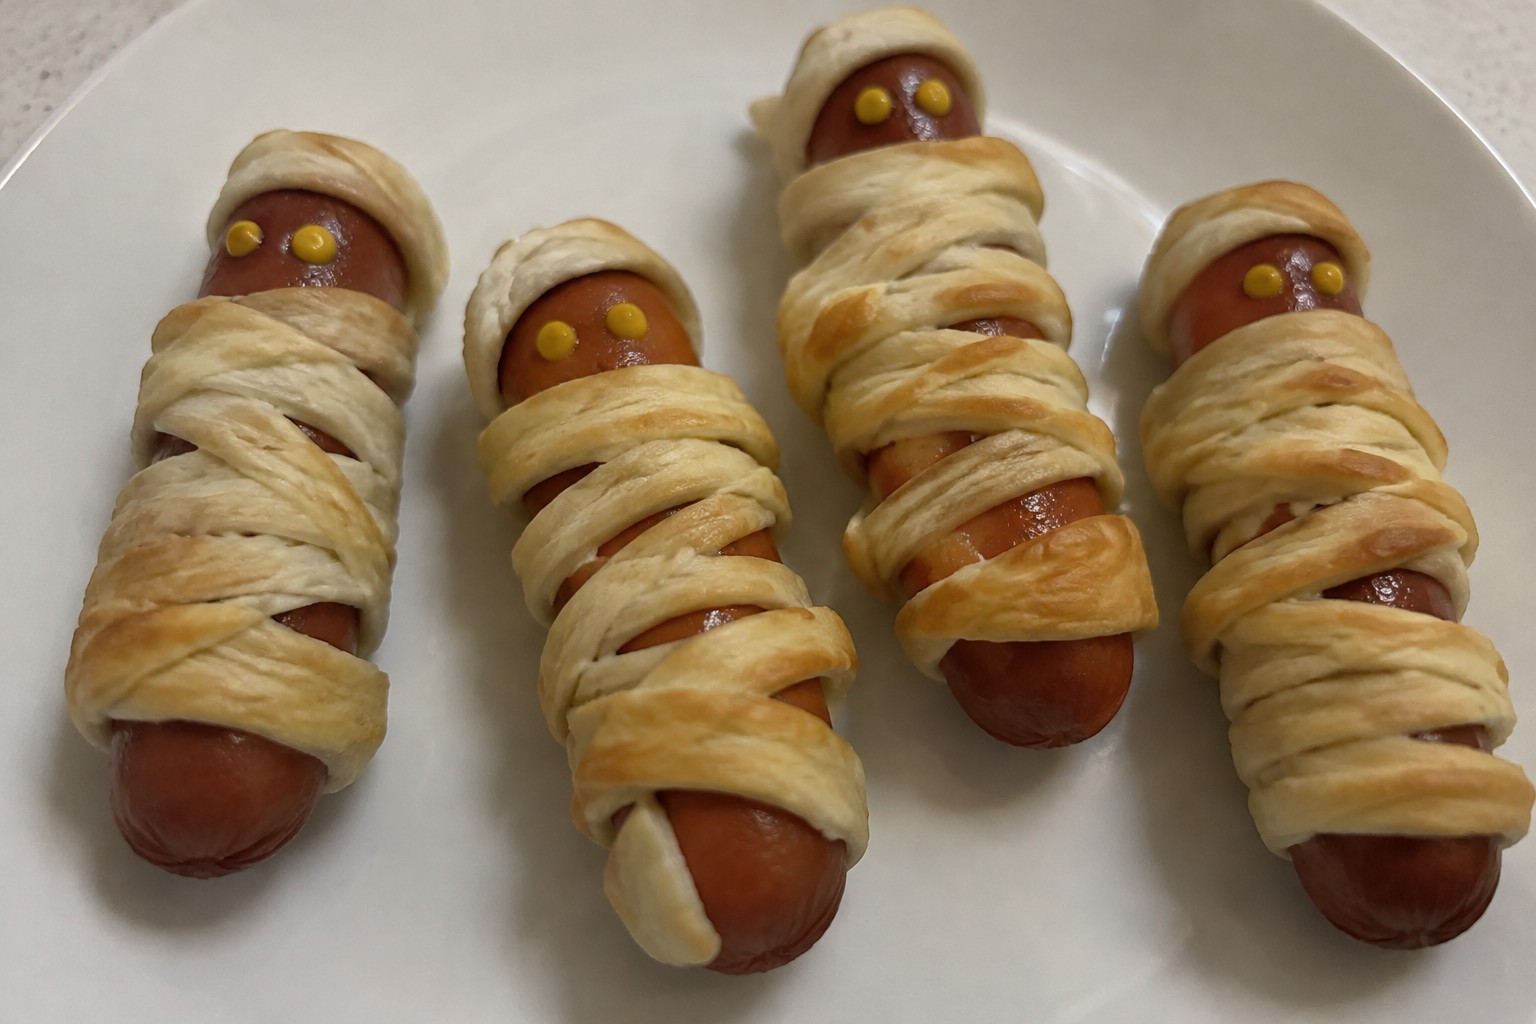
Mummy-Wrapped Hot Dog Skewers
These mummy-wrapped hot dog skewers turn a simple party staple into a fun Halloween treat that fits right into a kids’ celebration. The strips of dough create a bandage look around each hot dog, and the skewers make them easy for children to pick up and eat without much mess. The result is a savory bite with a flaky crust on the outside and a warm, juicy center.
They work well as a snack or light main at an afternoon party where kids want something familiar yet themed. The mild taste keeps even picky eaters happy while the visual detail adds to the festive mood.

Serves 4 people.
Ingredients
- 8 beef hot dogs
- 1 can (8 ounces) refrigerated crescent roll dough
- 8 wooden skewers
- 2 tablespoons yellow mustard
Instructions
- Preheat the oven to 375 degrees and line a baking sheet with parchment paper.
- Cut each hot dog in half crosswise so you have 16 pieces total. Thread two pieces onto each wooden skewer, leaving a small gap between them.
- Open the crescent roll dough and cut it into thin strips about half an inch wide. Wrap the strips around each hot dog piece in a crisscross pattern to resemble bandages, leaving small gaps for the eyes.
- Place the skewers on the prepared baking sheet. Bake for 12 to 15 minutes until the dough is golden brown and the hot dogs are heated through.
- Remove from the oven and let cool slightly. Use the yellow mustard to dot two small eyes on each wrapped hot dog.
Extra Tips
Keep the dough strips narrow and space them loosely so the hot dog shows through in places for a clearer mummy effect. If the dough starts to stick while wrapping, dust your hands lightly with flour. These skewers taste best served warm with extra mustard or ketchup on the side for dipping. Leftovers can be stored in the fridge and reheated in a 350-degree oven for a few minutes to restore crispness.Course: Appetizer Cuisine: American Equipment: Baking sheet, Knife, Parchment paper
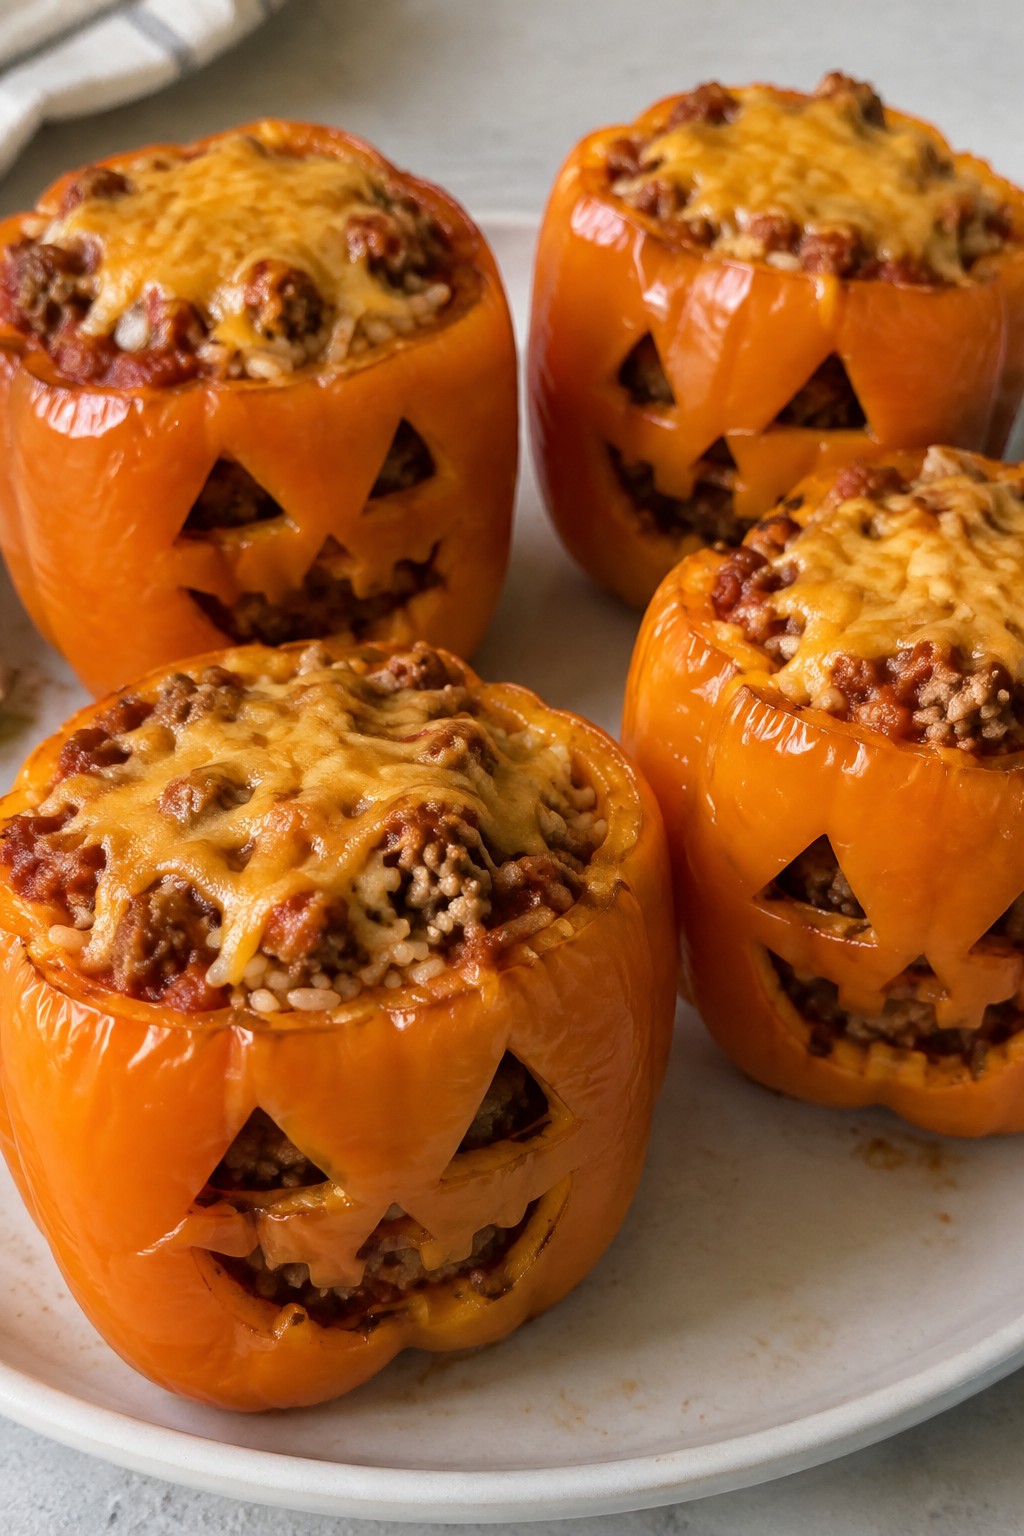
Jack-O’-Lantern Stuffed Bell Peppers
These stuffed peppers turn ordinary bell peppers into jack-o’-lanterns that stand out on a kids’ party table. They work well for Halloween because the carved faces add a playful touch without extra decorations or special tools.
The filling combines mild ground turkey with rice and cheese for a savory, kid-friendly taste. The peppers soften during baking while still holding their shape and the fun carved details.
Serves 4 people.
Ingredients
- 4 large orange bell peppers
- 1 pound ground turkey
- 1 cup cooked white rice
- 1 small onion, finely chopped
- 1 cup marinara sauce
- 1 1/2 cups shredded cheddar cheese
- 1 teaspoon garlic powder
- Salt and black pepper to taste
Instructions
- Preheat the oven to 375 degrees F and lightly grease a baking dish.
- In a large skillet over medium heat, cook the ground turkey and chopped onion until the meat is browned and the onion is soft. Drain any excess liquid.
- Stir in the cooked rice, marinara sauce, garlic powder, salt, and black pepper. Remove the skillet from the heat and mix in 1 cup of the shredded cheddar cheese until melted and combined.
- Cut the tops off each bell pepper and set the tops aside. Use a small knife to carve simple jack-o’-lantern faces into the sides of the peppers. Remove the seeds and membranes from inside each pepper.
- Spoon the turkey and rice mixture evenly into the carved peppers. Place the filled peppers in the prepared baking dish and sprinkle the remaining 1/2 cup of cheddar cheese over the tops.
- Bake for 25 to 30 minutes until the peppers are tender and the cheese is melted and bubbly. Serve with the reserved pepper tops placed back on if desired.
Extra Tips
Choose peppers with flat sides so the carved faces stay clear after baking. If the filling seems too thick after mixing, add a splash of water to loosen it before stuffing. Leftovers reheat well in the microwave, though the carved details soften slightly on the second day.Course: Appetizer Cuisine: American Equipment: Large Skillet, Baking Dish, Sharp Knife
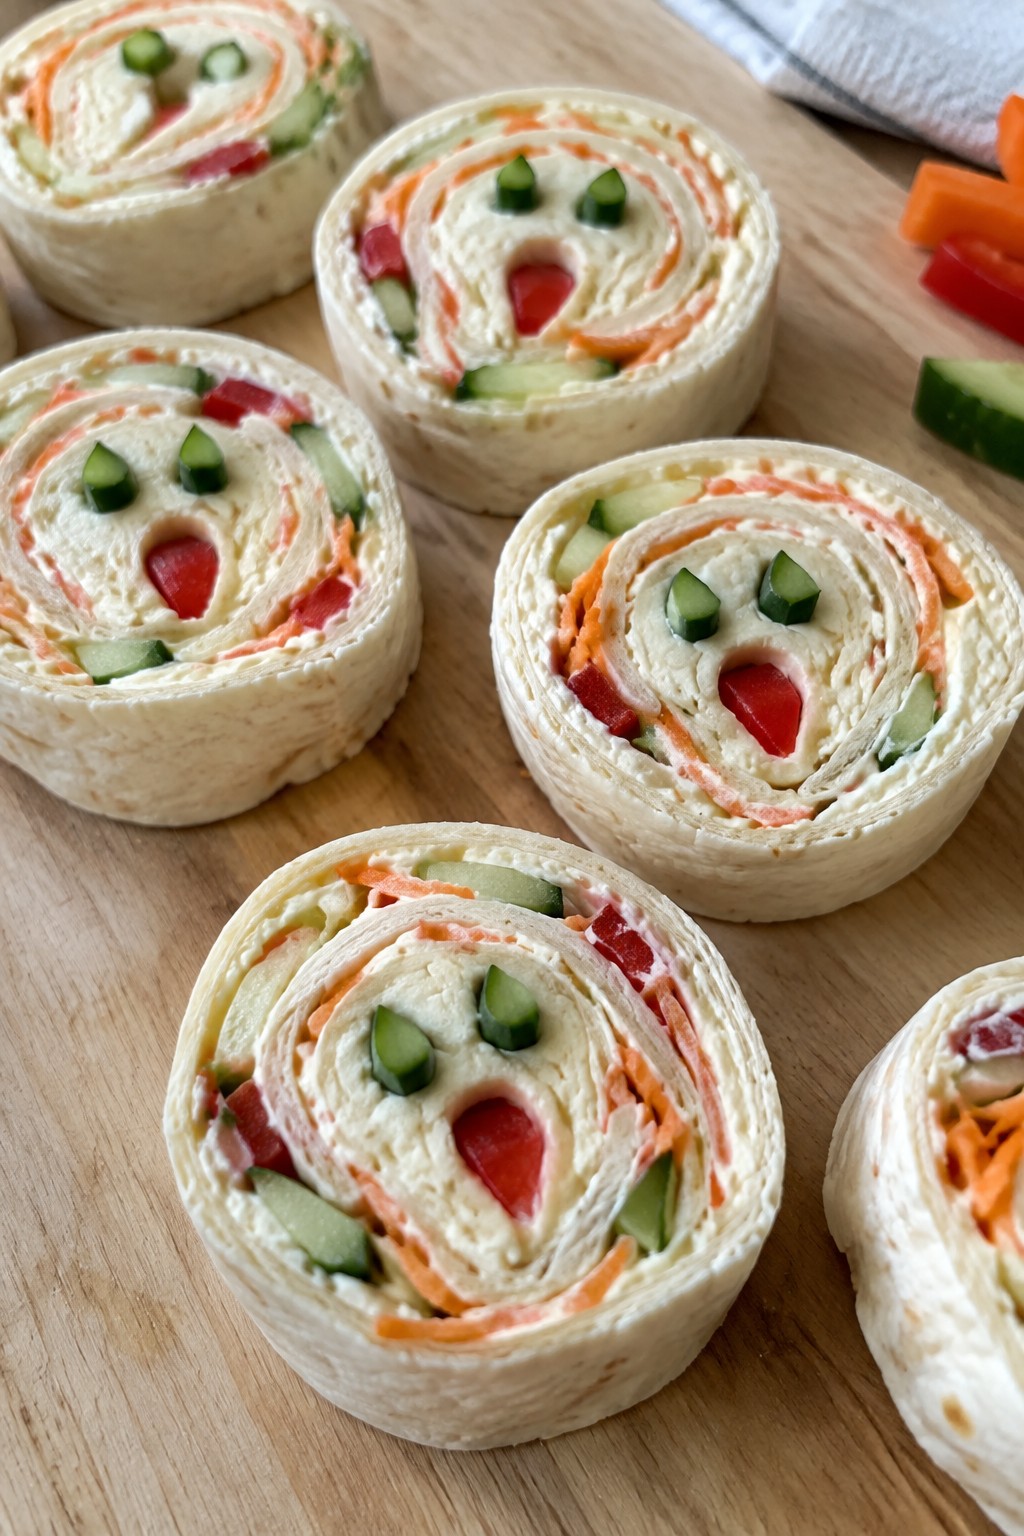
Ghostly Cheese and Veggie Pinwheels
These pinwheels bring a simple spooky touch to a kids’ Halloween party spread. The pale cheese filling shows through the tortilla slices for a ghostly effect while the colorful veggies add crunch that children often enjoy.
The recipe works well as an easy make-ahead snack that travels well to school events or home parties. Creamy cheese balances the fresh vegetables without any heavy flavors that might overwhelm young palates.
Serves 4 people.
Ingredients
- 4 large flour tortillas
- 8 ounces cream cheese, softened
- 1 cup shredded mozzarella cheese
- ½ cup shredded carrots
- ½ cup diced cucumber
- ½ cup diced red bell pepper
Instructions
- Lay the tortillas flat on a clean surface and spread an even layer of cream cheese over each one, leaving a small border around the edges.
- Sprinkle the shredded mozzarella cheese evenly across the cream cheese on all four tortillas.
- Distribute the shredded carrots, diced cucumber, and diced red bell pepper evenly over the cheese layer on each tortilla.
- Roll each tortilla tightly from one edge to the other, pressing gently to help the filling hold together.
- Slice the rolled tortillas into 1-inch pinwheels with a sharp knife and arrange them on a serving plate.
Extra Tips
Chill the rolls for 15 minutes before slicing if you want cleaner edges. The mozzarella keeps the color light for the ghostly look, so avoid swapping it for orange cheddar. Leftovers store in an airtight container in the fridge for up to one day, though the tortillas soften slightly after the first serving.Course: Appetizer Cuisine: American Equipment: Mixing bowl, Sharp knife, Cutting board
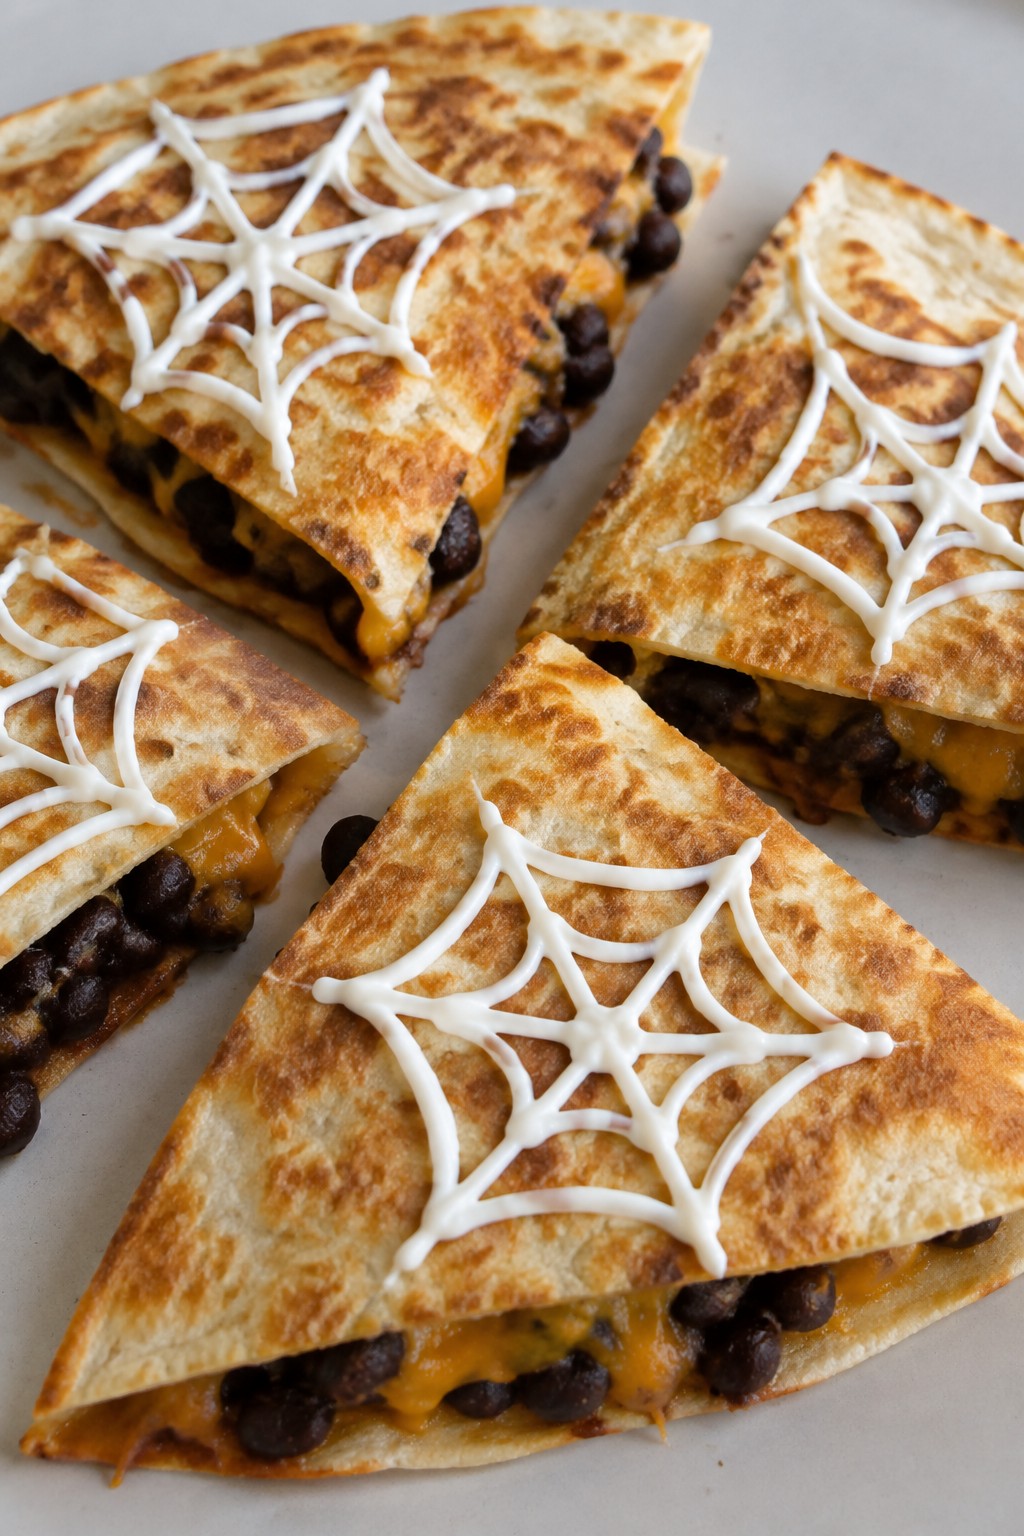
Spiderweb Black Bean Quesadilla Triangles
These quesadilla triangles bring a simple Halloween touch to a kids’ party with their spiderweb design on top. The black bean filling keeps them hearty while the melted cheese makes them easy for little hands to grab. They work well as a savory snack that stands out from all the sweet treats on the table.
The flavor stays mild and cheesy with a light smoky note from the seasoned beans. The sour cream webs add a cool, creamy contrast without overpowering the quesadilla itself. Kids enjoy the visual detail, and parents appreciate that the recipe stays straightforward.
Serves 4 people.
Ingredients
- 4 large flour tortillas
- 1 (15-ounce) can black beans, drained and rinsed
- 1 teaspoon ground cumin
- 1/2 teaspoon chili powder
- 1/4 teaspoon salt
- 1 1/2 cups shredded cheddar cheese
- 2 tablespoons olive oil
- 1/2 cup sour cream
Instructions
- Drain and rinse the black beans, then place them in a bowl. Add the cumin, chili powder, and salt, then mash the mixture with a fork until most beans are broken down but some chunks remain.
- Lay one tortilla flat and spread one-quarter of the bean mixture over half of it. Sprinkle one-quarter of the cheese on top of the beans. Fold the tortilla in half to form a half-moon shape. Repeat with the remaining tortillas, beans, and cheese.
- Heat 1 tablespoon of olive oil in a large skillet over medium heat. Place two folded tortillas in the skillet and cook for 2 to 3 minutes per side until the tortillas turn golden and the cheese melts. Repeat with the remaining oil and tortillas.
- Let the cooked quesadillas rest for 1 minute, then cut each one into four triangles. Spoon the sour cream into a small zip-top bag, snip off one corner, and pipe thin lines to create a spiderweb pattern on each triangle.
Extra Tips
Pipe the sour cream webs right before serving so they stay bright white against the golden tortillas. If the bean mixture feels dry, add a teaspoon of water while mashing to help it spread evenly. Leftovers reheat well in a dry skillet over low heat to keep the tortillas crisp.Course: Appetizer Cuisine: Mexican Equipment: Large skillet, Mixing bowl, Zip-top bag
Candy Corn Layered Yogurt Parfaits
These parfaits copy the look of classic candy corn with three colorful yogurt layers in clear cups. They work well for a kids’ Halloween party because they need no baking and can be put together ahead of time.
The bottom yellow layer tastes lightly fruity, the middle orange layer adds a mild sweetness, and the top white layer keeps things creamy. Finished with a few candy corn pieces on top, the treat feels festive without being overly rich.
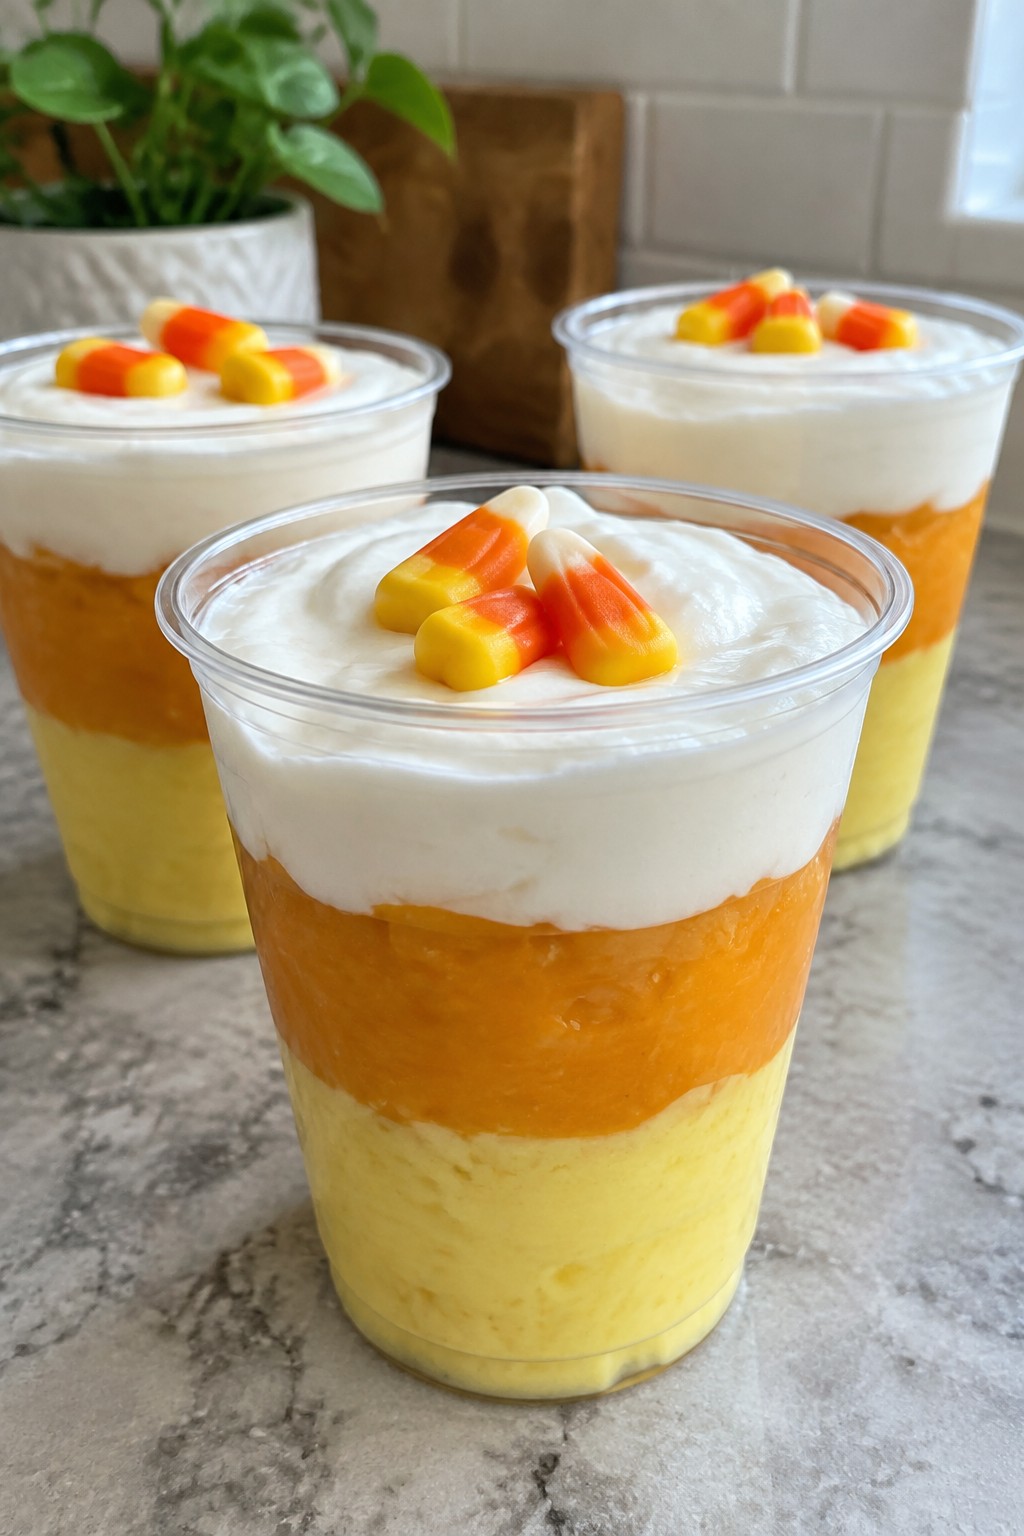
Serves 4 people.
Ingredients
- 3 cups vanilla Greek yogurt
- 1 cup crushed pineapple, drained
- 1 cup mango puree
- 12 candy corn pieces
Instructions
- Divide the vanilla Greek yogurt into three equal portions of 1 cup each in separate bowls.
- Stir the drained crushed pineapple into the first bowl until the mixture turns a pale yellow.
- Stir the mango puree into the second bowl until the mixture turns orange.
- Leave the third bowl plain to keep the white layer.
- Spoon the yellow yogurt mixture into the bottom of four clear glasses or cups.
- Add the orange yogurt mixture as the next layer in each glass.
- Top each parfait with the plain white yogurt.
- Place three candy corn pieces on the white layer of each parfait before serving.
Extra Tips
Spoon the layers slowly and wipe the inside of the glass between colors for clean stripes. The parfaits can be assembled up to four hours ahead and kept in the fridge. If the mango puree seems thick, thin it with a teaspoon of the yogurt before mixing so the layers spread evenly.Course: Dessert Cuisine: American Equipment: Mixing bowls, Spoon, Clear glasses or cups
Bat-Shaped Sweet Potato Fries with Ketchup
These bat-shaped sweet potato fries bring a simple, playful touch to a kids’ Halloween party table. The shapes make the dish feel festive without extra effort, and the fries offer a mix of natural sweetness and light seasoning that pairs easily with ketchup for dipping.
The result is a crispy-edged snack with a soft center that works well for small hands and short attention spans at a gathering.
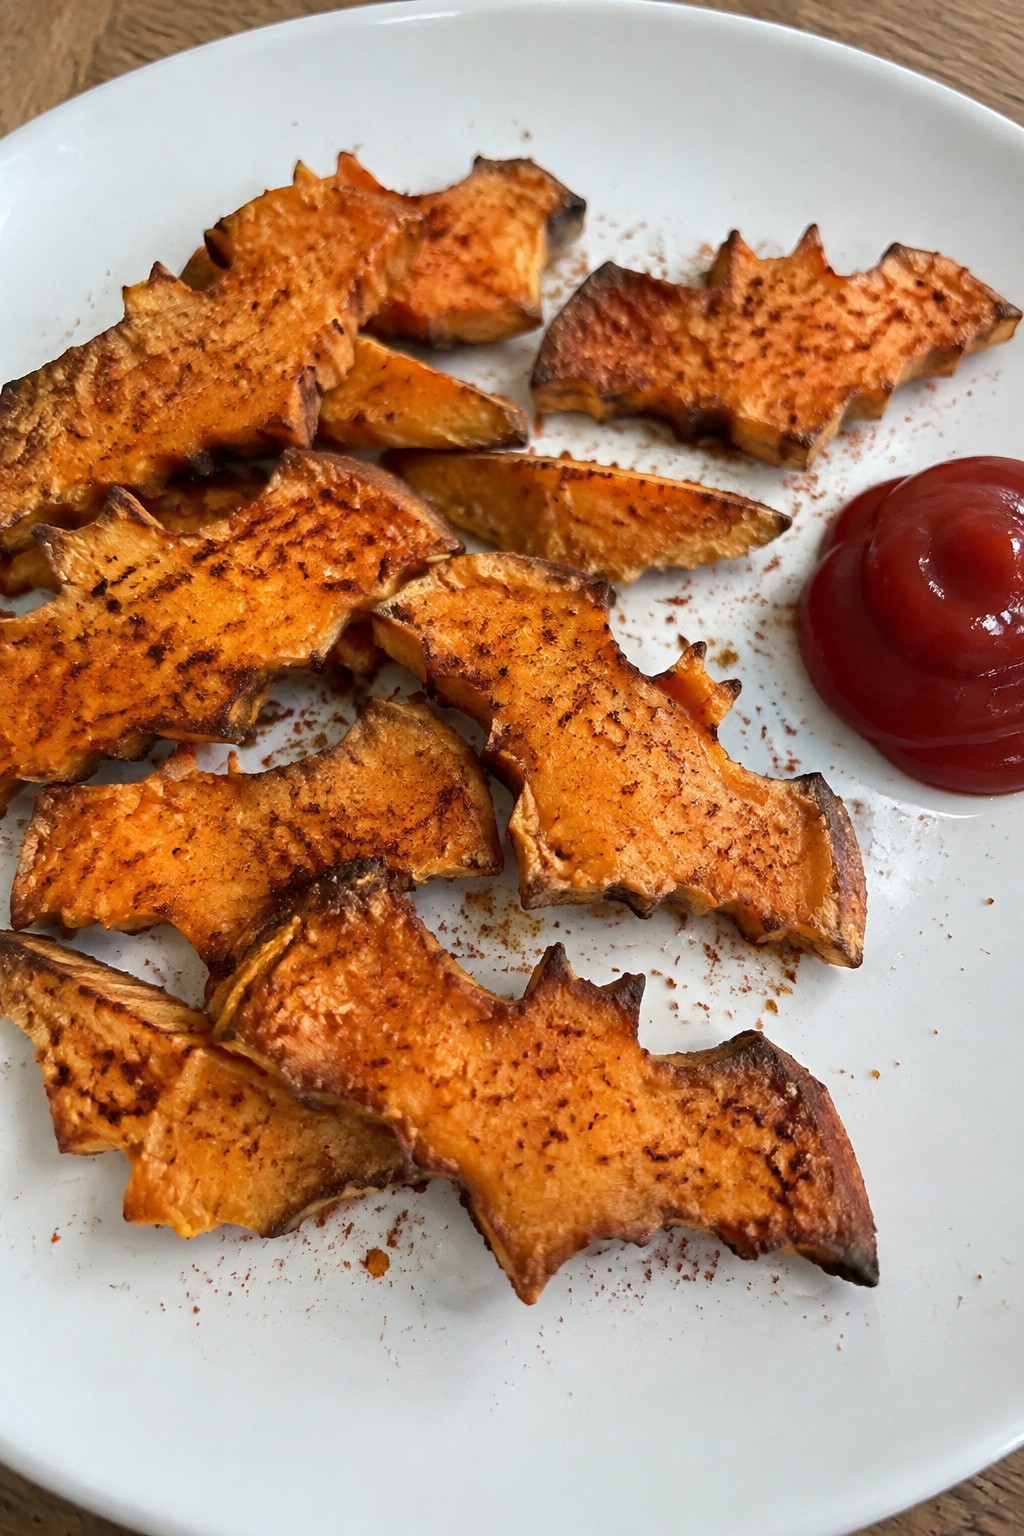
Serves 4 people.
Ingredients
- 4 medium sweet potatoes, peeled
- 3 tablespoons olive oil
- 1 teaspoon salt
- 1 teaspoon paprika
- 1/2 cup ketchup, for serving
Instructions
- Preheat the oven to 425°F and line a baking sheet with parchment paper.
- Cut the sweet potatoes into 1/4-inch thick slabs.
- Press a bat-shaped cookie cutter into each slab to create the shapes and set aside the scraps for another use.
- Place the bat shapes in a mixing bowl and toss with the olive oil, salt, and paprika until evenly coated.
- Arrange the shapes in a single layer on the prepared baking sheet.
- Bake for 20-25 minutes, turning the pieces once halfway through, until the edges turn golden and crisp.
- Remove from the oven and serve warm with the ketchup on the side.
Extra Tips
Cut the sweet potato slabs to an even thickness so the bat shapes cook at the same rate and stay intact. Paprika gives the fries a warm color and mild flavor that holds up well after baking. Leftovers can be reheated in a 400°F oven for a few minutes to restore crispness rather than using a microwave.Course: Snack Cuisine: American Equipment: Baking Sheet, Mixing Bowl, Oven, Cookie Cutter
Frankenstein Avocado Toast Bites
These Frankenstein Avocado Toast Bites turn a simple snack into a fun Halloween activity that kids can help assemble. The bright green avocado spread sits on crisp toast bases, and olive details create the monster faces that always get giggles at a kids’ party.
The creamy avocado pairs with the crunch of toasted bread for a mild flavor that most children enjoy. Each bite stays small enough for little hands to pick up easily during a party.

Serves 4 people.
Ingredients
- 4 slices white bread
- 2 ripe avocados
- 1 tablespoon lemon juice
- ¼ teaspoon salt
- 12 black olives
Instructions
- Toast the 4 slices of bread until golden and firm.
- Cut each avocado in half, remove the pits, and scoop the flesh into a bowl.
- Add the lemon juice and salt to the avocado. Mash with a fork until mostly smooth with a few small chunks remaining.
- Spread the mashed avocado evenly over the 4 toasted bread slices.
- Slice each piece of toast into 3 rectangles to make 12 bites total.
- Cut 8 olives in half lengthwise and press two halves into the sides of each bite for the bolts.
- Slice the remaining 4 olives into thin strips and arrange the strips across the top edge of each bite to form the hair.
Extra Tips
Make the avocado mash right before serving so it stays bright green. If you need to prepare ahead, press plastic wrap directly on the surface of the mash and store it in the fridge for up to two hours. Whole grain bread works in place of white bread if you prefer more fiber.Course: Appetizer Cuisine: American Equipment: Toaster, Mixing Bowl, Knife
Pumpkin Patch Deviled Eggs
These deviled eggs turn a classic party bite into a fun Halloween display. The orange-tinted filling and chive stems give each egg the look of a tiny pumpkin, making them a hit with kids at any spooky gathering. They taste like the familiar creamy, tangy deviled eggs everyone knows, with a little extra color for the theme.
The recipe keeps prep simple so you can focus on the rest of the party spread. Kids enjoy spotting the "pumpkins" on the platter, and the flavors stay mild enough for young guests.
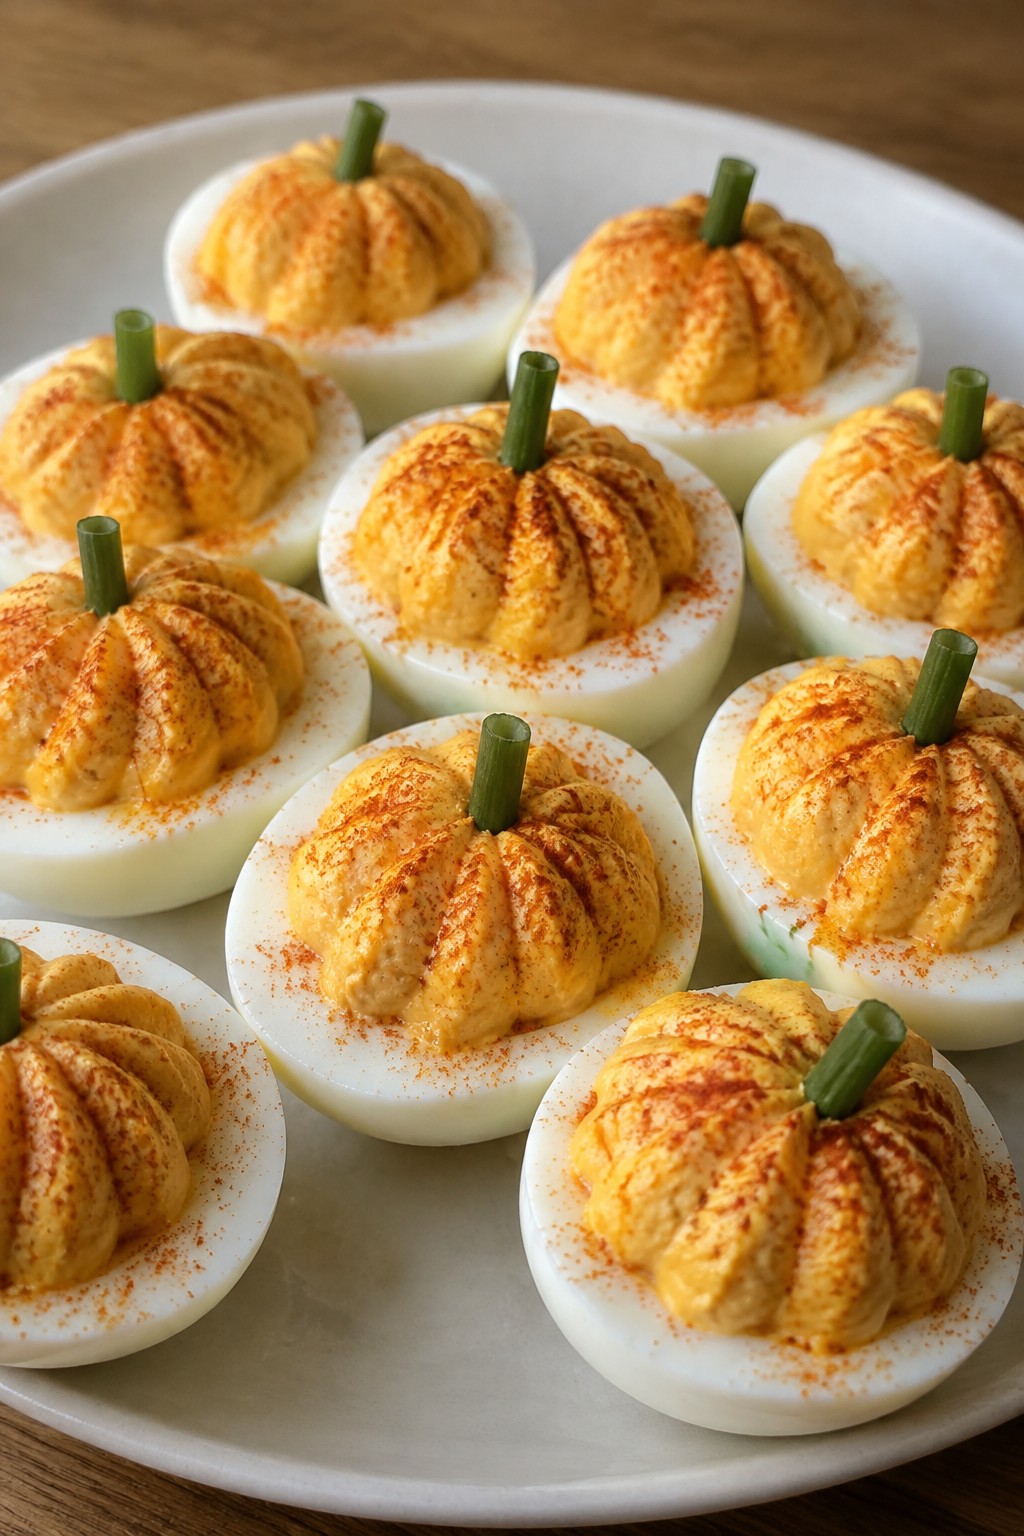
Serves 4 people.
Ingredients
- 6 large eggs
- 3 tablespoons mayonnaise
- 1 teaspoon yellow mustard
- 1 teaspoon paprika, plus extra for dusting
- 1/4 teaspoon salt
- 1/8 teaspoon black pepper
- 12 small chive pieces
Instructions
- Place the eggs in a large pot and cover them with cold water. Bring the water to a boil over medium-high heat, then remove the pot from the heat, cover it, and let the eggs sit for 12 minutes.
- Drain the hot water and run cold water over the eggs until they are cool enough to handle. Peel the eggs and slice each one in half lengthwise.
- Scoop the yolks into a mixing bowl. Mash them with a fork until smooth.
- Add the mayonnaise, yellow mustard, 1 teaspoon paprika, salt, and black pepper to the yolks. Stir until the mixture is creamy and evenly colored.
- Spoon or pipe the yolk mixture back into the egg white halves.
- Dust the tops lightly with extra paprika for color. Insert one chive piece into the top of each filled egg to create a stem.
Extra Tips
Pipe the filling with a small star tip for a neat pumpkin shape. If the filling seems too thick after mixing, add a tiny splash of water to loosen it. These eggs hold up well in the fridge for a few hours before the party, so you can assemble them ahead and keep the platter covered until guests arrive.Course: Appetizer Cuisine: American Equipment: Large pot, Mixing bowl, Fork
Witch Finger Breadsticks with Marinara
These witch finger breadsticks add a playful Halloween touch to a kids’ party spread. They are simple to shape and bake ahead so you can focus on the rest of the event.
The breadsticks come out soft inside with a light golden crust and a hint of garlic and oregano. The marinara on the side gives kids something familiar to dip into while the almond “fingernails” make the fingers easy to spot.

Serves 4 people.
Ingredients
- 1 pound pizza dough
- 2 tablespoons olive oil
- 1 teaspoon dried oregano
- 1/2 teaspoon garlic powder
- 4 drops green gel food coloring
- 8 whole blanched almonds
- 1 cup marinara sauce
Instructions
- Heat the oven to 400 degrees and line a baking sheet with parchment paper.
- Place the pizza dough in a mixing bowl and knead in the green gel food coloring until the color is even.
- Divide the dough into 8 equal pieces and roll each piece into a thin log about 5 inches long.
- Use a knife to make two shallow cuts across each log to create knuckle lines.
- Press one almond into the tip of each log to form a fingernail.
- Place the shaped fingers on the prepared baking sheet and brush them lightly with olive oil.
- Sprinkle the oregano and garlic powder evenly over the tops.
- Bake for 12 to 15 minutes until the edges turn golden.
- Warm the marinara sauce and serve it in a small bowl alongside the breadsticks.
Extra Tips
Press the almonds in firmly before baking so they stay attached until the kids pull them off. If the dough feels sticky after adding the food coloring, dust your hands with a little flour. Leftovers keep in an airtight container at room temperature for one day and reheat well in a 300-degree oven for five minutes.Course: Appetizer Cuisine: American Equipment: Baking Sheet, Mixing Bowl, Pastry Brush
Monster Green Slime Jello Cups
These Monster Green Slime Jello Cups add a bright, wobbly element to a kids’ Halloween party table. The lime flavor stands out just enough to feel festive without being too sweet, and the jiggly texture keeps little ones entertained while they eat.
The cups come together quickly and set in the fridge, so you can make them ahead and focus on other party details. Clear cups let the green color show through, and simple candy eyes turn each serving into a playful monster face.
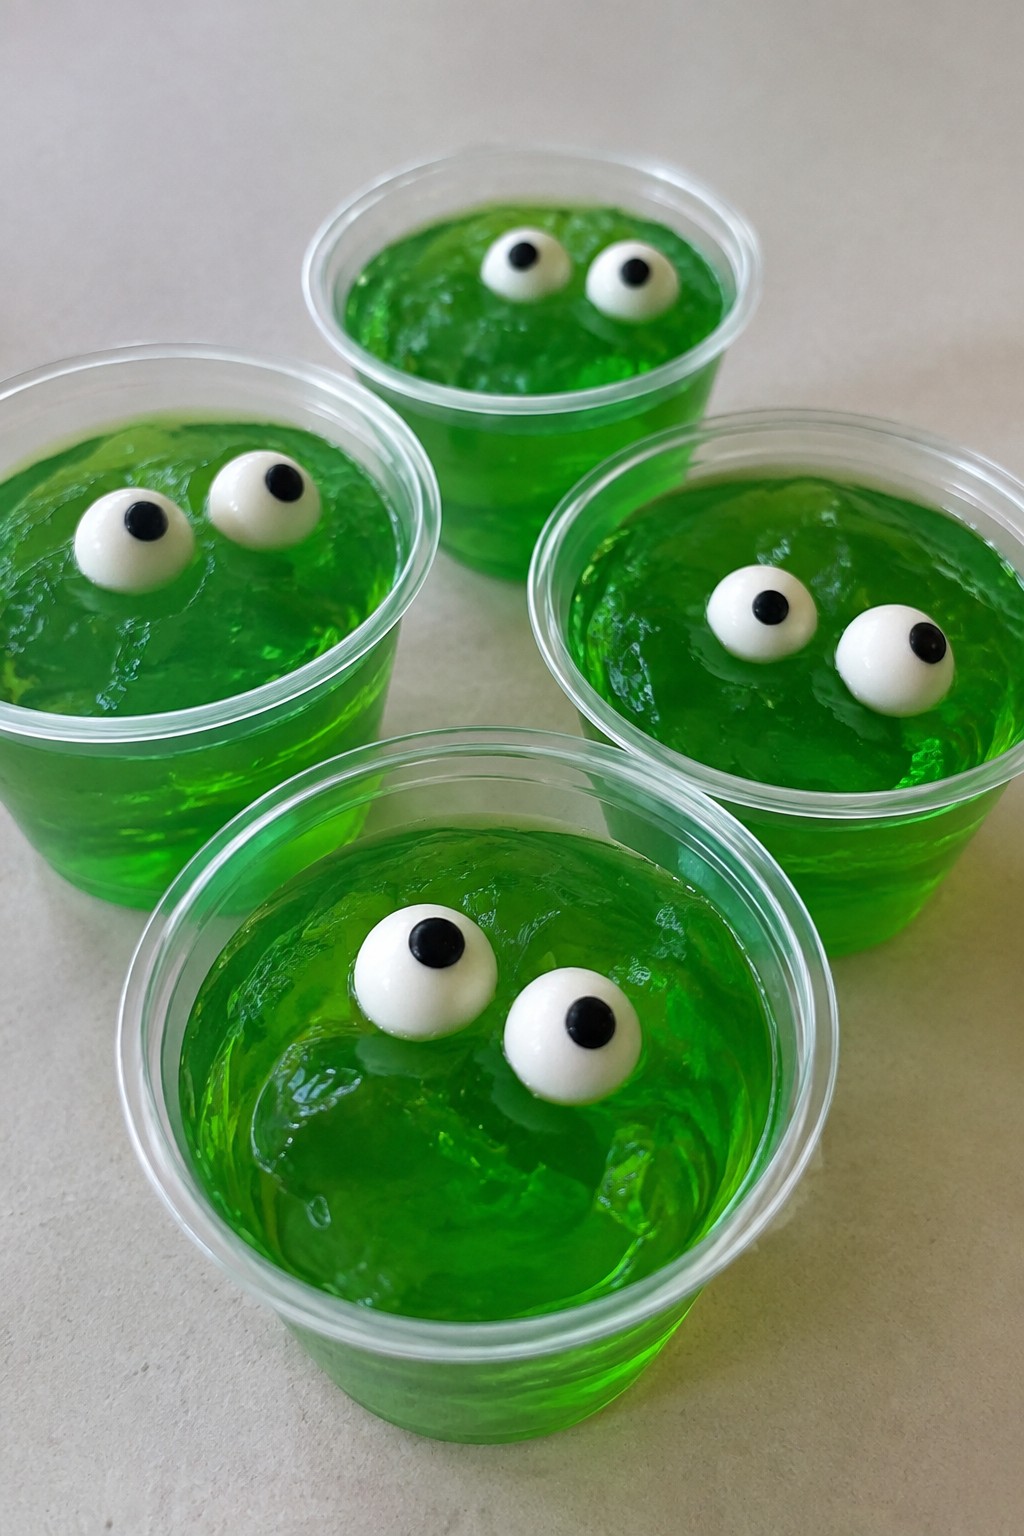
Serves 4 people.
Ingredients
- 1 package (3 oz) lime gelatin
- 1 cup boiling water
- 1 cup cold water
- 8 candy eyeballs
- 4 clear plastic cups
Instructions
- Pour the lime gelatin into a mixing bowl and add the boiling water. Stir until the gelatin is fully dissolved.
- Add the cold water and stir again to combine.
- Divide the mixture evenly among the four clear plastic cups.
- Place the cups in the refrigerator and chill until the gelatin is fully set, about four hours.
- Just before serving, press two candy eyeballs gently onto the surface of each cup to create the monster faces.
Extra Tips
Press the candy eyeballs on right before guests arrive so they stay in place without sinking. If you need to make the cups farther ahead, keep the eyeballs in a small bag and add them at the last minute. The lime flavor pairs well with the slight tartness of the gelatin, so avoid adding extra sugar.Course: Dessert Cuisine: American Equipment: Mixing Bowl, Measuring Cup, Refrigerator
Skeleton Bone Pretzel Rods with Dip
These pretzel rods get coated in white chocolate to look like skeleton bones, making them a fun and easy snack for a kids’ party. They work well as a no-fuss treat that children can help assemble and then enjoy with the sweet dip on the side. The result is a crunchy pretzel base with a smooth, sweet coating and a creamy dip for extra flavor.
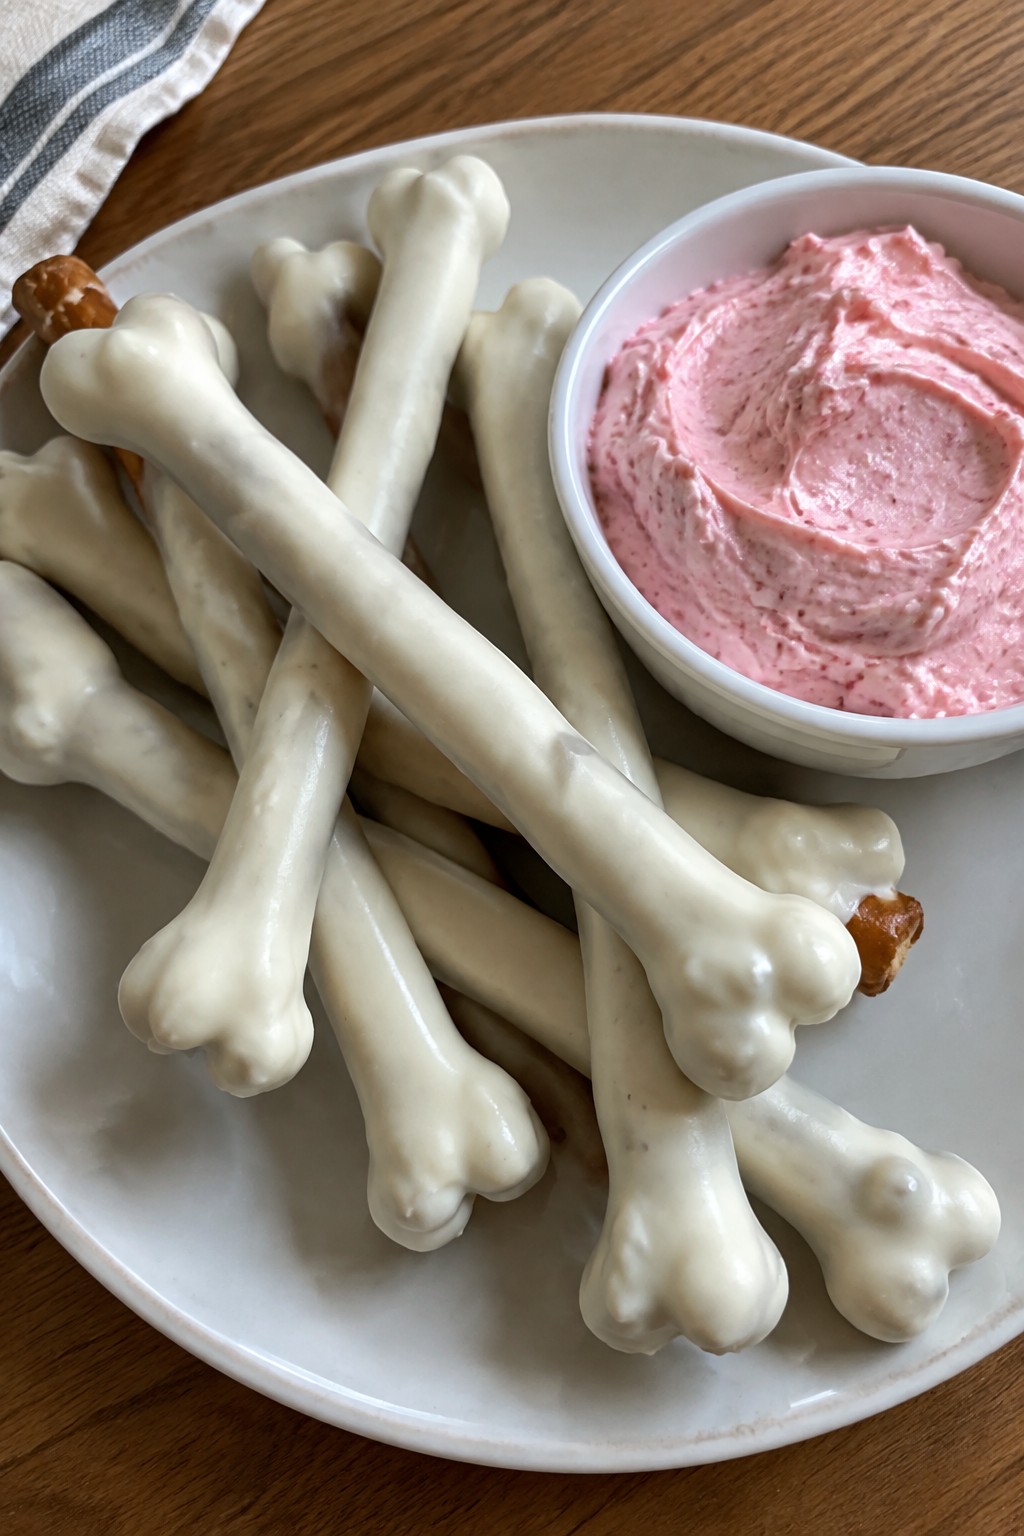
Serves 4 people.
Ingredients
- 12 large pretzel rods
- 1 cup white chocolate chips
- 1 tablespoon coconut oil
- 4 ounces cream cheese, softened
- 1/2 cup strawberry jam
Instructions
- Line a baking sheet with parchment paper and set it aside.
- Place the white chocolate chips and coconut oil in a microwave-safe bowl. Heat in 30-second intervals, stirring after each, until fully melted and smooth.
- Dip each pretzel rod into the melted white chocolate, covering about two-thirds of the rod while leaving one end plain for easy handling. Place the dipped rods on the prepared baking sheet.
- Let the chocolate set at room temperature for 20 minutes until firm.
- In a small mixing bowl, combine the softened cream cheese and strawberry jam. Stir until the mixture is smooth and uniform.
- Transfer the dip to a small serving bowl and place it next to the finished pretzel rods.
Extra Tips
Let the white chocolate set fully before moving the rods to avoid smudges. If the dip turns out too thick, add a teaspoon of milk to loosen it. Store any leftovers in an airtight container in the fridge and bring the dip back to room temperature before serving again.Course: Snack Cuisine: American Equipment: Microwave-safe bowl, Baking sheet, Mixing bowl
Vampire Bite Meatball Sliders
These sliders bring a fun Halloween twist to a classic meatball sandwich. The marinara sauce gives each bite a bright red look that fits the vampire theme, while the soft buns and melted cheese keep things kid-friendly and easy to eat at a party.
The meatballs stay tender inside and hold up well in the sauce. Kids enjoy the simple flavors and the chance to grab a slider without needing a fork.

Serves 4 people.
Ingredients
- 1 lb ground beef
- ½ cup Italian breadcrumbs
- 1 large egg
- 2 cloves garlic, minced
- 1 tsp dried oregano
- ½ tsp salt
- ¼ tsp black pepper
- 2 cups marinara sauce
- 8 slider rolls
- 4 slices provolone cheese, halved
- 2 tbsp butter, melted
- 1 tsp garlic powder
Instructions
- Preheat the oven to 400°F. In a large bowl, combine the ground beef, breadcrumbs, egg, minced garlic, oregano, salt, and black pepper. Mix until just combined, then shape into 8 meatballs.
- Place the meatballs on a baking sheet and bake for 15 minutes until cooked through.
- While the meatballs bake, warm the marinara sauce in a skillet over medium heat. Add the cooked meatballs to the sauce and let them simmer for 5 minutes.
- In a small bowl, mix the melted butter with the garlic powder. Brush the mixture on the cut sides of the slider rolls and toast them in the oven for 3 to 4 minutes until lightly golden.
- Assemble each slider by placing a halved slice of provolone on the bottom roll, adding one meatball with a spoonful of sauce, and topping with the other half of the roll.
Extra Tips
Simmering the meatballs in the sauce helps them stay moist and lets the flavors blend. If you want to prepare ahead, form and bake the meatballs the day before, then reheat them in the marinara right before assembling. Use sturdy slider rolls so they do not get too soggy from the sauce.Course: Appetizer Cuisine: American Equipment: Large bowl, Baking sheet, Skillet, Pastry brush
Haunted House Gingerbread Cookie Houses
These cookie houses give kids a hands-on project they can build and decorate at the party. Each small structure gets a dark, spooky finish with black icing and simple candy details that fit the Halloween theme. The gingerbread stays soft inside with crisp edges, while the icing sets firm enough to hold the walls together.
The activity works well after the main snacks are served, when children want something creative to do. It produces four individual houses that travel easily on a platter.

Serves 4 people.
Ingredients
- 2 1/2 cups all-purpose flour
- 2 teaspoons ground ginger
- 1 teaspoon ground cinnamon
- 1/2 teaspoon baking soda
- 1/4 teaspoon salt
- 1/2 cup unsalted butter, softened
- 1/2 cup brown sugar
- 1/3 cup molasses
- 1 large egg
- 3 cups powdered sugar
- 2 tablespoons meringue powder
- 1/3 cup water
- Black food coloring
- 1 cup assorted Halloween candies
Instructions
- Preheat the oven to 350 degrees F and line two baking sheets with parchment paper.
- In a medium bowl, whisk together the flour, ground ginger, cinnamon, baking soda, and salt.
- In a large bowl, beat the softened butter and brown sugar until light. Add the molasses and egg, then mix until smooth.
- Gradually stir the dry ingredients into the wet mixture until a dough forms. Divide the dough into four equal portions.
- Roll each portion into a rectangle about 1/4 inch thick on a lightly floured surface. Cut each rectangle into four walls and two roof pieces to form a small house shape.
- Transfer the pieces to the prepared baking sheets and bake for 10 to 12 minutes until the edges are firm. Let the cookies cool completely on the sheets.
- While the cookies cool, make the icing. Combine the powdered sugar, meringue powder, and water in a bowl and beat until stiff peaks form. Stir in black food coloring until the icing reaches a deep black color.
- Spoon the black icing into piping bags or zip-top bags with a corner snipped off. Pipe icing along the edges of the cookie pieces to assemble each house, pressing the walls and roof together gently.
- Use the remaining black icing to cover the roofs and add window and door details. Press Halloween candies onto the wet icing to finish the decorations.
Extra Tips
Work with one house at a time when assembling so the icing does not dry before the pieces are joined. If the icing feels too thick for piping, add a few drops of water; if it runs, beat in a little more powdered sugar. Store finished houses in a single layer in an airtight container at room temperature for up to two days.Course: Dessert Cuisine: American Equipment: Mixing bowls, Baking sheets, Piping bags, Whisk, Electric mixer
Creepy Crawly Ants-on-a-Log Celery Boats
This version of ants on a log turns the classic snack into easy-to-grab celery boats that fit right in at a kids’ Halloween party. The crunchy celery pairs with creamy peanut butter and sweet raisins for a simple bite that feels festive without any extra fuss.
The recipe keeps things practical. Kids can help assemble the boats, and the result holds up well on a party table.

Serves 4 people.
Ingredients
- 4 large celery stalks
- ½ cup peanut butter
- ⅓ cup raisins
- ¼ cup mini chocolate chips
Instructions
- Rinse the celery stalks under cold water and pat them dry with a paper towel.
- Trim the ends off each stalk, then cut the stalks into 3-inch lengths to create the boats.
- Spread about 2 tablespoons of peanut butter into the groove of each celery piece using a spoon or small knife.
- Press raisins and mini chocolate chips gently into the peanut butter to create the creepy crawly topping.
- Arrange the finished boats on a serving plate.
Extra Tips
Cut the celery pieces ahead of time and store them in a container of cold water to keep them crisp. If the peanut butter is too thick to spread, stir in a teaspoon of honey before filling the boats. Leftovers keep in an airtight container in the fridge for one day, though the celery softens slightly.Course: Snack Cuisine: American Equipment: Knife, Cutting Board, Spoon
