
Halloween with kids often means needing snacks that do more than just fill them up. These ideas let you make simple treats while getting the kids involved in the process. Most use ingredients you likely have on hand already. Each one works as both a snack and a short activity to pass the time. They are straightforward enough to fit into a busy day.
Helpful Tips Before You Start
A little prep makes these snacks easier to turn into activities the kids can join.
Recommended Products

100% Pure Freeze-Dried Apples: Made with real apple slices and nothing else. No added sugar, no preservatives, and no artificial ingredients for clean, simple snacking

FRUIT IS OUR ONLY INGREDIENT: Finally, a real fruit snack that kids of all ages love, made with 100% apples That’s it Apple Crunchable are perfect for children aged 2 and up, healthy snacks for kids.

Premium Quality Red Apple Chips - Made from USA-grown red apples sourced directly from Washington State, these baked apple chips are picked at peak ripeness to ensure the best flavor and freshness. Each slice is uniquely crinkle cut and baked to crispy perfection for a satisfying crunch in every bite.
Set Up Stations First
Place ingredients in separate bowls and line up tools on the counter. Kids can move from one spot to the next without waiting.
Use Cookie Cutters and Spreaders
Keep sharp knives off the table and hand out plastic spreaders or cutters instead. Kids stay busy shaping and decorating with less supervision.
Cover the Work Area
Lay parchment paper or a cheap tablecloth down before you begin. Spills and crumbs stay in one place and cleanup takes minutes.
Match Tasks to Ages
Let younger kids place toppings or stir dips while older ones cut soft fruit with supervision. Everyone gets a job that feels doable.
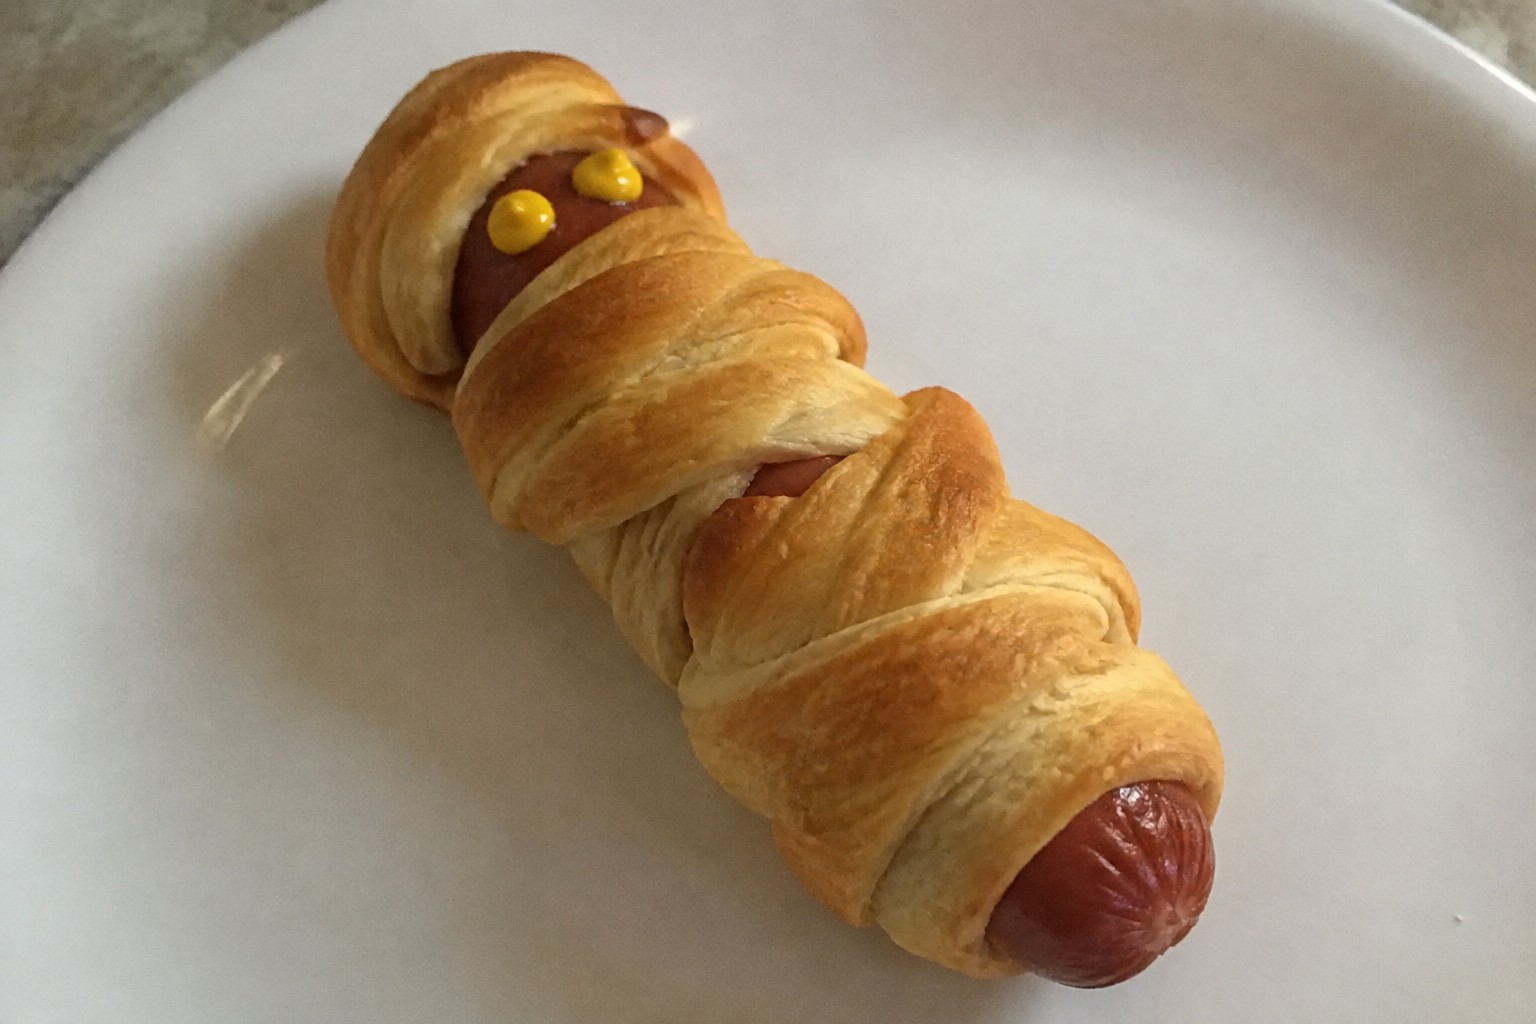
DIY Mummy Hot Dog Roll-Ups with Topping Station
This recipe turns simple hot dogs into a hands-on Halloween activity. Kids wrap strips of dough around the hot dogs to create the mummy look, then gather at a topping station to finish their own creations. The result is a warm, savory snack with a crisp outer layer and juicy center.
The topping station adds variety without extra cooking. Children can add cheese, pickles, or condiments to match their tastes while keeping the focus on the fun of decorating.

Serves 4 people.
Recommended Products

SANDWICH SPREADER KNIFE 4.72 INCH BLADE: Effortlessly slice and spread your favorite fillings with precision using this versatile sandwich knife spreader. From sandwiches to bagels and toast, it's the perfect tool for evenly distributing condiments, butter, cream cheese, and more.

PREMIUM QUALITY - Our butter knife spreader boasts a stainless steel blade and a comfortable wooden handle, ensuring durability and ease of use

Precision 4" Stainless Steel Blade - Durable, rust-resistant blade designed for smooth slicing through sandwiches, bread, bagels, deli meats, and more.
Ingredients
- 8 all-beef hot dogs
- 1 package refrigerated crescent roll dough
- 1/4 cup ketchup
- 1/4 cup yellow mustard
- 1/2 cup shredded cheddar cheese
- 1/4 cup chopped dill pickles
- 2 tablespoons sliced black olives
Instructions
- Preheat the oven to 375 degrees and line a baking sheet with parchment paper.
- Unroll the crescent roll dough on a clean surface and cut it into thin strips about half an inch wide.
- Wrap the dough strips around each hot dog in a crisscross pattern, leaving small gaps to resemble mummy bandages.
- Place the wrapped hot dogs on the prepared baking sheet and bake for 12 to 15 minutes until the dough is golden brown.
- Remove the hot dogs from the oven and let them cool for a few minutes.
- Set out the ketchup, mustard, shredded cheddar cheese, chopped dill pickles, and sliced black olives in small bowls to create the topping station.
Extra Tips
Let the hot dogs cool slightly before the topping station so the cheese melts just enough without making the dough soggy. Keep extra dough strips on hand in case any break during wrapping. Leftovers store well in the refrigerator for one day and reheat best in a 350-degree oven for five minutes.Course: Snack Cuisine: American Equipment: Baking sheet, Oven, Knife
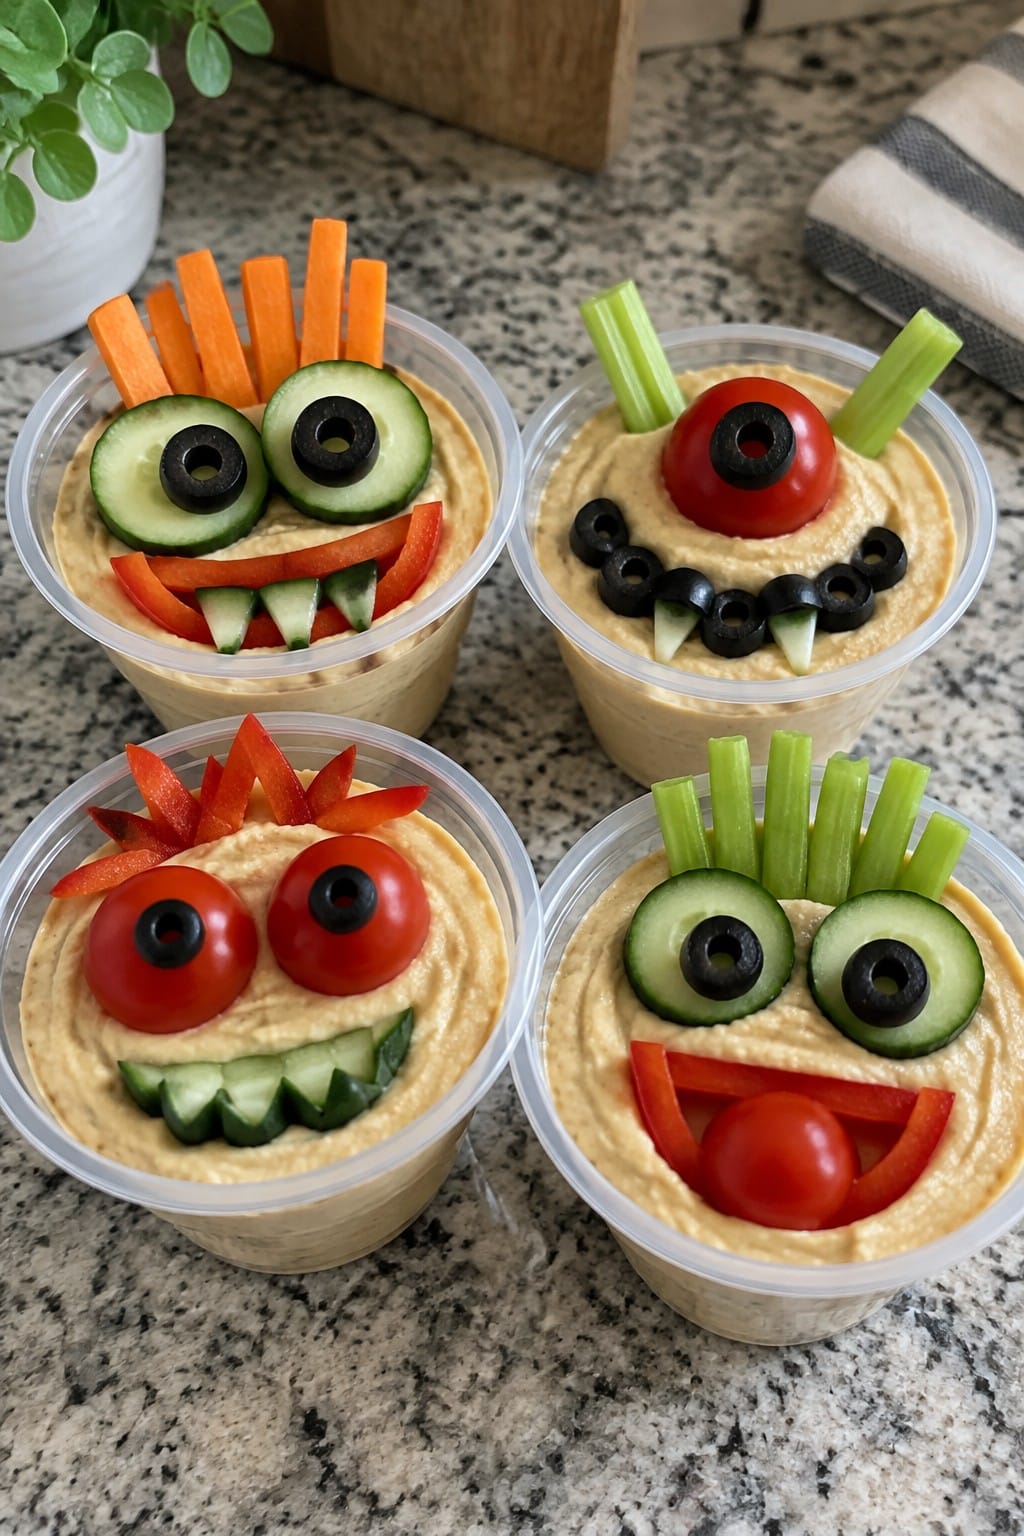
Build-Your-Own Monster Veggie Cups
This recipe turns snack time into a hands-on activity. Kids arrange cut vegetables in individual cups to create silly monster faces before they eat. The result is fresh and crunchy with a creamy dip base that holds everything together.
It works well at Halloween parties or after-school gatherings. Children stay busy while they play with their food in a structured way.
Serves 4 people.
Recommended Products


Made without artificial ingredients

DELICIOUSLY FLUFFY: Enjoy the irresistible taste and texture of our Vanilla Mini Dehydrated Marshmallow Bits, perfect for adding a touch of sweetness to your favorite treats.
Ingredients
- 2 cups hummus
- 4 large carrots, cut into sticks
- 4 celery stalks, cut into sticks
- 1 cucumber, sliced into rounds
- 12 cherry tomatoes
- 1 red bell pepper, cut into strips
- 1/2 cup black olives, sliced
- 4 small clear plastic cups
Instructions
- Place one cup on the table for each child. Spoon 1/2 cup hummus into the bottom of each cup to create a base layer.
- Set out the carrot sticks, celery sticks, cucumber rounds, cherry tomatoes, bell pepper strips, and sliced olives in separate bowls.
- Let each child push carrot or celery sticks into the hummus to form monster hair or arms.
- Add cucumber rounds or cherry tomatoes on top of the hummus for eyes, then place olive slices on them to make pupils.
- Use bell pepper strips to create mouths or eyebrows by pressing them into the hummus.
- Finish by adding any extra olive slices or vegetable pieces as teeth or noses.
Extra Tips
Serve the cups right after assembly so the vegetables stay crisp. If you need to prep ahead, keep the cut vegetables in water in the fridge and add them to the hummus just before the kids start building. Swap the hummus for ranch dip if your group prefers a thinner texture.Course: Snack Cuisine: American Equipment: Cutting board, Knife, Small bowls
Decorate Your Own Ghostly Sugar Cookies
This recipe turns plain sugar cookies into a hands-on Halloween activity that kids can lead themselves. It works well for small groups or classroom parties where children want to create their own treats without needing an oven. The finished cookies taste sweet and buttery with a soft center and a smooth layer of frosting on top.
The decorating step keeps things simple so even young bakers can take part. White frosting forms the ghost shape while black details give each cookie its face. Candy eyes add quick character without extra tools.

Serves 4 people.
Ingredients
- 12 baked sugar cookies
- 1 1/2 cups vanilla frosting
- Black food coloring
- 24 candy eyes
Instructions
- Arrange the baked sugar cookies in a single layer on a clean work surface or tray.
- Spoon the vanilla frosting into a bowl and stir until smooth. Spread a generous layer of white frosting over each cookie to form the ghost body.
- Place a few drops of black food coloring into a small portion of the remaining frosting and stir until it turns dark. Use the tinted frosting to pipe or spread simple eyes and a mouth on each ghost.
- Press two candy eyes onto the black details of each cookie while the frosting is still soft.
- Let the decorated cookies sit for a few minutes so the frosting can set before serving.
Extra Tips
If the frosting feels too thick, stir in a teaspoon of milk to make spreading easier for small hands. Store any leftovers in a single layer under plastic wrap at room temperature for up to two days. Skip the black food coloring and use chocolate chips pressed into the white frosting for eyes if you prefer a milder look.Course: Dessert Cuisine: American Equipment: Mixing bowls, Spatula, Piping bag
Assemble Spooky Spiderweb Pizzas
These pizzas turn a simple snack into a hands-on activity that lets kids create their own spiderweb designs. They work well for an afternoon Halloween gathering or a classroom party where children can join in the assembly. The result is a warm, cheesy base with a mild tomato flavor and a fun visual twist.

Serves 4 people.
Ingredients
- 4 English muffins
- 1 cup marinara sauce
- 2 cups shredded mozzarella cheese
- 4 sticks string cheese
- 12 black olives
Instructions
- Preheat the oven to 400 degrees F and line a baking sheet with parchment paper.
- Split each English muffin in half and place the halves cut side up on the baking sheet.
- Spread 2 tablespoons of marinara sauce over each muffin half.
- Sprinkle 1/4 cup of shredded mozzarella cheese evenly over the sauce on each half.
- Pull each string cheese stick into thin strips and arrange the strips on top of the mozzarella to form a spiderweb pattern on every pizza.
- Slice the black olives in half and place two halves on each pizza to form spider shapes.
- Bake for 8 to 10 minutes until the cheese is melted and the edges are lightly golden.
Extra Tips
Let the kids arrange the string cheese strips themselves so each web looks different. Use a spoon to add small dots of extra marinara in the center if you want the web to stand out more after baking. These pizzas are best eaten right away while the cheese is still stretchy.Course: Snack Cuisine: American Equipment: Baking sheet, Oven, Spoon
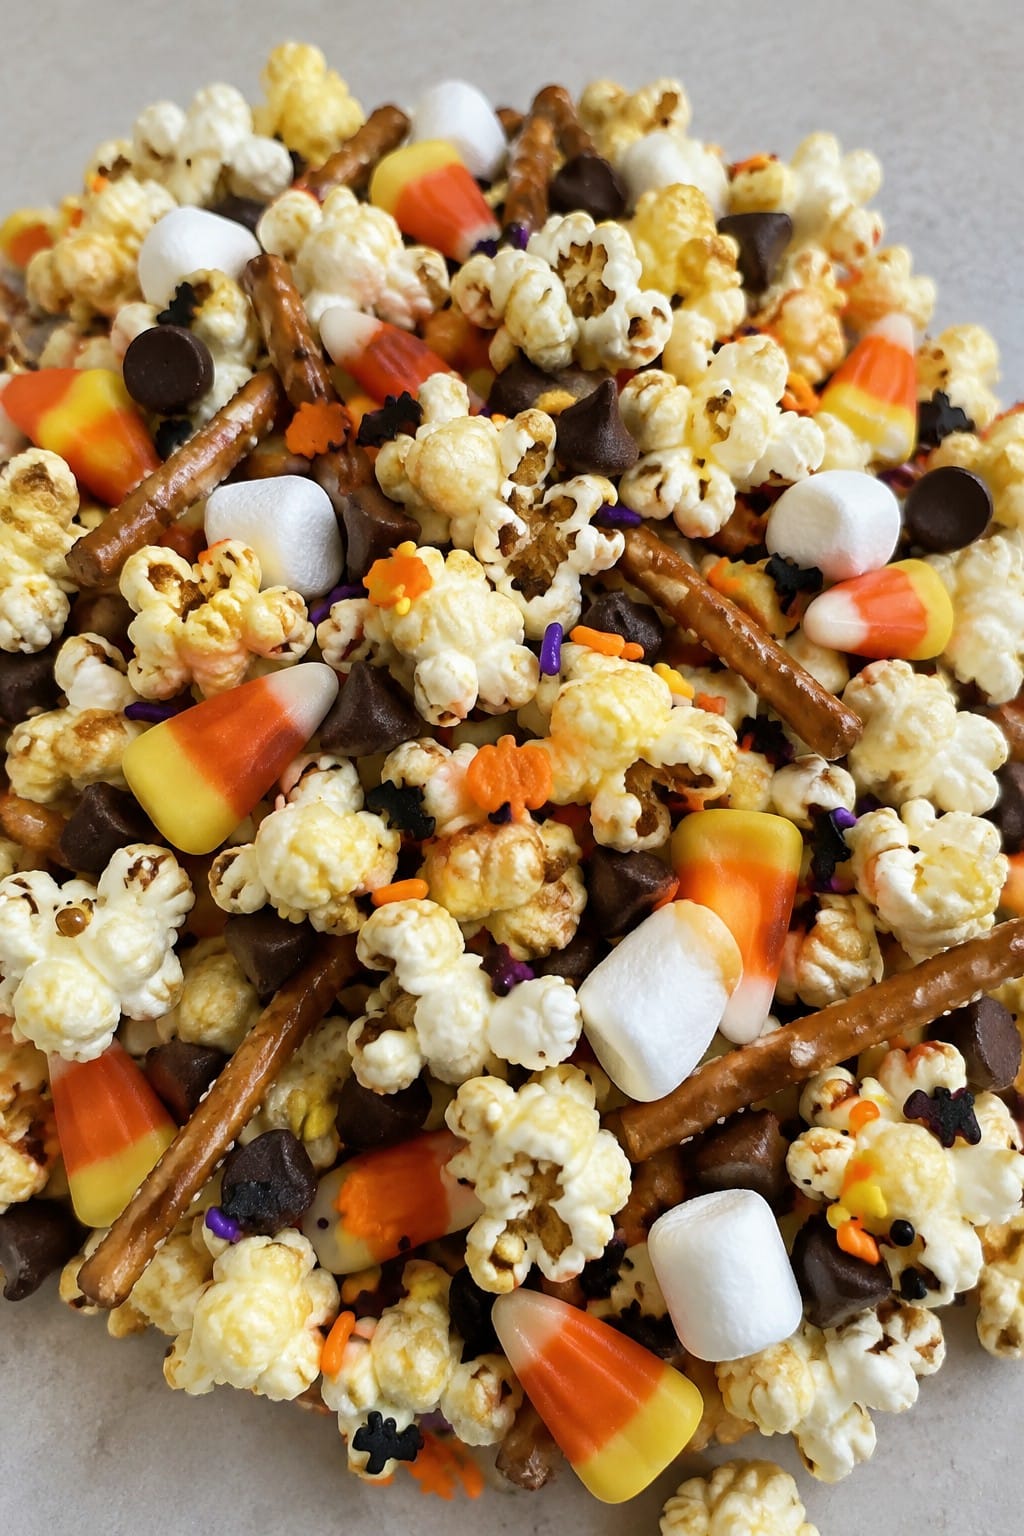
Create Halloween Popcorn Snack Mix Bar
This snack bar turns popcorn into a hands-on Halloween activity that kids can customize themselves. It works well at parties or after-school gatherings because children pick and mix their own combinations from a set of sweet and salty add-ins. The result is a crunchy base with chewy candies and a bit of chocolate in every handful.
The flavor stays balanced between buttery popcorn and colorful mix-ins that appeal to young tastes without being overly rich.
Serves 4 people.
Ingredients
- 10 cups popped popcorn
- 1 cup candy corn
- 1 cup mini marshmallows
- 1/2 cup chocolate chips
- 1 cup pretzel sticks
- 1/4 cup Halloween sprinkles
Instructions
- Pop the popcorn and place it in a large bowl. Let it cool for a few minutes so it stays crisp when mixed later.
- Set out the candy corn, mini marshmallows, chocolate chips, pretzel sticks, and Halloween sprinkles in separate small bowls. Arrange them around the popcorn so kids can reach everything easily.
- Give each child a paper bag or small bowl and invite them to scoop popcorn first, then add their chosen toppings.
- Let the kids shake or stir their mixes gently to combine the ingredients without crushing the popcorn.
Extra Tips
Keep the popcorn plain and unseasoned so the sweet toppings stand out. If you make the bar ahead, store the popcorn in an airtight container and set the toppings out right before the activity to keep them fresh. For a less sweet version, reduce the candy corn and add more pretzels.Course: Snack Cuisine: American Equipment: Large bowl, Small bowls
Make Your Own Witch Hat Graham Treats
These witch hat graham treats give kids a simple hands-on task that turns basic pantry items into a Halloween snack. The process of spreading chocolate and building the hat shape keeps little hands busy while creating something they can eat right away. Each treat has a crisp graham base, a smooth chocolate layer, and a pointed chocolate top with colorful accents.
This recipe works well for an afternoon activity or a small party station. The finished treats taste like a mix of toasted graham and milk chocolate with a bit of crunch from the candy accents.

Serves 4 people.
Ingredients
- 4 graham cracker sheets
- 1/2 cup semi-sweet chocolate chips
- 4 Hershey’s chocolate kisses
- 8 candy corns
- 2 tablespoons orange and black sprinkles
Instructions
- Place the chocolate chips in a microwave-safe bowl and heat in 20-second bursts, stirring between each, until fully melted and smooth.
- Lay the four graham cracker sheets on a plate or baking sheet. Spoon a layer of melted chocolate over the top of each sheet and spread it evenly with the back of the spoon.
- Press one Hershey’s chocolate kiss into the center of the chocolate on each graham cracker to form the point of the hat.
- Arrange two candy corns on opposite sides of the kiss on each treat to create the brim detail.
- Sprinkle the orange and black sprinkles over the chocolate surface while it is still soft.
Extra Tips
Work in small batches when melting the chocolate so it stays easy to spread. If the chocolate firms up too quickly, warm it for a few more seconds. Store any leftovers in a single layer in an airtight container at room temperature for up to two days.Course: Snack Cuisine: American Equipment: Microwave-safe bowl, Spoon, Plate
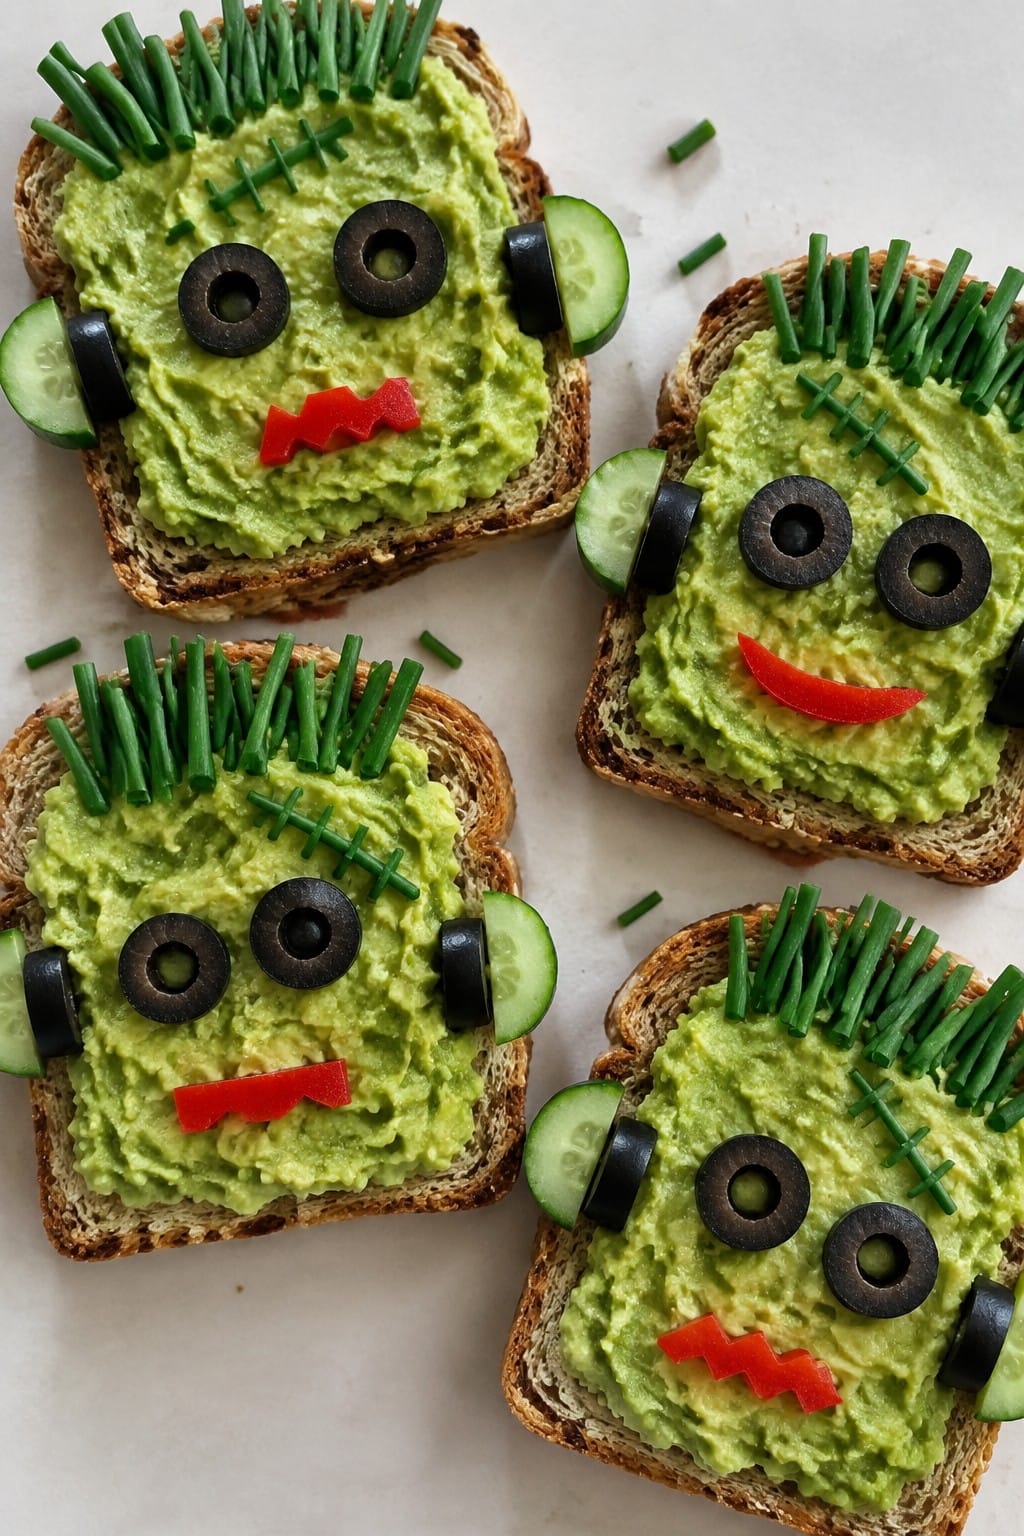
Design Frankenstein Avocado Toast Faces
This recipe turns simple avocado toast into a hands-on Halloween activity that kids can help assemble. The green avocado base creates the perfect Frankenstein skin tone, while the toppings let children build silly monster faces without any special tools.
The result is creamy avocado on crisp toast with a bright citrus note from the lemon. It works well as an after-school snack or a party activity where everyone decorates their own slice.
Serves 4 people.
Ingredients
- 4 slices whole wheat bread
- 2 ripe avocados
- 1 tablespoon lemon juice
- 1/2 teaspoon salt
- 8 pitted black olives
- 4 thin cucumber slices
- 12 fresh chives
- 1 small red bell pepper
Instructions
- Toast the 4 slices of bread until golden and crisp.
- Cut the avocados in half, remove the pits, and scoop the flesh into a mixing bowl.
- Add the lemon juice and salt to the avocado, then mash with a fork until mostly smooth with a few small chunks remaining.
- Spread the mashed avocado evenly over each slice of toast.
- Slice 4 of the black olives in half to create eyes and place two halves on each toast.
- Cut the cucumber slices into small rectangles and position one on each side of the toast to form neck bolts.
- Use the chives to create stitched lines across the avocado surface.
- Cut thin strips from the red bell pepper and arrange them as mouths on each face.
Extra Tips
Use a serrated knife when cutting the toast after decorating to keep the toppings in place. The chives can be swapped for thin green onion strips if needed, but avoid anything too thick that would overpower the creamy avocado. These faces are best eaten right after assembly while the toast stays crisp.Course: Snack Cuisine: American Equipment: Toaster, Mixing bowl, Knife
Craft Jell-O Witch’s Brew Parfaits
This recipe turns basic Jell-O into a hands-on Halloween snack where kids can join in the layering and decorating. The green base and creamy additions create a simple brew look in clear cups that feels festive without extra fuss.
Each parfait combines the light jiggle of lime Jell-O with smooth pudding and a few candy pieces for contrast in both texture and taste.
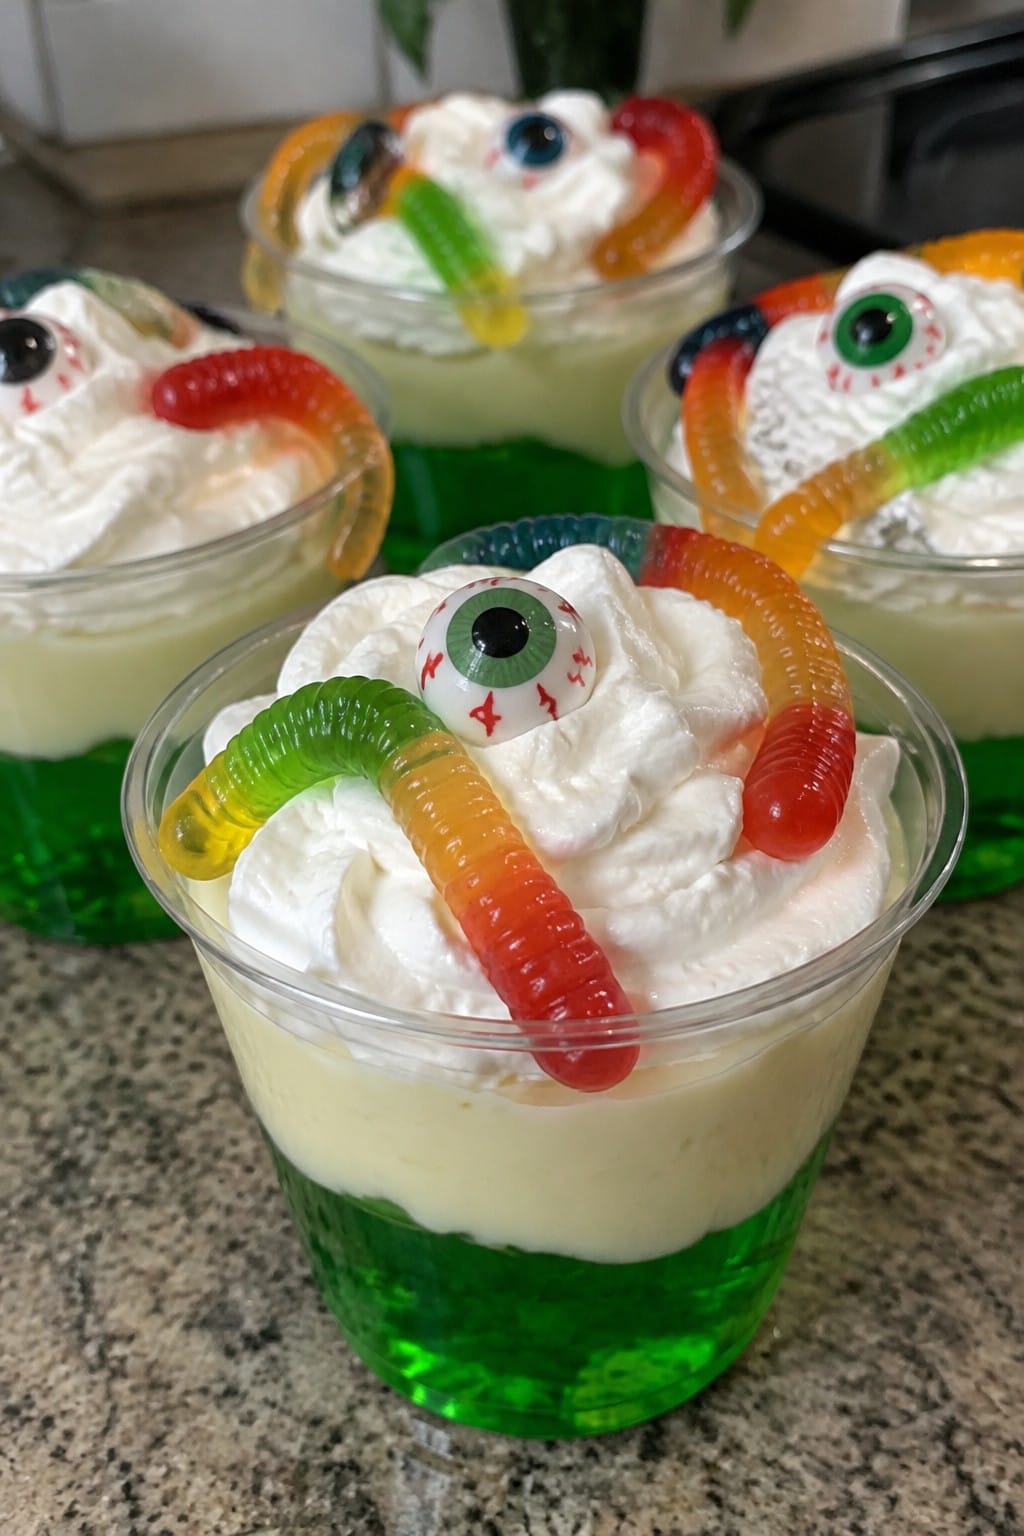
Serves 4 people.
Ingredients
- 1 package (3 oz) lime gelatin
- 1 cup boiling water
- 1 cup cold water
- 1 cup prepared vanilla pudding
- 1/2 cup whipped topping
- 8 gummy worms
- 12 candy eyeballs
Instructions
- Pour the lime gelatin into a mixing bowl and add the boiling water. Stir until the gelatin fully dissolves.
- Stir in the cold water, then place the bowl in the refrigerator for about 30 minutes until the mixture thickens slightly but is not fully set.
- Spoon a layer of the thickened gelatin into the bottom of four clear cups or glasses.
- Add a layer of vanilla pudding on top of the gelatin in each cup.
- Repeat with another layer of gelatin and finish with a small dollop of whipped topping.
- Press two gummy worms and three candy eyeballs into the whipped topping on each parfait.
Extra Tips
Let the kids press the candy eyeballs and gummy worms into place themselves so they feel involved in the final step. If the gelatin sets too firm before layering, give it a quick stir to loosen it for easier spreading between pudding layers.Course: Snack Cuisine: American Equipment: Mixing bowl, whisk, parfait glasses, spoon
Build Bat Wing Pretzel Rod Snacks
These pretzel rod bats give kids a hands-on task they can finish in minutes. Each child gets a rod to turn into a bat by attaching the wings and eyes, so the snack works well for small Halloween parties or after-school fun. The finished treats taste like salty pretzels coated in sweet chocolate with a little chewy texture from the licorice wings.
The dark coating and simple face details make them look like bats without any fancy tools. Kids enjoy choosing how wide to spread the wings and where to place the eyes, which keeps them busy while the chocolate sets.
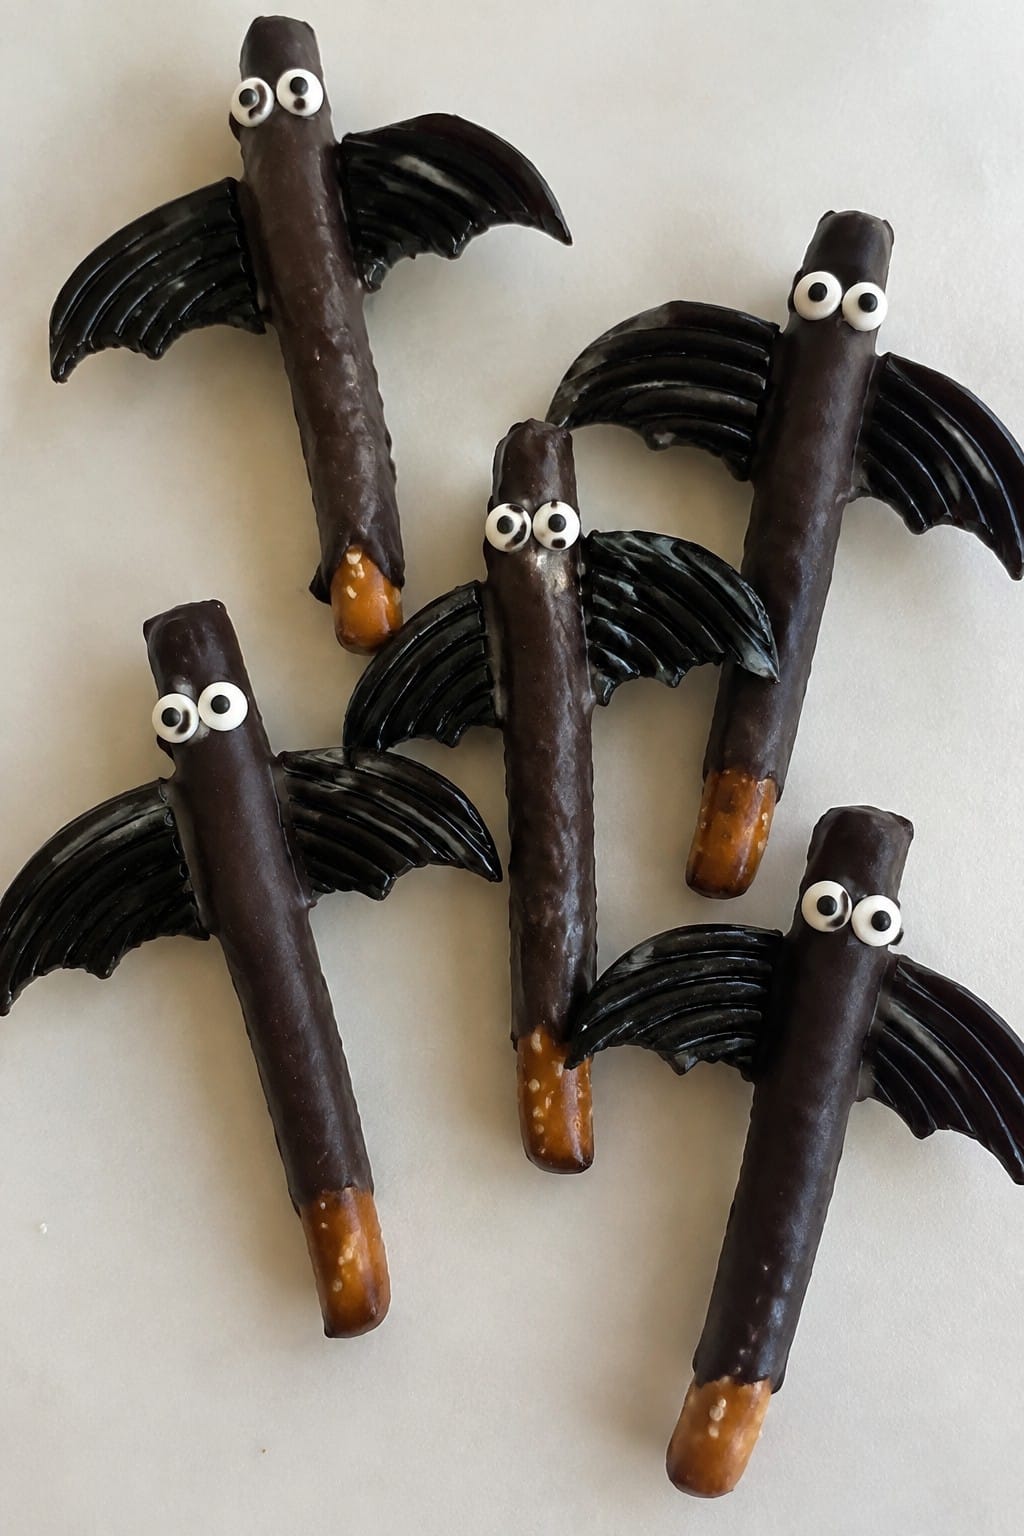
Serves 4 people.
Ingredients
- 12 pretzel rods
- 1 cup black candy melts
- 12 pieces black licorice, each cut into two 4-inch lengths
- 24 candy eyes
Instructions
- Line a baking sheet with parchment paper and set it aside.
- Place the black candy melts in a microwave-safe bowl. Heat in 30-second bursts, stirring after each, until fully melted and smooth.
- Dip one end of each pretzel rod into the melted candy, coating about two inches. Let excess drip back into the bowl.
- Lay the coated rod on the parchment paper. Immediately press two licorice lengths onto the coated section to form wings on each side.
- Add two candy eyes to the same coated area while the candy is still soft.
- Repeat with the remaining rods. Let the candy harden at room temperature for 15 minutes before serving.
Extra Tips
If the candy melts thicken while you work, warm them for 10 seconds to loosen. Store finished bats in an airtight container at room temperature for up to two days. For a milder flavor, swap black candy melts for milk chocolate and add a drop of black food coloring. Keep the licorice pieces short so the wings stay balanced on the rod.Course: Snack Cuisine: American Equipment: Microwave-safe bowl, Baking sheet, Parchment paper
Assemble Pumpkin Patch Cheese Ball Bites
These cheese ball bites come together quickly as a hands-on Halloween activity. Kids can roll the mixture into balls and add stems, turning snack prep into a creative project that ends with edible pumpkins arranged like a patch.
The result is a creamy, savory bite with a mild cheese flavor and a touch of color from paprika. They fit well on a snack table for parties or after-school fun without needing any baking.
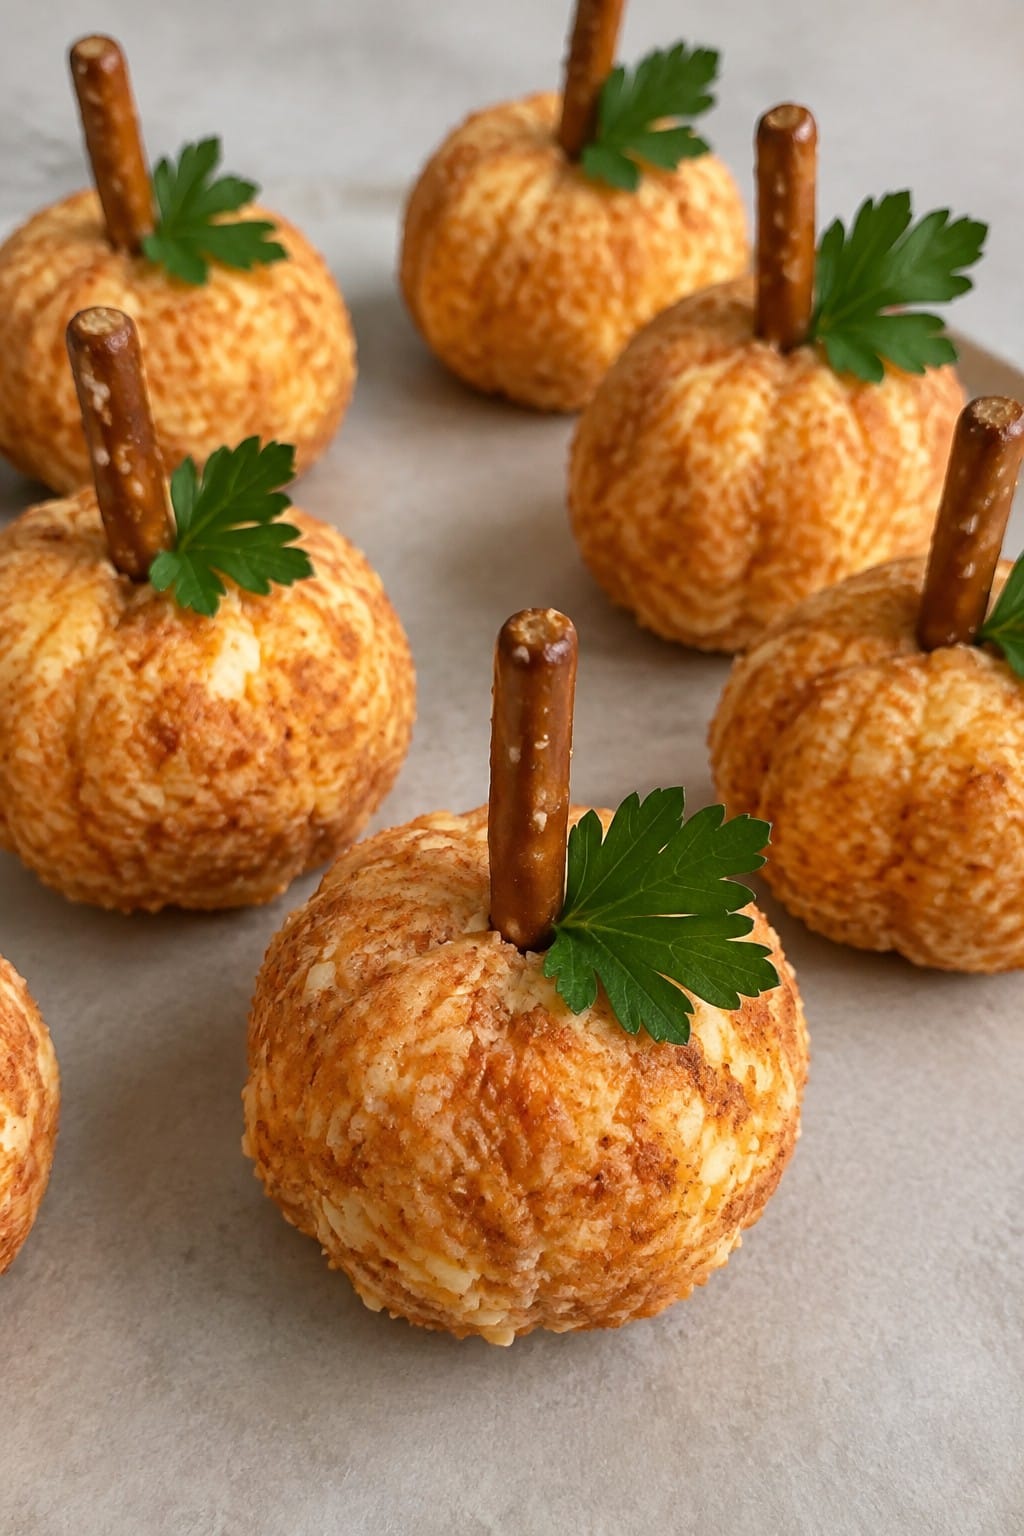
Serves 4 people.
Ingredients
- 8 ounces cream cheese, softened
- 1 1/2 cups shredded cheddar cheese
- 1 teaspoon paprika
- 12 pretzel sticks
- 12 fresh parsley leaves
Instructions
- Place the cream cheese, shredded cheddar cheese, and paprika in a mixing bowl. Stir until the mixture is smooth and evenly colored.
- Scoop out portions of the mixture and roll them between your hands to form 12 small balls.
- Push one pretzel stick into the top of each ball to create a stem.
- Set one parsley leaf beside each pretzel stick to resemble a pumpkin leaf.
- Arrange the finished bites on a platter so they look like a small pumpkin patch.
Extra Tips
Prepare the cheese mixture a few hours ahead and keep it covered in the fridge, then roll and decorate right before serving so the pretzels stay crisp. If the mixture feels too soft to roll, chill it for 10 minutes first. Swap the parsley for small pieces of green onion tops if that is what you have on hand.Course: Snack Cuisine: American Equipment: Mixing Bowl, Measuring Spoons
Create Monster Apple Slice Mouths
Kids enjoy building these apple mouths as a hands-on snack during Halloween gatherings. The activity keeps them busy while they create silly faces, and the result is a simple treat that balances fresh fruit with a creamy spread. Each bite gives a crisp apple texture followed by smooth peanut butter and the light crunch of almonds.
This works well for small groups or after-school fun when you want something quick to prepare together. The flavors stay mild and familiar, making it easy for most children to like.
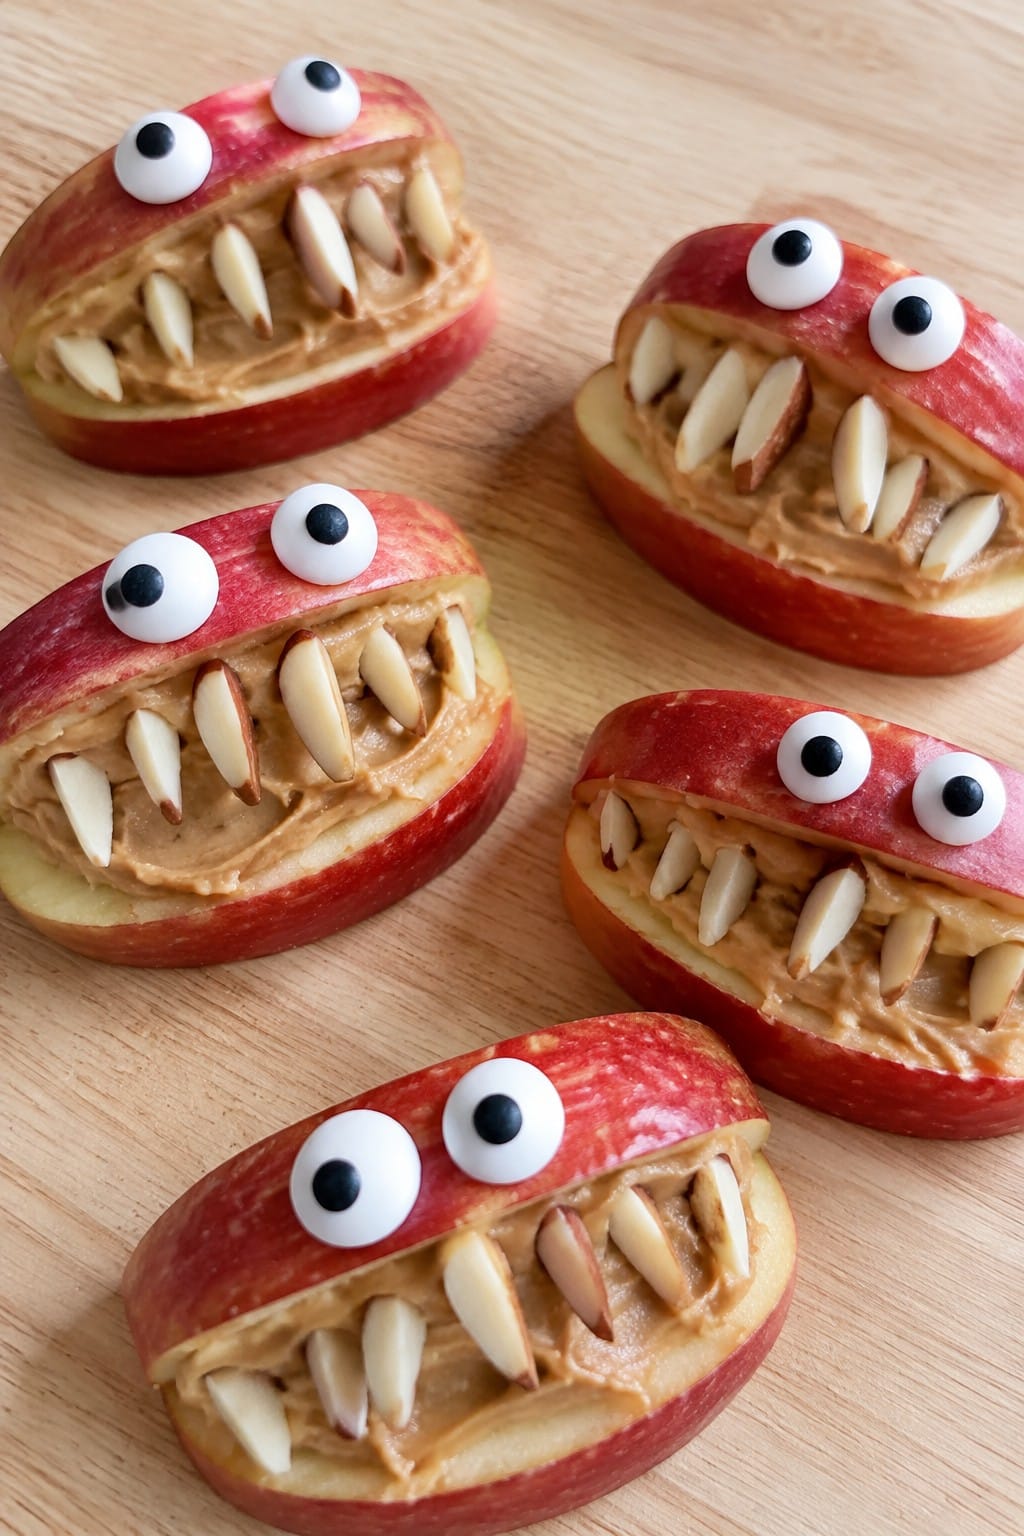
Serves 4 people.
Ingredients
- 4 medium apples
- 1/4 cup peanut butter
- 1/2 cup slivered almonds
- 16 candy eyes
Instructions
- Wash the apples and cut each one into four thick wedges, removing the core from each piece.
- Spread a thin layer of peanut butter on one cut side of each apple wedge.
- Press slivered almonds into the peanut butter along one edge of the wedge to form a row of teeth.
- Dab small dots of peanut butter on the top of each wedge and press two candy eyes into place.
Extra Tips
Use a butter knife for spreading so kids can help without making too much mess. Red apples hold their shape better than softer varieties during assembly. If the peanut butter feels stiff, warm it slightly for easier spreading.Course: Snack Cuisine: American Equipment: Knife, Cutting board, Spoon
Make Skeleton Bone Breadstick Dippers
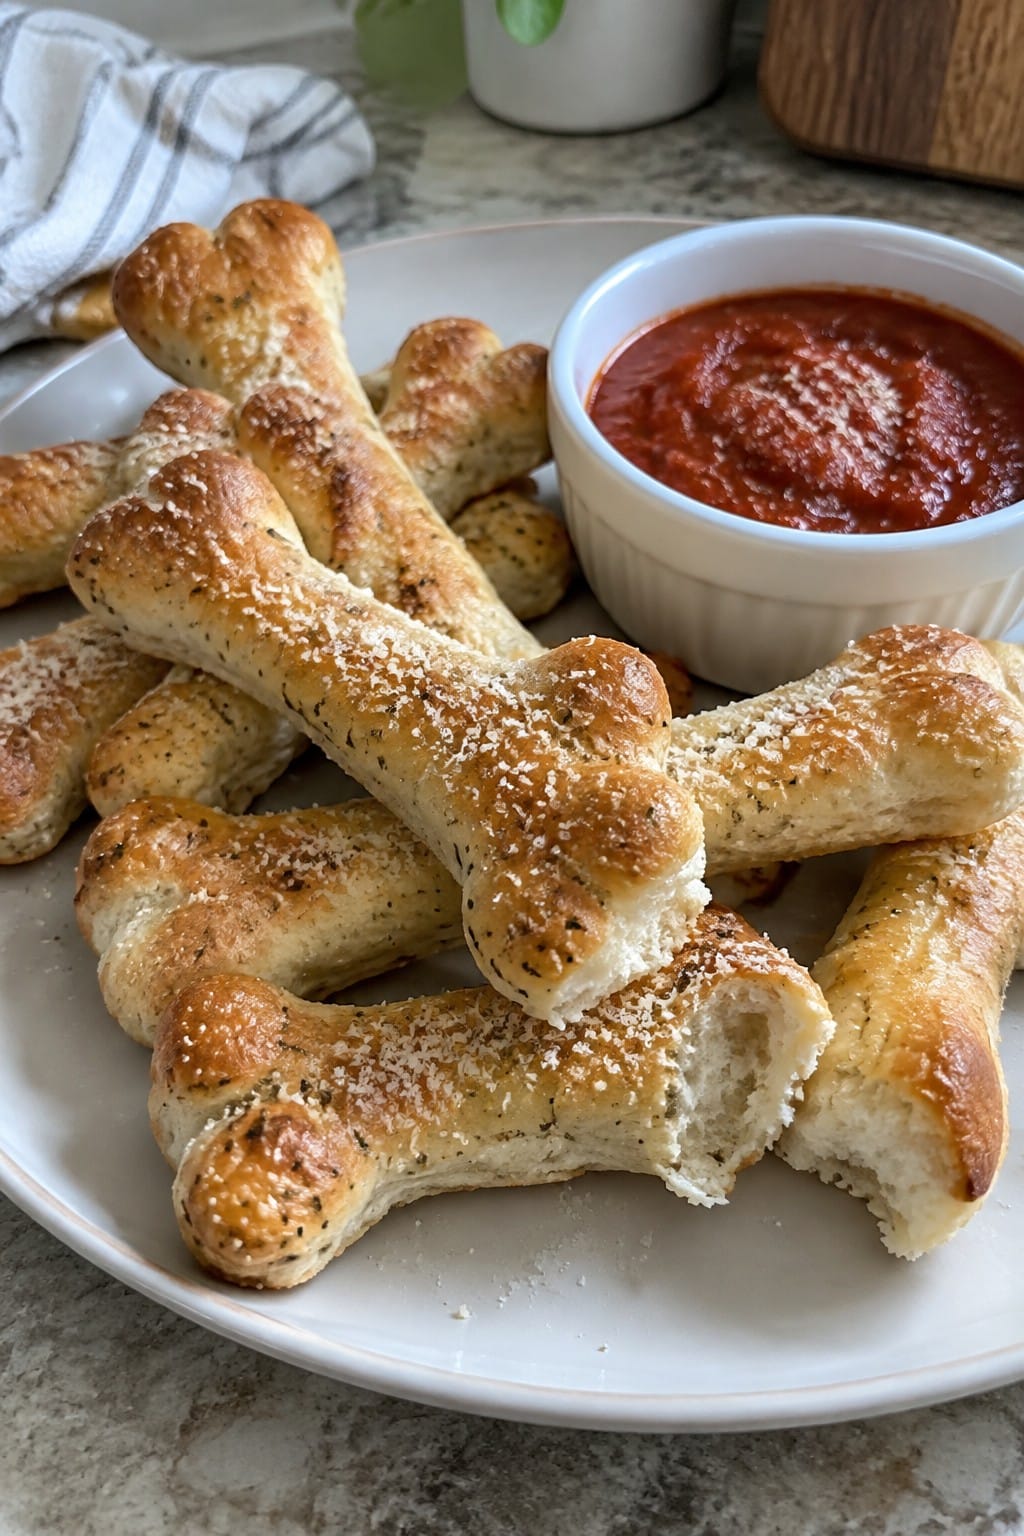
These skeleton bone breadstick dippers give kids a hands-on task that fits right into a Halloween snack spread. Children can roll and shape the dough into bone forms before baking, which keeps them busy and adds a playful element to the snack. The finished breadsticks turn out golden on the outside with a soft center and carry a light garlic and cheese taste that pairs well with a simple marinara dip.
The dippers work as both a savory bite and a quick activity that does not require special tools. They stay sturdy enough for dipping yet remain easy for small hands to handle.
Serves 4 people.
Ingredients
- 1 (13.8-ounce) can refrigerated pizza crust
- 2 tablespoons melted butter
- 1 teaspoon garlic powder
- 1/4 cup grated Parmesan cheese
- 1 cup marinara sauce
Instructions
- Heat the oven to 375 degrees and line a baking sheet with parchment paper.
- Unroll the pizza crust on a lightly floured surface and cut it into 8 long strips.
- Roll each strip slightly longer and pinch the ends to form a bone shape with thicker knobs at both ends.
- Place the shaped strips on the prepared baking sheet and brush them evenly with the melted butter.
- Sprinkle the garlic powder and grated Parmesan cheese over the tops of the breadsticks.
- Bake for 12 to 15 minutes until the breadsticks are golden brown.
- Warm the marinara sauce in a small bowl and serve it alongside the cooled breadsticks for dipping.
Extra Tips
Shape the dough ends a little thicker than the middle so the bone look holds after baking. If the dough feels sticky while shaping, dust your hands with a small amount of flour. Leftovers can be stored in an airtight container and reheated in a 300-degree oven for five minutes to restore crisp edges.Course: Snack Cuisine: American Equipment: Baking sheet, Pastry brush, Small bowl
Design Creepy Crawly Ants on a Log Station
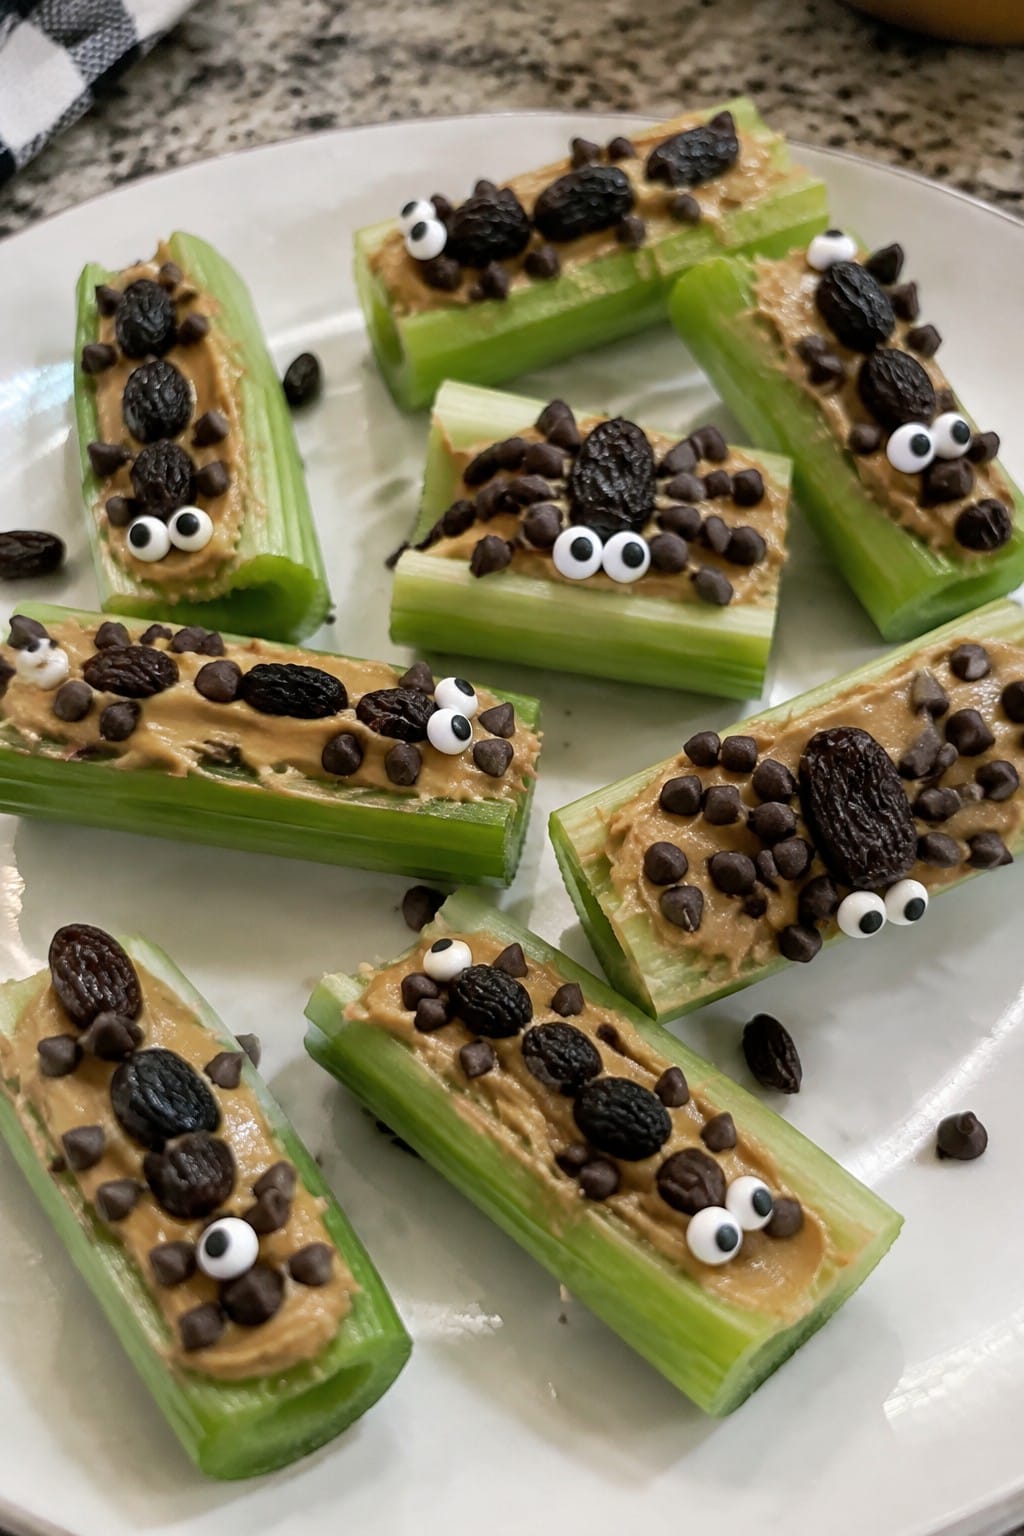
This recipe turns the classic ants on a log into a hands-on activity that lets kids build their own creepy crawly versions. It works well for Halloween parties or after-school fun because children can experiment with different toppings while still ending up with a crunchy, creamy snack.
The finished logs have a crisp celery base, smooth peanut butter layer, and a mix of chewy and crunchy add-ins that resemble bugs and spiders.
Serves 4 people.
Ingredients
- 8 celery stalks, cut into 4-inch pieces
- 1/2 cup creamy peanut butter
- 1/4 cup raisins
- 2 tablespoons candy eyeballs
- 1/4 cup mini chocolate chips
Instructions
- Arrange the celery pieces on a large platter or tray so they are easy for kids to reach.
- Place the peanut butter in a small bowl with a butter knife or spreader nearby.
- Set out the raisins, candy eyeballs, and mini chocolate chips in separate small bowls.
- Let each child spread peanut butter along a celery piece.
- Add raisins as the main ants, then use candy eyeballs and mini chocolate chips to create extra bugs or spider details.
Extra Tips
Set the topping bowls on a low table so younger kids can reach everything without help. If someone does not like peanut butter, cream cheese works in its place without changing the assembly steps. Leftovers keep best when the celery and toppings are stored separately in the fridge for up to one day.Course: Snack Cuisine: American Equipment: Cutting board, Knife, Small bowls, Serving platter
Build Haunted House Rice Krispie Structures
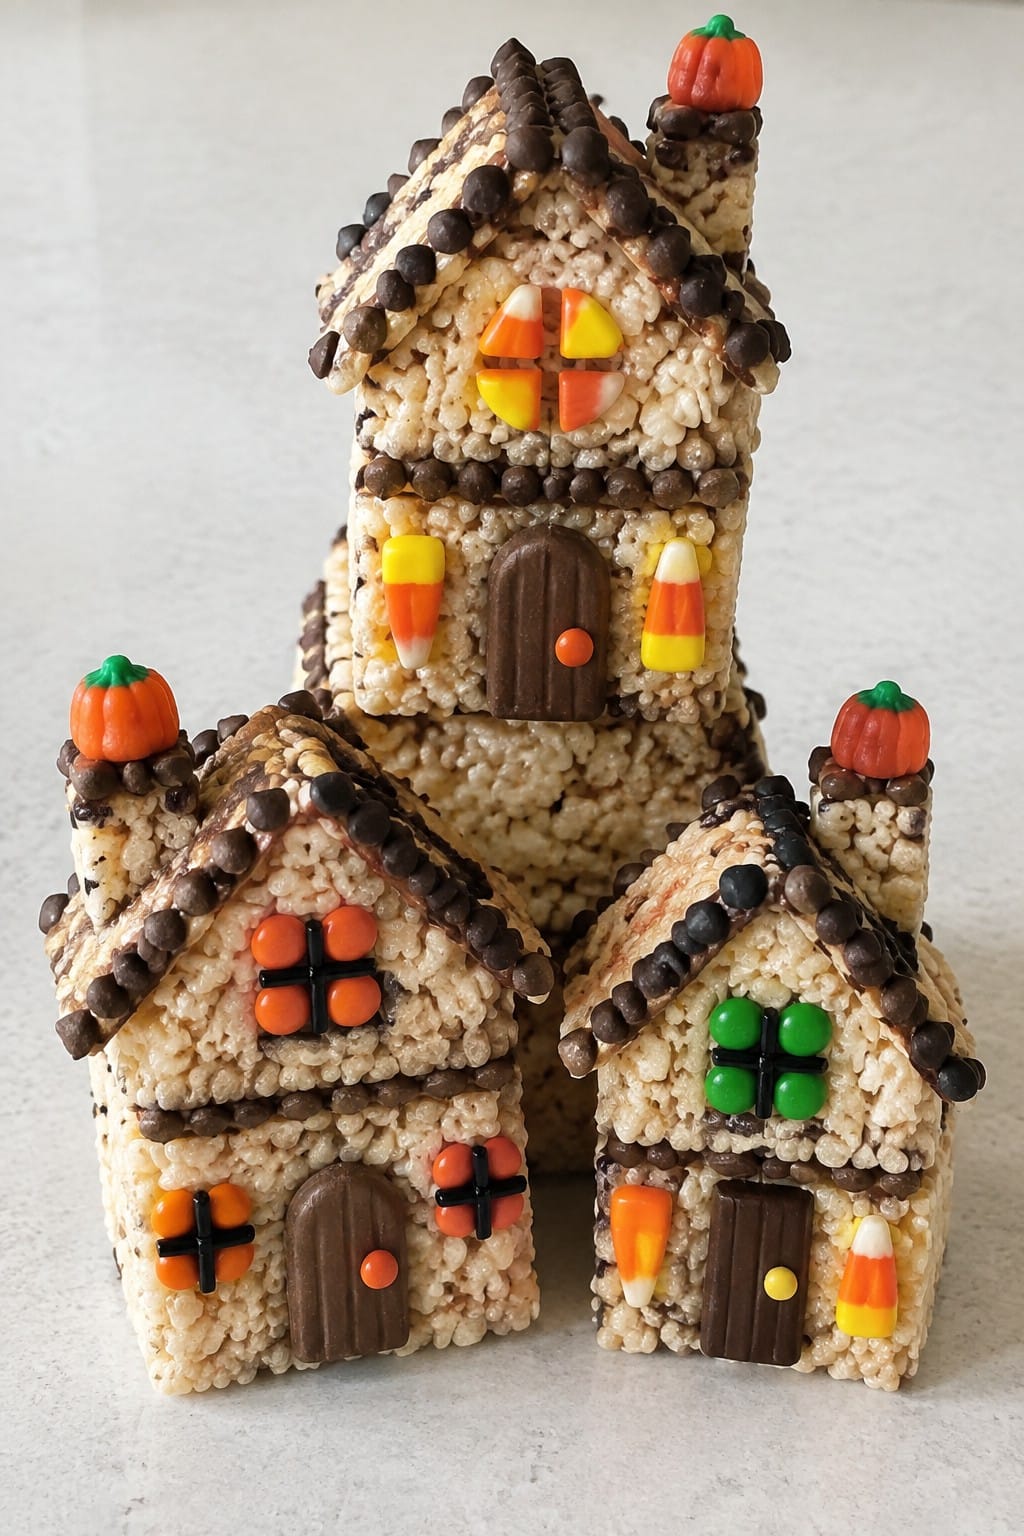
This recipe turns a batch of Rice Krispie treats into a hands-on Halloween activity. Kids press and stack the pieces to create their own haunted houses, which makes snack time feel like playtime.
The finished structures stay chewy inside with a light crisp edge. Sweet marshmallow flavor pairs with simple candy decorations for a treat that looks festive without much fuss.
Serves 4 people.
Ingredients
- 3 tablespoons butter
- 4 cups mini marshmallows, divided
- 6 cups Rice Krispies cereal
- 1/2 cup chocolate chips
- Assorted Halloween candies
Instructions
- Melt the butter in a large pot over low heat. Add 3 cups of the mini marshmallows and stir until fully melted and smooth.
- Remove the pot from heat and stir in the Rice Krispies cereal until evenly coated.
- Press the mixture into a greased 9×13 pan and let it cool for 10 minutes until firm but still pliable.
- Cut the cooled slab into rectangles and triangles to form walls and roofs.
- Melt the chocolate chips in the microwave in 20-second bursts, stirring between each until smooth.
- Use the melted chocolate to attach the pieces together into house shapes. Press a few extra mini marshmallows between pieces if extra hold is needed.
- Let the structures set for 5 minutes, then add the assorted Halloween candies as decorations.
Extra Tips
Work with the treats while they are still slightly warm so the pieces hold together better when stacked. Keep extra mini marshmallows nearby in case any walls need a quick sticky patch. Store finished houses in a single layer at room temperature for up to one day.Course: Snack Cuisine: American Equipment: Large pot, 9×13 pan, Microwave-safe bowl
Assemble Eyeball Grape and Yogurt Skewers
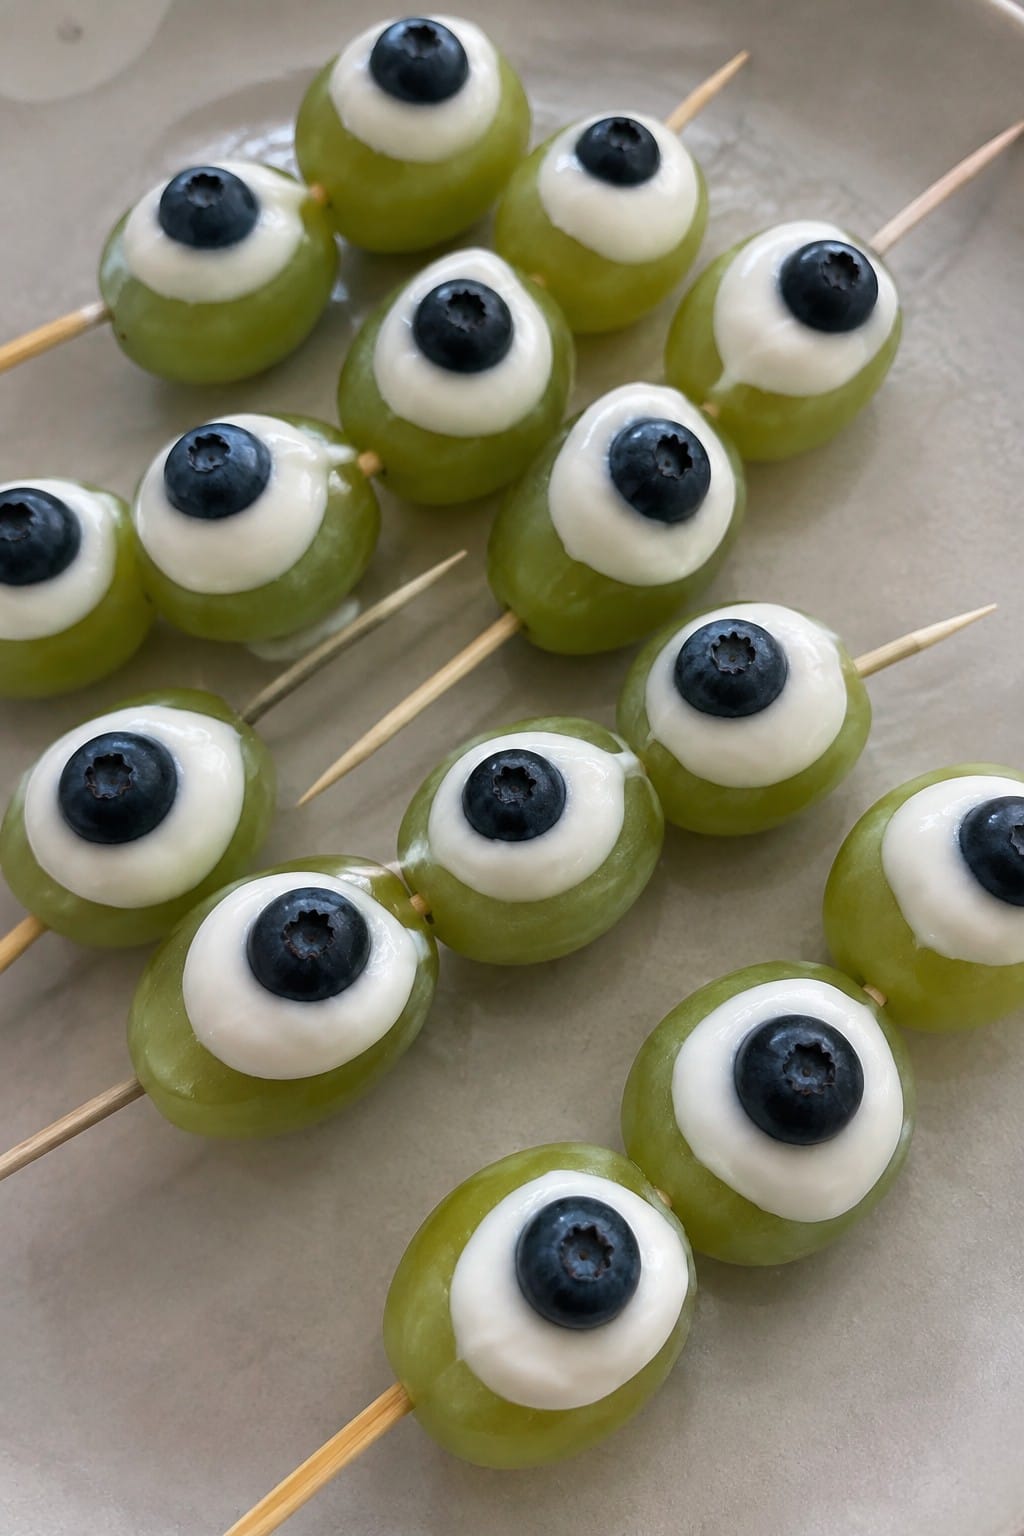
This recipe turns simple grapes into spooky eyeballs that kids can build themselves. The hands-on assembly keeps little hands busy while creating a snack that feels festive without any cooking.
The finished skewers offer juicy pops of grape against cool, creamy yogurt. Blueberries act as the pupils, giving each grape its eyeball look.
Serves 4 people.
Ingredients
- 2 cups green seedless grapes
- 1 cup plain Greek yogurt
- 1/2 cup fresh blueberries
- 8 wooden skewers
Instructions
- Rinse the grapes and blueberries under cool water and pat them dry with a clean towel.
- Set out the yogurt in a small bowl. For each eyeball, place a grape on a plate and add a tiny dot of yogurt on one side.
- Press one blueberry into the yogurt dot so it sticks and forms the pupil.
- Repeat until all grapes have a blueberry attached.
- Slide three or four finished eyeballs onto each wooden skewer, spacing them evenly.
Extra Tips
Make the eyeballs right before serving so the yogurt stays fresh. If the yogurt feels too thick, stir in a teaspoon of milk to loosen it for easier dabbing. Kids can work in pairs to speed up the assembly.Course: Snack Cuisine: American Equipment: Wooden skewers, Small bowl
